I’m so excited to share this super fun project! If you are on Instagram you might’ve seen these jewelry boxes turning to sewing boxes? You can use the hashtag #travelsewingkit to see all kinds of ideas! This project was so much fun, I knew I needed to share how I covered mine, along with a few tips!
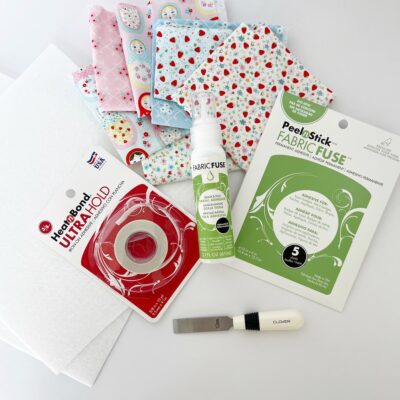
Supplies
- Jewelry Box (I purchased mine on Amazon here)
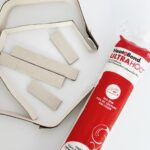
- Thermoweb Heat n Bond Ultrahold Adhesive Tape
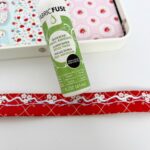
- Thermoweb Fabric Fuse Liquid Adhesive
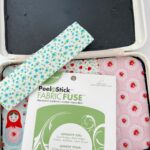
- Thermoweb Peel n Stick Fabric Fuse
- Ultra Firm Stabilizer
- Fabric Scraps
Instructions


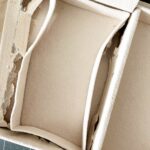
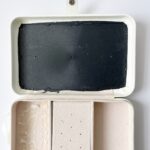
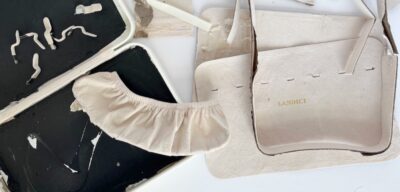
Go ahead and jump right in removing everything from the inside of the jewelry box. Some of the pictures I’ve seen don’t remove everything. A lot of them leave the whole bit on the inside of the lid. I literally gutted it. It’s totally up to you. I used a sewing tool called a Buttonhole Cutter. It has a sharp end that literally works as a cutter to remove things cleanly. You could use a knife or scissors.
Note: The only thing I did not remove was the little piece of fabric that creates a “hinge” holding the bottom of the box and the lid together.
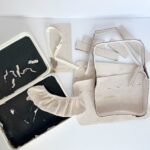
Keep EVERYTHING you have removed, (except for the little foam roller part). Most things will be covered and used again.
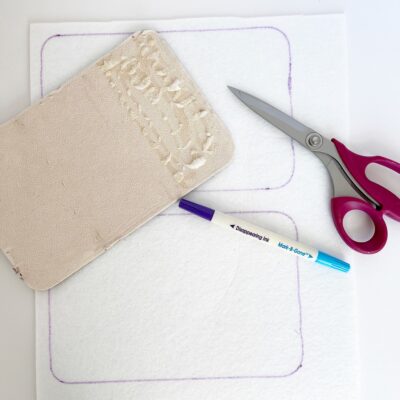
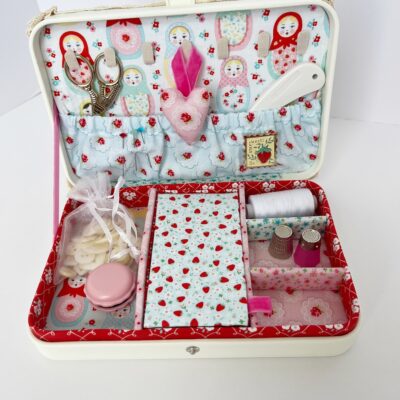
Now the fun begins! The first thing I did was to create the base that would be attached to both the bottom of the box and the inside of the lid. I used a stiff ultra firm craft interfacing for this step, but you could also use a heavy cardstock. Use the bottom piece that you removed from the box as the pattern to draw and cut two stiff bases.
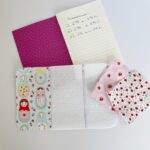

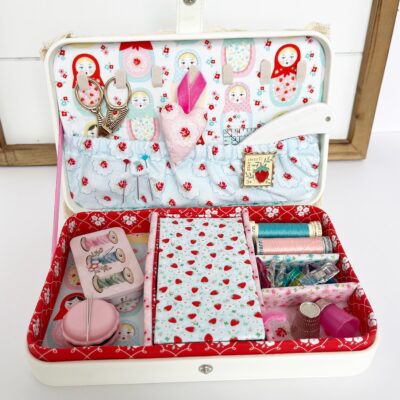
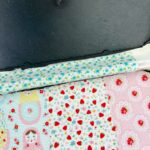
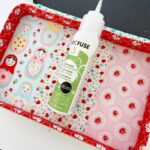
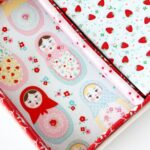
For the bottom base I used three different fabrics. These will create the three separate boxes in the bottom of the box. I trimmed them to the size I had chosen and ironed each one to the adhesive side of the stiff interfacing (mine had an iron adhesive, you could use liquid adhesive if you need to). Then I used a tiny bit of Fabric Fuse liquid adhesive glue along the exposed raw edges, just to keep them from fraying. You barely have to apply any and then just use your finger to smooth it down.
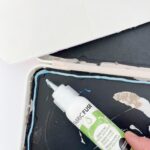
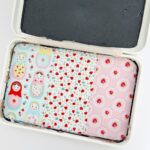
Squeeze a bead of Fabric Fuse liquid adhesive along the inside edge of the bottom of the box and place your bottom panel. Press your panel in place all along the edge with your fingers. It dries pretty quickly.
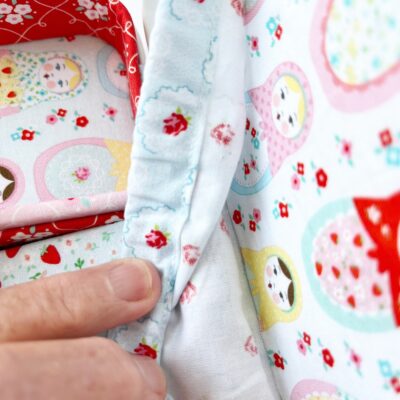
Measure the fabric hinge that is in the box (that holds the box bottom and lid together). Cut a piece of fabric the same size, but add 1/2 inch in length. Turn the short edges 1/4 inch to the wrong side and iron those down. The long edges can be left raw as they will be hidden. Use Peel n Stick Fabric Fuse sheet and cut it to the exact size of your fabric strip. Follow instructions to apply it to the wrong side of the fabric. Now apply the adhesive fabric over the existing fabric henge. Fold over carefully and finger press in place. It is sticky and strong… it will adhere immediately, so take your time on this step!
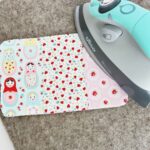
Now we are going to begin the process of covering all those little divider sections and the long bottom trim piece. This is not a hard step, but it does take a little time. I started with the long piece that goes all the way around the inside of the box. You will measure the length and the width of that cardboard piece. I cut my fabric the exact length, but doubled the width. Cut a piece of Heat n Bond Ultra Hold interfacing the same size, OR you can use Heat n Bond Ultra Hold Adhesive Tape. Follow instructions to iron it to the wrong side of your long fabric piece. Lay the cardboard piece down the center of the length of the fabric (on top of the adhesive), fold the raw edges of fabric over and iron that in place (yes, you are ironing to cardboard!). Now place a bead of the liquid adhesive all the way down the center of that long piece. Carefully place it in the bottom of the box, with the raw seam edges centered to the back of the box. This might take a little adjusting to get it right and you have time to this before the liquid adhesive sticks. Once it is in place, use your fingers to keep gently pushing it against the side of the of the box until it adheres. You can use sewing clips or clothes pins to hold it in place as well. Set aside for now.


Continue covering the rest of the little cardboard pieces as we did in the step above.
Now we are going to focus on the inside of the lid. I cannot even believe that I did not seem to take pictures of this step. However, I think I can step you through it anyway! First of all, those little metal hook things that we removed will be used exactly as is, so just set them aside for now. Go back to the remaining Ultra Firm Interfacing piece you cut in the beginning and go ahead and cover that exactly as you did the bottom piece except with one piece of fabric.
Now you will take the little elastic pocket and cut a piece of fabric the exact size, adding about 3/4 inch to the top edge. Fold that top edge over 1/4 inch and iron. Now fold it over another 1/2 inch and iron that. Sew along the bottom of that hem to create a channel for adding your elastic. Now take a long length of 1/4 inch wide elastic with a safety pen attached to the one end and feed it through the channel, attach each side with a seam of stitching to hold in place. Use Liquid Adhesive glue to fold this piece around the bottom of the Stabilizer piece. Use fabric clips or clothes pins to hold it place. (This is a bit of a fiddly process, so just take your time.)
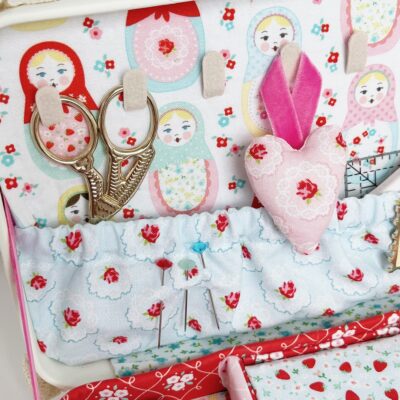
Next you will take the original fabric piece that was in the box and you see those little slits in it? Lay this piece on the back of the covered Stabilizer and use a pin or pencil to push through those slits and mark them on the stabilizer piece. Very carefully use scissors to cut those little slits all the way through to the front. Place a hook through each of the slits and kind of adjust them to fit (refer to the original picture of how they looked in the beginning). Once you have them the way you want it’s time for the final step!
Note: These little hooks are absolutely optional. I wanted them there to hold my tiny scissors as well as a little pin cushion. But you can omit the above step if you think you don’t want them.

To make this inside cover REALLY adhere, I used the Peel n Stick Fabric Fuse sheets again. They work so well. You’ll need two pieces butted up together, cut them so that they are exact and will cover the complete back of the Stabilizer. Remove the paper backing and adhere to the Stabilizer until you have it exactly as you want it. It needs to go right to the edge. Trim if necessary. Run a bead of Liquid Adhesive to the inside of the lid and now remove the final paper backing of the Fabric Fuse and place the entire lid piece in place. You will need to make sure that the elastic pocket is turned completely to the back of the sides and the bottom. Use a little knife to gently push it in if you need to.
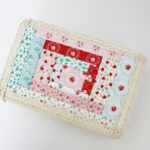
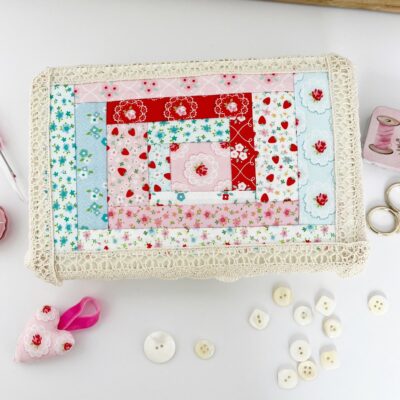
Optional Finish: I decided that the outside of the box needed a little bling! So I made a simple little Log Cabin quilt block, used Fabric Fuse sheets to attach it and then I cut some vintage lace and glued it on with Liquid Adhesive! This is totally optional but I loved the finish!!!
Now its time to fill up your sewing box and enjoy it!!
Have fun and remember… this project can be finished ANY way you want! You can make it as simple or as difficult as you’d like!