


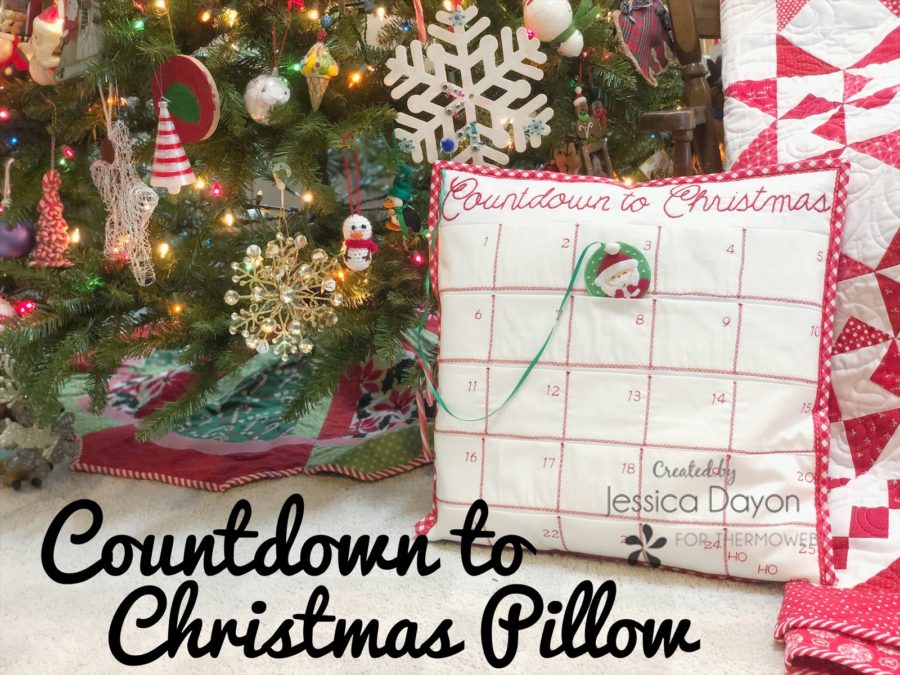
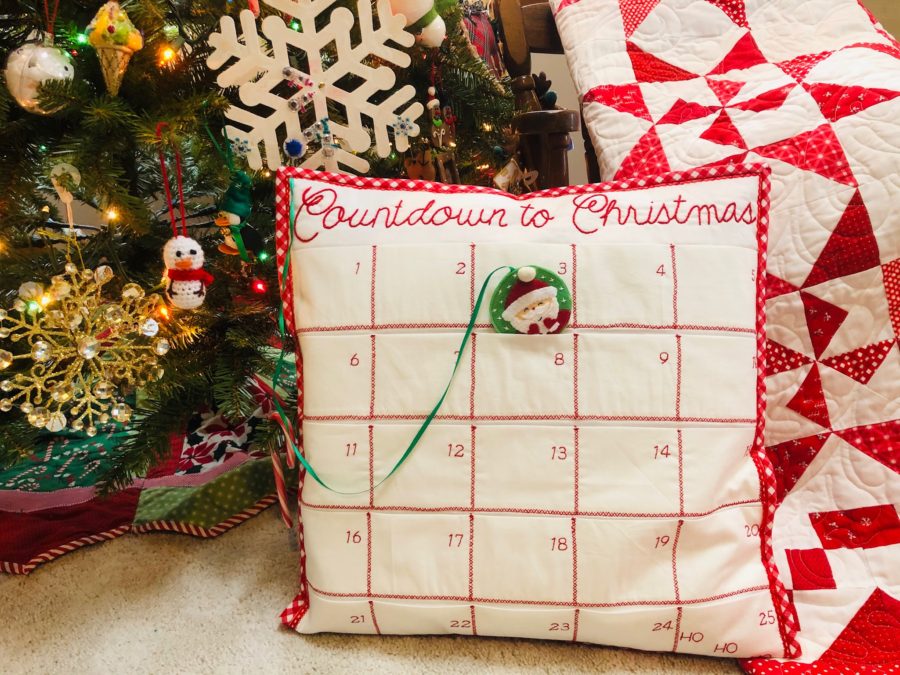
Hi, Everyone! My name is Jessica Dayon and I am here today to show you how to make this really fun Countdown to Christmas pillow! Christmas is my favorite time of year and I love adding handmade items to my decorations every year. I came up with this fun pillow idea and I’m so happy to be sharing it with you today!
COUNTDOWN TO CHRISTMAS PILLOW
This pillow finishes at 18″ x 18″
MATERIALS
1 1/2 yards of solid white fabric
1 fat quarter of fabric for the binding
1 fat quarter of fabric for the pillow back
21.5″ zipper
18.5″ x 18.5″ square of Heat n Bond Fusible Fleece
Felt as called for in the Santa ornament pattern (you can find that pattern HERE)
Skinny green ribbon- about 25″
Ric Rac or ribbon to trim the pillow- about 2 1/2 yards
Heat N Bond No Sew Hem Adhesive, 3/8″
18″ x 18″ pillow form
INSTRUCTIONS
BASIC INSTRUCTIONS
Read through the instructions before beginning
All seams are sewn with ¼” seam allowance unless noted
RST means right sides together
WOF means Width of Fabric
CUTTING
From the solid white fabric,
-cut 1- 18.5″ x 18.5″ square
-cut 5- 6.5″ x 18.5″ pieces
From the binding fabric, cut 4- 2.5″ x 21″ strips
PILLOW ASSEMBLY
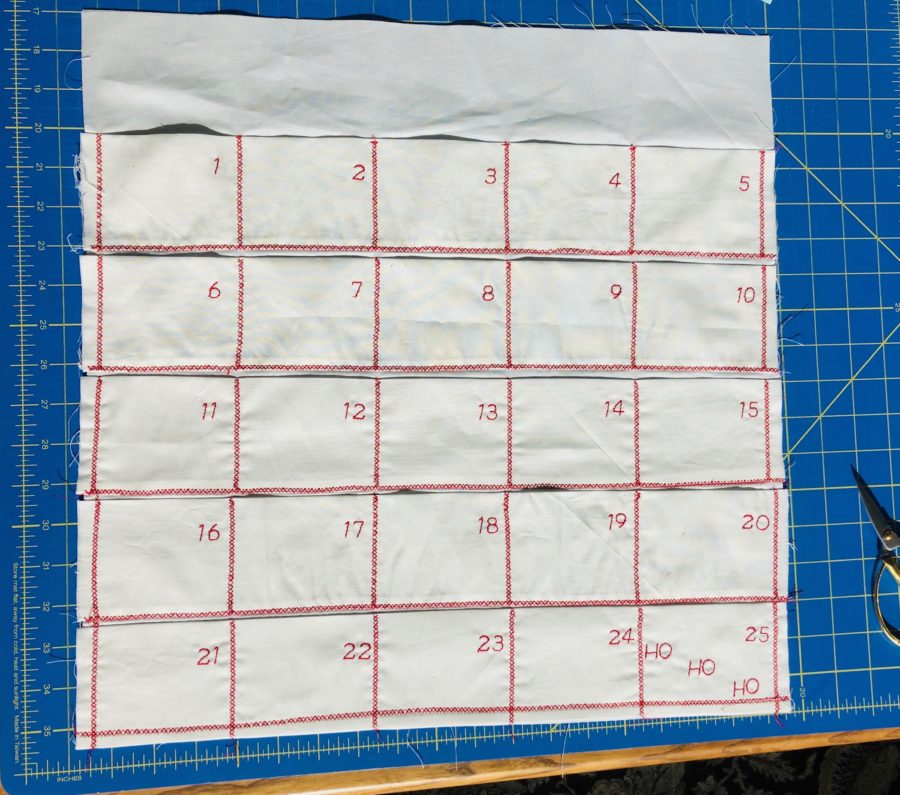
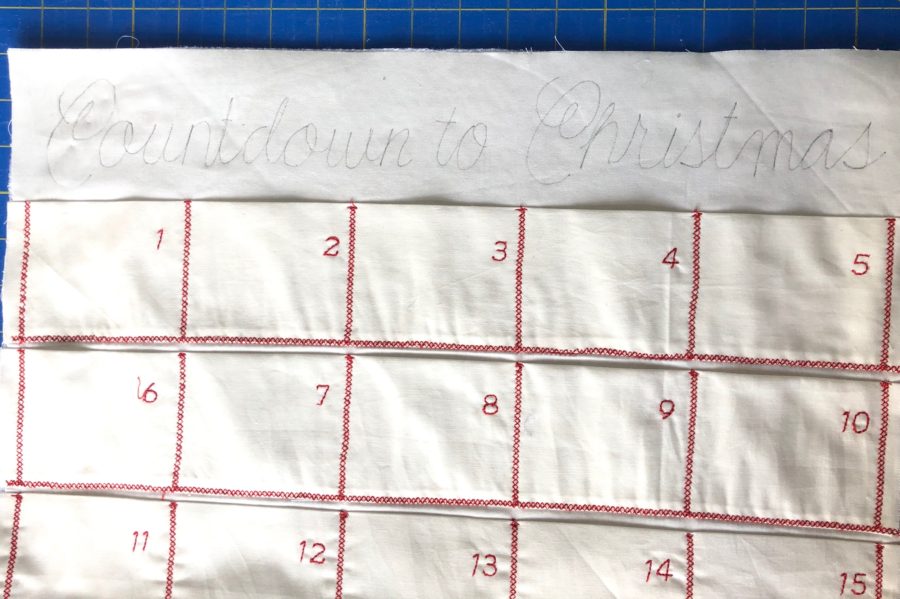
Take the 18.5” square piece of white fabric. Starting at 3.25” down from the top, draw a horizontal line with a quilting marker. Then draw another horizontal line spaced 3” down from the first. Repeat 3 more times for a total of 5 lines.
Take 1- 6.5” x 18.5” white piece of fabric and fold it in half width-wise. Sew 1/4” away from the raw edges of the 18.5” side, making a tube. Turn right side out, align the seam on the bottom edge. Press. Repeat four more times with the remaining 4- 6.5” x 18.5” white pieces.
With your quilt marking tool, divide the tube evenly into 5 sections (Note: Mark 1/4” from each edge, then divide the remaining space evenly.)
Hand or machine embroider the numbers 1-25 on each of the 25 sections. I also embroidered “Ho Ho Ho” on the 25th day.
Line up the first tube (the one numbered 1-5) on the white fabric that you drew the lines on. Place the first one with the top edge right along the top line.
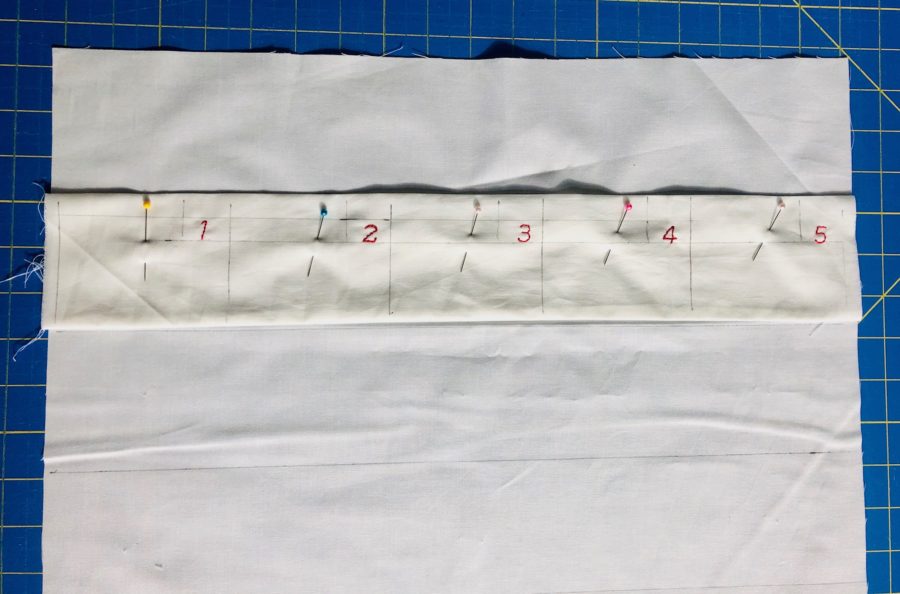
Stitch across the whole length of the bottom of the tube, securing it to the 18.5” fabric square. Then stitch on each of the six lines that divide the tube into sections. I used a decorative stitch but a straight stitch would work just as nicely.
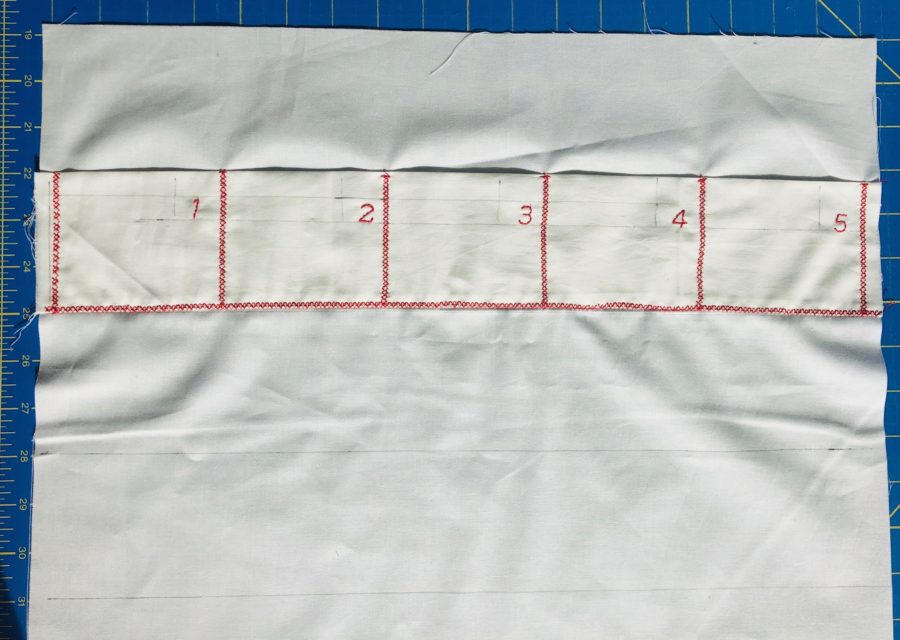
Repeat for the remaining 4 tubes.
Fuse the Heat n Bond Fusible Fleece to the back of the calendar.

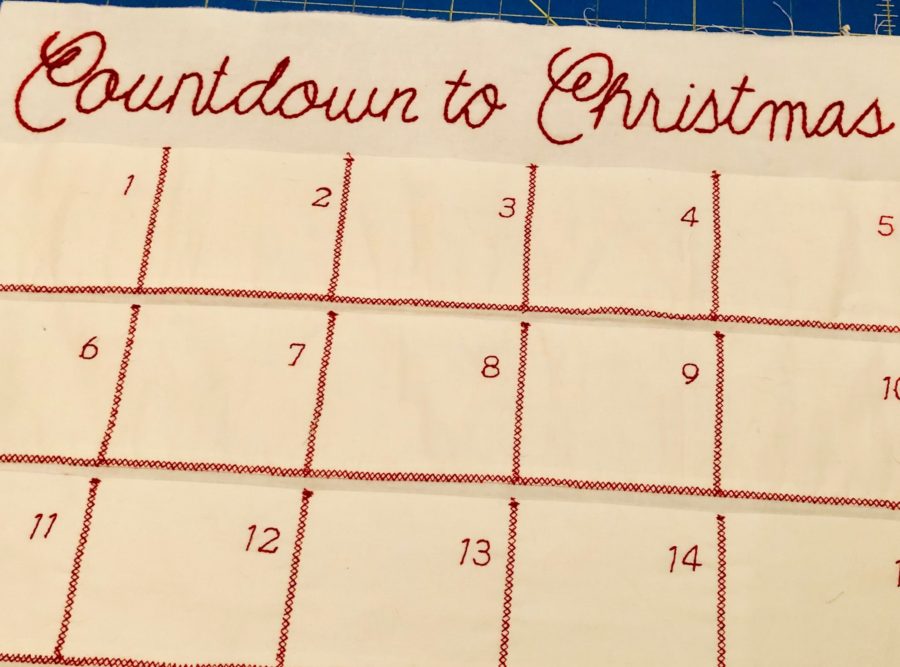
Using your quilt marking tool, hand-letter ‘Countdown to Christmas’ across the top in the remaining space. Be mindful of the 1/4” seam allowance that will be taken away from the top and sides when binding.
Hand embroider on top of the lettering. I used a chain stitch to do mine.
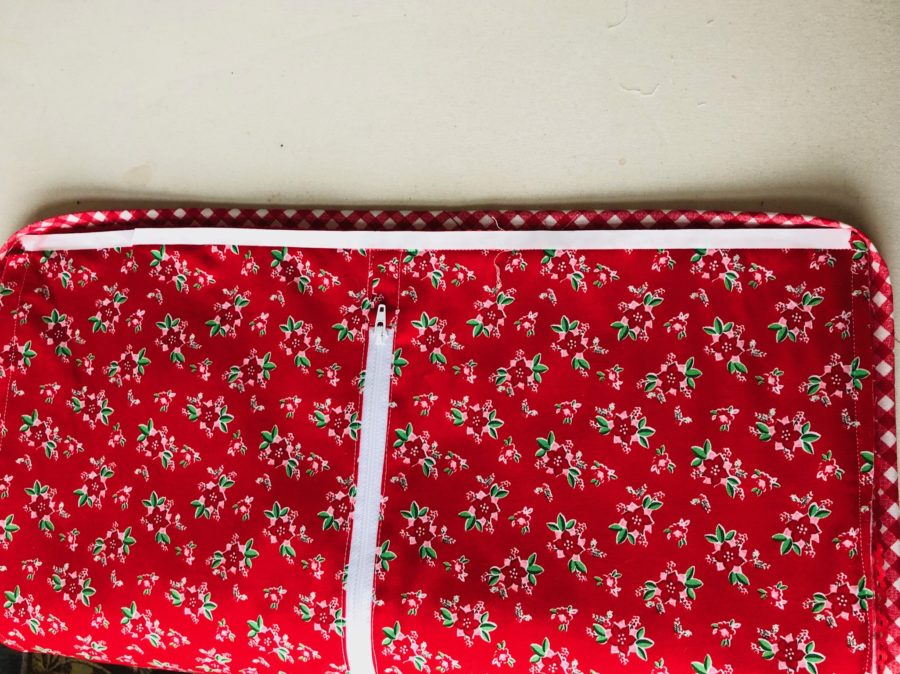
Prepare your pillow back using the fat quarter and zipper. You’ll want the back to measure 18.5” square.
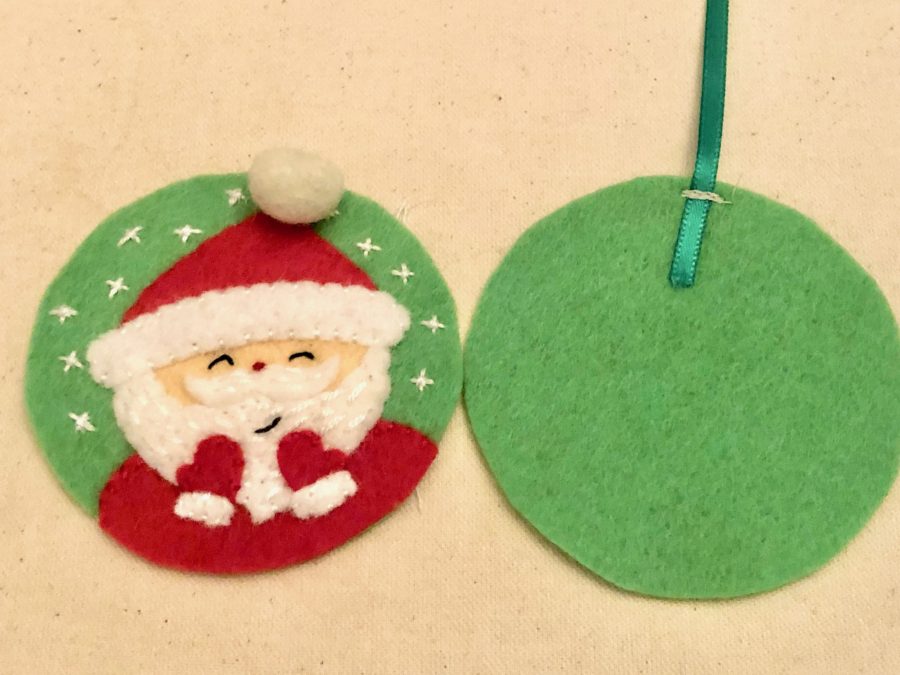
To make the day marker, I purchased a cute Santa pattern from Hello Felt on Etsy. You can find that pattern HERE. I printed the templates at 80% of the original so that it would fit into each pocket. Make the front as the pattern states. Cut out the plain back circle. I did not use the top to make it look like an ornament but you definitely could if you wanted to. Sew them together will the piece of ribbon coming from the top of the marker.
Prepare the binding. Pin the layers together- backing the wrong side up, pillow top, right side up. I added a decorative ribbon around the perimeter of the pillow and then pinned my binding on top of it until I stitched it down. Slip the end of your ribbon under the top corner of the ric rac and pin it there. Stitch the binding down.
Use hem tape to secure the binding to the back of the pillow.

That’s it! Enjoy your cute Countdown to Christmas pillow! On December 1st, insert the day marker into the “1” pocket, move it as each day passes, and your countdown to Christmas!
I hope you have enjoyed this tutorial and you found it easy to follow along with me! If you have any questions, please let me know! Don’t forget to follow me on Instagram so you can stay up to date with my latest free projects- @jessicadayon. Share what you made! I’d love to see your progress photos and finished pillow! Use the hashtags #jessicadayonpatterns and #thermoweb and tag me so I can see your version @jessicadayon
Also, you can find my blog HERE. On it, I share free quilt patterns and tutorials so go check it out! You can also find me on Instagram @jessicadayon where you can connect with me and see my daily work, current projects, inspiration, giveaways, quilt alongs, and all of my patterns.
Thanks for following along with me! Merry Christmas!
-Jessica
mjmarmo
November 19, 2019 at 10:15 am (4 years ago)Darling!
Jessica Dayon
November 20, 2019 at 3:50 pm (4 years ago)Thank you!!
Denise Bryant
November 19, 2019 at 12:00 pm (4 years ago)Adorable project!
Jessica Dayon
November 20, 2019 at 3:50 pm (4 years ago)Thank you!
Charlene Russell
November 19, 2019 at 5:12 pm (4 years ago)So cute. Thanks for sharing your talents with us!
Jessica Dayon
November 20, 2019 at 3:51 pm (4 years ago)My pleasure! I’m so glad you like it! Thank you!