


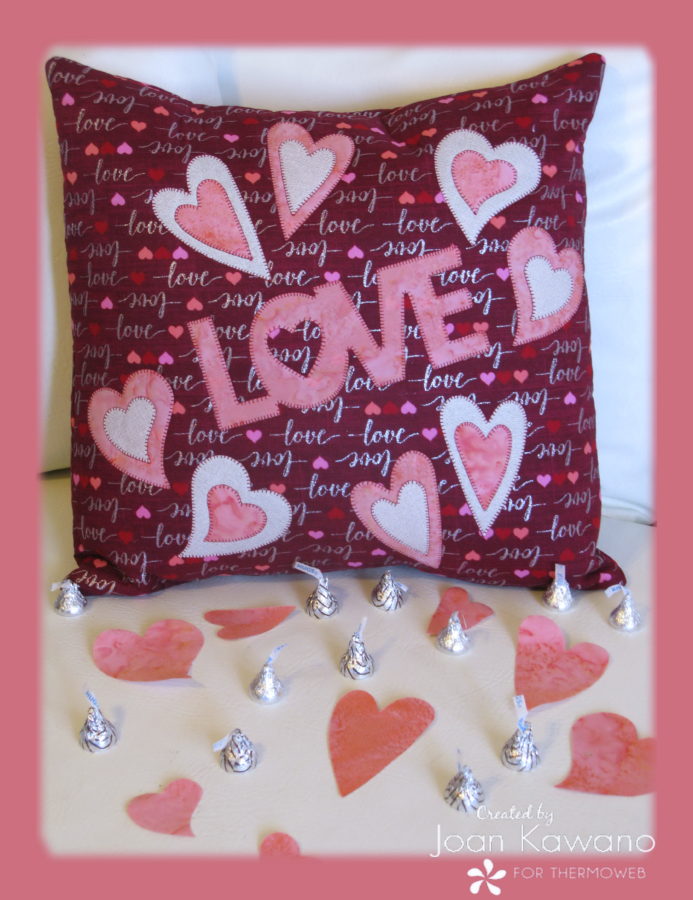
As Valentine’s day approaches, we turn to all things “Love”.
This Conversation Heart Pillow, thanks to Thermoweb and Crafter’s Edge, says it all!
Conversation Hearts Valentine Pillow
There is plenty of time to whip one up, for the one you LOVE.
Downloading the free Conversation Hearts Pillow pattern.
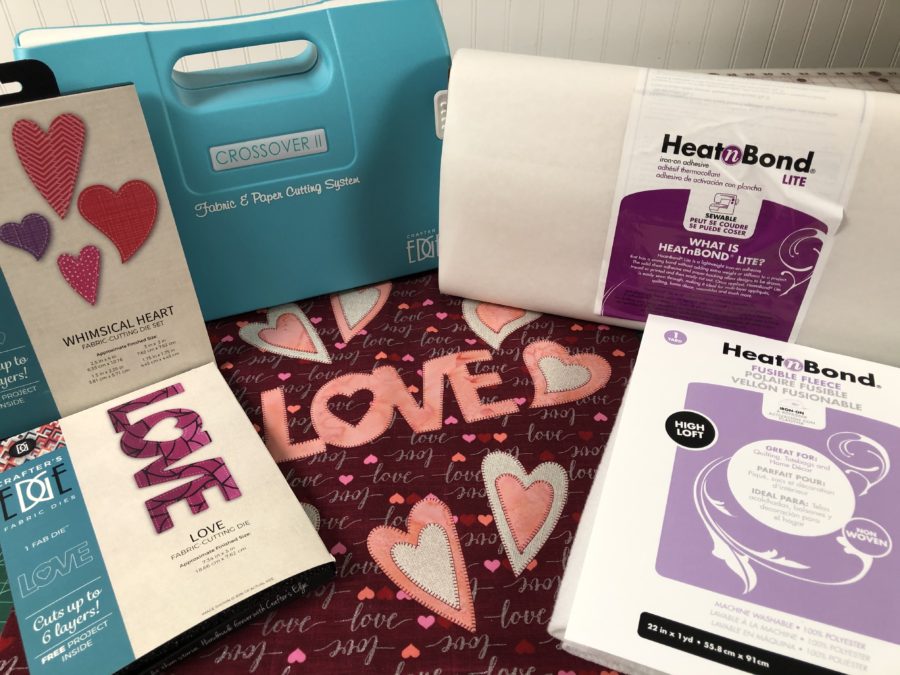
Supplies
½ yard HeatNBond®Lite
1 package HeatNBond®Fusible Fleece
“Crafter’s Edge” dies “Love” and “Whimsical Hearts”
½ yard fabric for pillow
¼ yard fabric for “Love” and hearts
¼ yard contrasting fabric for hearts
1 – 18”x 18” pillow form
Additional Supplies
Thread to match, applique pressing sheet, rotary cutter, mat, and ruler.
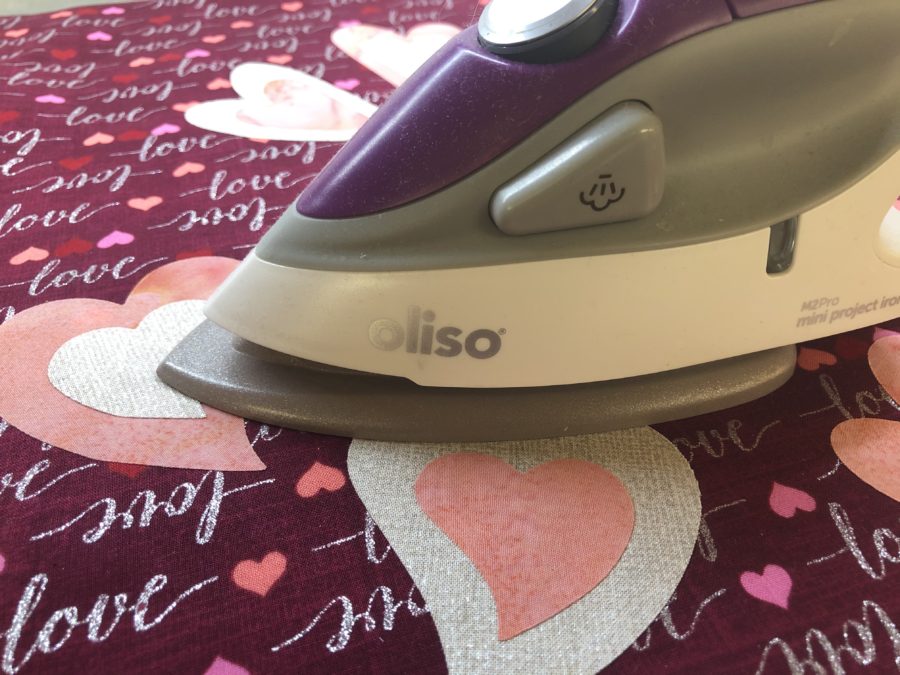
Crossover II die cutting machine or Accuquilt GO with adapter plates. Oliso iron.
Cutting
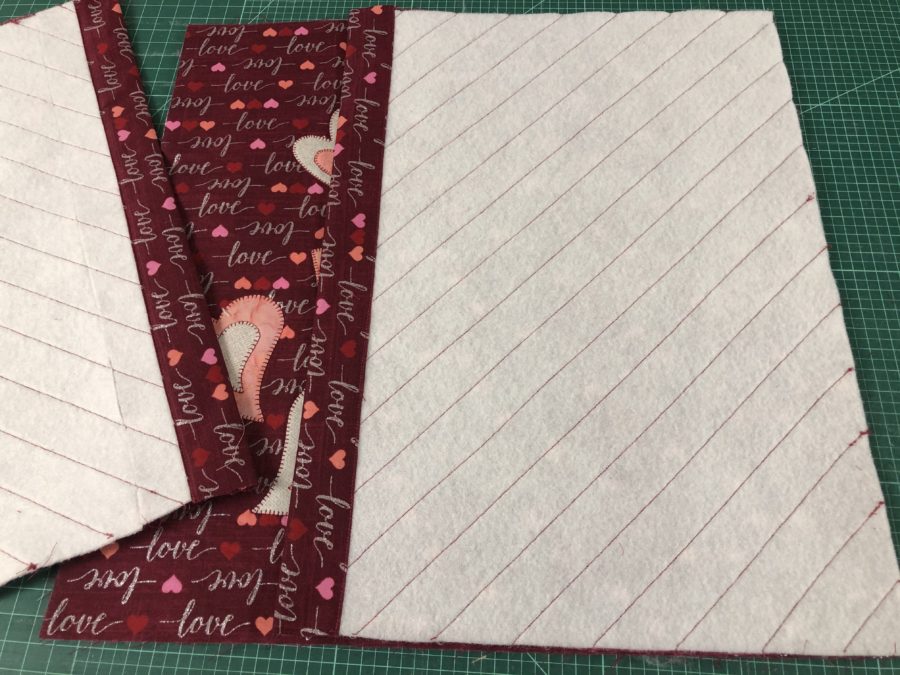
Cut 1 – 16 ½” X 16 ½” square of pillow fabric and fusible fleece.
Cut 1 – 16 ½” x 12” rectangle of pillow fabric and fusible fleece
Cut 1 16 ½” x 10” rectangle of pillow fabric and fusible fleece.
(You will need to piece fusible fleece if using a 1-yard package)
Cut 2 – 4” x 16 ½” strips for binding of back pieces.
Cut 1 – 4 ½” x 8 ½” rectangle of fabric and HeatNBond®Lite for the word “Love”
Cut 2 – 5” x 8” rectangles of the fabric of each color and 4 rectangles of HeatNBond®Lite for the hearts.
Assembly
1. Fuse the HeatNBond®Fusible Fleece to the backside of all pillow pieces.
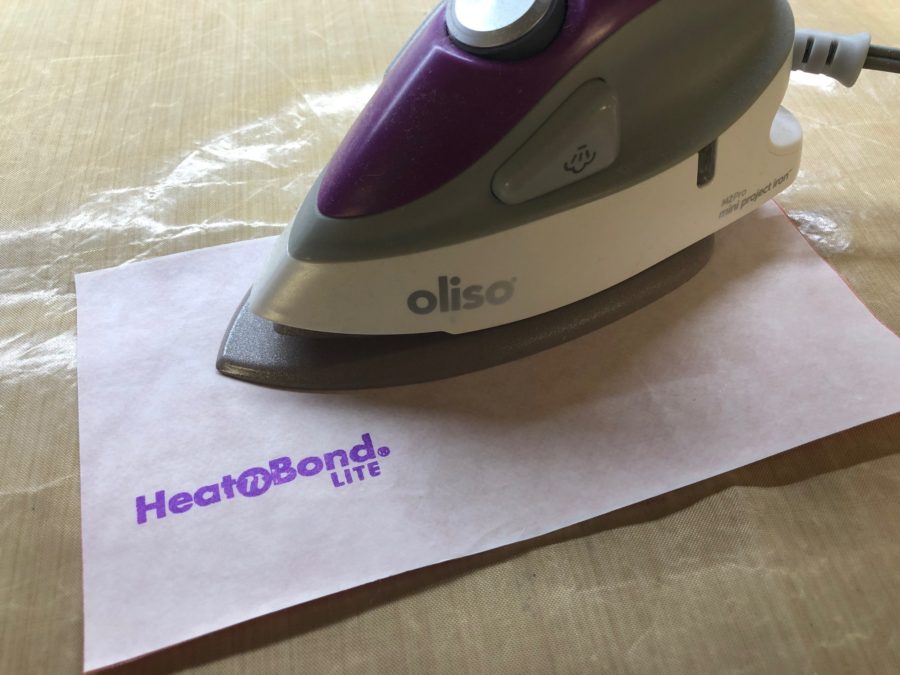
2. Fuse HeatNBond®Lite Iron-On Adhesive to the back of all of the fabrics for the hearts and the word “LOVE”. Allow fabrics to cool. For the word “Love”, place the die on fabric with the paper side up. Run it through your machine following the manufacturer’s instructions.
For the “Whimsical Hearts”, stack 2 different fabrics paper side up and 2 different fabrics paper side down. The Crossover II fabric cutter will cut up to 6 layers of fabric. Run through your machine following the manufacturer’s instructions.
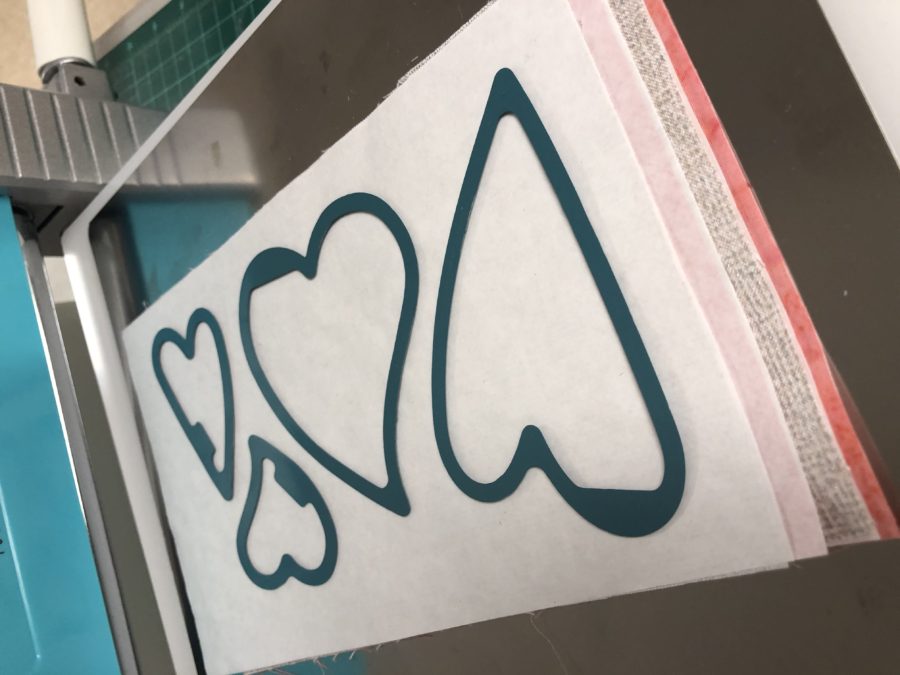
You will have 2 complete sets of mirror image hearts, in both colors.
3. Peel the paper off the back of your “Love” and “Whimsical Hearts”. Stacking opposite color hearts. Arrange as desired on 16 ½” pillow front. Fuse in place and stitch as desired.
4. Loosely quilt the 2 rectangle pieces for pillow back.
5. Fold 4” x 16 ½” strips in half wrong sides together. Place on top of 1 side of each rectangle piece. Using a ¼” seam, stitch to create a binding for the pillow opening. Fold over to the back and machine stitch in place.
6. Lay pillow top face up. Place the 16 ½” x 12” rectangle, face down on pillow top, lining up the right-hand side. Binding edge towards the center of the pillow. With the remaining 16 ½” x 10” rectangle, lay on the opposite side with the binding edge towards the center. The overlap will create the opening to insert the pillow form into.
7. Pin and stitch around the entire pillow using a ¼” seam. Turn right side out and insert pillow form.
Note: I find using a bigger pillow form than the cover, makes it nice and puffy.
What is my conversation heart saying???
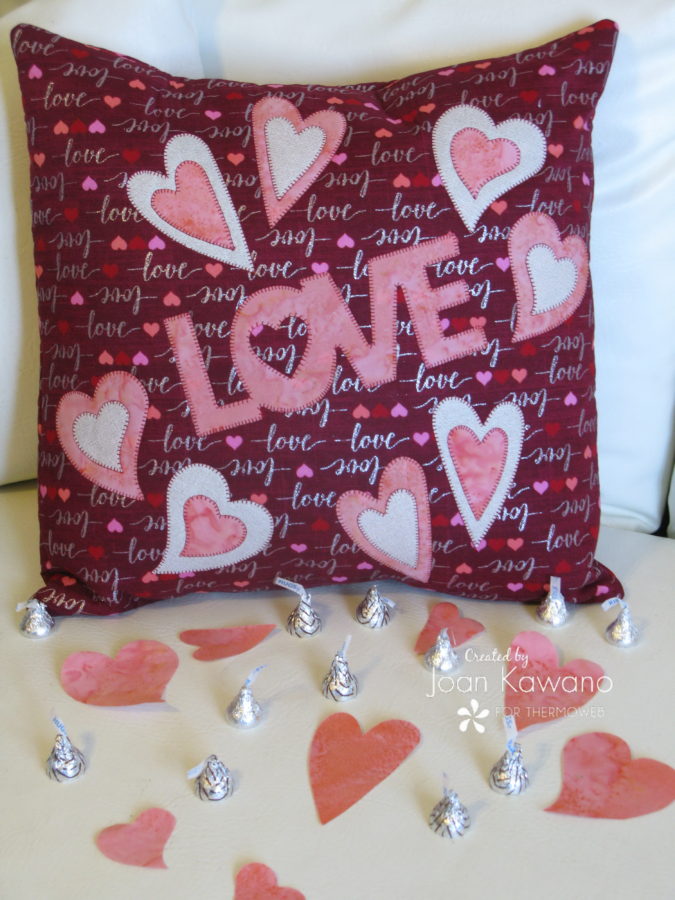
“All you need is love. But a little chocolate now and then doesn’t hurt.” — Charles M. Schulz