


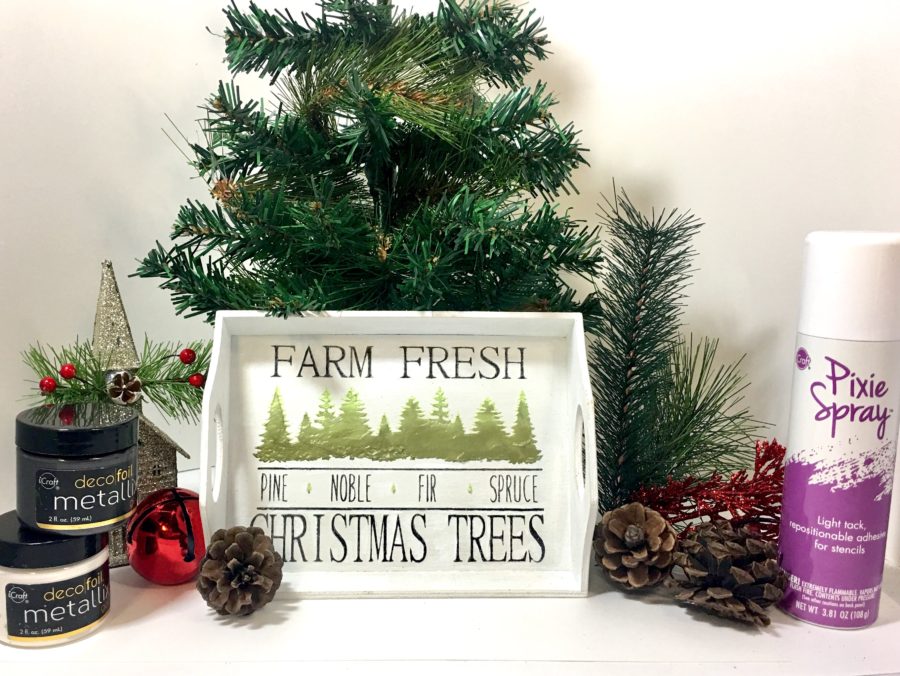
Hello friends; thanks for stopping by and allowing me to share my Christmas Tree Farm Tray/Sign with you today! I created this piece to complement a 3-tier tray I am using as kitchen decor, but you will see if you follow along below that this project can be translated into any size or sign type.
Christmas Tree Farm Tray
Supplies:
Metallix – White Pearl and Black Ice
Other Supplies: Wood tray or sign base, white chalk paint, and brush, electronic cutter and software, cardstock, spatula and dye-based re-inkers in green tones.
STEP ONE:
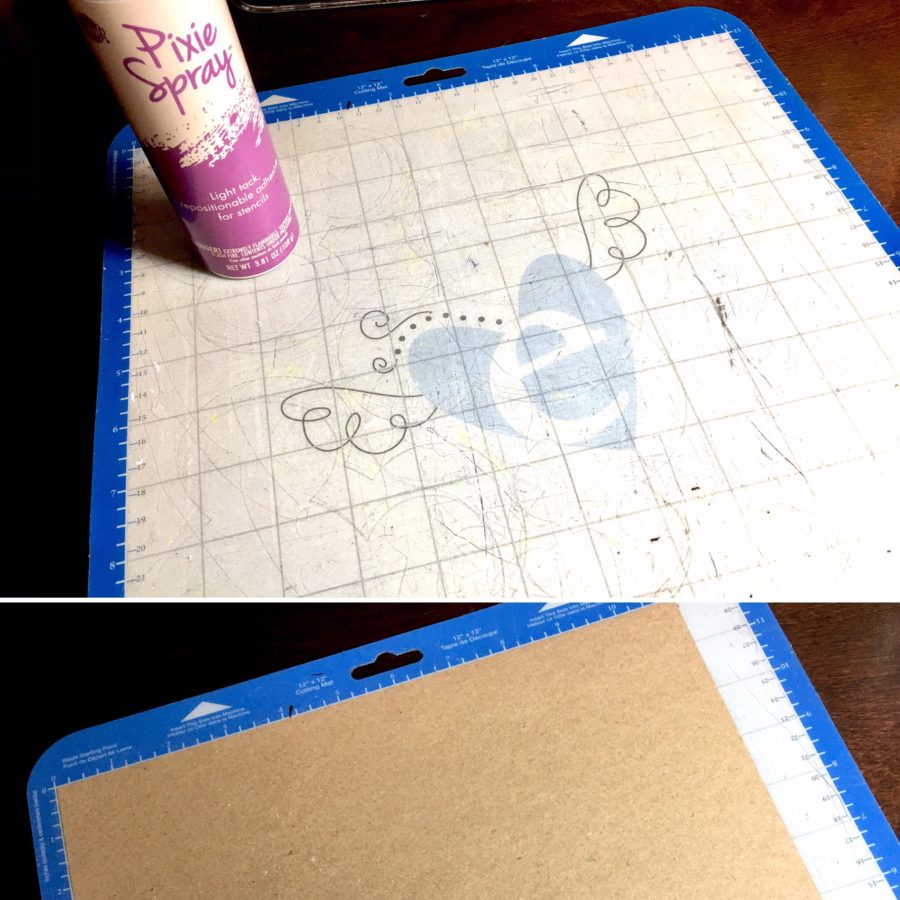
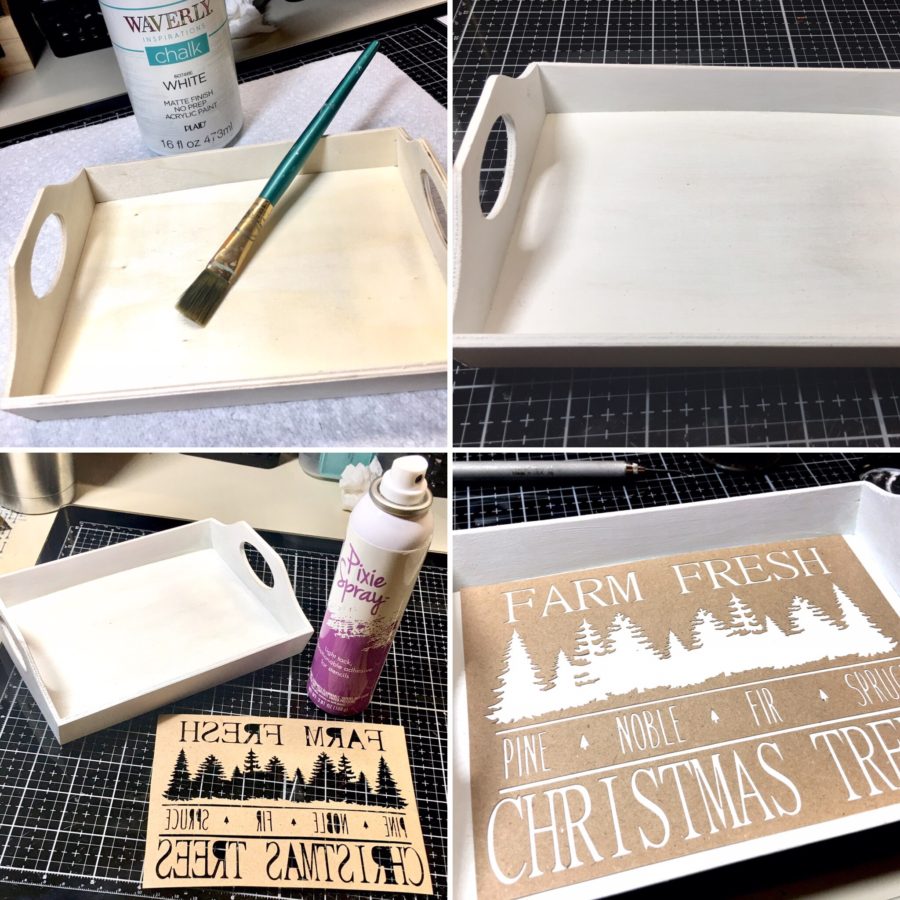
If you’re anything like me, you will need to prepare your cutting mat for this project. My mats are all quite used and have little to no sticky left. iCraft Pixie Spray is my new best friend when it comes to cutting mats. Simply give it a good shake, spray onto your mat and wait one minute before placing your paper down. It gives you the perfect amount of tack without holding on so tightly that your paper tears when you try to remove it.
Hint: If my mat is really bad, I spray one light coat of Pixie Spray, wait one minute and spray another light layer. I find this is more effective than spraying to thick a layer all at once.
STEP TWO:
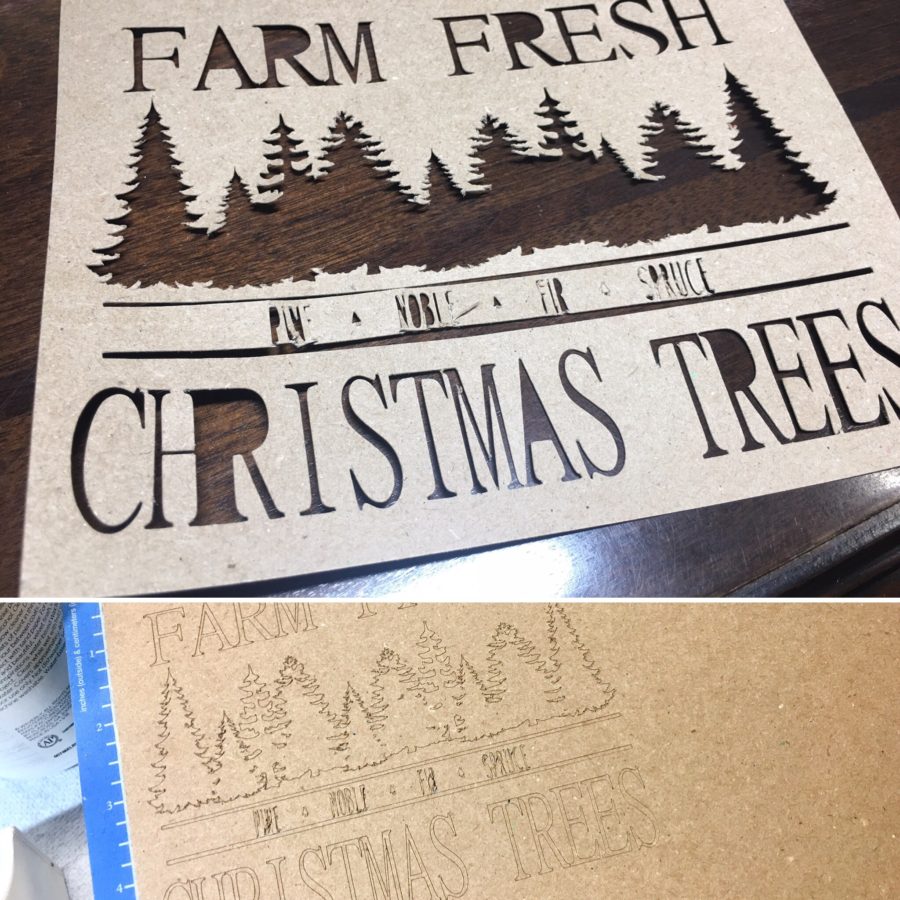
You will need the software for your ecutter or other software such as Photoshop or Inkscape (I used Inkscape). I went online to find a free SVG to avoid starting from scratch. I got this one here Ruffles & Rain Boots. She has a ton of really great free svgs as well as some amazing ones for purchase. You can always start from scratch but I’m all about taking shortcuts lol. As you can see, you can manipulate the image to any size and even change the shape as I have below.
The top left image is the SVG as downloaded. The top right shows where I manipulated it, using a different font which lengthens the image so that it’s no longer square. I needed a rectangle image for this project. I also broke apart the trees so that I could copy and paste a few more in between. This lengthens that area as well. Cut out the image according to your machine instructions. I cut mine from cardstock but you could use vinyl as well. I really like the way it came out.
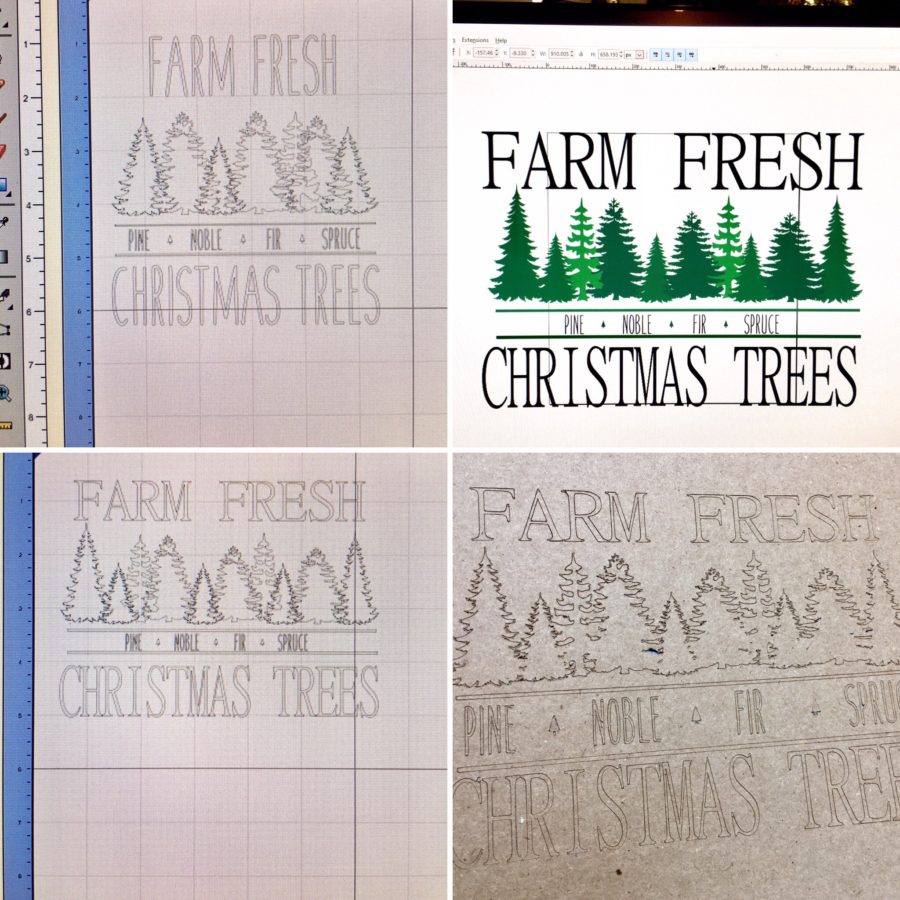
Hint: If your first try is not successful, try manipulating the image further to get the look you want. As you can see from the failed attempt below, that center lined section was too small to cut out cleanly. I enlarged the font in that area and decreased the size of the larger words. In doing this I maintained the overall size but the tiny words were now larger and easier to cut out.
STEP THREE:
Once you have successfully ecut your stencil, give your sign base a coat of white chalk paint. You can use regular acrylic paint but the chalk paint is best for a farmhouse feel. I took a wet rag and rubbed the edges after painting to remove some of the paint and to give it a more rustic feel.
Spray the backside of your stencil with Pixie Spray, wait one minute and press onto your sign base.
Hint: Pixie Spray works best with a non-porous surface. The spray worked fine on the cardstock which soaked it up immediately. However, if I had covered the back of my stencil with a very thin layer Ultra Bond Liquid Adhesive or matte medium and allowed it to dry before applying the Pixie Spray it would have had better adhesion and been less likely to bleed under the stencil edges.
STEP FOUR:
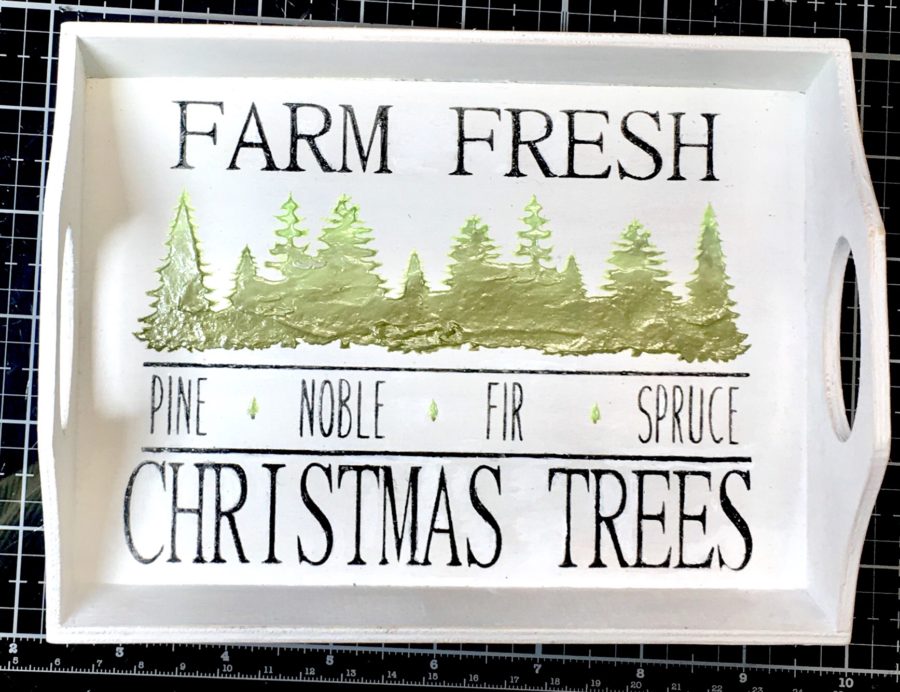
Spread Black Ice Metallix over the text area of the stencil. I used a pointy spatula because I was working in a small area. If spreading over a larger sign, the Stencil Pal gives a much more even coverage and will cover larger areas with ease.
Add dye-based ink in green tones to White Pearl Metallix and blend. This will give you a gorgeous trio of shimmery greens to use for your trees. I use the dye-based ink because it allows more of the Metallix shimmer to shine through. Start with the lightest shade of green on the treetops. Then fill in with the medium and then darkest to give it an ombre look.
Hint: I could have spread this a lot thinner than I did. I ended up wasting a lot of product simply because I did not scrape back over the top to remove the excess. This is another problem that is alleviated by using the Stencil Pal. Because I left so much excess, I did have some cleaning up to do after I removed my stencil.

STEP FIVE:
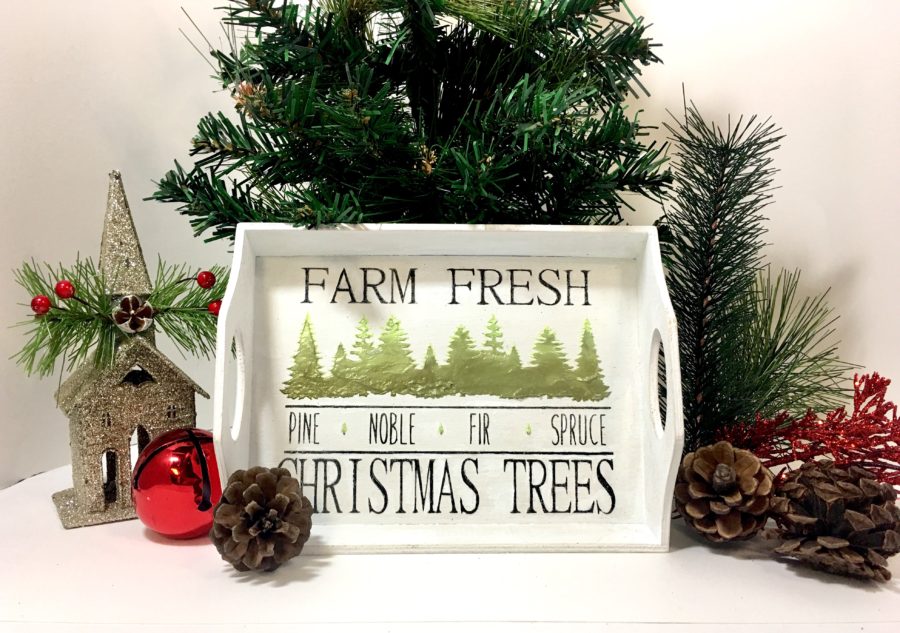
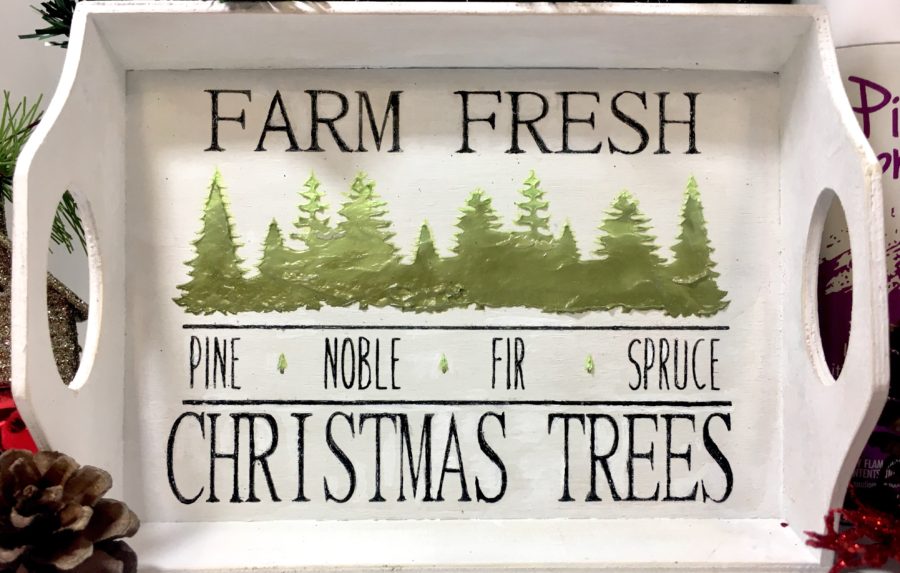
Carefully remove the stencil and enjoy your holiday sign! I really love the dimension and shimmer on the trees. What do you think . . . will you give it a try?
Hint: I decided to dry brush a little white back over the text to dull it down a tiny bit, but not enough to take away the Metallix shimmer. If you do this, MAKE SURE YOU WAIT UNTIL METALLIX IS COMPLETELY DRY! I thought mine was dry but I did get a little black that spread over my surface. Because of this, the result is not quite as clean looking as it could have been. It’s so stinking cute that I don’t even mind it lol.
Thanks again for stopping by. I hope you found something to take away with you.
Wendy