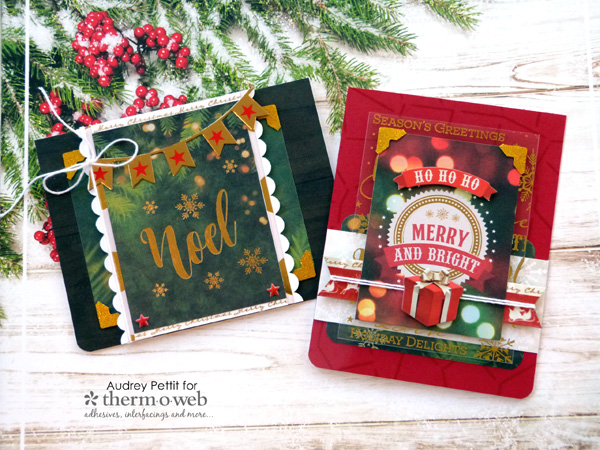
This week, we are so excited to be joining up with PaperHouse here on the Therm O Web blog to share some holiday inspiration featuring the adorable Christmas Joy collection by PaperHouse mixed with Therm O Web’s amazing line up of products.
Christmas Joy Holiday Cards with Therm O Web and Paper House Productions
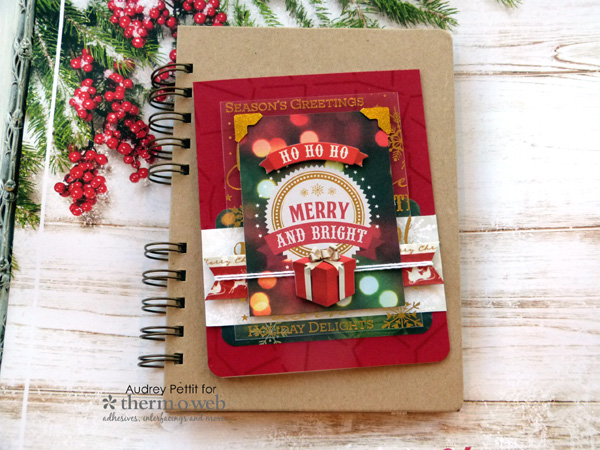
Merry and Bright Holiday Card
by Designer Audrey Pettit
Therm O Web Supplies:
Gina K Designs Premium Cardstock: Red Velvet, Luxury White
iCraft Deco Foil Stencil: Crackle
Glitter Dust Photo Corners: Gold
XL Memory Tape Runner
Gina K Designs Foam Squares: White
iCraft Easy-Tear Tape: 1/2″
iCraft Purple Tape
Other Supplies:
PaperHouse Christmas Joy Collection: Patterned Paper, Transparency Sheet, Dimensional Stickers, Washi Tape
GinaK Designs Premium Ink: Red Velvet
Twine: Stampin’Up
Corner Rounder: EK Success
Mini Ink Blending Tool: Ranger Ink
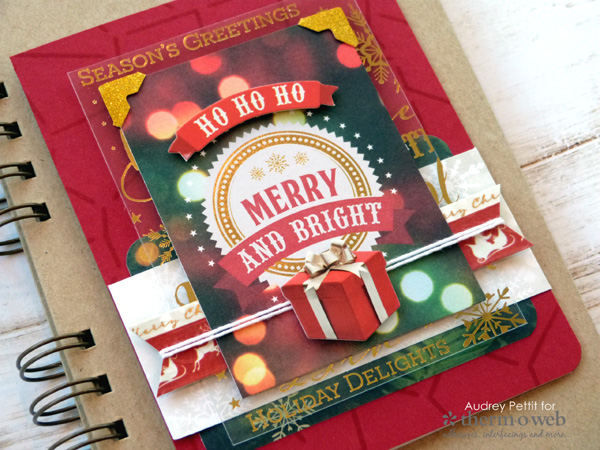
I can never have too many Christmas cards, so for my projects today, I focused on holiday cards that have lots of layers and dimension, but that are still relatively flat for mailing. Because with all the cards that I mail out in December, postal friendly designs are a definite plus. And with Therm O Web’s new 1/16″ foam squares by GinaK Designs, slim cards are easier than ever.
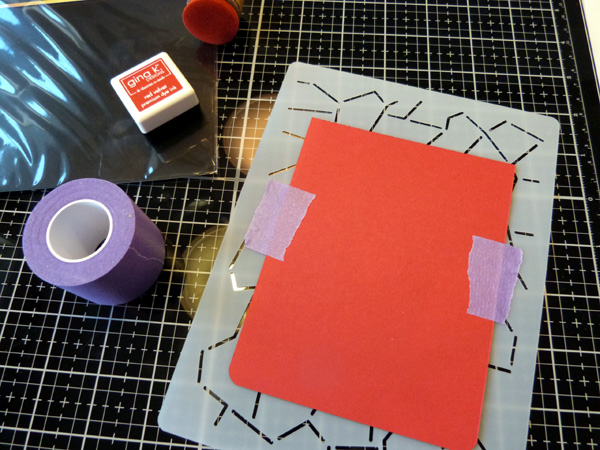
To begin, trim a 4.25″ x 5.5″ panel of Red Velvet cardstock, and round the two bottom corners using a corner rounder punch. Place the front of the cardstock down onto the Crackle stencil, and hold it in place with a bit of Purple Tape. Flip the stencil side up, and then ink around the edges of the paper using Red Velvet ink applied with an ink blending tool. Remove the stencil.
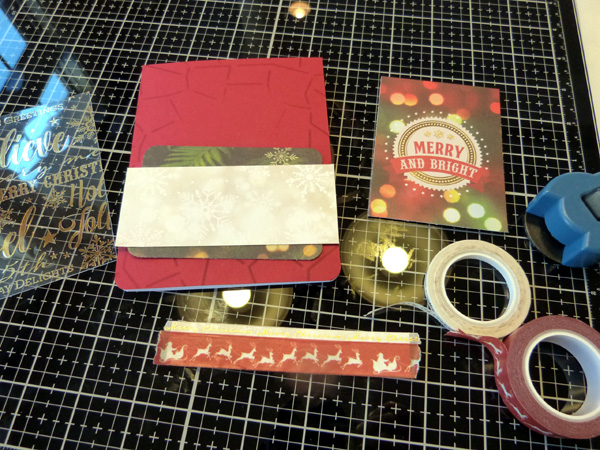
Create a top-folding A2 card base from Luxury White cardstock, and round the two bottom corners. Adhere the stenciled panel to the card base using tape runner adhesive. Cut patterned papers to layer across the bottom of the card, and cut the Merry and Bright journaling card from the papers. Trim a panel of printed transparency that is 1/2″ larger than the journaling card on all sides. Cut a 1″ x 4.25″ strip of white cardstock, and cover it with strips of washi tape. Trim off the excess tape from the edges, and then cut the ends into v-notches.
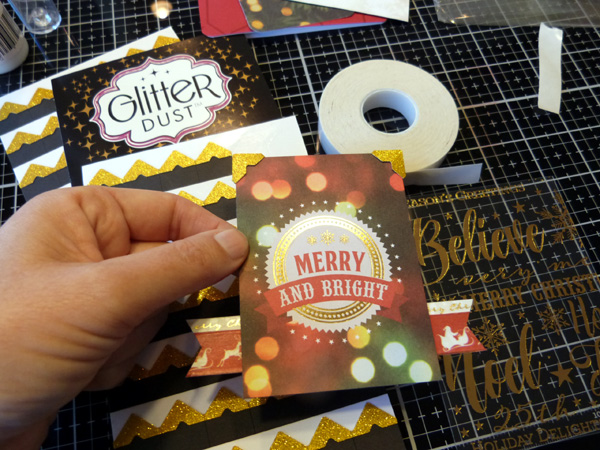
Add gold Glitter Dust photo corners to the top of the journaling card. Adhere the washi tape strip to the back of the journaling card using 1/2″ iCraft tape, and then adhere the panel to the transparency block using the iCraft tape.
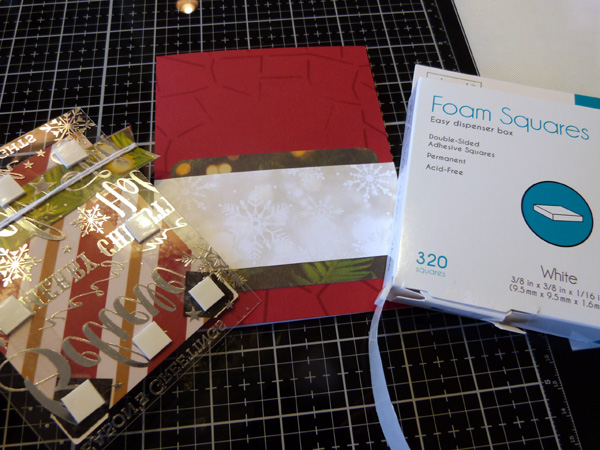
Adhere the patterned paper pieces to the bottom of the card. Wrap twine around the middle of the washi tape strip, and tie the twine into a simple knot at the center of the card. Trim the ends of the twine close. Adhere the transparency panel to the card using the new Foam Squares.
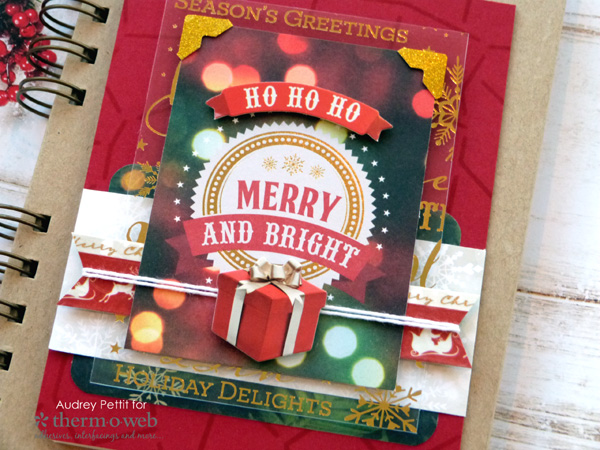
Embellish the card with Christmas Joy dimensional stickers. To keep the card as flat as possible, remove the bottom layer of the present and the foam that comes on the back of the stickers, and replace them with GinaK Designs Foam Squares.
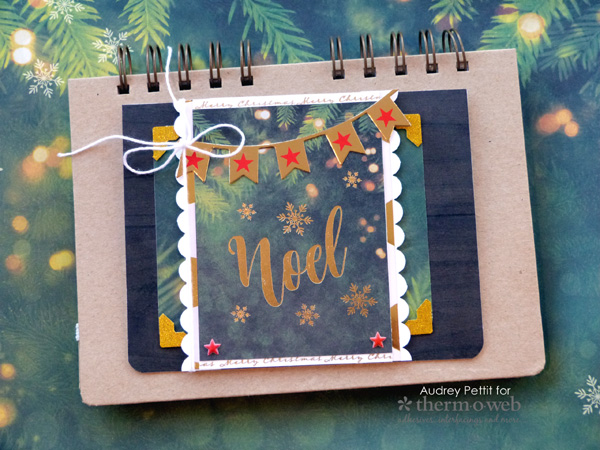
Noel Holiday Card
by Designer Audrey Pettit
Therm O Web Supplies:
Gina K Designs Premium Cardstock: Luxury White
Glitter Dust Photo Corners: Gold
XL Memory Tape Runner
Gina K Designs Foam Squares: White
iCraft Easy-Tear Tape: 1/2″
iCraft Mixed Media Adhesive
Other Supplies:
Paper House Christmas Joy Collection: Patterned Paper, Foiled Paper, Cardstock Stickers, Puffy Stickers, Washi Tape
Twine: Stampin’Up
Corner Rounder, Scalloped Border Punch: EK Success
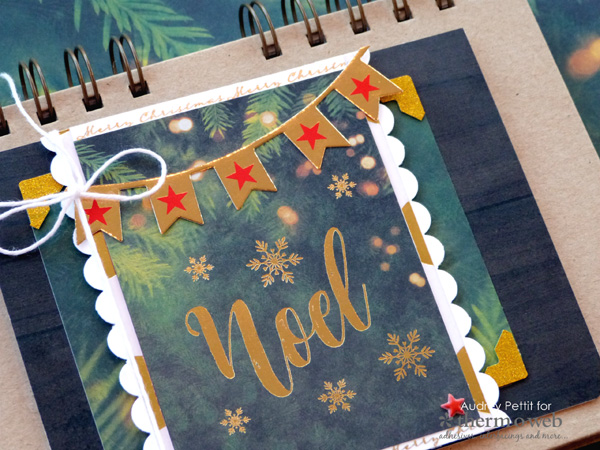 My second card uses many of the same elements, but this time in a horizontal landscape design.
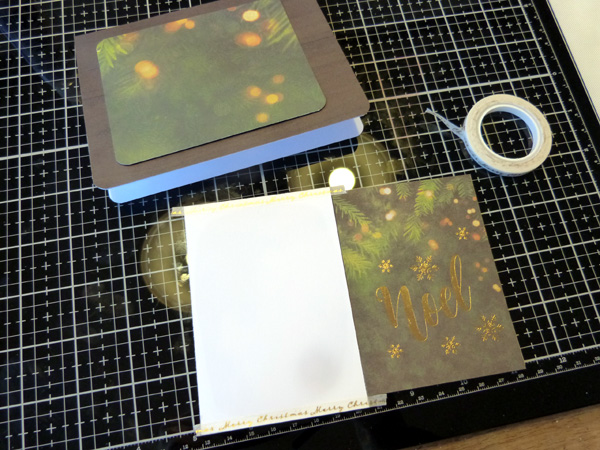
Create a top-folding horizontal card base from Luxury White Cardstock. Trim a 4.25″ x 5.5″ piece of brown woodgrain paper, and adhere it to the card base using a tape runner. Round the two bottom corners of the card. Trim a small panel of pine tree paper to layer, and trim the Noel journaling card from the papers. Cut a strip of white cardstock that is the same width as the journaling card, but 4.25″ in height. Add washi tape across the top and bottom, trimming off the ends as needed.
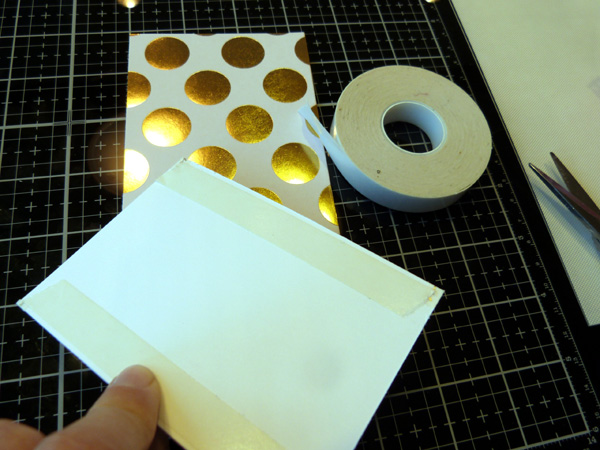
Trim a piece of foiled patterned paper that is the same height as the journaling card/washi tape panel, but slightly wider. Adhere the journaling card to the foiled paper using 1/2″ iCraft tape.
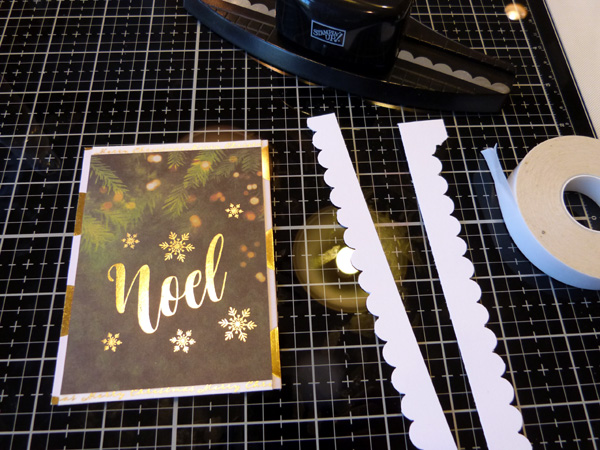
Cut two long thin strips of white cardstock, and add a scalloped border to one edge of each using a border punch. Adhere the strips to both the right and the left edge of the layered journaling panel, and trim off the ends as needed.
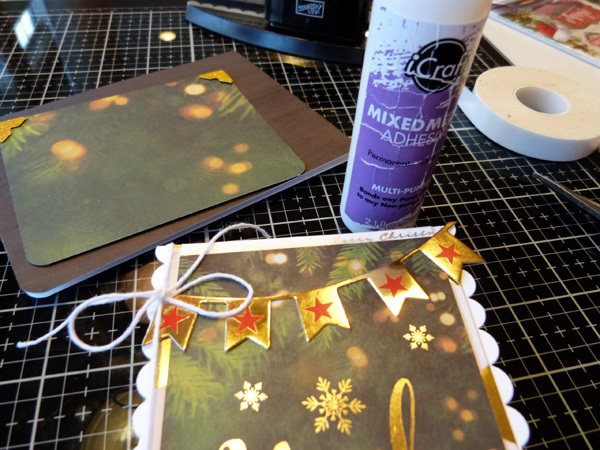
Wrap twine around the left side of the panel, tying it into a bow at the top left corner. Add a cardstock banner sticker across the top of the panel, cutting off the excess from the sides. Add a small dab of Mixed Media adhesive underneath the bow, and adhere it in place. Add gold photo corners to the second card panel.
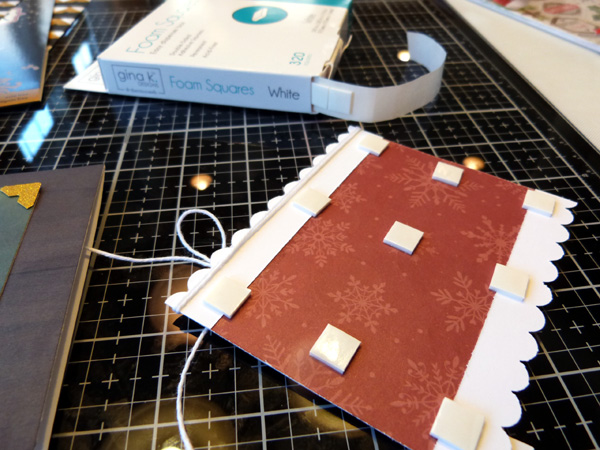
Adhere the layers in place with tape runner and foam squares.
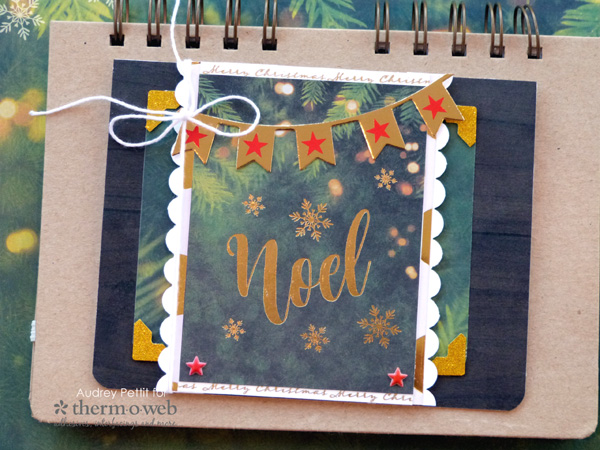
Enjoy!
We hope you’ve enjoyed this week during our cross-promotion with our friends at Paper House Productions! We know it’s wonderful to be inspired but even better to have a chance to win some supplies to give you a chance to make some holiday memories of your own with our products.
Leave us a comment and let us know what you love most about the holiday season. We’ll pick one random winner next Monday at 9 am CST to win a $20 Gift Certificate! Be sure to check back in!

And that’s not all!
Our friends at Paper House Productions are also offering to you a chance to win a $20 Gift Card to shop with them! They have all sorts of amazing products to chose from. Just follow the Rafflecopter below to get yourself entered to win!


Sue D
December 7, 2018 at 2:05 pm (7 years ago)So pretty and festive.
Sharon Clabaugh
December 7, 2018 at 3:01 pm (7 years ago)I love making Christmas Cards………..the ones I don’t have time to make! But I let everything else slide and do it anyway. lol
Denise Bryant
December 7, 2018 at 3:43 pm (7 years ago)Beautiful projects! Love the foils!
Kathy E.
December 7, 2018 at 8:18 pm (7 years ago)What I love most about the holiday season is the warmth and kindness it brings out in people. I’m not sure how it happens, but it seems that people everywhere soften their hearts and words during this wonderful, holy season. What’s not to love about that?
Carla Hundley
December 7, 2018 at 9:00 pm (7 years ago)Gorgeous ways to
make the cards. I
love driving around
town and seeing all
the holiday lights!
Carla from Utah
memalagene
December 8, 2018 at 10:14 am (6 years ago)Wonderful creations! I love all the layers! I especially love the Noel card! My favorite thing this time of the year is celebrating with family and yummy cooking!