Hello everyone and welcome to Gift Idea week here on the Therm O Web blog. It’s Deb here today and I have a Christmas gift tag holder, gift bag and card to share with you created with Therm O Web’s Deco Foil Flock and Foil Transfer Sheets. I also used some wonderful scrapbook papers from Carta Bella and I think this little Merry & Bright gift ensemble would make a lovely hostess gift or a gift for a special friend.
Christmas Gift Tag Holder
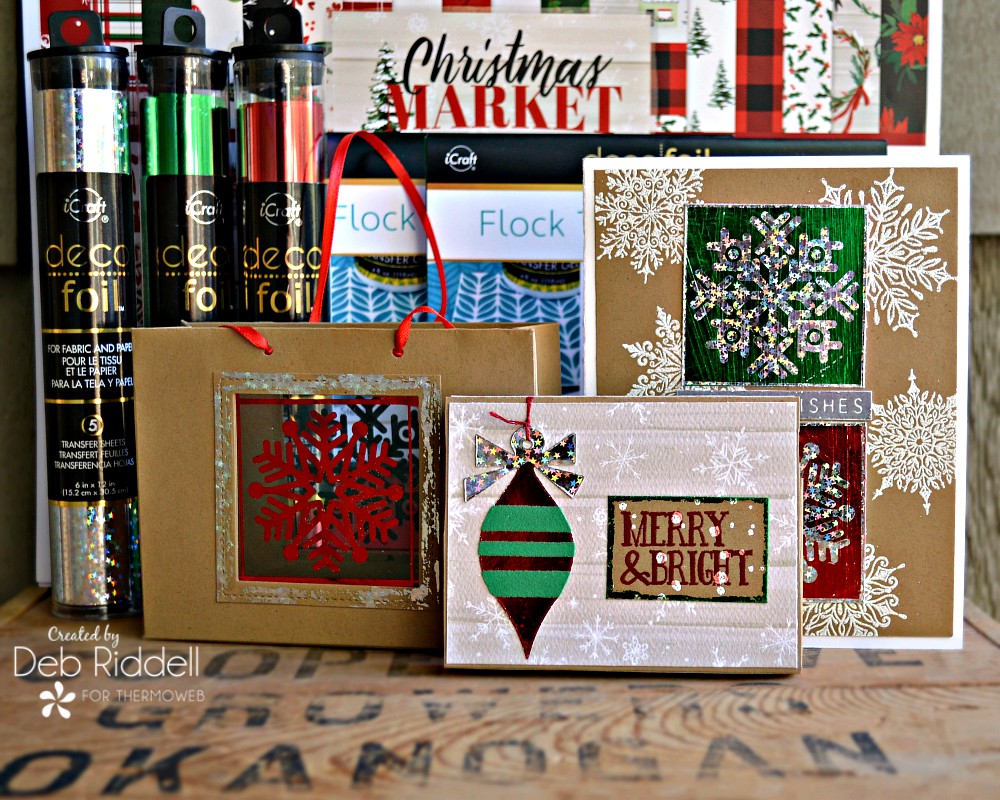
Therm O Web Supplies Used:
Deco Foil Flock Transfer Sheets – Ruby Red
Deco Foil Flock Transfer Sheets – Emerald Green
Deco Foil Transfer Sheets – Red
Deco Foil Transfer Sheets – Green
Deco Foil Transfer Sheets – Silver Stars
Brutus Monroe Designer Toner Sheets – Snow Day
Deco Foil™ PeelnStick Toner Sheets
Deco Foil™ Toner Sheets
Deco Foil™ Liquid Adhesive 2.1oz
Deco Foil™ Adhesive Pen .34floz
iCraft Ultra Bond Adhesive 2 fl oz
iCraft Metal Tips For Liquid Adhesives
Purple Tape – 1.5″
Memory Tape Runner XL™
iCraft Adhesive™ Tape • 1/4 in
iCraft Adhesive™ Tape • 1/2 in
Gina K. Designs Terrific Tape 1/8 in x 27 yds
Gina K. Designs (3) Nested Square Dies • Single Stitch Design • Large Set
Gina K. Designs (3) Nested Rectangle Dies • Single Stitch Design • Large Set
Gina K. Designs Premium Cardstock • Luxury White
Other supplies used:
Echo Park Paper Company – Carta Bella Christmas Market Collection Kit
Sizzix – Mini Retro Ornaments Movers & Shapers dies; Mini Paper Snowflakes dies
Stampers Anonymous – Mini Swirly Snowflakes stamps; Flurry stamp; Modern Christmas stamps; Holiday Drawings stamps
Ranger Ink – Distress Embossing Ink: Archival Ink
Miscellaneous – kraft cardstock; 1/8″ red satin ribbon; red embroidery floss; clear embossing powder; white sparkle embossing powder; free gift bag template (click here to download); heat laminator; die cutting machine; hole punch; sewing machine; envelope punch board; small velcro dots; copy paper
Merry & Bright Gift Tag Holder
Box Instructions
Start by cutting a piece of kraft cardstock to 5 1/2″ x 11″ for the gift cardholder. Score on the long side at 2″, 2 3/8″, 5 1/4″, 5 5/8″ and 8 1/2″.
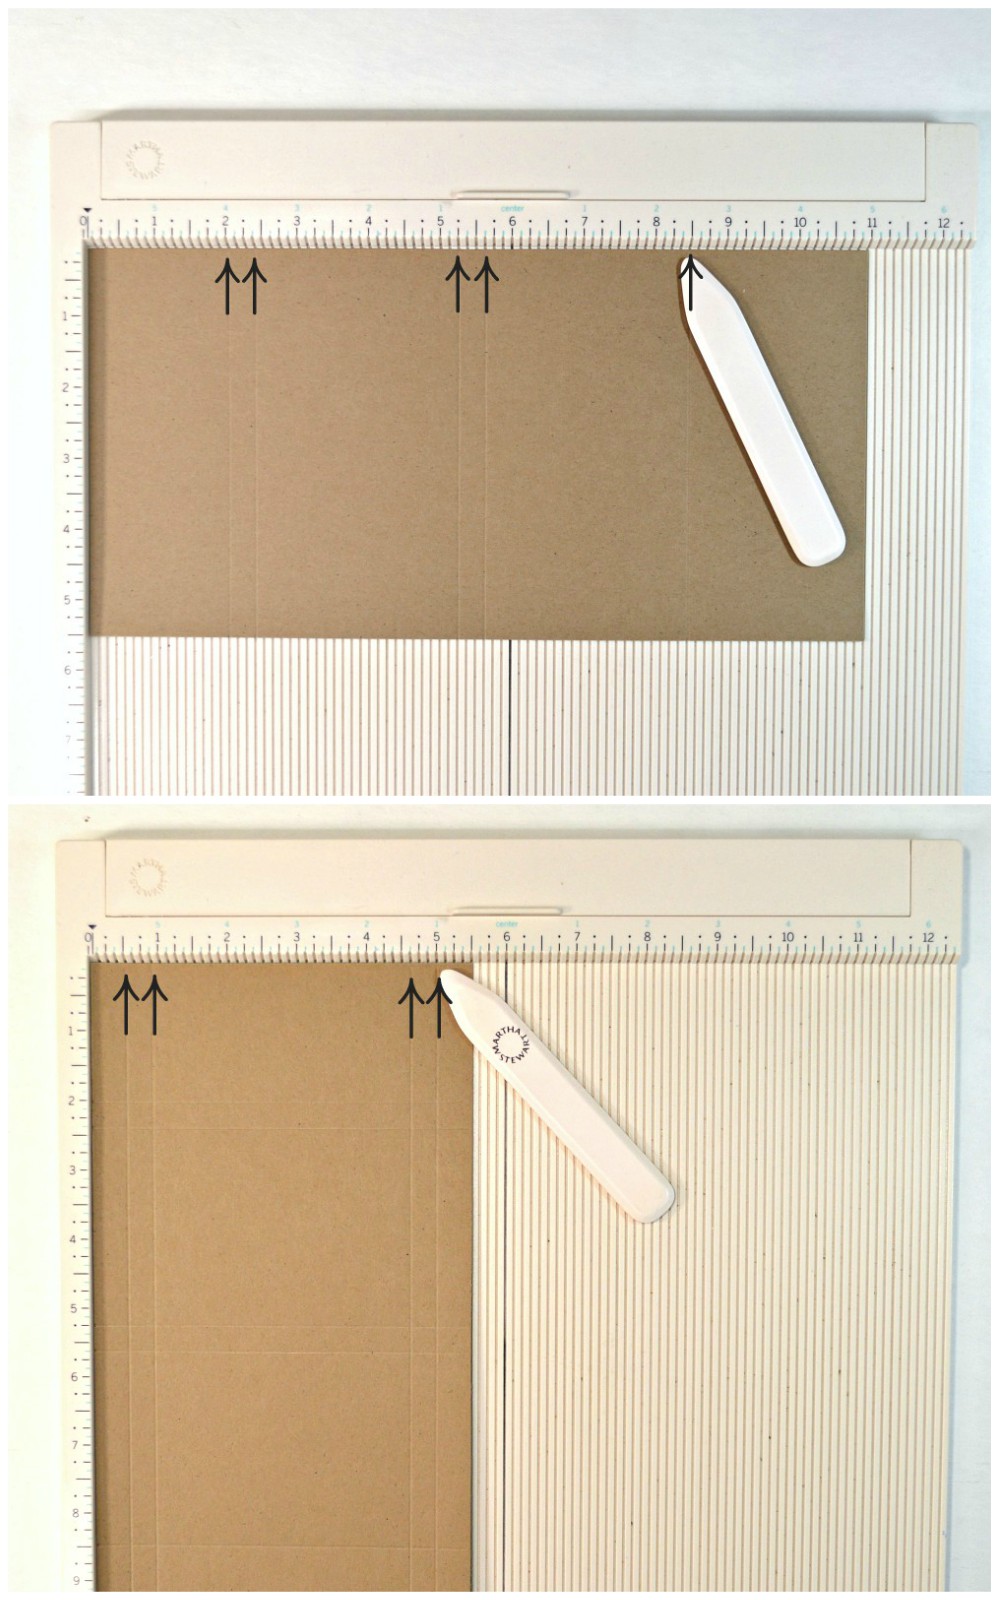
Turn the cardstock and score again on the short side at 1/2″, 7/8″, 4 5/8″ and 5″.
Cut away all of the areas indicated by the scribbles in the picture below. This gift card holder is based upon a design by PaperCrafter45 on YouTube so you can also refer to her video (click here to see it), the dimensions are different but the construction is the same.
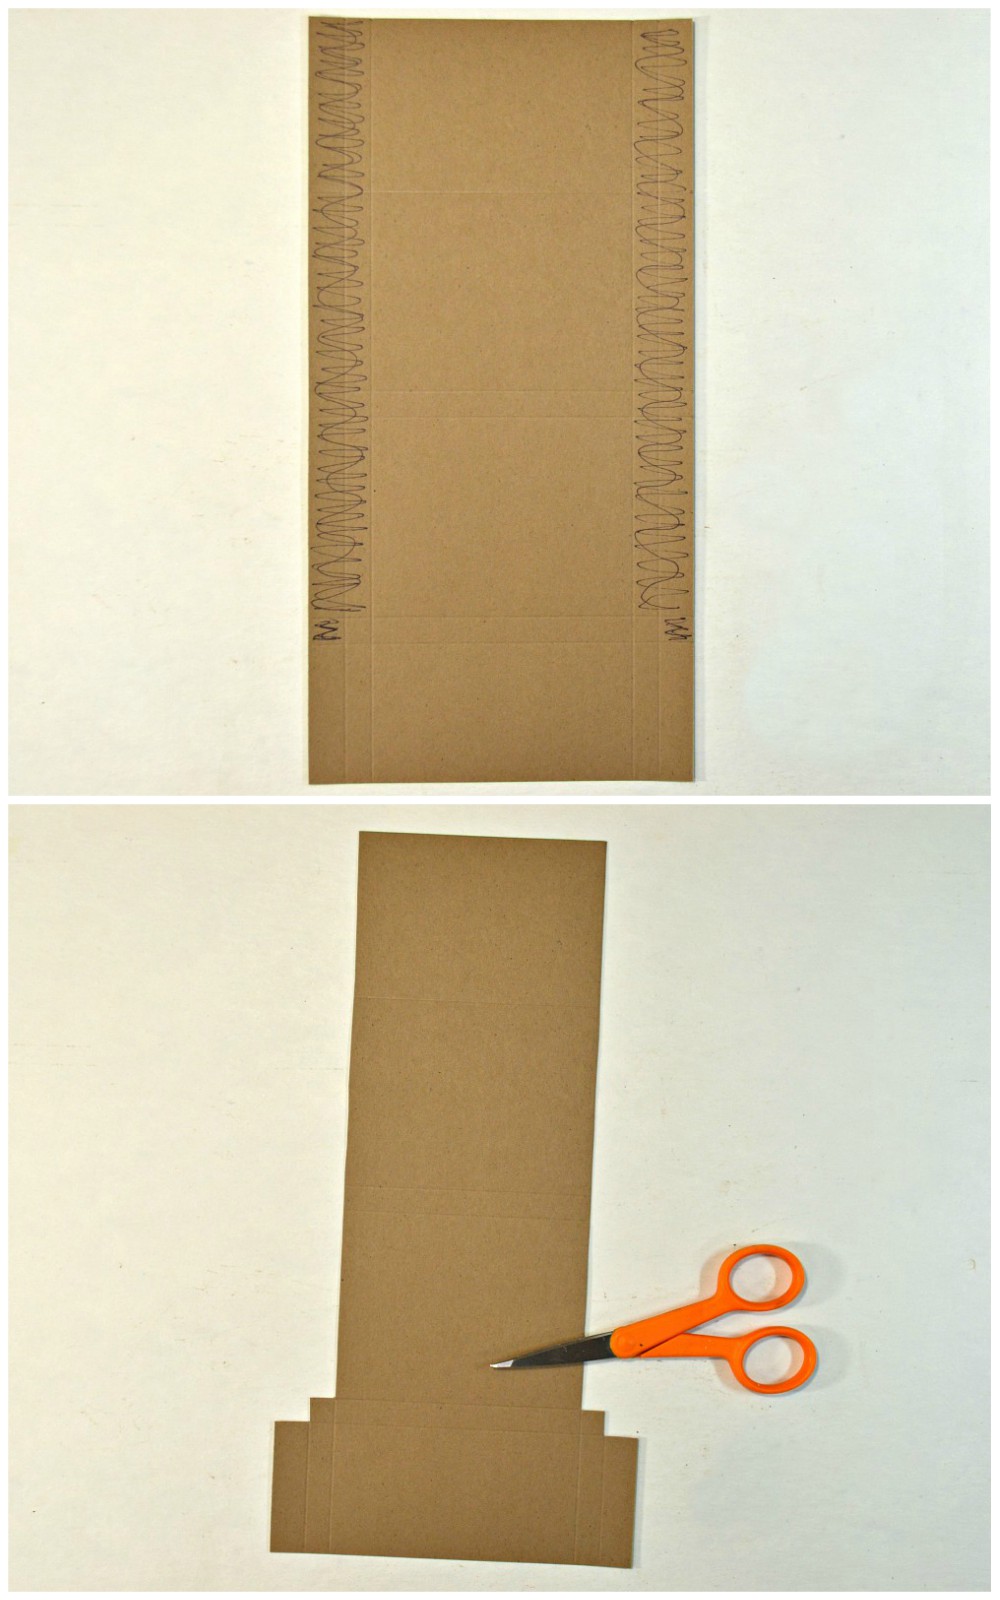
Once trimmed, this is what your gift card holder will look like (so far!).
Cut the little tabs on each side up to the last horizontal scoreline.
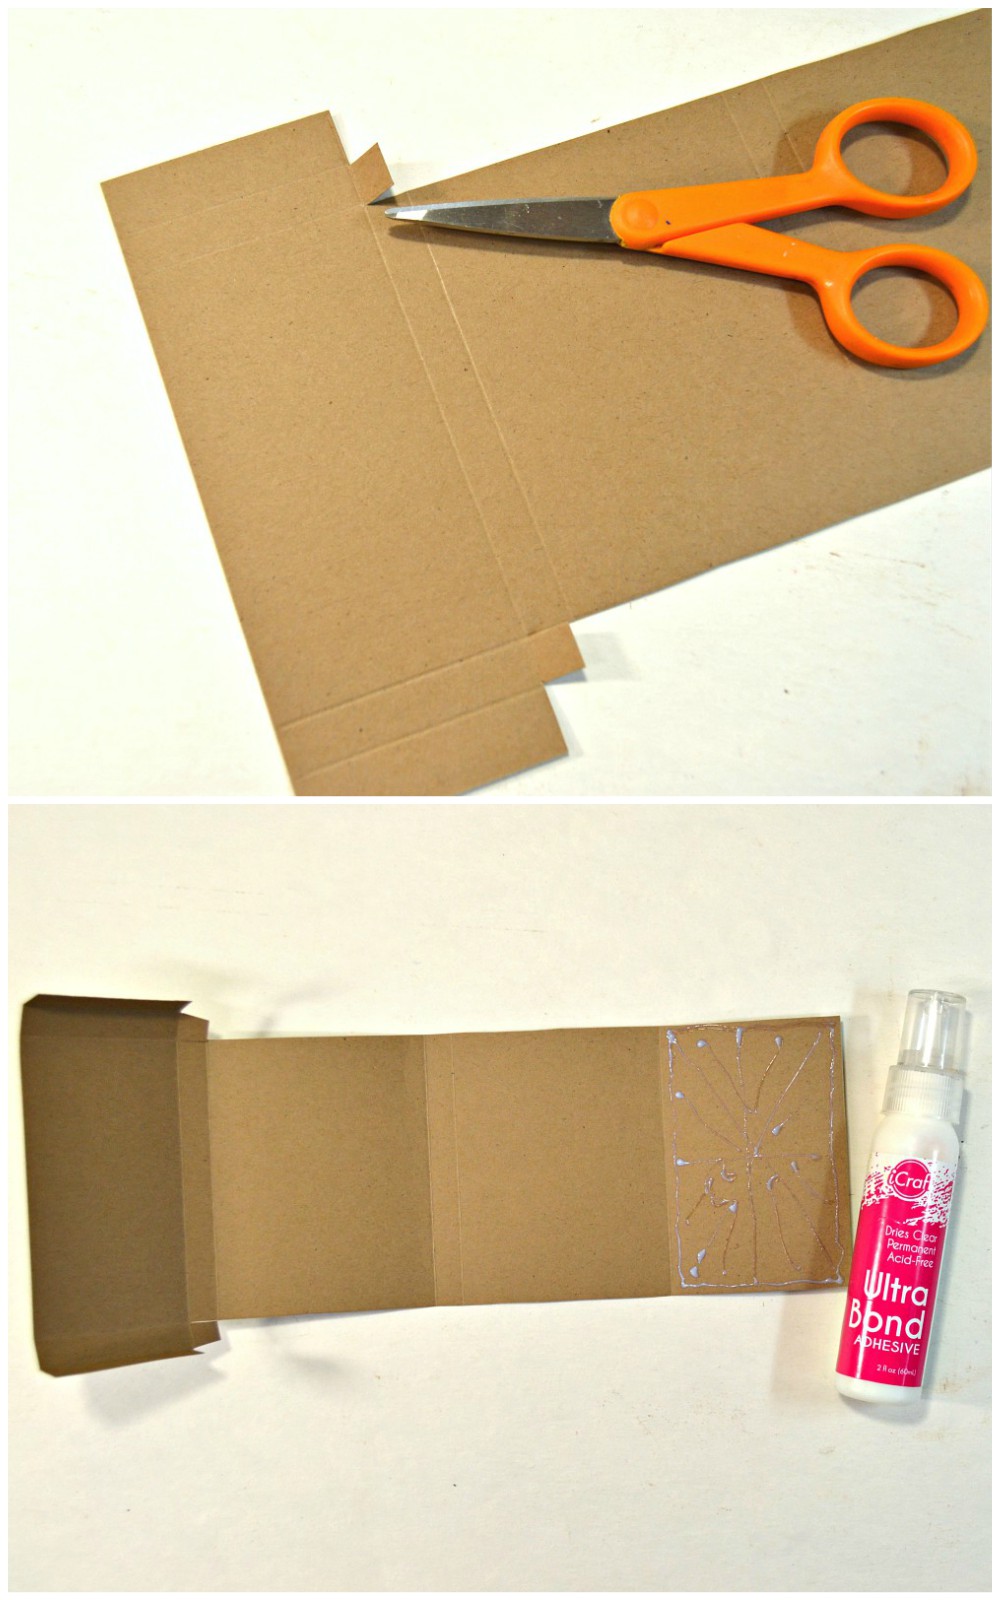
Apply iCraft Ultra Bond adhesive to the last panel on the other end and fold it over. This will become the front cover of your gift tag holder box.
Fold up the sides of your gift box and apply adhesive to the two little tabs and the sides of the gift box to adhere it to the back flap.
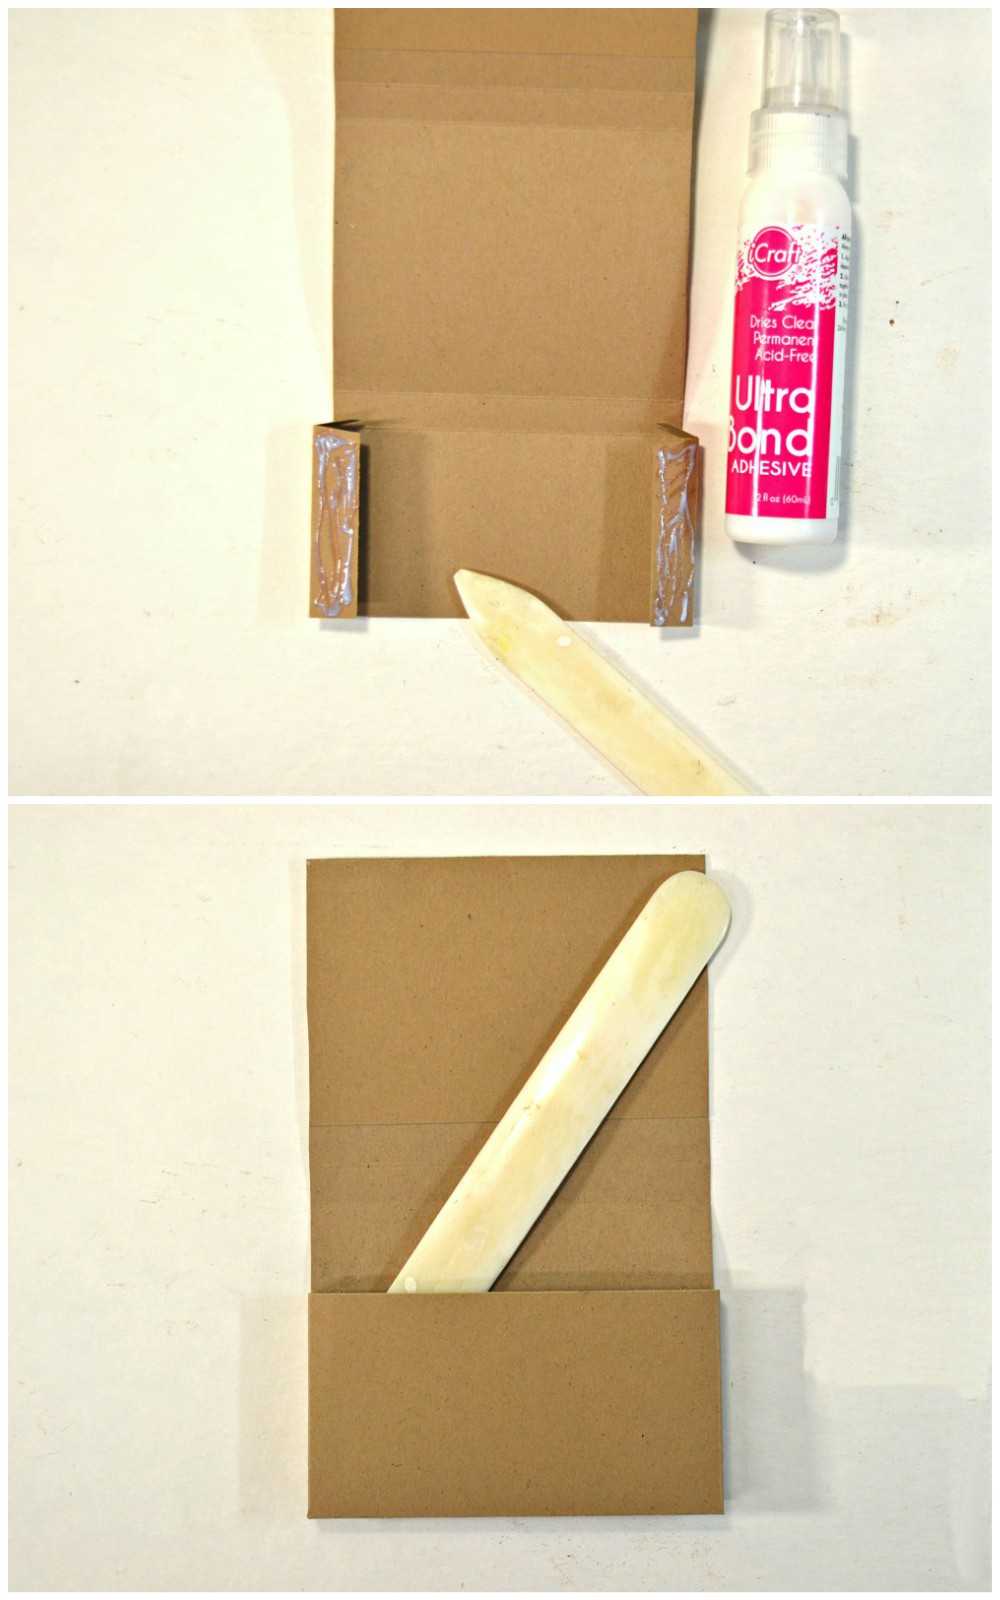
The base of your gift box holder is now completed.
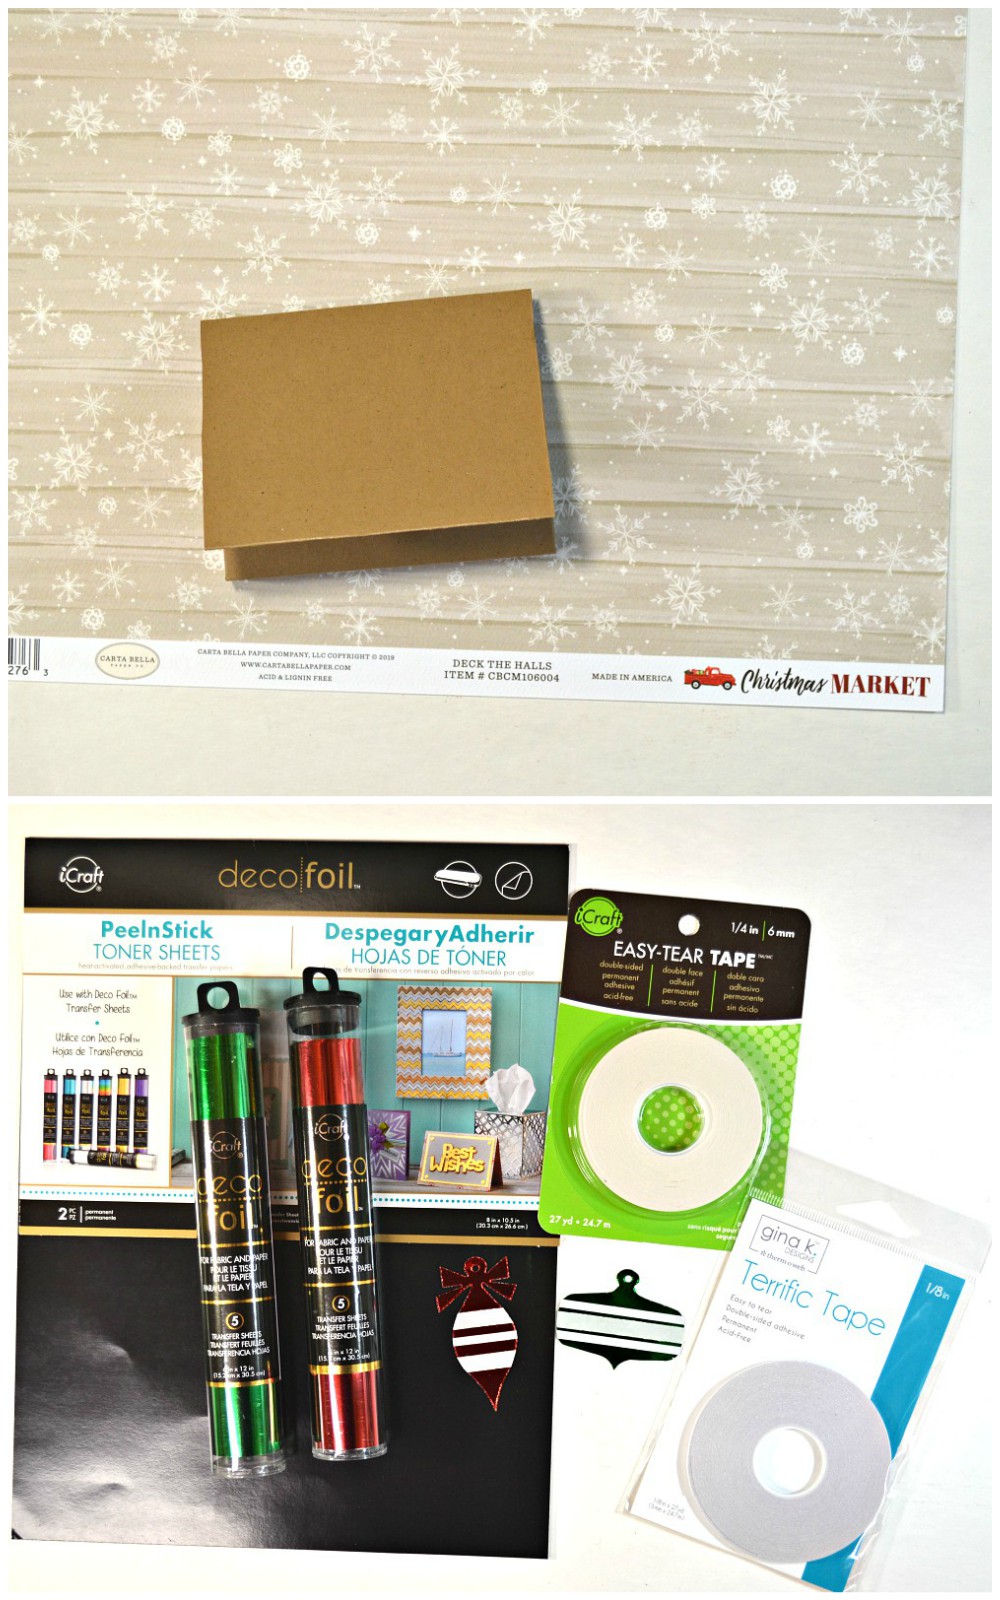
Cut matting pieces from Carta Bella’s Deck The Halls scrapbook paper (CBCM106004) to cover the box inside and out. I just left a scant 1/8″ reveal on my box and cut my matting pieces to the following sizes:
Outside mats: 2 pieces cut to 3 5/8″ x 2 3/4″; 2 pieces cut to 3 5/8″ x 3/8″ and 1 piece cut to 3 5/8″ x 1 7/8″
Inside mats: 2 pieces cut to 3 5/8″ x 2 3/4″ and 1 piece cut to 3 5/8″ x 3/8″
Time to Foil
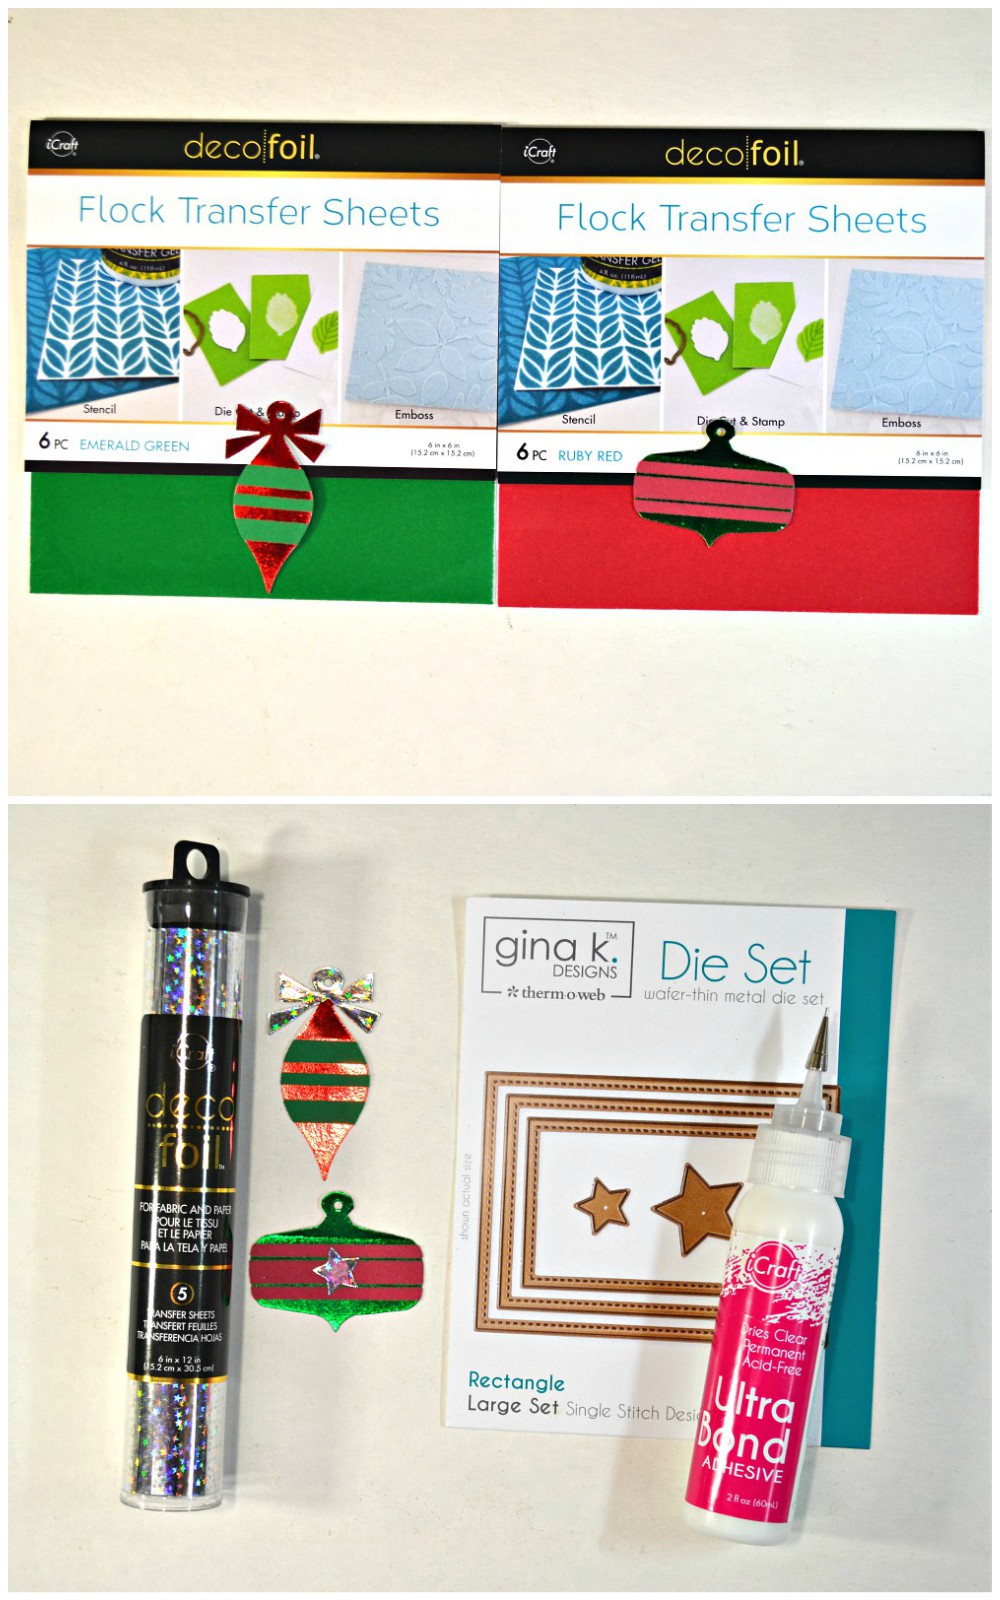
Preheat your laminator and cover two pieces of Deco Foil PeelnStick Toner Sheet with Red Deco Foil and Green Deco Foil. Die-cut two Mini Retro Ornaments, one from Red foil and one from Green foil, and then add strips of double-sided tape (1/4″ and 1/8″) to the ornaments as shown.
Remove the backing paper from the double-sided tape and burnish on Emerald Green Flock Transfer Sheet to the Red foiled ornament and Ruby Red Flock Transfer Sheet to the Green foiled ornament.
Foil a piece of Deco Foil Toner Sheet with Silver Stars Deco Foil and die cut another ribbon with the Mini Retro Ornaments die and a star with the smallest star from Gina K Designs Large Rectangle die set. Adhere the foiled ribbon onto the Red foiled ornament and the star to the Green foiled ornament with Ultra Bond Adhesive (I didn’t use the PeelnStick Toner Sheet for these embellishments as I didn’t want them to be too dimensional). Pssst, have you tried the iCraft Metal Tips with the Ultra Bond Adhesive? Perfect for adding adhesive to those teeny tiny die cuts without any fuss or muss!
Adhere the Red foiled ornament onto the front of your matted gift tag holder. I added a little piece of red embroidery floss as a hanger. Stamp a piece of kraft cardstock with the Flurry stamp and emboss with white sparkle embossing powder. Stamp a sentiment over top (this is from the Holiday Drawings stamp set) with red ink and clear emboss the sentiment. Add Deco Foil Adhesive around the edges of the sentiment with the Deco Foil Adhesive Pen, wait a few seconds until it is tacky and then burnish on some Green Deco Foil. Adhere the sentiment to the front of the gift tag holder.
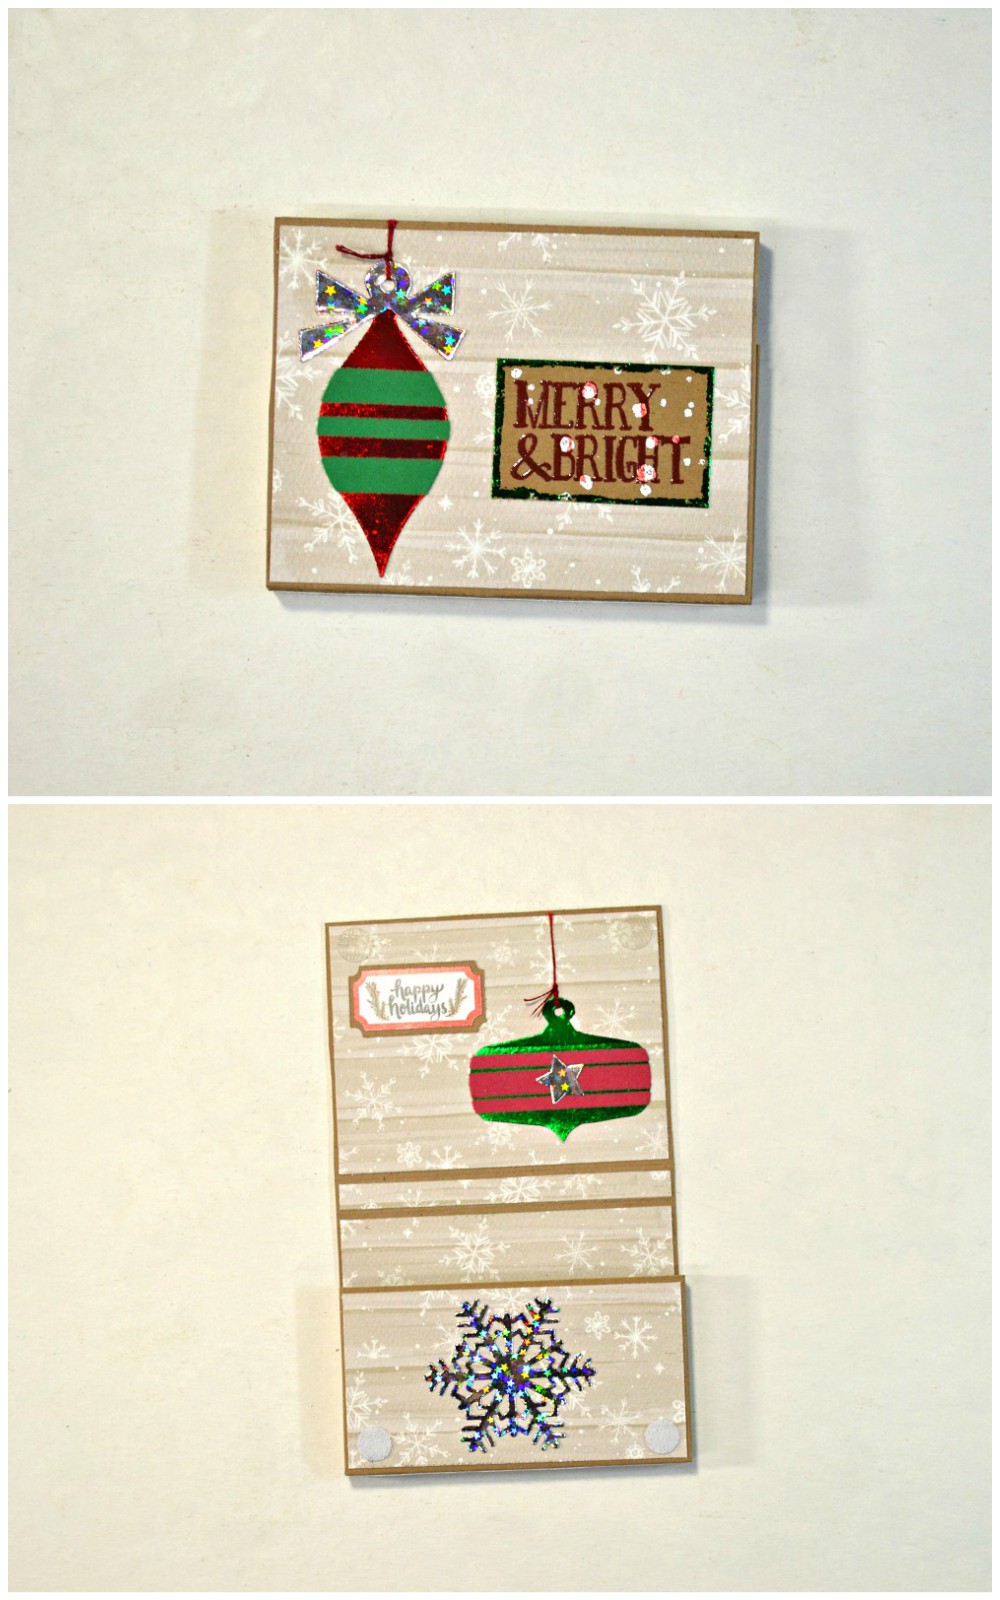
Adhere the Green foiled ornament to the inside cover of the gift tag holder. Add a sticker sentiment from Carta Bella’s Element Stickers (CBCM106014). Die-cut a Mini Paper Snowflake from the Silver Stars foiled Toner Sheet and adhere it to the front of the box. Add a couple of small Velcro dots to keep your gift tag box closed.
Cut out all of those wonderful gift tags from Carta Bella’s Gift Tags scrapbook paper (CBCM106006). Punch the holes and add a piece of red embroidery floss for a tie.
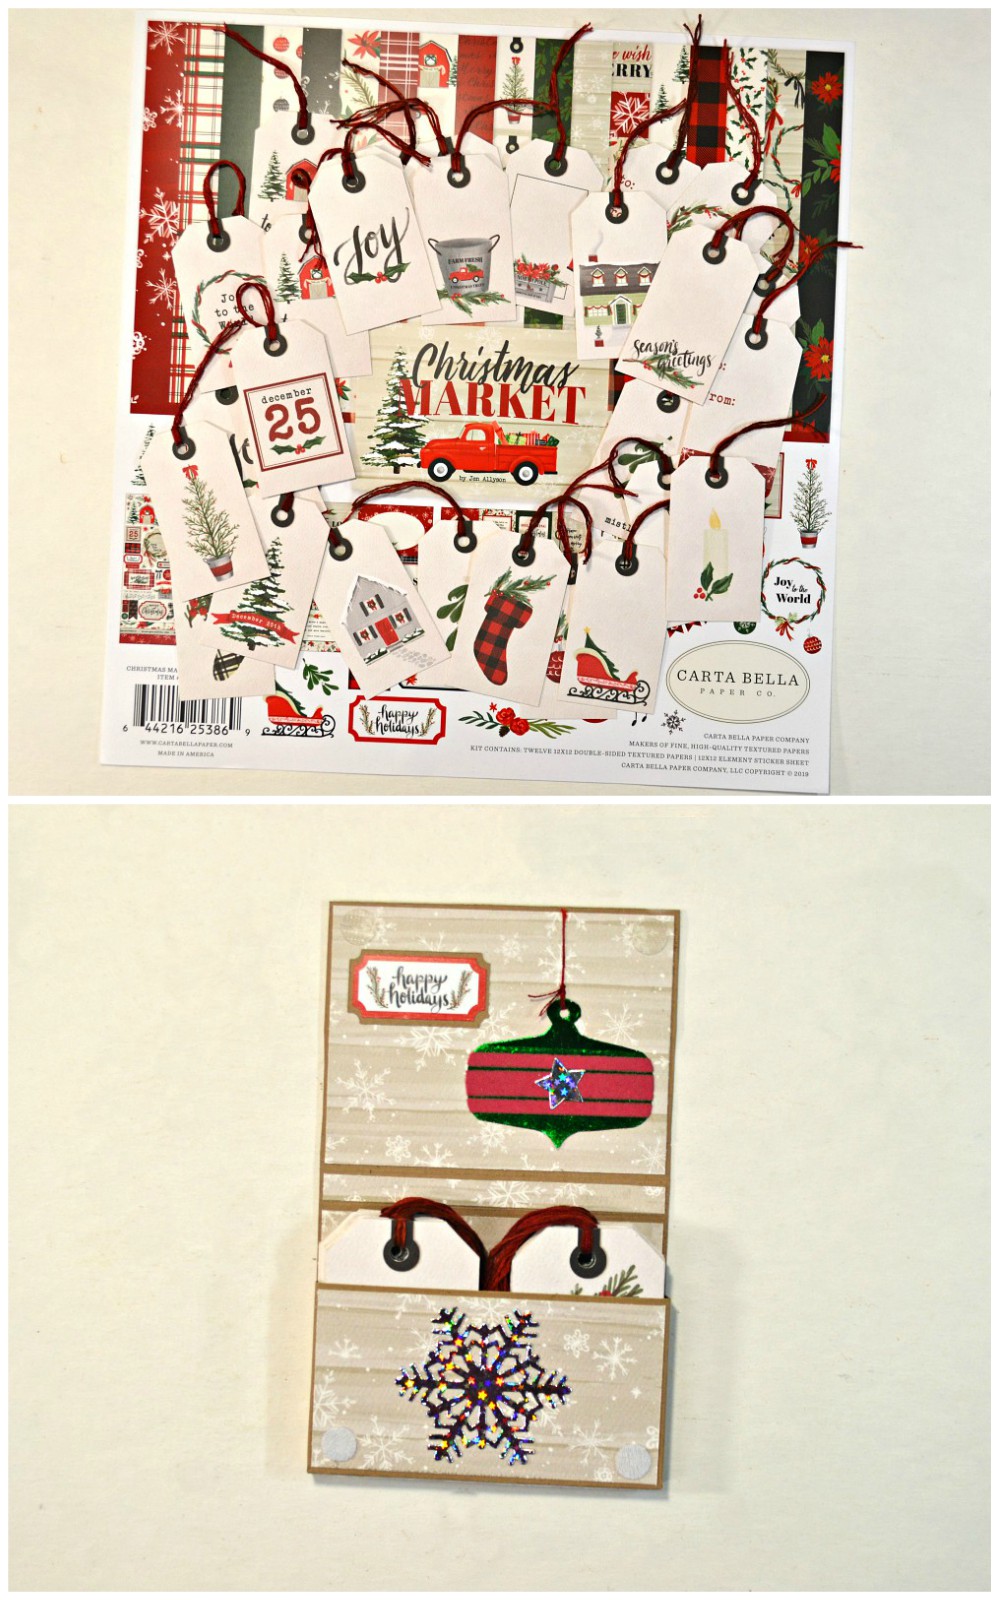
Insert the gift tags into the holder and it is done!
Make a Notepad
I then started to think about what the recipient could do with this little gift tag holder after all of the tags had been used. So I made a little note pad by cutting numerous pieces of paper to 2 1/2″ x 3/12″, sewed through the paper along the top with my sewing machine (no thread!) about 1/2″ from the top to make a score line (so you can tear the pages off as they are used) and then punched a couple of holes and tied the pages together with a piece of ribbon. An easy peasy note pad to tuck into the gift tag holder once it’s empty!
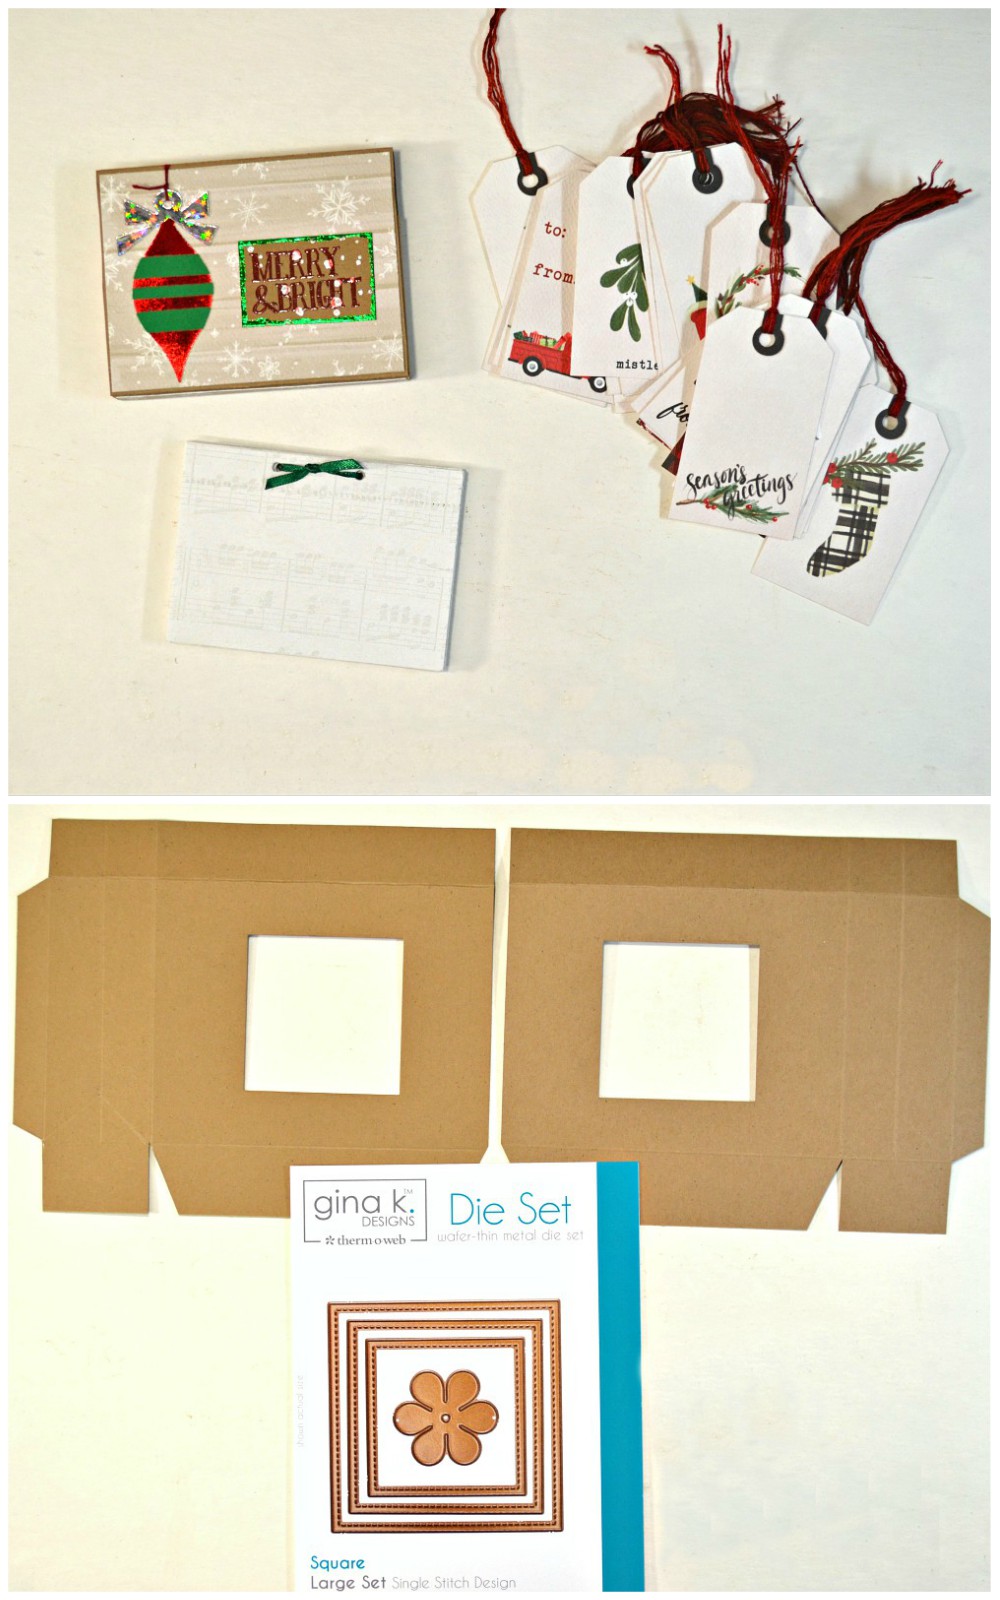
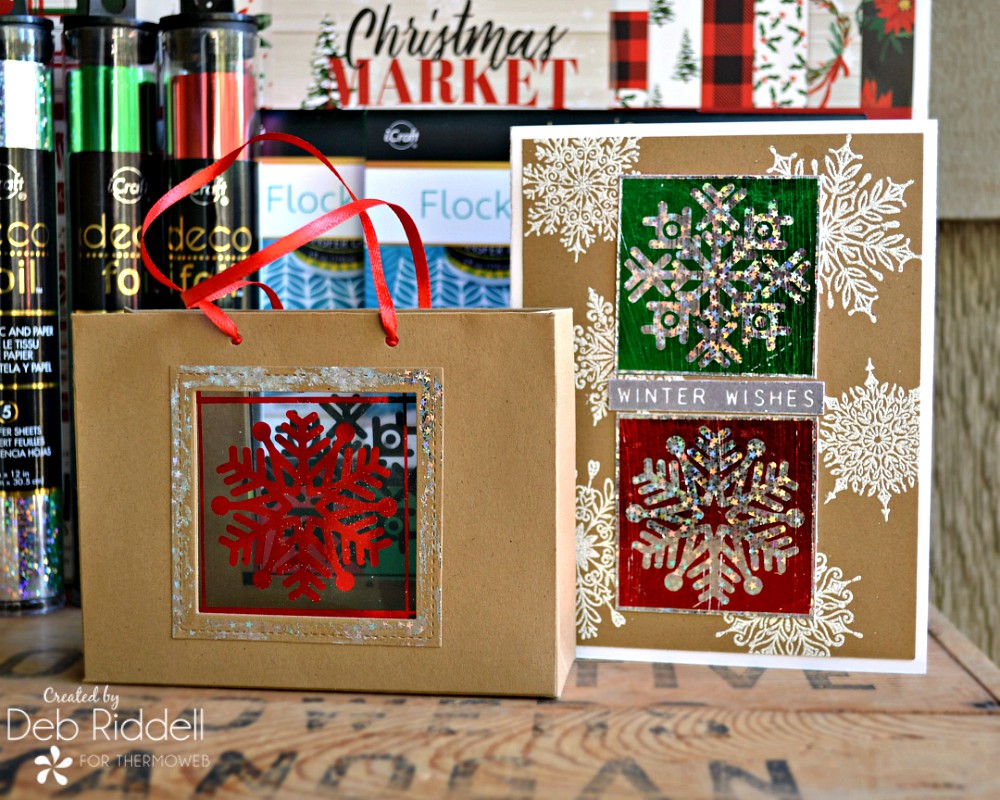
Now that we have the gift, we have to have a gift bag to put it in. I resized a free gift bag template that I found online and cut a front and back from kraft cardstock (click here to download the free gift bag template that I resized). Die-cut a square opening in each piece with the smallest die of Gina K. Designs Large Square die set.
Cut out two of the snowflake squares from Brutus Monroe’s Snow Day Clear Designer Toner Sheet. Foil one snowflake with Green Deco Foil and the other with Red Deco Foil. Keep the negative images on the Red and Green Deco Foil as we will be using them on the accompanying card.
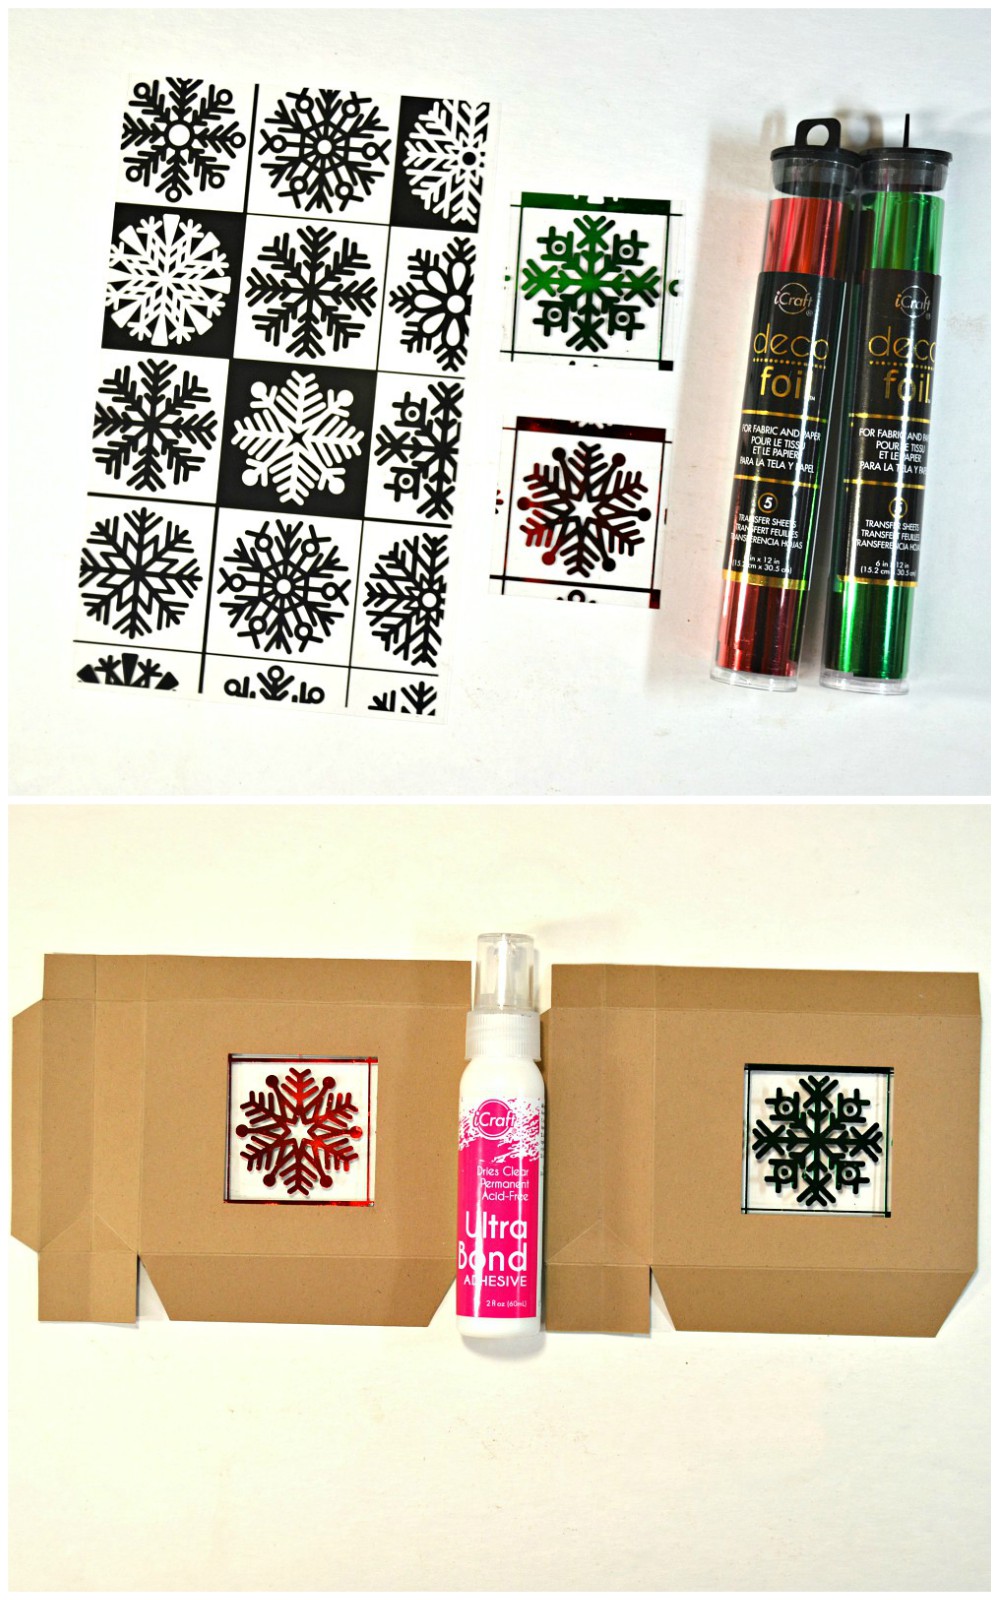
Adhere the foiled snowflakes to the back of the gift bag pieces behind the die-cut openings with Ultra Bond Adhesive.
Frames for the Holder
Make two frames for the snowflakes by nesting the smallest Square die inside the next largest Square die, holding them in place with Purple Tape and die-cutting them from kraft cardstock. Add Deco Foil Adhesive to the frame randomly with the Deco Foil Adhesive Pen and burnish on Silver Stars Deco Foil once the adhesive is tacky.
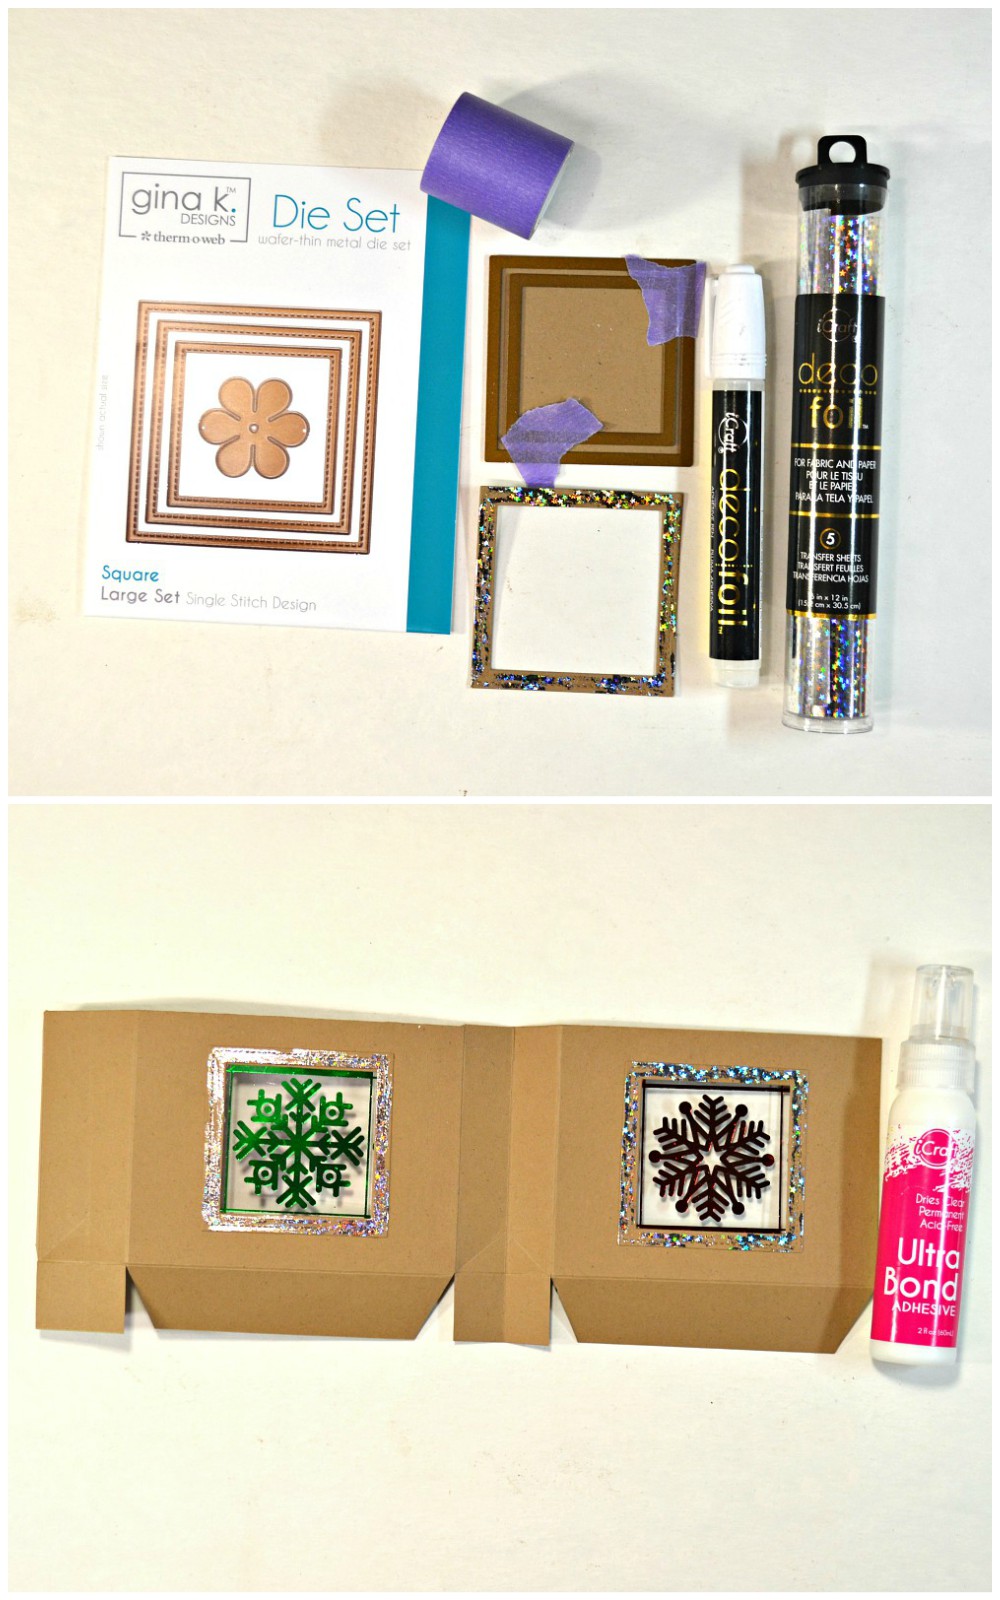
Adhere the foiled frames to the front of the gift bag. Adhere the two gift bag pieces together on one side and fold down the top edge, trimming the top edge as needed if you can see it through the windows, and adhere in place with Ultra Bond Adhesive.
Adhere the second side together to form the git bag and then adhere the bottom flaps to close it in.
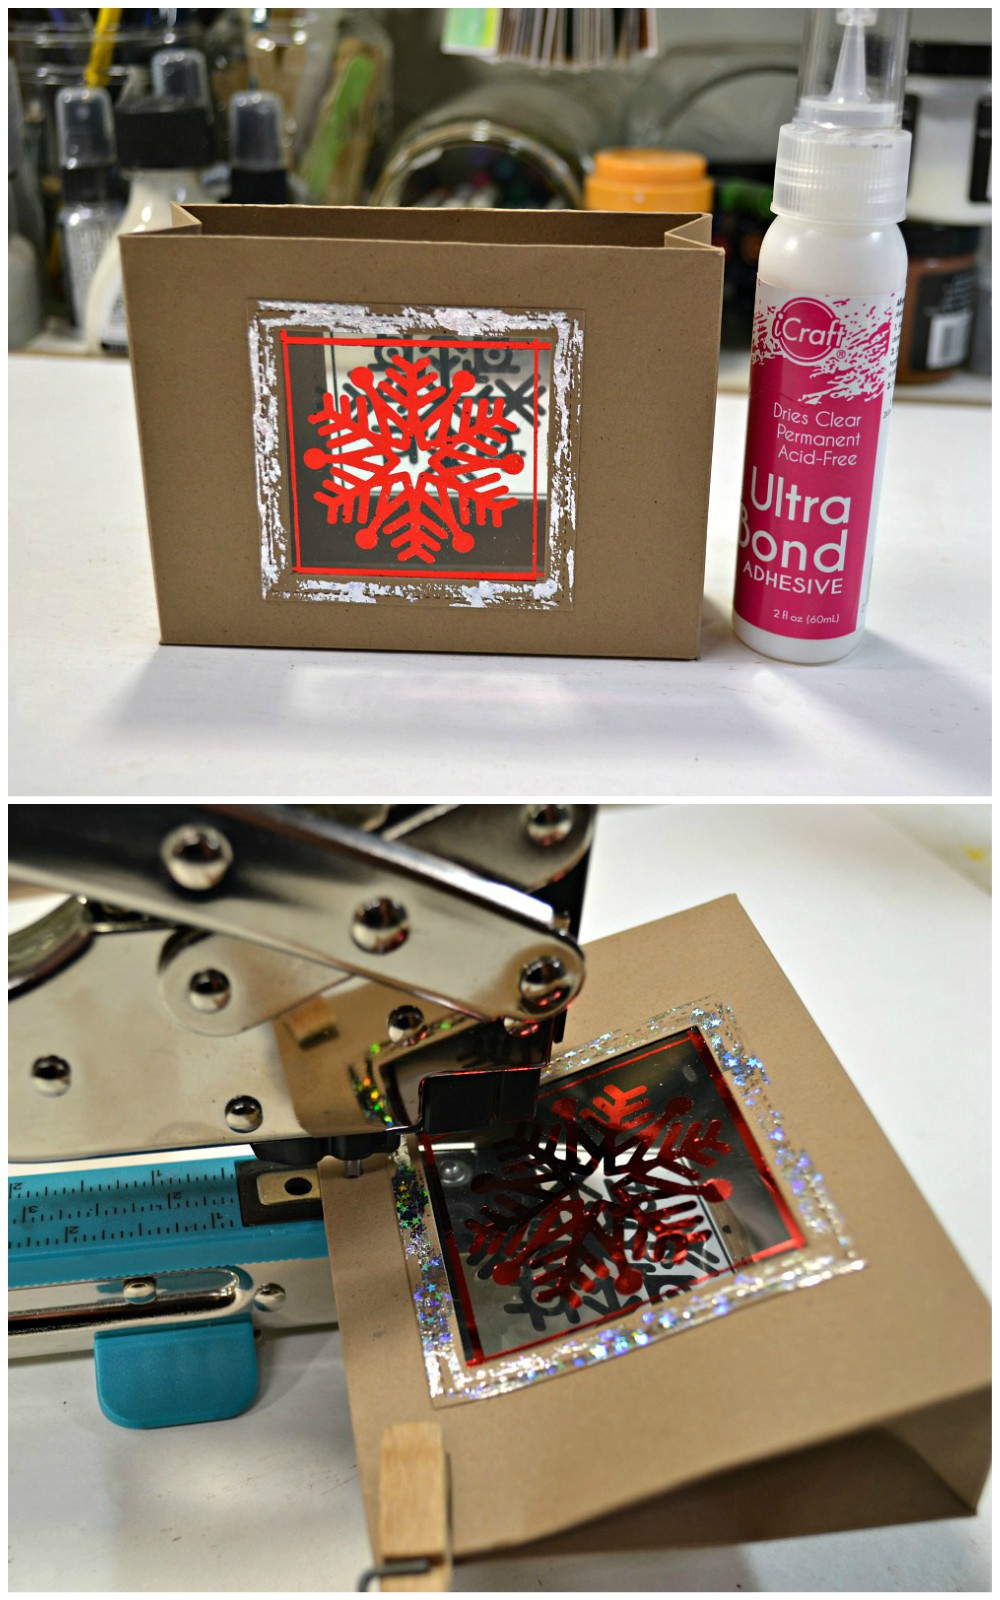
Clip the top edge together and punch a couple of holes for the handles.
Add a couple of lengths of 1/8″ red satin ribbon for your gift bag handles, adhering it in place with Ultra Bond Adhesive.
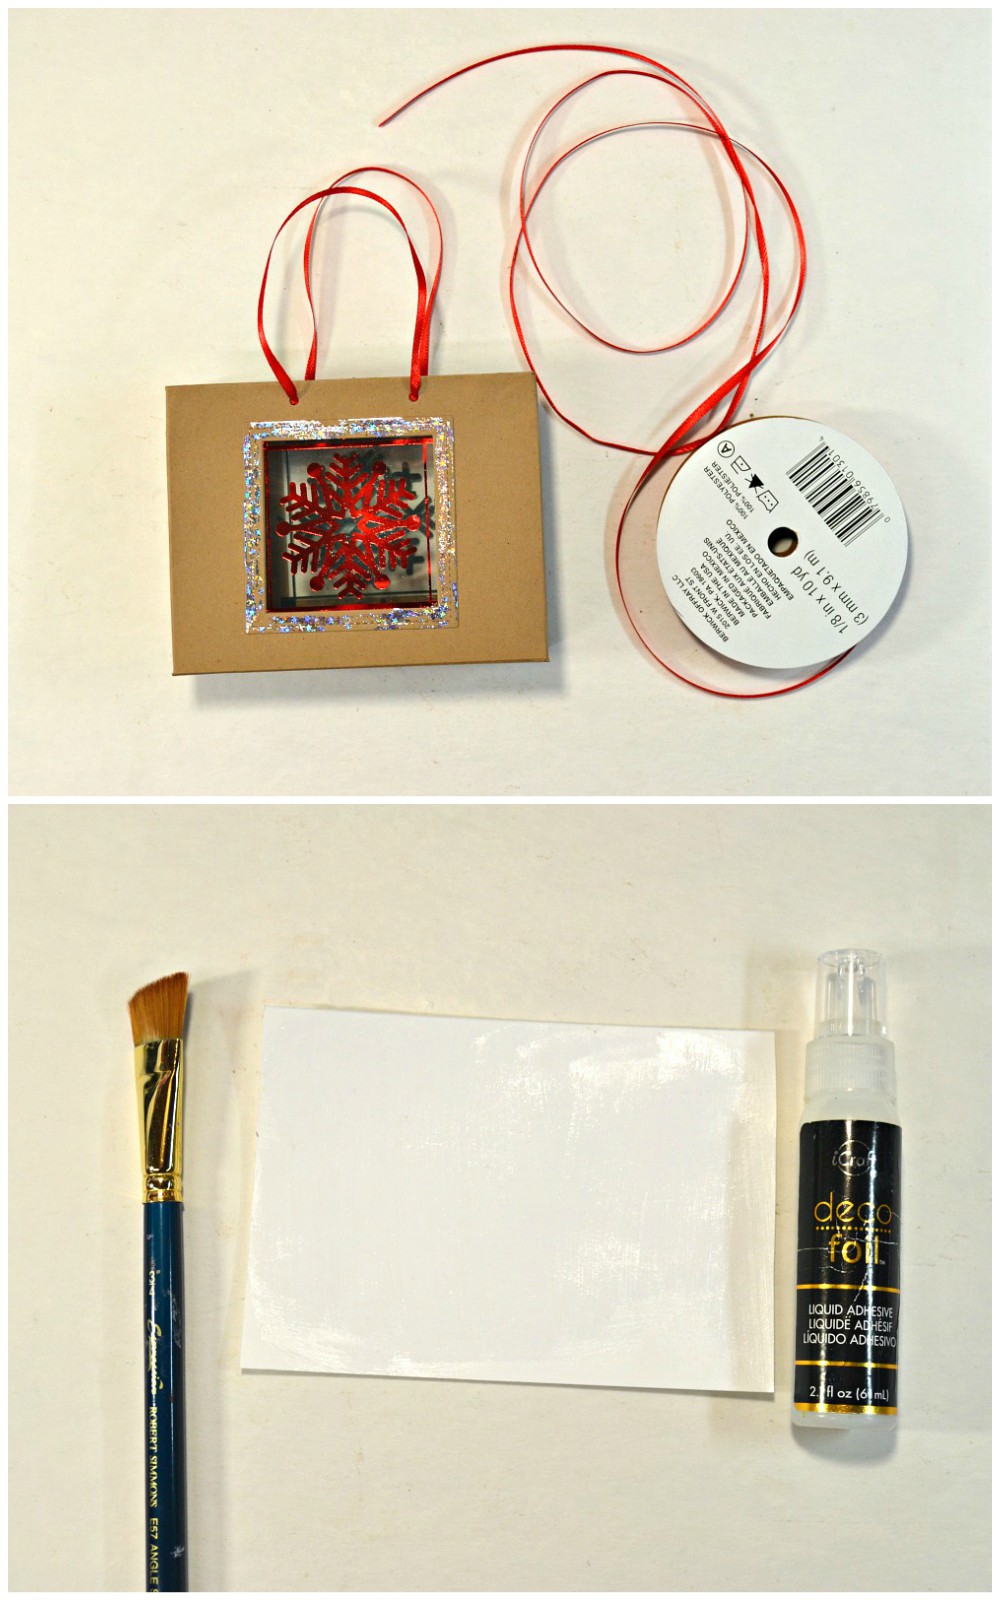
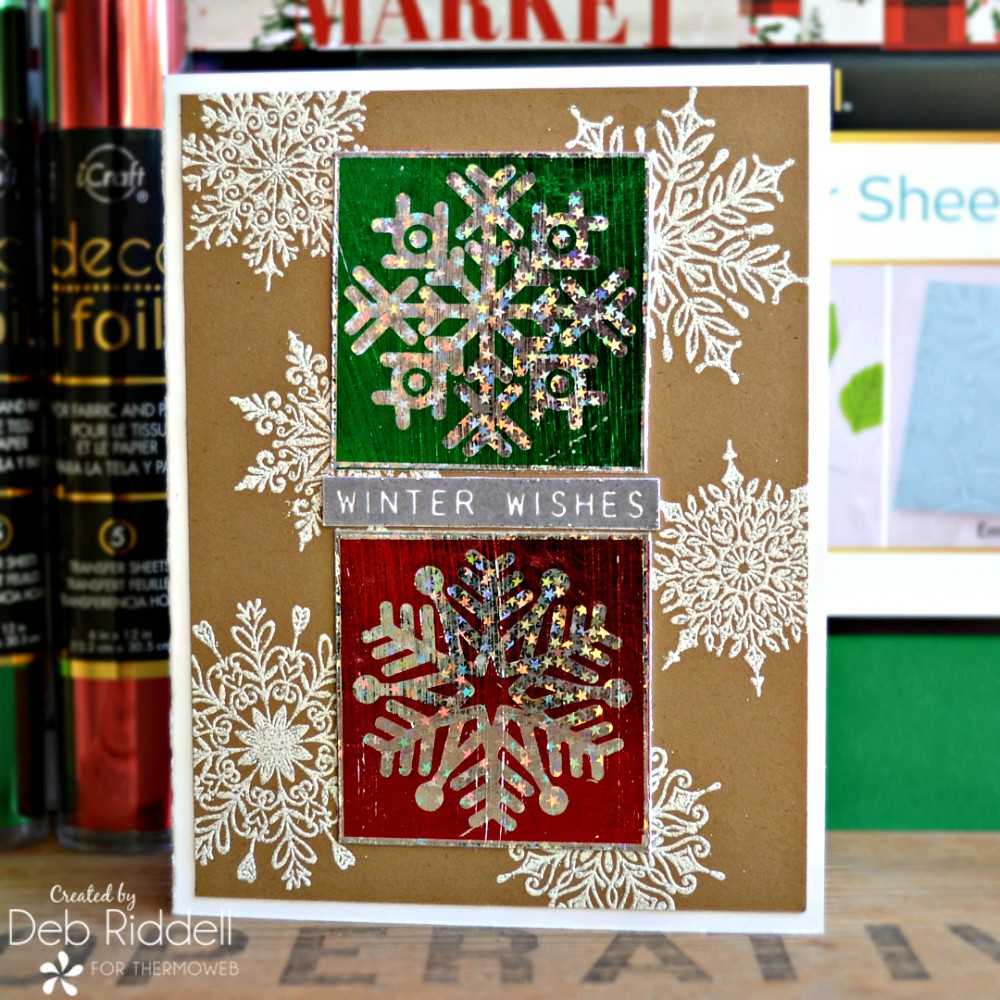
To finish off our gift ensemble, we need a card. Cover a piece of white cardstock with Deco Foll Liquid Adhesive, applying it with a paintbrush so you get some texture lines in the adhesive. Set it aside to dry (takes 1-2 hours).
Apply the Snow Play snowflake negatives left on the Red and Green foil to the adhesive covered cardstock and run it through your pre-heated laminator. Remove the backing film from the foiled images.
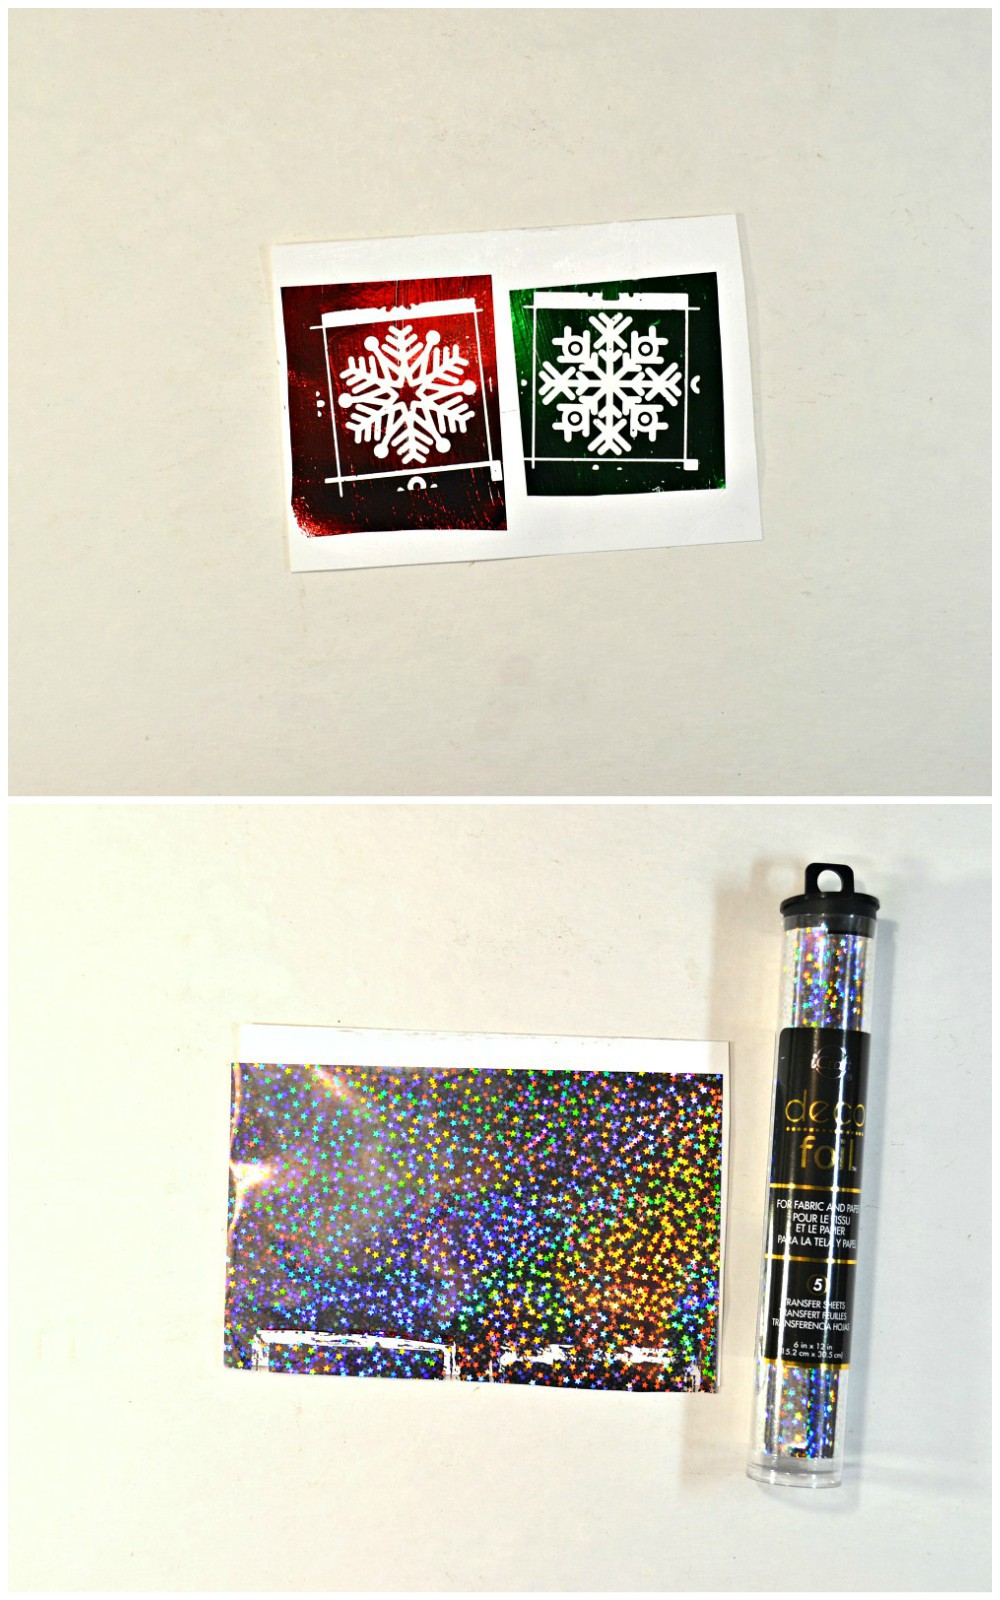
Cover the entire piece of cardstock with a piece of Silver Stars Deco Foil and run it through your laminator once again. Remove the backing film from the Silver Stars Deco Foil and trim the snowflakes down into squares.
Love how you can see the brushstrokes, adds some lovely texture to the foiled images!
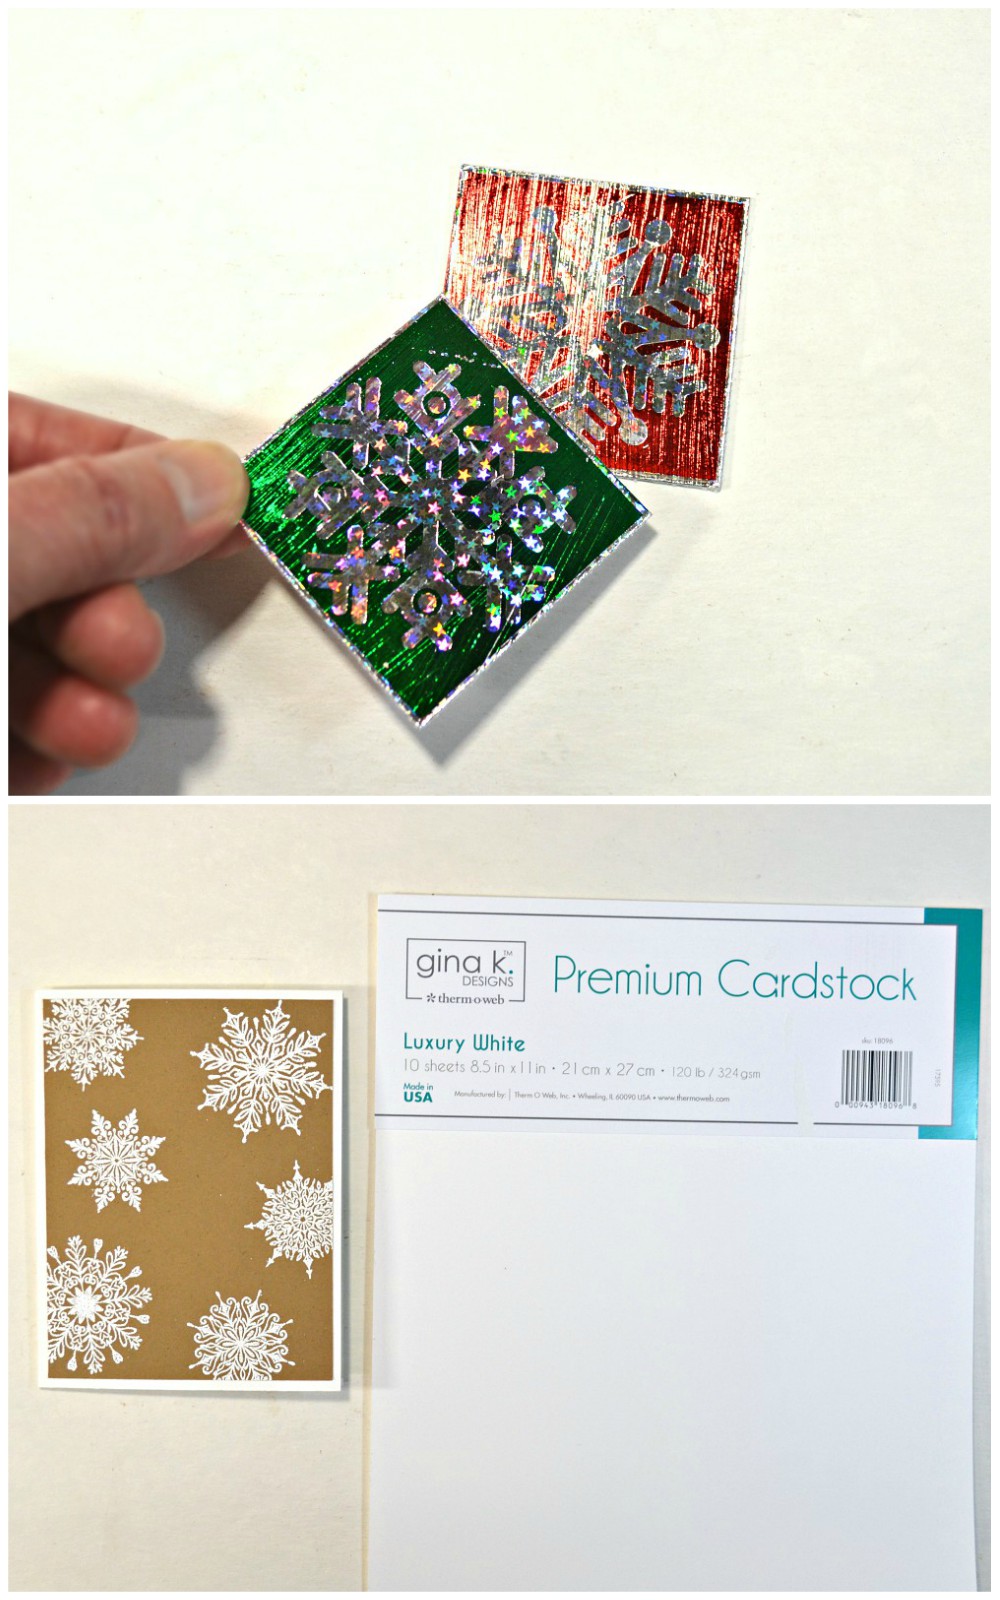
Prepare a card blank from Gina K. Designs Luxury White Premium cardstock by cutting a piece to 5 1/2″ x 8 1/2″ and folding it in half. Cut a piece of kraft cardstock to 4″ x 5 1/4″ and stamp it randomly with Mini Swirly Snowflake stamps and clear embossing ink. Emboss the kraft cardstock with white sparkle embossing powder and adhere it to the front of the card blank with your Memory XL tape runner or iCraft Easy Tear tape.
Adhere the foiled snowflake squares to the front of the card. Stamp a sentiment (this is from the Modern Christmas stamp set) with silver or grey ink and adhere it in between the two foiled snowflake squares.
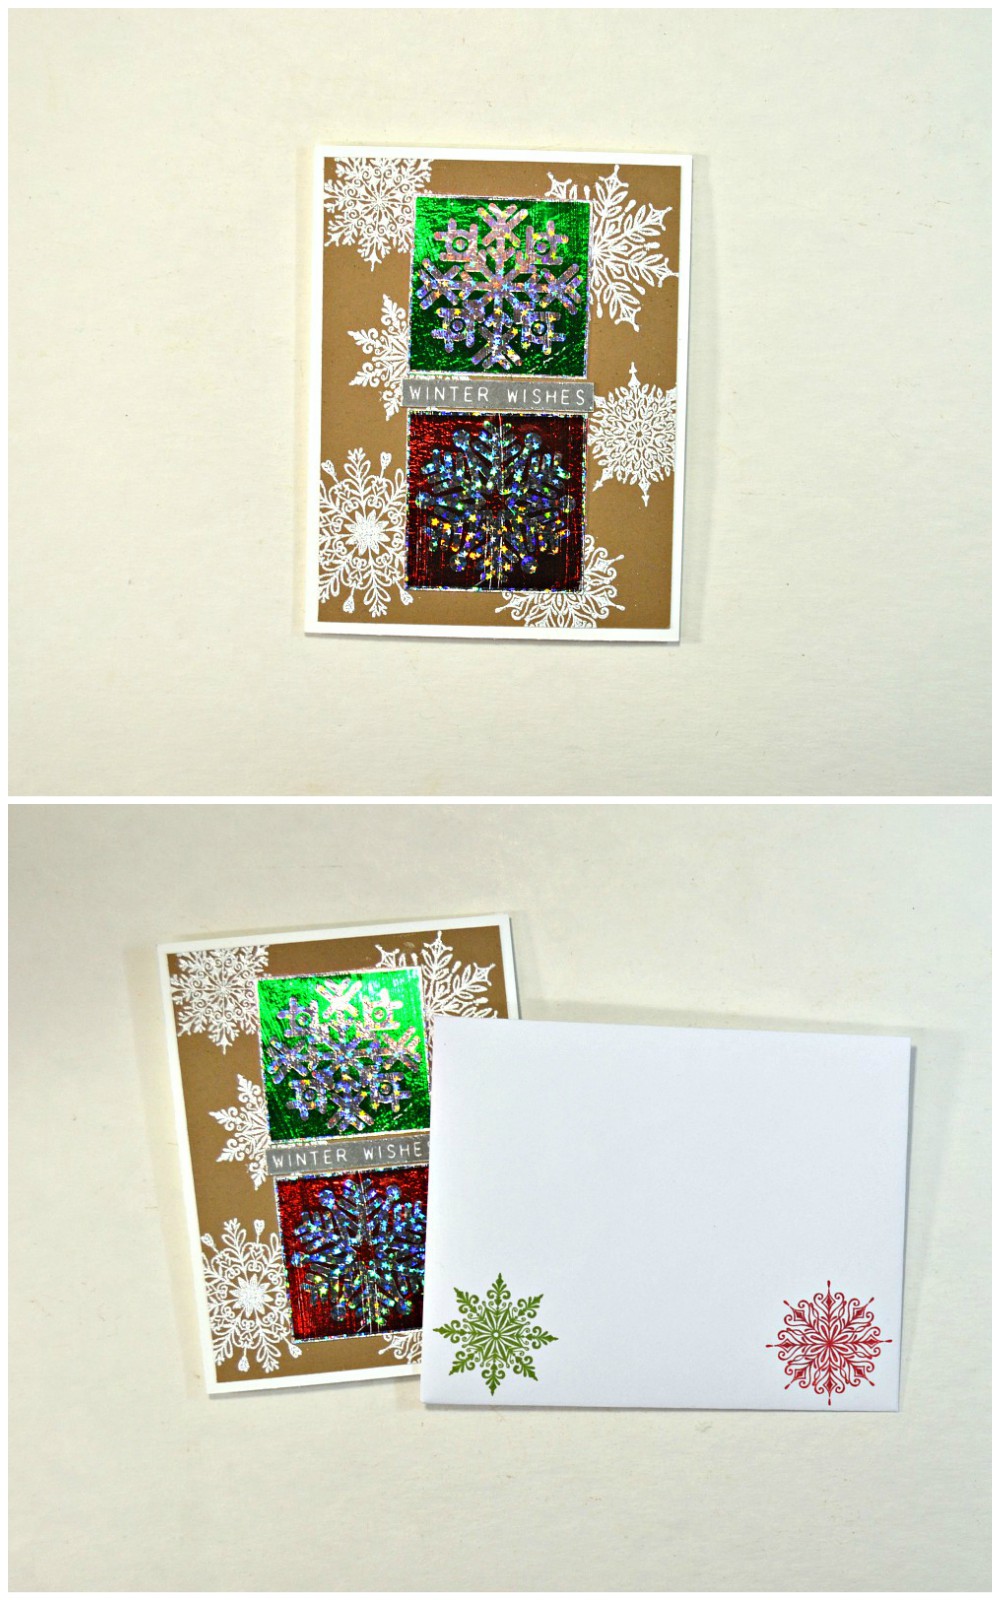
And as a finishing touch, make an envelope for your card (I just used some copy paper and We R Memory Keepers’ Envelope Punch board) and stamp more Mini Swirly Snowflakes onto the front with red and green ink. Your Christmas Gift Tag Holder ensemble is complete! Here are a few closeups of the finished gift set.
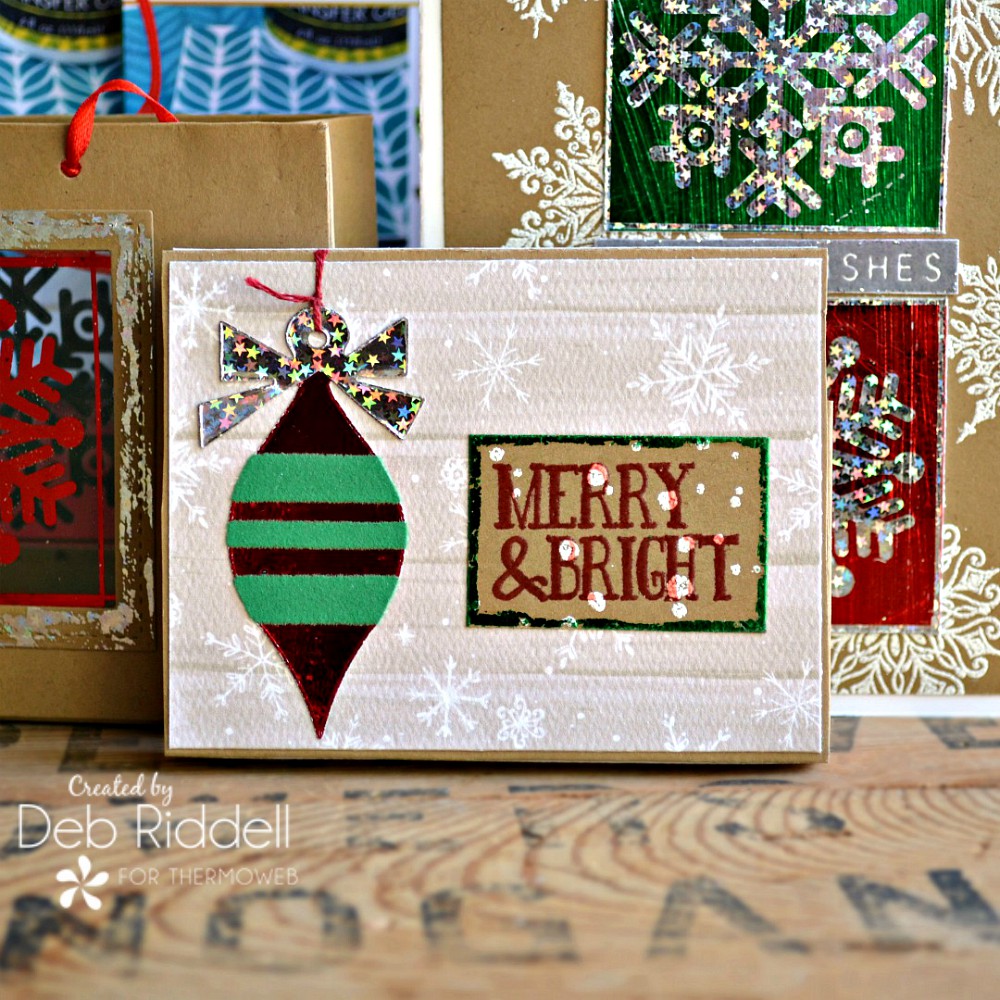
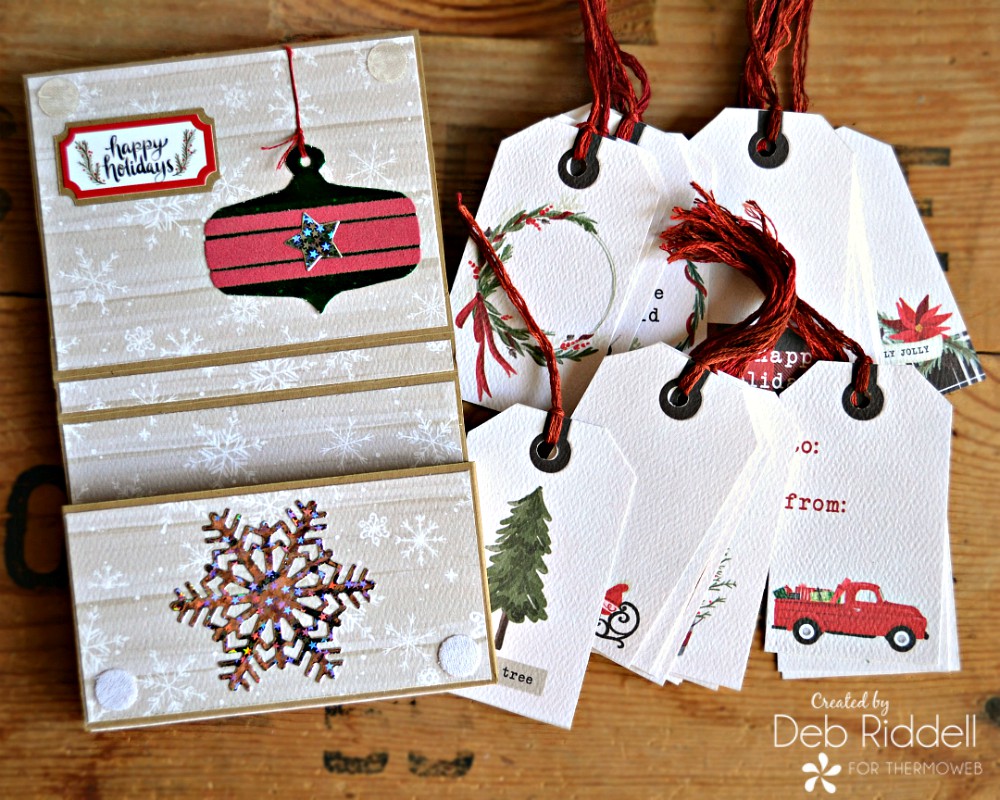
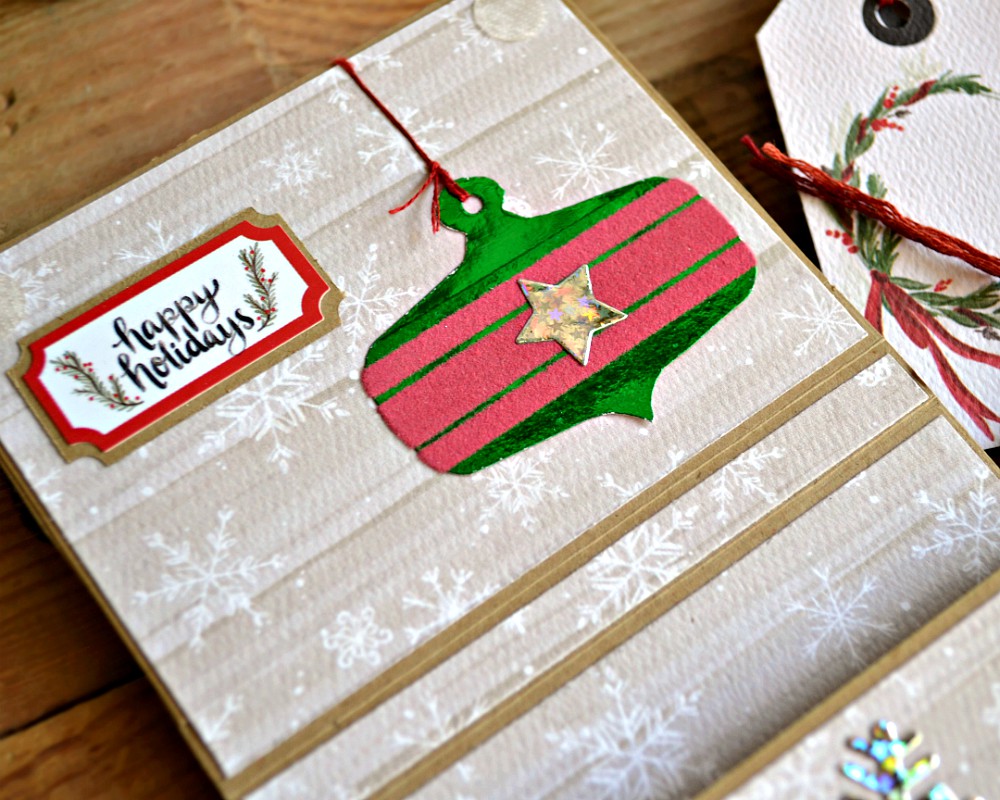
I hope that I’ve given you some ideas for your own handmade Christmas gifts. You can make this whole ensemble or just make the card or the gift bag or the tag holder; lots of options depending upon your gift-giving needs! Thanks as always for stopping by today and as always happy creating!
Deb xo

mjmarmo
November 18, 2019 at 2:54 pm (6 years ago)Darling ideas!!
Deb Riddell
November 18, 2019 at 6:04 pm (6 years ago)Glad you enjoyed them mjmarmo, have fun! Deb xo
Denise Bryant
November 19, 2019 at 2:29 pm (6 years ago)Pretty snowflakes and ornaments! Love all that sparkle! Great project!
Deb Riddell
November 20, 2019 at 1:39 pm (6 years ago)Thank you Denise! Deb xo
KAREN KRUSCHKE
November 20, 2019 at 4:02 pm (6 years ago)How can I get directions and things i need to make the card that is on your front page from Gina K? Its the coffee cup with flower on it?
admin
November 21, 2019 at 10:48 am (6 years ago)Hi Karen… you’ll find the tutorial for that card here > Coffee Hop Card