


Hello Crafty Friends!!
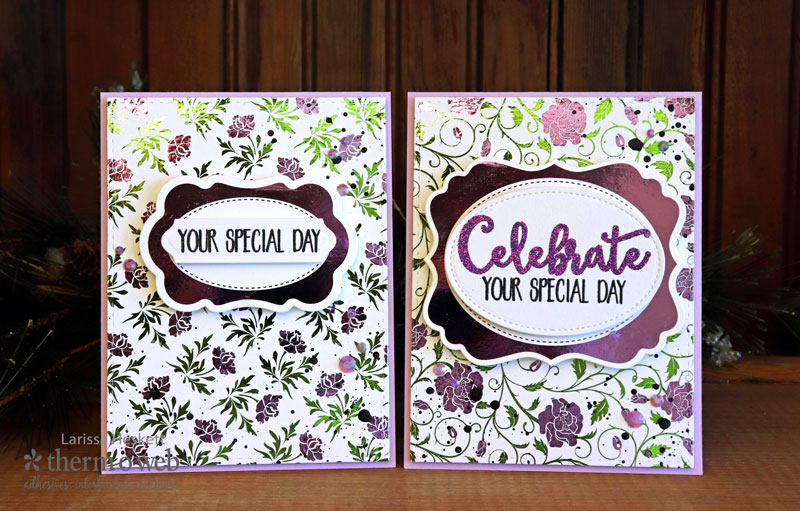
Celebrate with Gina K Designs Wedding Cards
Larissa here today to share a really FUN Layered Foiling Technique with you. If you’re new to foiling or have been wanting to give it a try, this technique is going to get you INSPIRED to give it a go!! I don’t know about you, but I always have a hard time picking just one color of Deco Foil to use on a project, that’s how this technique was born.
You can accomplish this technique in several ways, and I’ve shared a couple different ways to accomplish this already!! You can find the Posts HERE and HERE!! Today we’re going to focus on using the Gina K Designs Foil Mates and any of your FAVORITE Gina K Designs Fancy Foils!!
Celebrate with Gina K Designs Wedding Cards Instructions:
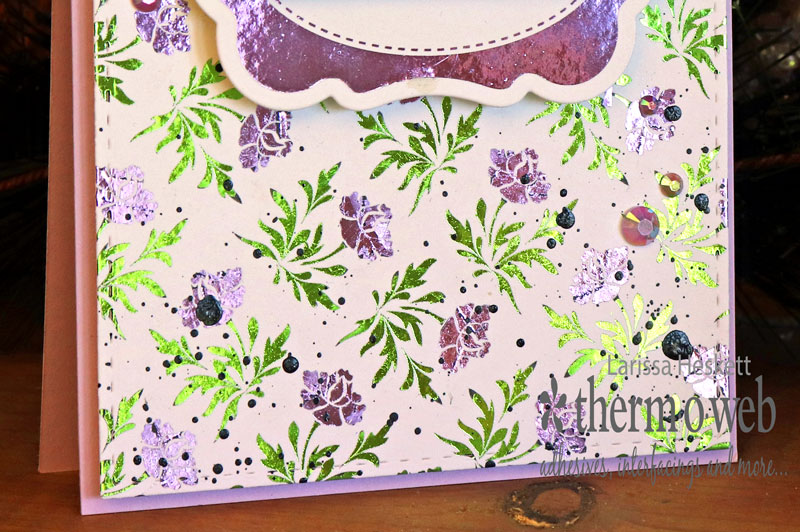
Start with the Gina K Designs Foil Mates of your choice!! I’ll be using the NEW Gina K Designs Foil Mates Backgrounds in the Elegant Florals Designs as I’m creating Wedding Cards!! Then pick the colors of Gina K Designs Fancy Foils you’d like to work with, I’d suggest 2-5 colors. You can experiment though and choose according to the design you have in mind. For my project today I’m going to work with 2 different colors: Gina K. Designs Fancy Foils in Wild Lilac and Grass Green.
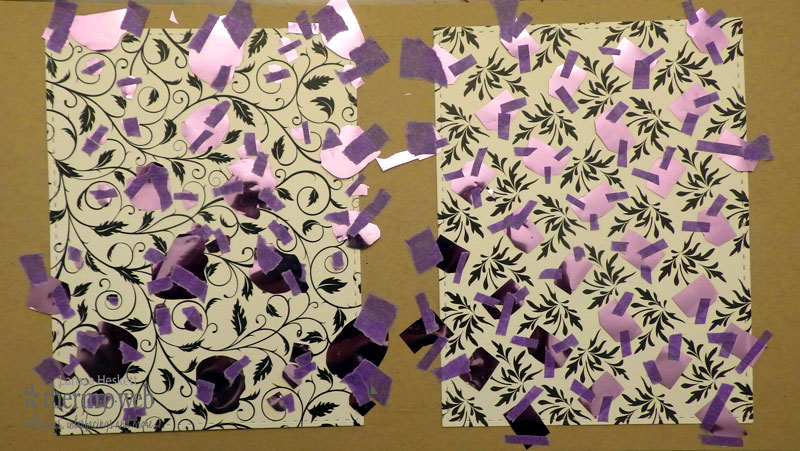
Start by cutting your strips of foil. I usually cut judging by the size of the Design I’m working with, in this case, the Size of the Flowers!! Then decide if you’re going to create a proportional design or if you’re going for a random design. I want a cohesive look so I’m doing all of the Flowers with Wild Lilac and all of the Greenery with Grass Green!!
Start by placing all of the smaller pieces first, using small pieces of Purple Tape to secure them in place as you go. Continue this method until you have all of the pieces placed. You can then overlap the Grass Green Foil over the entire piece and you won’t have to worry about getting a color of foil somewhere you don’t want it.
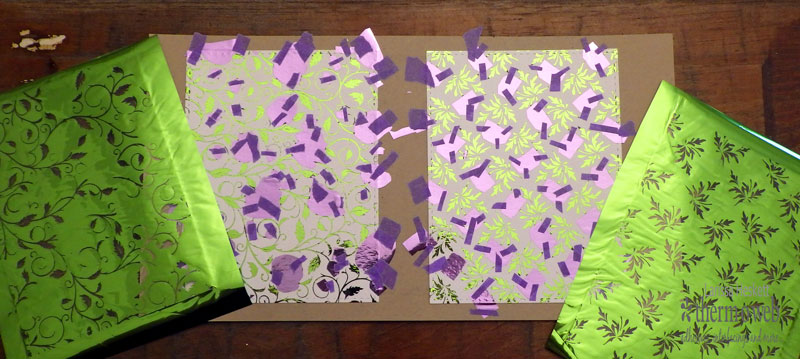
Place your Foiled piece into a carrier sheet and run it through your laminating machine. After it has cooled, you can start the remove the taped foil pieces. Be CAREFUL and take your time on this step, as you don’t want to ruin your project after all of this work.
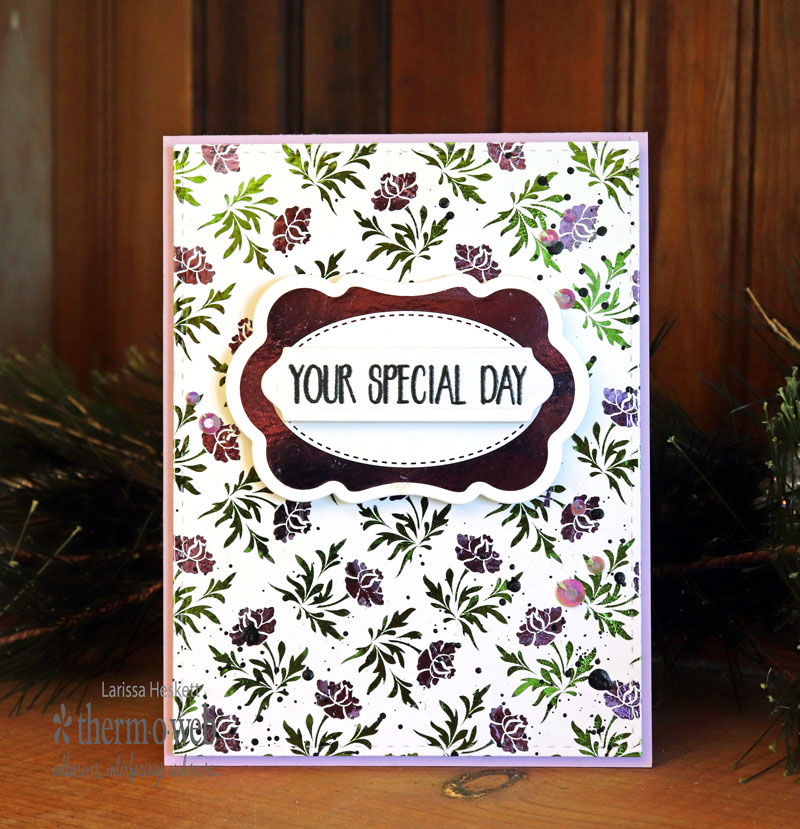
Once your layered foiled piece is revealed you’ll just want to SQUEAL in DELIGHT as its always rewarding to see the finished results!! Then you can create anything you’d like with your creation. For today I’m going to create a Wedding Card, using the NEW Gina K Designs Foil Mates Label Borders.
I Foiled the Label with Gina K. Designs Fancy Foils in Wild Lilac, then used the coordinating Gina K Designs Nested Label Dies to Die Cut it out!! For the Sentiment I Stamped and Embossed a Sentiment from the Lil’ Inker Designs Sweet Celebrations Stamp Set onto a Gina K Designs Nested Label Dies cut from some Gina K. Designs Premium Cardstock in Luxury White.
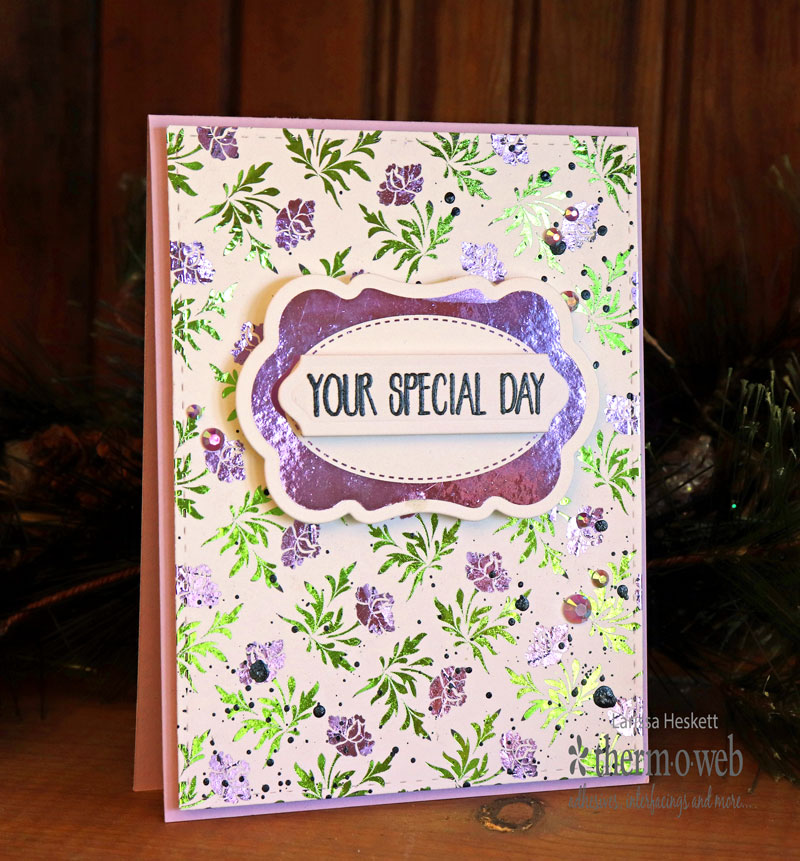
I wanted to add some texture so I added some ColoriQue Splatters in Black Diamond!! I cut some Gina K Designs Cardstock in Lovely Lavender to a Top Folding A2 Cardbase (4 1/4 x 5 1/2). I adhered the Layered Foiled Foil Mates Panel on top using some iCraft 3-D Foam Squares. I adhered the Foiled Label onto the Card using some more iCraft 3-D Foam Squares.
Then adhered the Stamped and Embossed Sentiment Label in the center of the Foiled Label using even more iCraft 3-D Foam Squares. I LOVE the dimension!! To finish off the Design I added a Few Pretty Pink Posh Jewels in Pansy Purple using Zots Bling Adhesive Dots!!
Therm O Web Products Used:
Gina K Designs Foil Mates Backgrounds Elegant Florals Designs
Gina K. Designs Fancy Foils in Wild Lilac and Grass Green
Purple Tape
Laminating Machine
Gina K Designs Foil-Mates Label Borders
Gina K Designs Nested Label Dies
Gina K. Designs Premium Cardstock in Luxury White
iCraft 3-D Foam Squares
Zots Bling Adhesive Dots
Other:
Lil’ Inker Designs Sweet Celebrations Stamp Set
ColoriQue in Black Diamond
Gina K Designs Cardstock in Lovely Lavender
Pretty Pink Posh Jewels in Pansy Purple
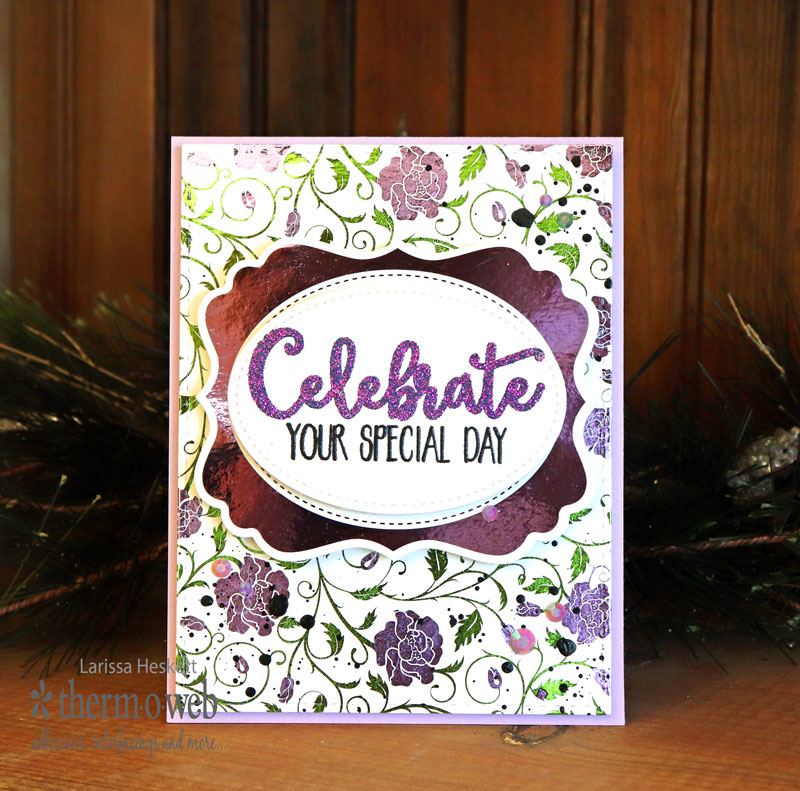
The Process for this next Card is exactly the same as the First Card only I used a different Pattern and Label!! I Stamped and Embossed the Sentiment also from the Lil’ Inker Designs Sweet Celebrations Stamp Set!! I used some WoW Embossing Glitter in Persian Indigo for “Celebrate”
I wanted to add some texture so I added some ColoriQue Splatters in Black Diamond!! I cut some Gina K Designs Cardstock in Lovely Lavender to a Top Folding A2 Cardbase (4 1/4 x 5 1/2). I adhered the Layered Foiled Foil Mates Panel on top using some iCraft 3-D Foam Squares. I adhered the Foiled Label onto the Card using some more iCraft 3-D Foam Squares. Then adhered the Stamped and Embossed Stitched Oval Die Cut in the center of the Foiled Label using even more iCraft 3-D Foam Squares. I LOVE the dimension!! To finish off the Design I added a Few Pretty Pink Posh Jewels in Pansy Purple using Zots Bling Adhesive Dots!!

Therm O Web Products Used:
Gina K Designs Foil-Mates Backgrounds Elegant Florals Designs
Gina K. Designs Fancy Foils in Wild Lilac and Grass Green
Purple Tape
Laminating Machine
Gina K Designs Foil-Mates Label Borders
Gina K Designs Nested Label Dies
Gina K Designs Nested Ovals Single Stitch Designs
Gina K. Designs Premium Cardstock in Luxury White
iCraft 3-D Foam Squares
Zots Bling Adhesive Dots
Other:
Lil’ Inker Designs Sweet Celebrations Stamp Set
ColoriQue in Black Diamond
Gina K Designs Cardstock in Lovely Lavender
WoW Persian Indigo Embossing Powder
Pretty Pink Posh Jewels in Pansy Purple
THANKS SO MUCH for stopping by today and I hope you feel INSPIRED to give this Layered Foiled Technique a try!!?? If you create something I hope you’ll share it with us on social media using the #thermoweb, #deofoil and #ginakdesigns as we LOVE to see what you create!!
Have a FABULOUS Week!!