Tis’ the season for crafting for the holidays! Whether you’re looking for card and packaging ideas, or quick and easy holiday gifts, we’ve got you covered with lots of fun projects featuring Therm O Web adhesives and iCraft® Deco Foil™ along with the adorable Dear Santa collection by our friends at Photo Play Paper.
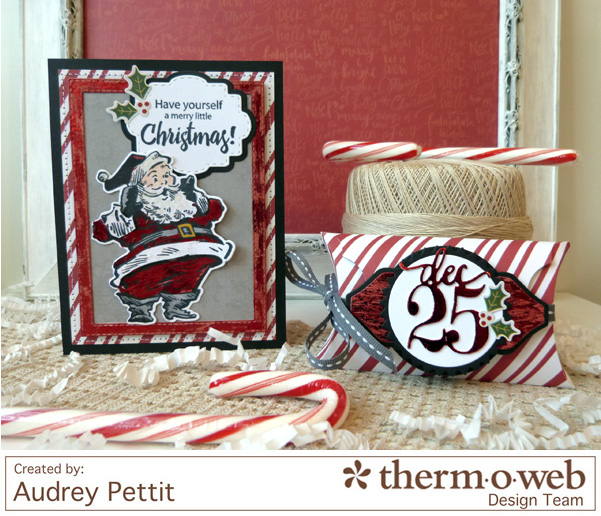 First up, a card and matching pillow box that focuses on several fun ways to use iCraft Deco Foil Transfer Sheets.
Dec. 25th Pillow Box and Card by Designer Audrey Pettit:
Supplies:
Therm O Web iCraft® Deco Foil™ Transfer Sheets- Red and Opal
Therm O Web iCraft® Deco Foil™ Liquid Adhesive
Therm O Web iCraft® Deco Foil™ Double-Sided White Adhesive Foam
Therm O Web XL Tape Runner
Therm O Web 3D Adhesive Squares
Patterned Paper, Cardstock Stickers: Dear Santa collection by Photo Play Paper
Cardstock: Ranger, Neenah
Stamps: My Creative Time, Sizzix
Dies: Sizzix, My Creative Time, Papertrey Ink
Ink: Ranger
Markers: Copic, Stampin’Up
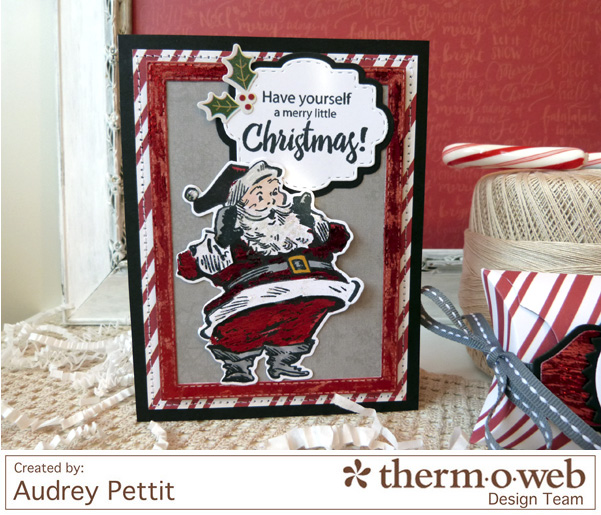 I love this Santa image from Sizzix. He is so fun and festive and really takes center stage on any card design. For this card, I created a simple layered framework for the image using bold black cardstock and several layers of patterned paper from the Dear Santa collection. I added a die cut label with a stamped greeting in the top corner, and framed Santa with a rectangular die cut frame. Santa is colored with markers and die cut with the matching die, and then to add some extra pizzazz, I dressed up the frame and Santa’s outfit and beard with iCraft® Deco Foil™ Transfer Sheets.
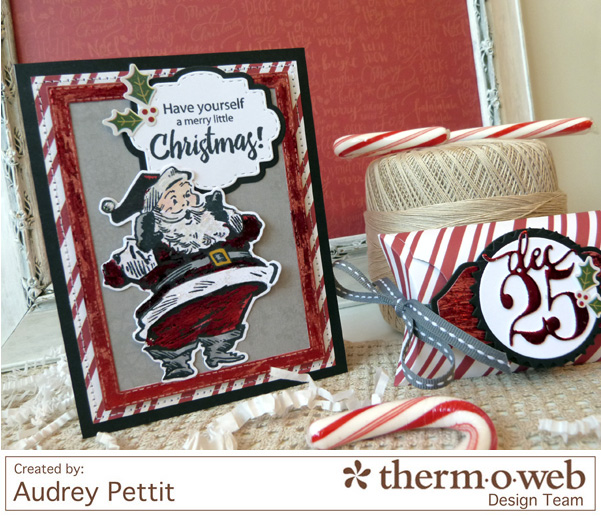
I really like the distressed, shabby finish you can achieve when applying the foils with iCraft® Deco Foil™ Liquid Adhesive. Simply dip an old paintbrush into the liquid adhesive, and paint it onto the item you wish to foil. For my Santa, I colored my image with markers first, and then added the liquid adhesive to random areas of his outfit, trim, and beard. For the frame, I inked the frame with red ink using an ink blending tool before applying the liquid adhesive to portions of the frame. When you’re finished, wash your brush out immediately, and then set the paper aside for the adhesive to dry. Once the adhesive is completely dry (but still tacky) to the touch, press the Deco Foil™ Transfer Sheet down (with the silver side down and the colored side up) onto the area and rub over the top with the tip of your finger. Move the sheet to a new area and repeat the process until all the areas are covered with foil. I used red foil on Santa’s suit and the frame, and Opal Deco Foil™ on the trim and beard.
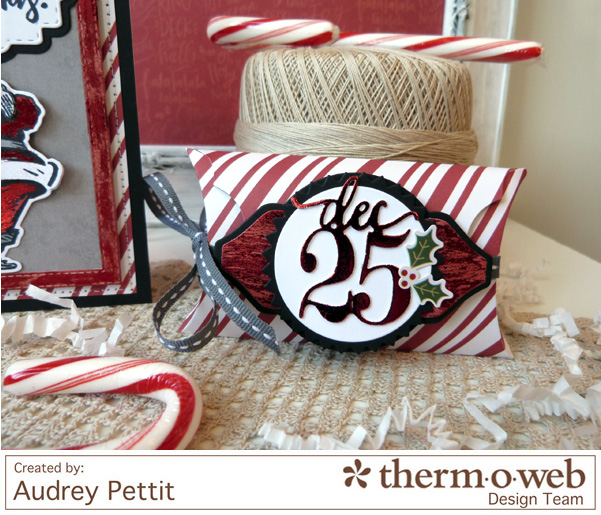
The pillow box uses the same technique for the background of the label. I like to carry over elements from one design to another to get a nice, cohesive looking set. Once again I used the same colors and papers as are on the card. And the star of the show on the gift box is definitely that pretty foiled Dec 25th die cut. That was created using the iCraft® Deco Foil™ Double-Sided White Adhesive Foam. I’ll show you how.
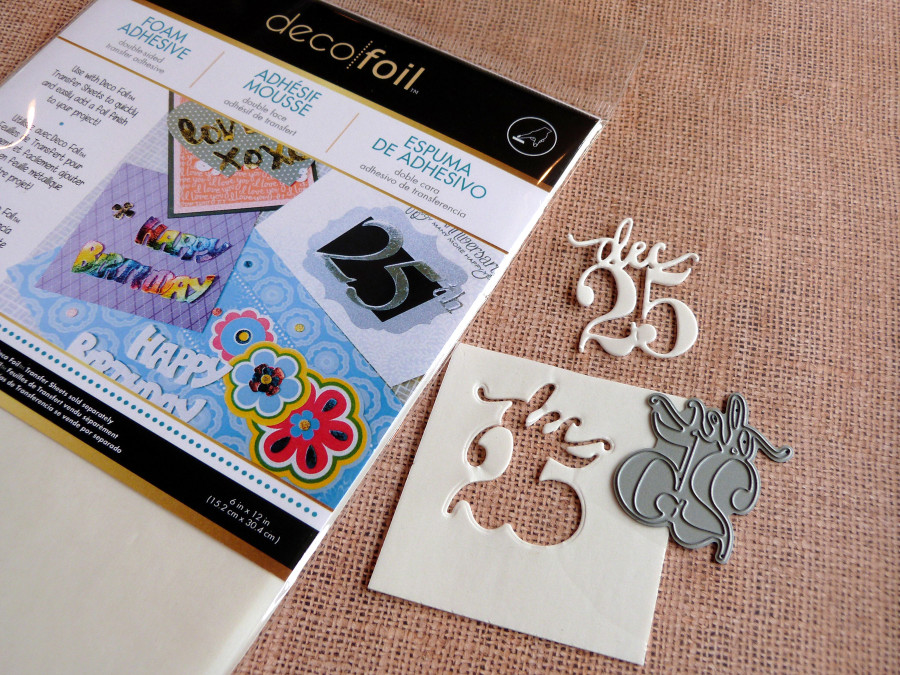
Begin by die cutting your image from the iCraft® Deco Foil™ foam adhesive. Carefully remove the foam from the die, using tweezers if needed.
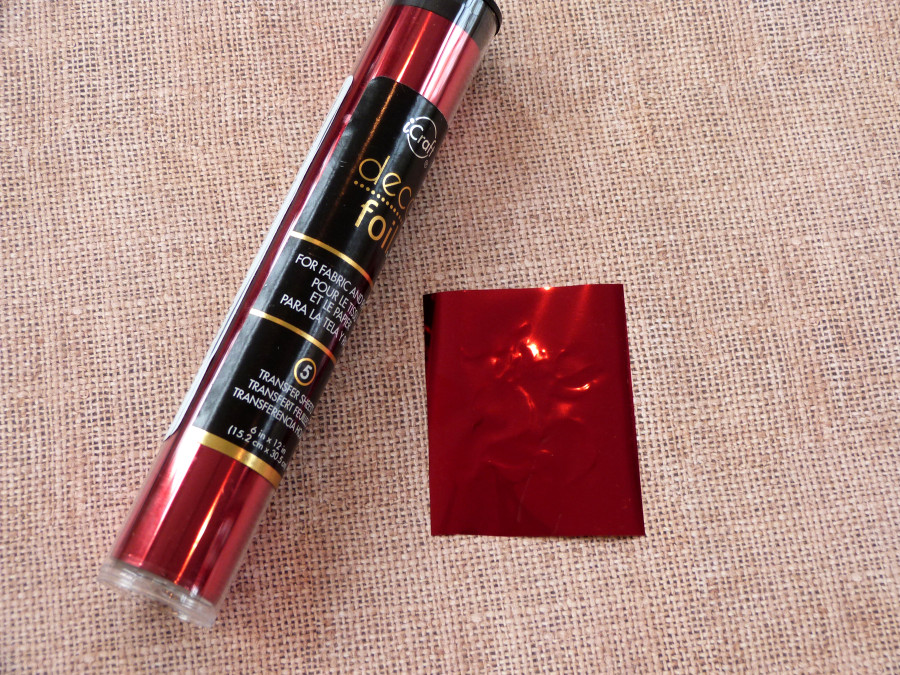
Peel off the top protective liner from the foam adhesive, and then press a piece of Deco Foil™ Transfer Sheet onto the adhesive. As always, make sure you place the foil with the colored side up and the silver side against the adhesive. Rub over the image carefully with the tip of your finger.
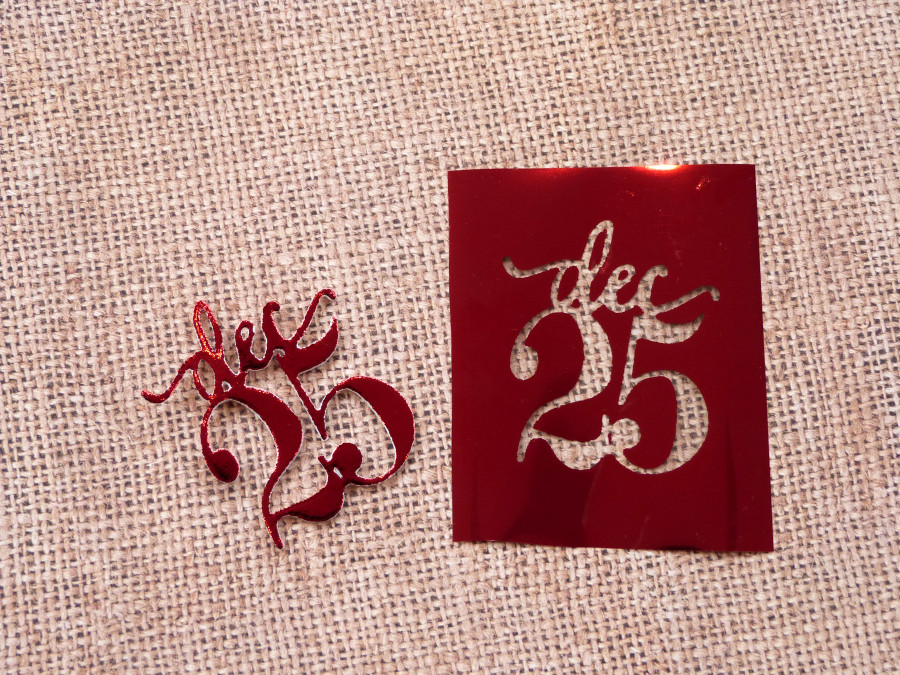 Then peel up the foil to reveal your beautiful foiled die cut. Now you can remove the backing paper and adhere the die cut to your project.
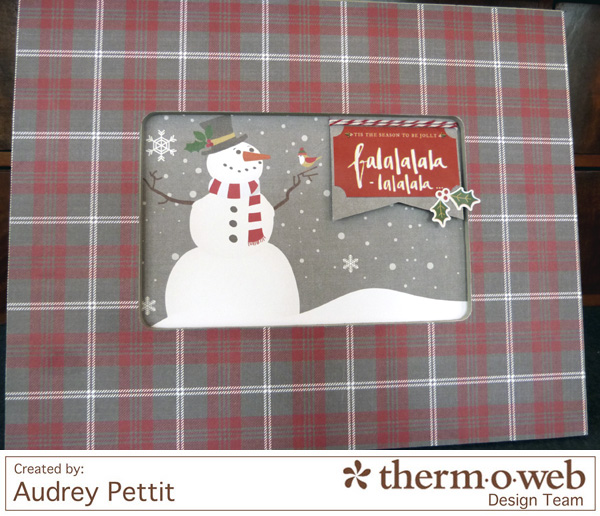
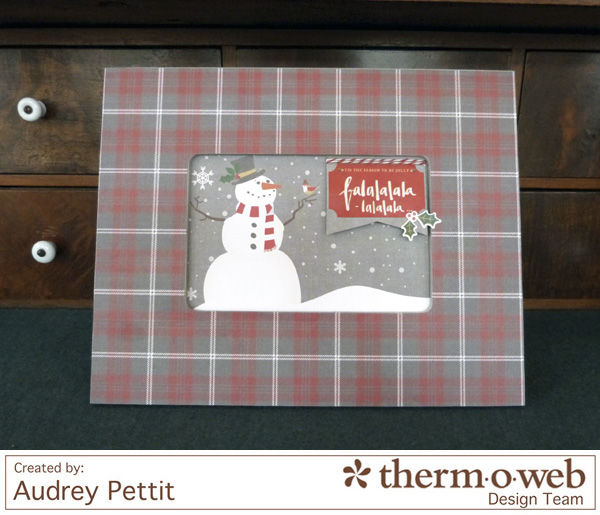 Looking for an inexpensive and easy holiday gift idea? Why not create a one-of-a-kind holiday decor piece using an unfinished wooden frame from your local big box craft store? It’s so quick and so simple and makes a great gift for anyone on your holiday list.
Falala Frame by Designer Audrey Pettit:
Supplies:
Therm O Web SuperStik Glue Stick
Therm O Web 3D Adhesive Squares
Patterned Paper, Journaling Card, Stickers: Dear Santa collection by Photo Play Paper
Twine: The Twinery
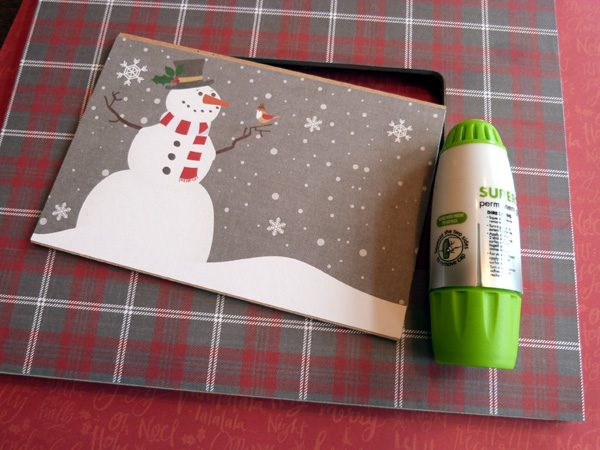
Simple cover the entire wooden frame with an even coating of SuperStick Glue Stick, and then top it with your favorite patterned paper. You can paint the sides and back of the frame like I did first if you want to. Press down on the paper to make sure it’s completely adhered, and then turn the frame over to the backside and trim around the center opening using a craft knife. I repeated the process to add that adorable snowman journaling card to the center frame piece.
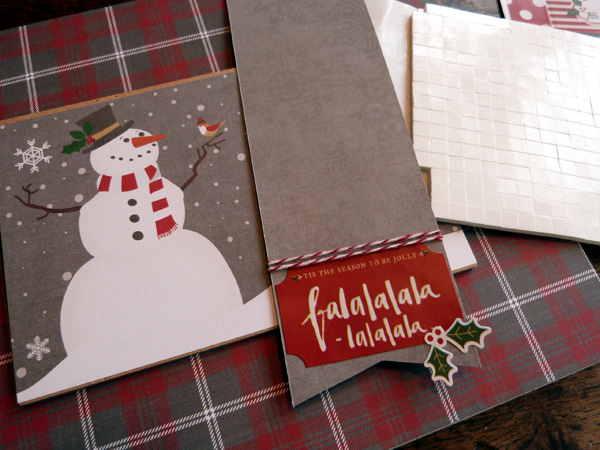 Then add cardstock stickers and twine to a strip of patterned paper. Cut the bottom of the paper into a V-notch to create a banner, and then adhere the banner to the top corner of the journaling card using 3D Adhesive Squares for dimension. I added the foam squares to the bottom of the banner only so that the foam didn’t get in the way at the top where it fit into the frame.
 So quick and easy! I hope you enjoy!

Have you heard we’re celebrating November with #30DaysofThankful
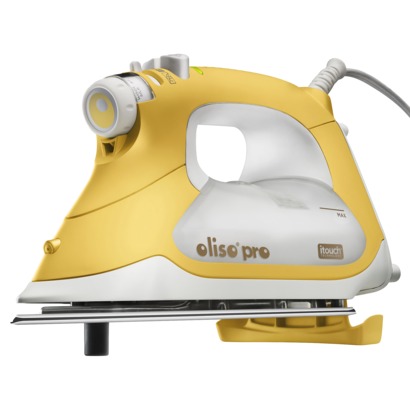
We’ve been sharing all the things we’re thankful for from our family and friends to our HeatnBond® Fusible Fleece, iCraft® Easy-Tear Tapes to our Pets. We’d be remiss though not to mention a tool we’re quite fond of.. the Oliso Pro TG1600 Steam Iron! It’s truly a gem and something we cannot do without. And we’d like to give you a chance to win one thanks to our friends at Oliso. Simply follow the Rafflecopter to enter to win!