


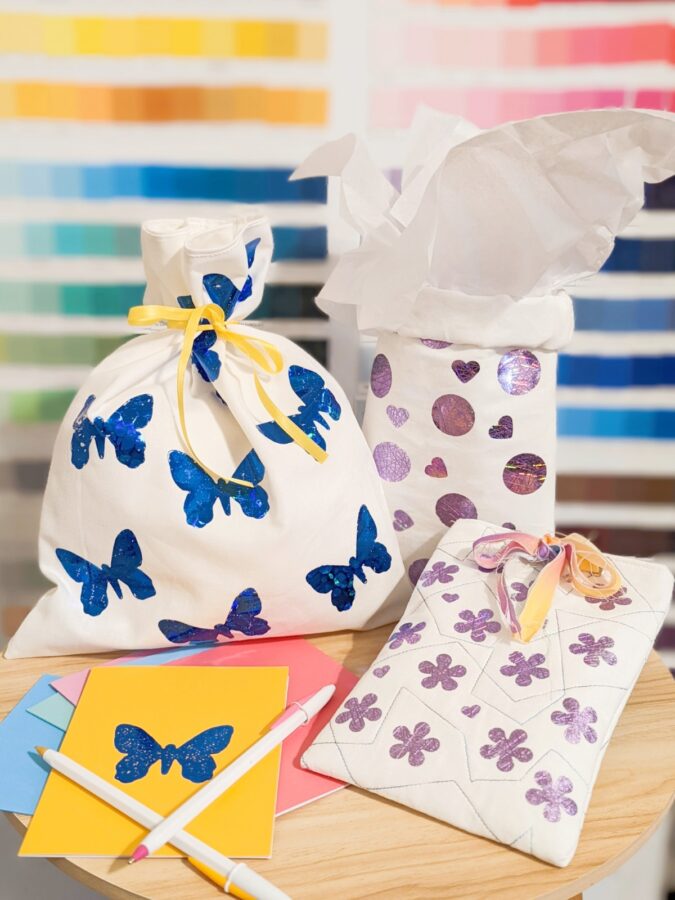
It’s a Celebration Week and we’re celebrating having Daisi Toegel join us again for another fun project! Daisi rose to the challenge this week with the cutest and environmentally fun reusable fabric gift bags that she accented with our Deco foil! Talk about adorable and think of all the other holidays that you can make bags for as well! Brilliant right?!

If you’re not already following Daisi on social…we hope you’ll click here to find her on Instagram and give her a follow!
Reusable Fabric Gift Bags with Deco Foil Accents
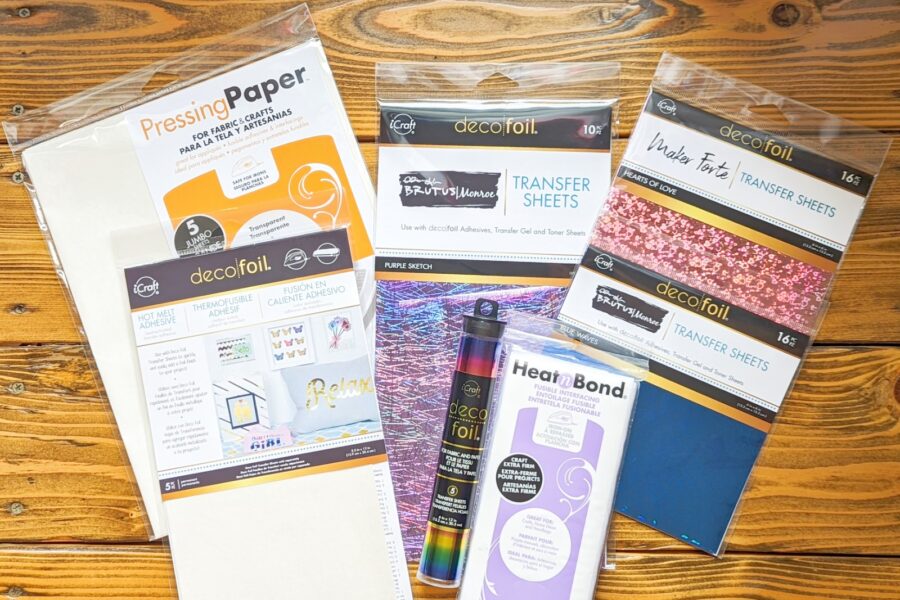
The materials used for this project are:
*HeatnBond Fusible Interfacing – Craft Extra Firm – Cut (2) in the chosen fabric size below
*(4) 10.5” x 6” fabric rectangle for SMALL size, or
*(4) 12.5” x 10.5” fabric rectangle for LARGE size
*Shape cutting tool: cutting dies machine, punch, etc.
*ribbon, lace, cord, eyelets, snap button etc.
*paper scissors, cutting mat, fabric scissors or rotary cutter, sewing machine, quilting ruler, iron.
Let’s Get Started on Those Fabric Gift Bags
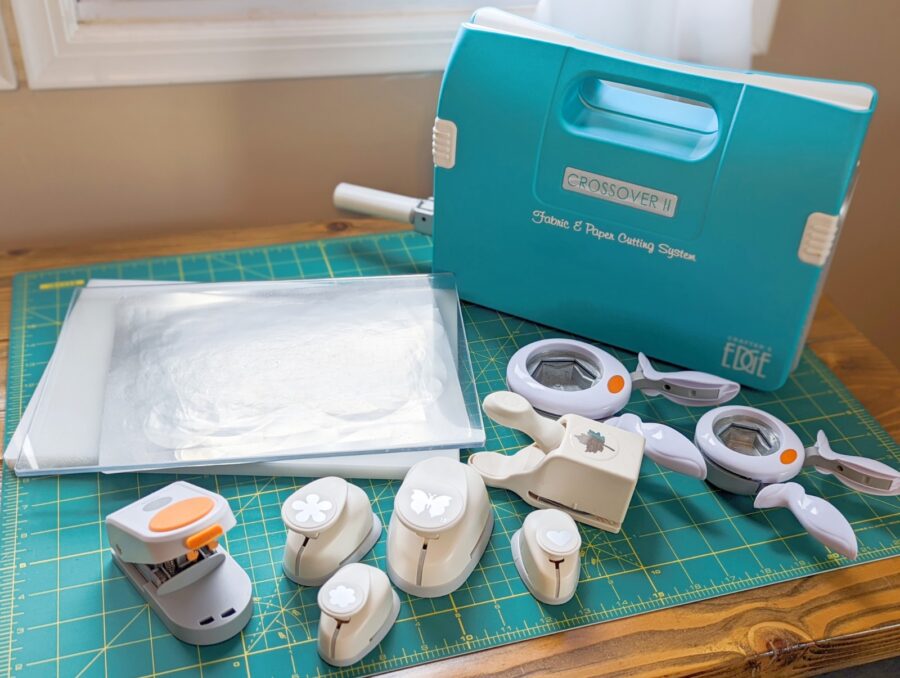
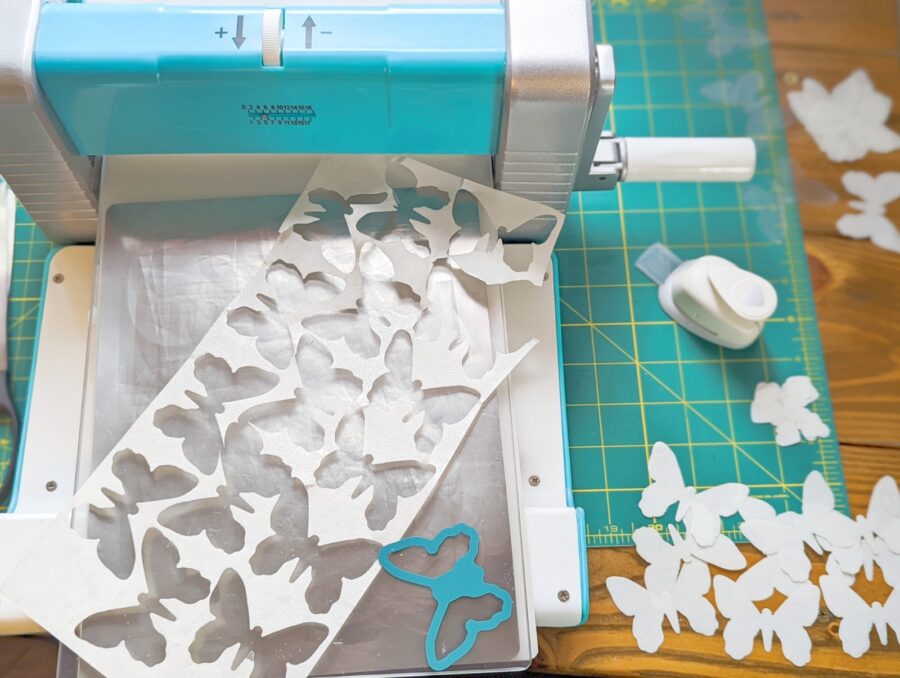
First, cut out the shapes you will be adding to the project. The shapes must be cut only on the Deco
Foil Hot Melt Adhesive. For a sturdier and precise cut if using a punch, put a piece of cardstock paper under the Deco Foil Hot Melt Adhesive and cut both together. In this tutorial, I am using a cutting die machine.
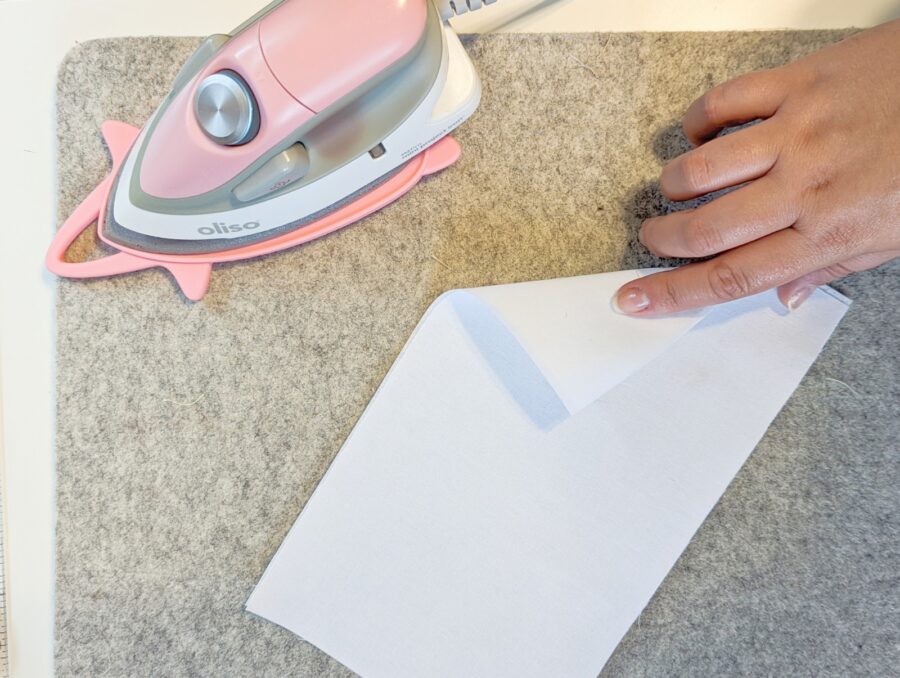
Cut the fabric and fusible interfacing pieces. In this tutorial, I am making a small size.
First, fuse both main fabrics to the fusible interfacing, the lining fabric will not be fused.
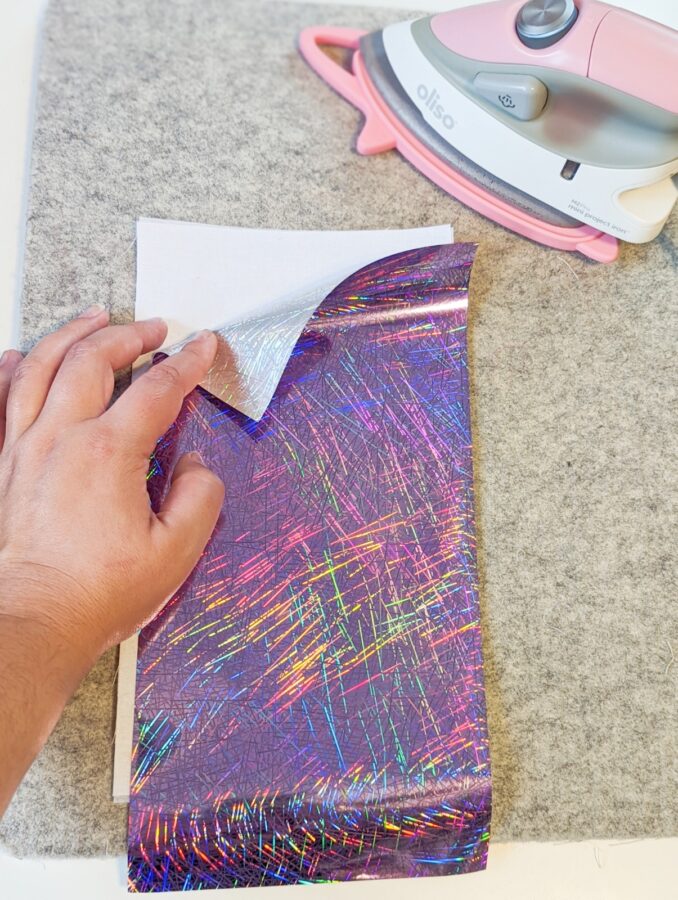
With every shape previously cut out on the Deco Foil Hot Melt Adhesive facing the glue side down, lay them all out as desired. See pic E for reference of the difference on both sides of the paper.
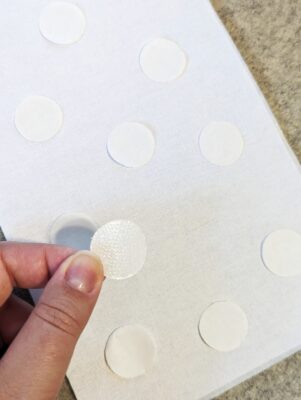
Lay the Deco Foil Transfer Sheet with the shiny side facing down on top of the previously shapes laid. Press for 30 seconds for all shapes. The iron needs to be set to the lowest temperature (medium or lower).
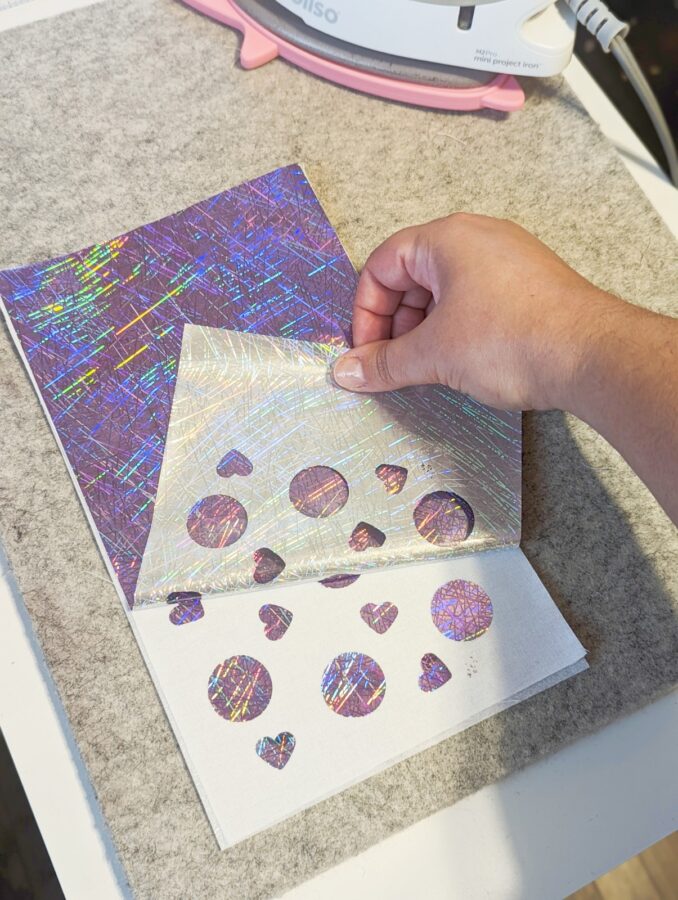
After pressing, let it cool, and remove every single paper shape from the glue. The glue stays on the fabric.
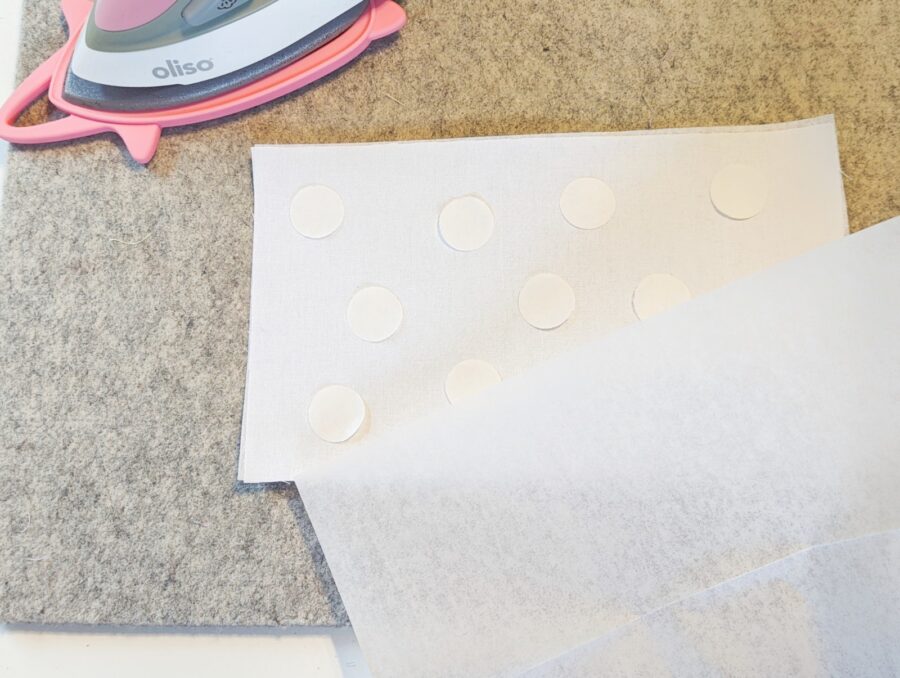
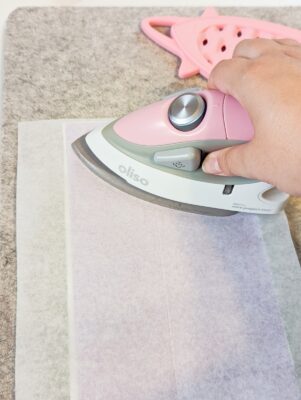
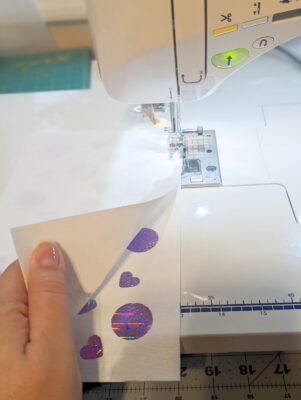
Lay the Deco Foil Transfer Sheet facing UP on top of the glue on the fused fabric piece. Instead of laying the entire Deco Foil Transfer Sheet, you can also cut pieces a bit bigger than the shapes and lay them on top of each shape, It’s up to you.
Lay the Pressing Paper on top of the Deco Foil Transfer Sheet and press for 30 seconds using the same temperature as before throughout the whole process.
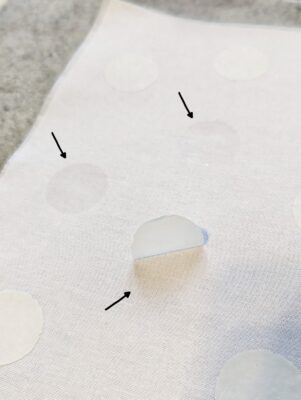
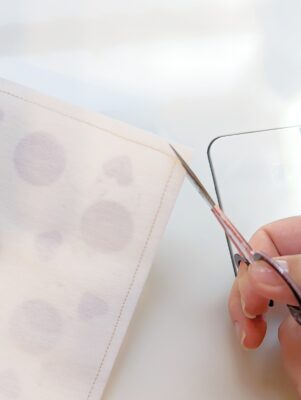
After pressing, let it cool and slowly remove the Deco Foil Transfer Sheet from the fabric. Just like magic you will see the beautiful shapes now all colored with the amazing prints and colors of the Thermoweb Deco Foil!!!
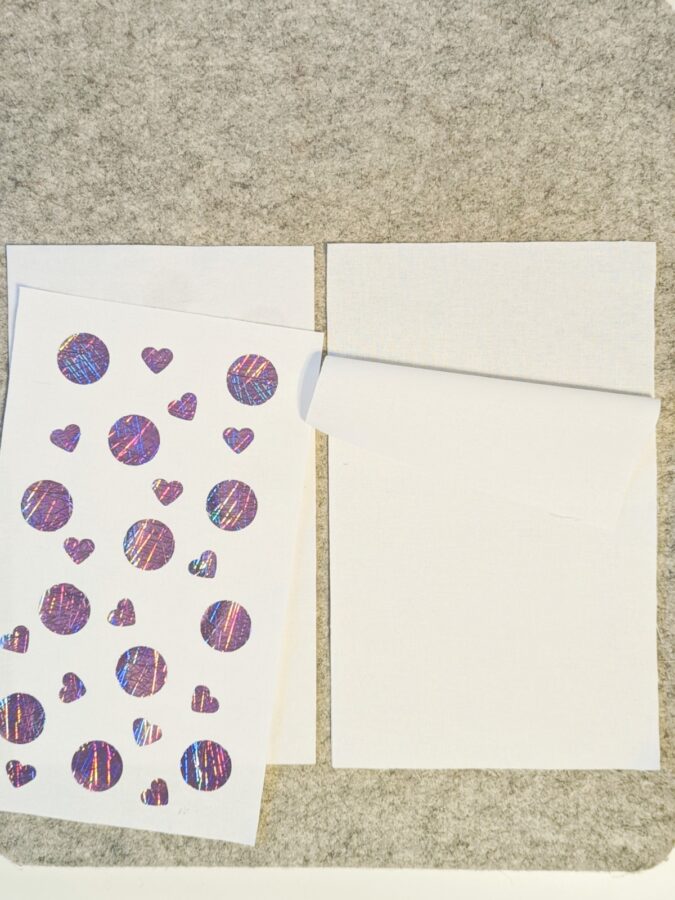
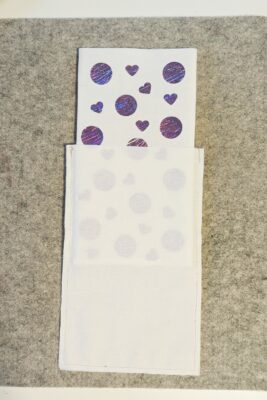
Using the two parts of the main fabric previously fused and ornamented with Deco Foil and the two pieces of fabric for the lining, let’s sew as follows.
Sew two separate sets. Each set is sewn as a U shape, leaving the top unsewn and with the fabrics facing right sides together.
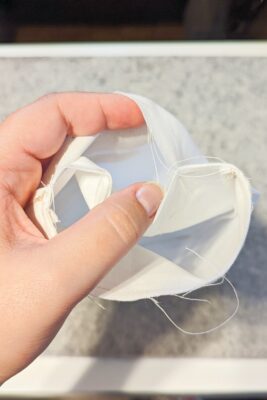
For both sets, cut out the corner tips for a nice corner after turning them inside out.
Turn inside out only the set sewn with the main fabrics, and using the pressing paper, press to set the seams and insert the whole piece inside the unturned lining part.
Sew around the top opening of the bag, leaving a 4-inch opening for turning the bag inside out. Don’t forget to backstitch in the beginning and at the end of the seam.
Press the opening (don’t forget to use the Pressing Paper), and topstitch all around to close.
The reusable gift bag is finished!!!! For this one, I decided to simply fold the opening down and the tissue paper gave it a nice finishing to the wrap.

For the large size, I added a contrasting color ribbon tied a bit below the top for a nice finish.
You can also use eyelets like I did for another small one I made, and use scrap fabric strips to make a closing ribbon.
The possibilities are endless and using the same steps you can adjust the measurements to make larger or smaller bags.


Daisi Toegel – Quilter and Pattern Designer
I am Daisi, Quilter and Pattern Designer for both quilts and bags. I love the traditional and colorful styles for piecing the designs I work with but also love some modern details.
Be sure to follow Daisi on Instagram and visit her website to learn more about her and her projects!
http://www.instagram.com/daisitoegel