


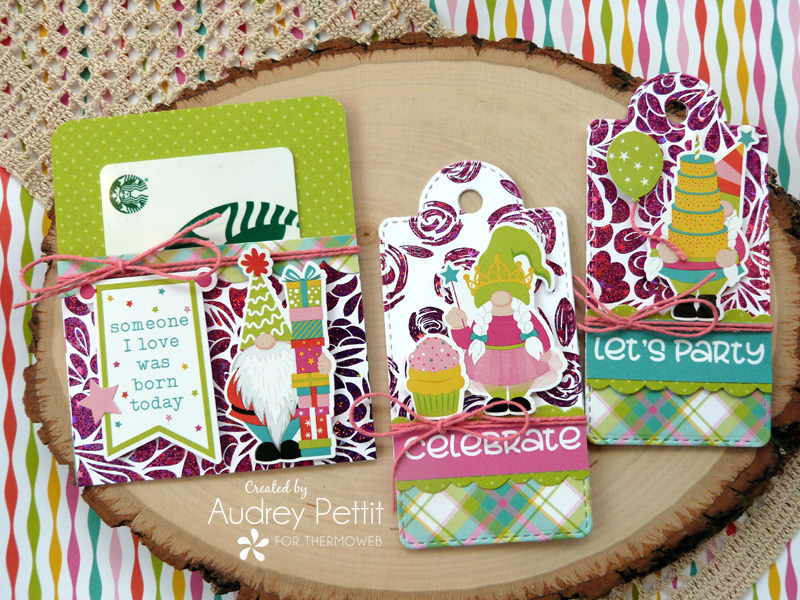
Celebrate Gift Card Holder and Gift Tags Set
by Designer Audrey Pettit
Therm O Web Blossom Buddies Tag Supplies
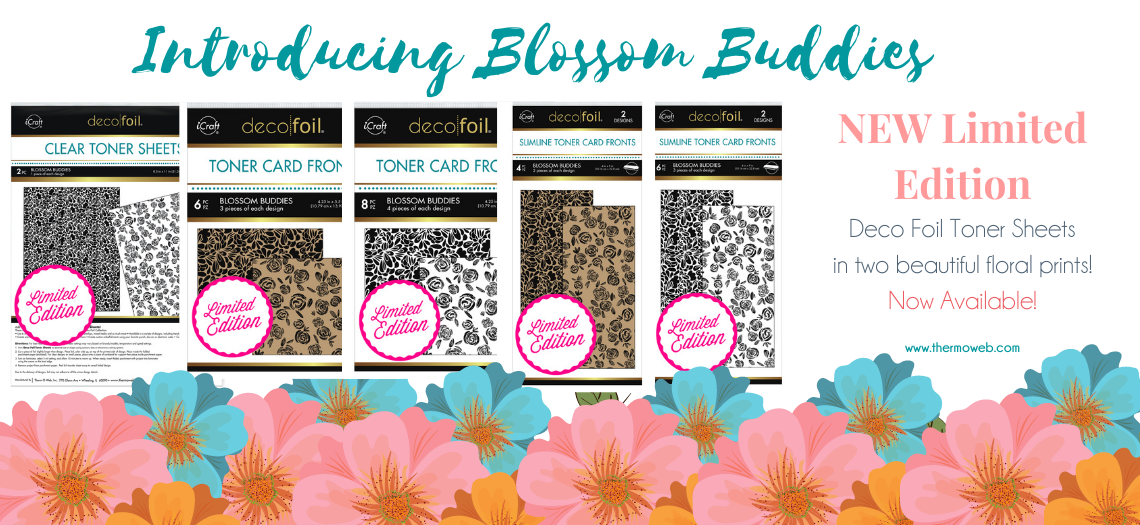
iCraft Deco Foil Toner Sheets: Blossom Buddies
Gina K Designs Fancy Foils Transfer Sheets: Twinkling Pink
iCraft Mixed Media Adhesive
Gina K Designs Foam Squares
Memory Tape Runner XL
iCraft SuperTape Adhesive Roll- 1/8″
Royal Sovereign Laminator
Photoplay Paper 12×12 Collection Kit: Tulla’s Birthday Party
Photoplay Paper Die Sets: Bracket/Speech Bubble, Border
Ek Success Corner Rounder
Pink Twine
We are so excited to share the next new Toner Sheet release with all of you this week! These beautiful new floral designs are so perfect for spring and summer crafting, and I know you will love all the options with the designs printed on clear acetate, white cardstock, and now kraft cardstock, too. Today I have a bright and happy birthday gift set to share with you featuring both new floral Toner Sheet designs and this adorable Tulla paper collection from Photoplay Paper. Let’s take a closer look.
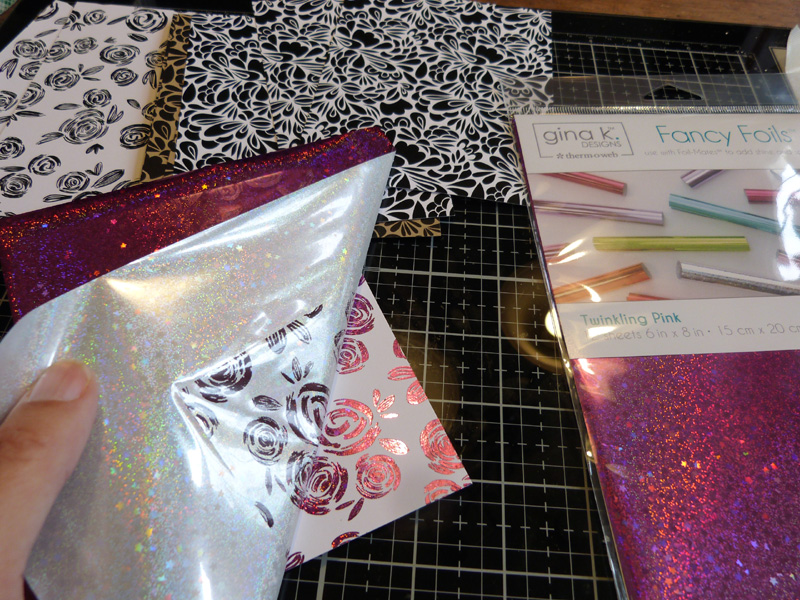
To begin, turn on your laminator, set it to the 3mm setting, and allow it to heat up. In the meantime, place a printed toner sheet (face up) between the sheets of a folded piece of parchment paper. Place a piece of Fancy Foils onto the Toner Sheet so that the silver side is down and the colored side is up. Run this sandwich through your laminator machine. Peel off the Fancy Foils sheet to reveal your beautifully foiled paper.
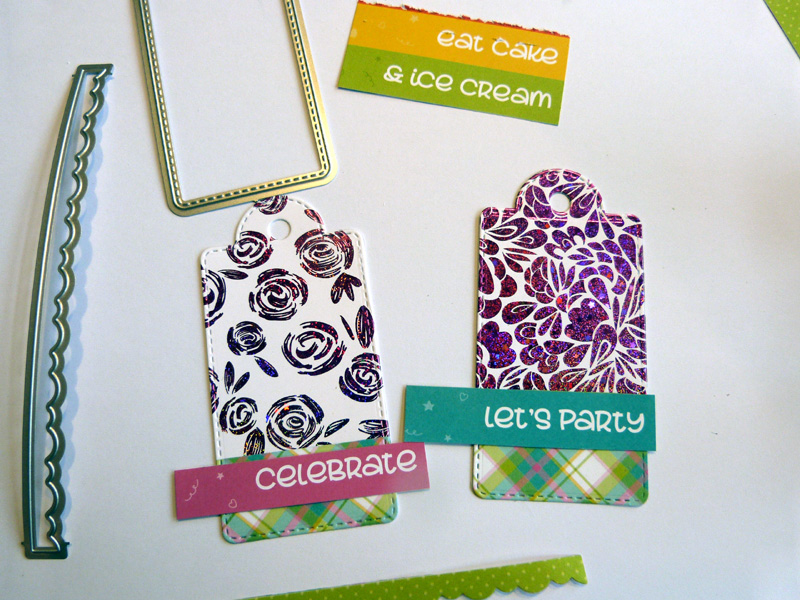
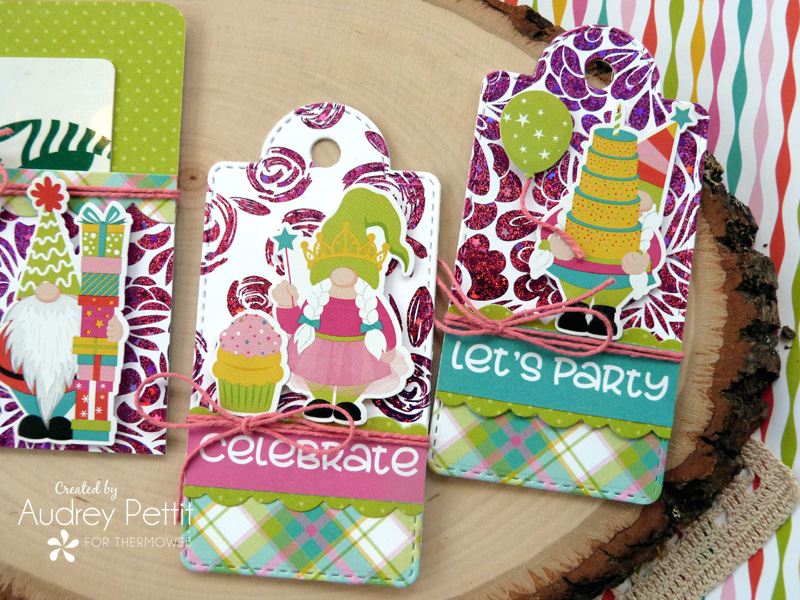
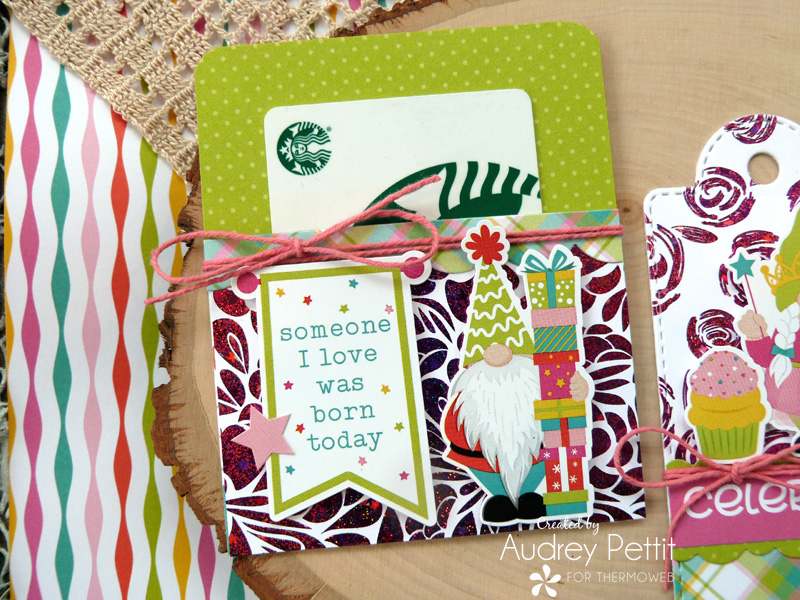
Cut the foiled toner sheet in half, and add a strip of patterned paper across the bottom. Die-cut a tag shape. Cut out word strips to layer over the seam where the two papers meet. Die-cut scalloped borders from patterned paper. Use Mixed Media adhesive to glue the scalloped border along both the top and bottom edge of the sentiment strips. Then adhere the strips onto the tags, trimming off the excess from the sides, as needed.
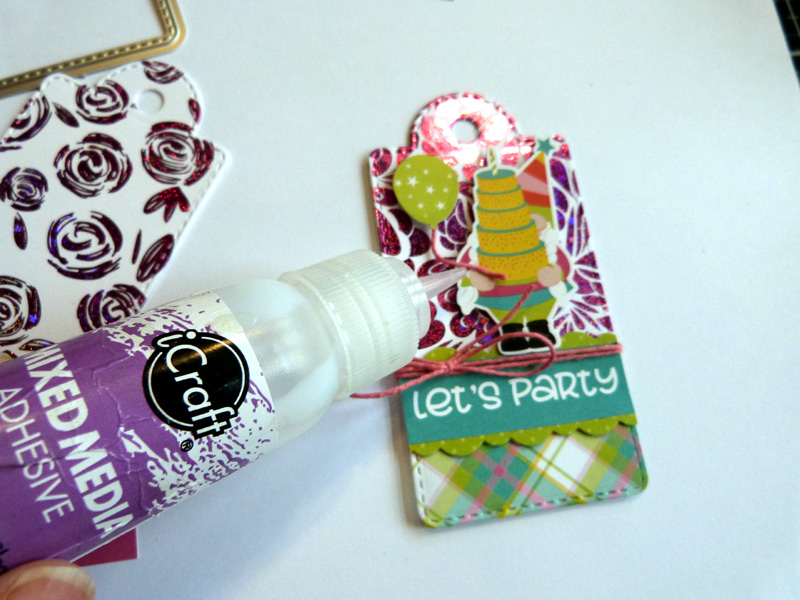
Wrap twine around the top of the sentiment strips and tie the ends into a bow on the left side. Place foam squares behind the cardstock stickers, and add them to the tags. Add a
small section of twine to the back of the balloon, and adhere it in the gnome’s hand using a small dot of Mixed Media adhesive. I like to add a dot of liquid adhesive behind the bow to keep it in place, too.
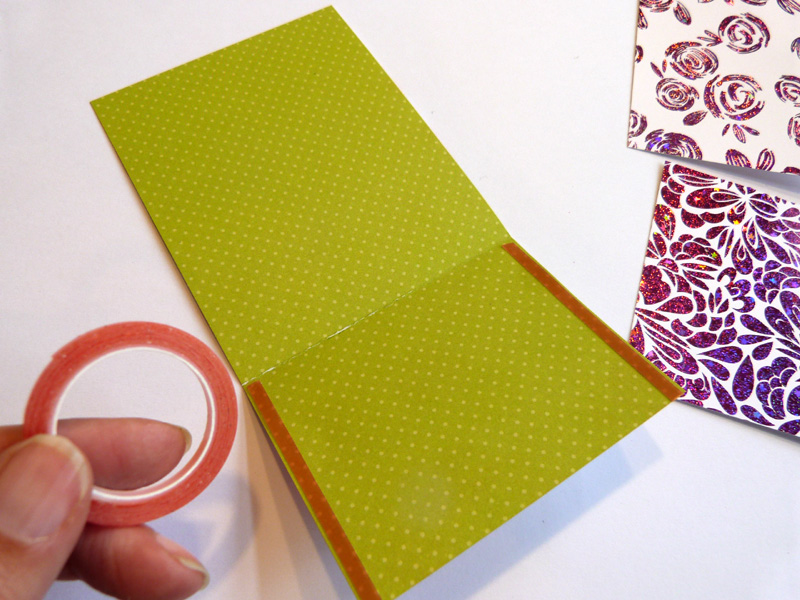
For the gift card holder, cut a 3.25″ x 6.5″ piece of patterned paper. Fold the bottom 2.5″ up to form a pocket flap. Add 1/8″ SuperTape strips along the outside edge of the pocket flap. Peel off the protective liner from the adhesive, and fold the pocket flap upwards to close.
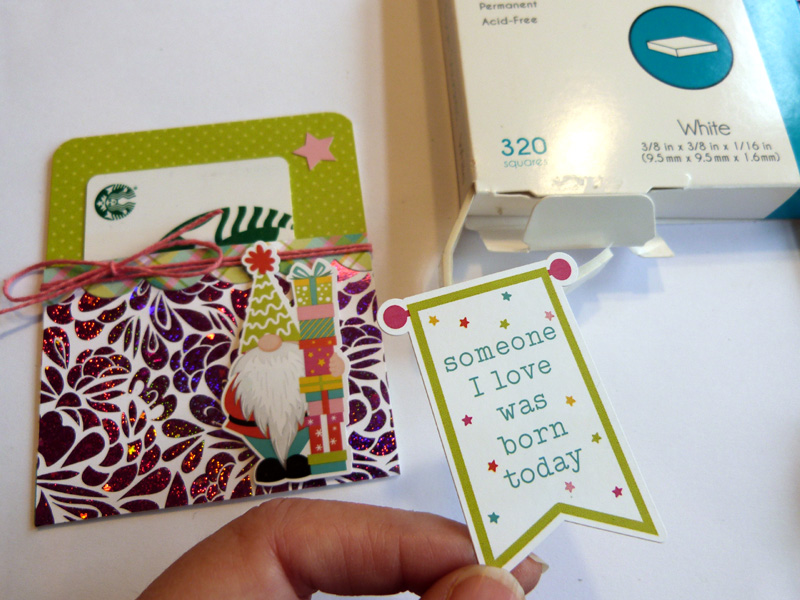
Use another portion of the foiled Toner Sheet paper to cover the front of the pocket. Add another die-cut scalloped border along the top of the pocket flap, and tie twine around the border. Place foam squares behind the cardstock stickers, and attach them to the holder. Use a corner rounder punch to round the two top corners of the back of the holder.
Enjoy!
Now before you go it would not be a new release week if we didn’t have a little bit of fun would it? We think not! So don’t miss this chance to enter to win a $25 Gift Card to shop with us! And when you’re done here…be sure to go enter our National Craft Month Giveaway HERE!