


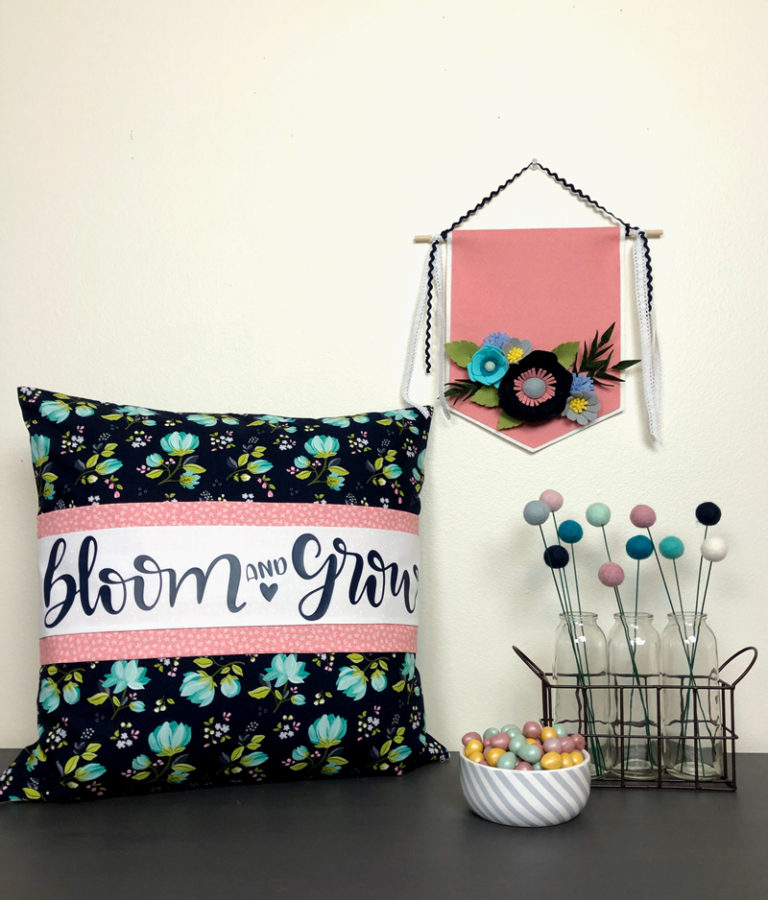
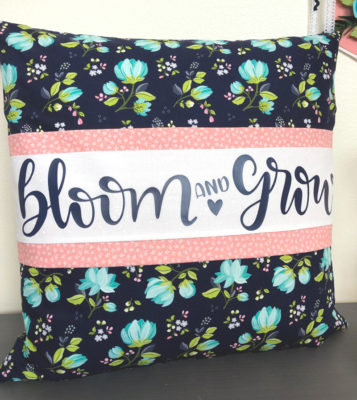
Bloom and Grow Spring Banded Pillow Cover
A banded pillow cover is a fantastic way to showcase a feature print while incorporating a fun text element as well. Using a permanent adhesive to hold the bands in place gives you the look of a banded pillow without the hassle of constantly adjusting them as they shift around your pillow cover. Today’s tutorial will walk you through all the steps for creating your own delightful pillow that can be modified for any season!
Today’s measurements are for a 20″ pillow form.
Supplies:
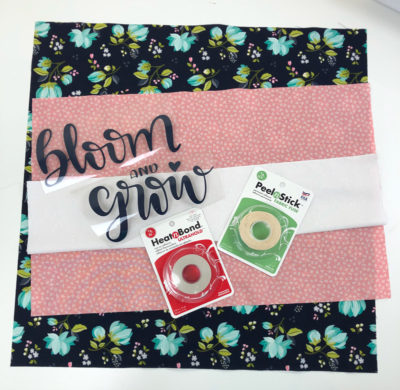
- 2/3 yards main fabric I am using Serenade fabric by Riley Blake Designs
- 1/3 yard or fat quarter of accent fabric
- 1/4 yard or fat quarter of quote fabric
- Heat n Bond Ultrahold 7/8″ OR Peel n Stick Fabric Fuse (this tutorial will show using the Heat n Bond, but if you fuse the Heat Transfer Vinyl before layering the bands, you could easily use the Fabric Fuse)
- Heat Transfer Vinyl for adding text to your quote band *note: you could omit this step and just feature a third fabric, create your quote with applique or applique shapes or other embellishments.
Bloom and Brow Spring Banded Pillow Instructions
Cutting:
- Cut your main fabric into a 20″ square.
- Cut your accent band to 12 1/2″ X 20″
- Cut your quote band to 8 1/2″ X 20″

- Fold your accent and quote bands in half and sew along the long raw edge using a 1/4″ seam allowance. This will create a 20″ long tube. ( white band in pic)
- Turn your tube right side out and press flat. Make sure you push out the seam to make a nice even rectangle- pink band in pic. (If you are adding the quote to your band before assembling the bands- do so now. If you are doing applique, I would also do that now so you are only sewing through the one band)
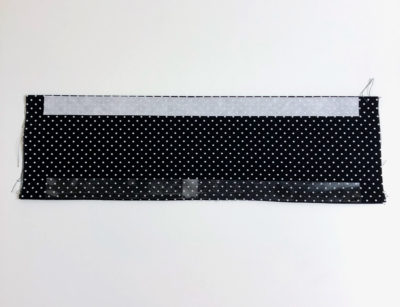
- Cut 18 1/2″ strips of Heat n Bond (or Peel n Stick) you want to make sure the adhesive is NOT going to be in your 1/2″ seam allowance when sewing the pillow together. (I neglected to take this picture when assembling the final pillow and didn’t have enough fabric to re-create it, so I apologize for the swap in fabric in the next couple of pictures 😉 )
- Center the strips on the top and bottom edge of the bands and fuse in place.
- Remove the paper backing. *If you are using fabric fuse, I would position the band BEFORE pulling off the paper backing so you don’t have to worry about the adhesive being exposed and sticking before you are ready.
- Lay out your main pillow fabric (the 20″ square) on your pressing surface.
- Center the accent band on the pillow front. I like to place mine just above center because as the pillow settles once it’s finished, the filling tends to shift a bit forward and I like the bands to appear centered after this happens instead of being pulled lower.
- Center the quote band on the accent band.
- Fuse into place.
- Adhere the Heat Transfer Vinyl to your project. I used a file found in Cricut Design Space, but you can always use your own. Another option is to applique your quote with fabric or felt. Remove the carrier sheets. *note after I adhered the lettering, I just lifted up the carrier sheets around the edges where I wanted to add the “and” and heart, but otherwise left the protective sheet in place as I added the small pieces- that way I made sure that I didn’t touch the vinyl with my heated surface.
Find the video tutorial with tips for sewing your banded pillow below…
All that is left is to finish off your pillow with a back. You can use any type of closure you like- from envelope to zipper. I chose to use an Invisible Seam Zipper closure on mine. You can find the full tutorial on my blog, or you can watch the video tutorial on my YouTube Channel.
If you want to see what a Christmas version of this pillow looks like, hop over to this post to check it out.
Have fun sewing!
xoxo,
Amy
[…] their room with. The stocking countdown banner and the large floor pillows (I show how to make the banded pillow cover here) were both hits with the girls, but my personal favorite was the No-Sew Tree skirt. Made with just […]