Step right up to the big top with a circus tent full of balancing elephants, juggling seals and floating unicorns. This pillow cover made with Calliope fabrics by Blend Fabrics will make anyone smile with it’s vibrant colors and the curtains open and close. Carla of Creatin’ in the Sticks here to show you how to create this super fun pillow cover with a quick quilt as you go method with HeatnBond High Loft Fusible Fleece.
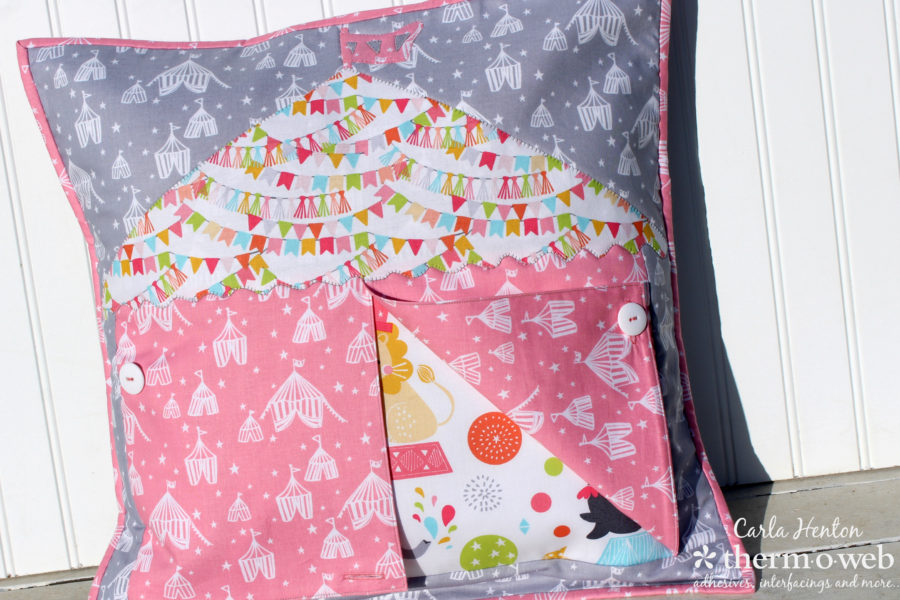
Big Top Circus Pillow Cover
The curtains open to reveal the big show!
by Carla Henton
Finished size: 18 1/2″ x 18 1/2″
Supplies:
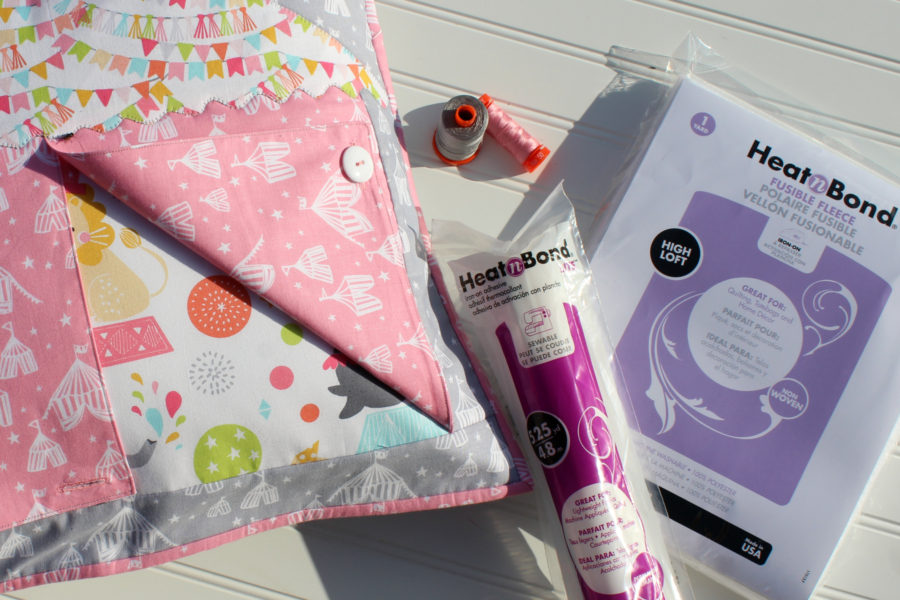
HeatnBond High Loft Fusible Fleece – 19” x 19”
HeatnBond® Lite iron on adhesive
HeatnBond Fusible light weight non-woven interfacing
2 – 8 ¼” x 9 ½” for curtains
Aurifil thread: 50 wt. (#2620, #2425)
Buttons 2 – 7/8”
Muslin: backing for pillow top (will not be seen) 19” x 19”
Iron: (I love my Oliso Pro)
erasable fabric pen
18” x 18” pillow form
general sewing supplies: scissors, pins, sewing machine, etc.
Fabric: Calliope by Maud Asbury for Blend Fabrics
Big Top Grey
A – 19” x 8 ¼”
B – 2 – 9 ½” x 2”
C – 19” x 2 ¼”
small scrap for flag triangles
Backing fabric for pillow 2 – 19” x 14”
Step Right Up Pink
D – 16” x 9 ½”
Big Top Pink
E – 2 – 16 ½” x 9 ½” (curtains)
small scrap for flag
Binding 2 – 2 ¼” x width of fabric
Bannerline Pink
For roof – 8 ½” x 22”
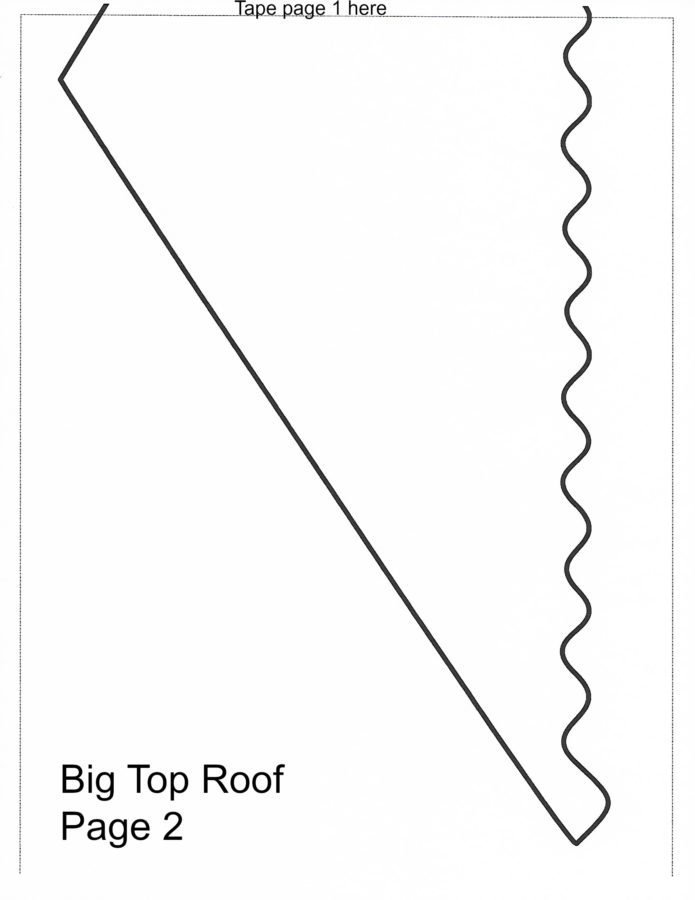
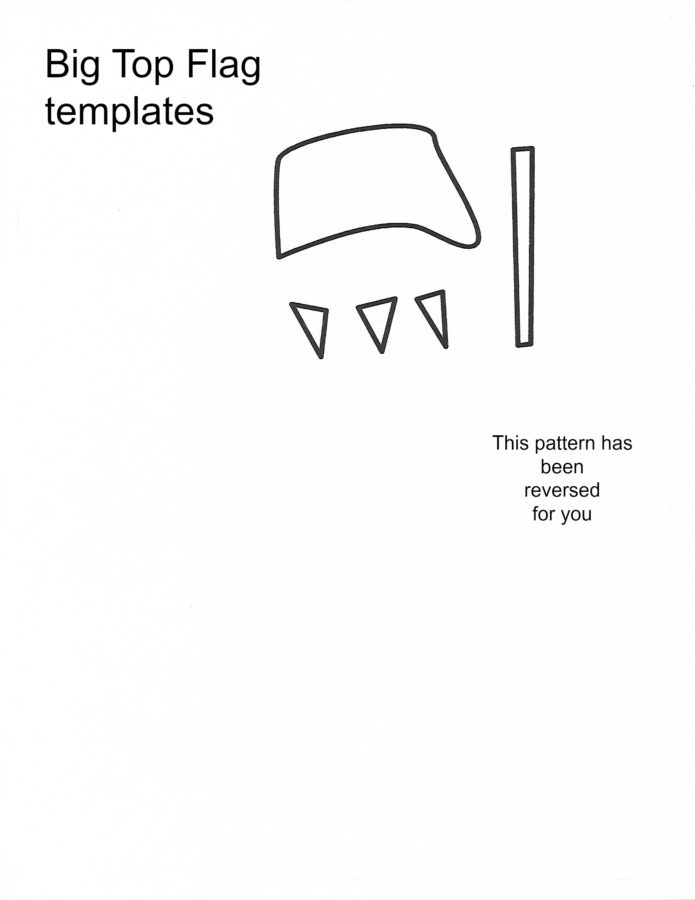
Pattern: (click and right click each of the following 3 pages to save or print. Enlarge, if necessary, to fit a full piece of paper)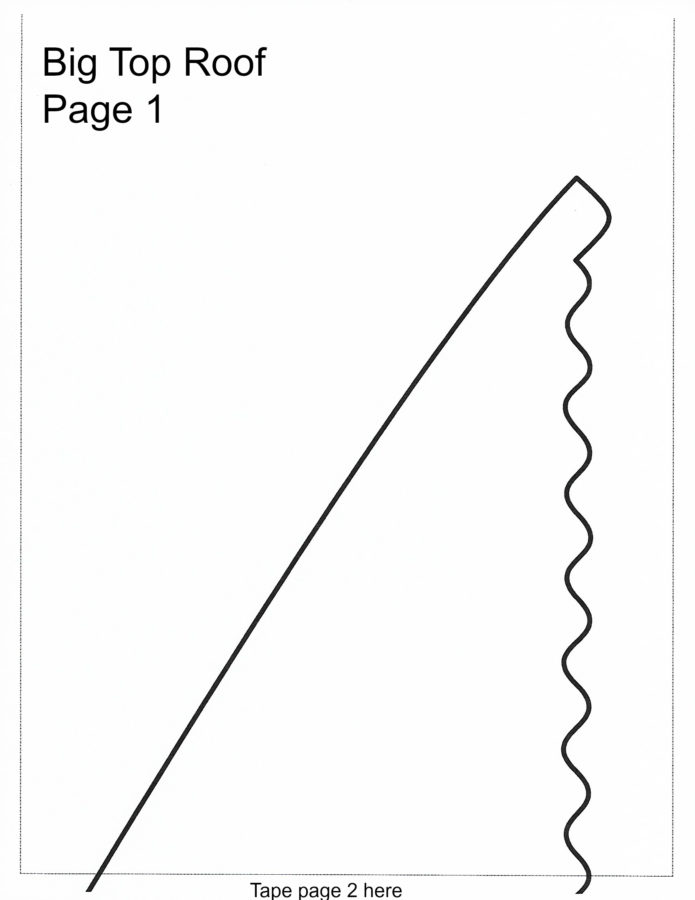
Big Top Circus Pillow Cover Instructions:
Step 1
Prepare the curtains by fusing the two 8 ¼” x 9 ½” pieces of HeatnBond interfacing to the left side of the wrong side of both E pieces following the package instructions. Fold the pieces of fabric in half right sides together and stitch ¼” seam along the bottom.
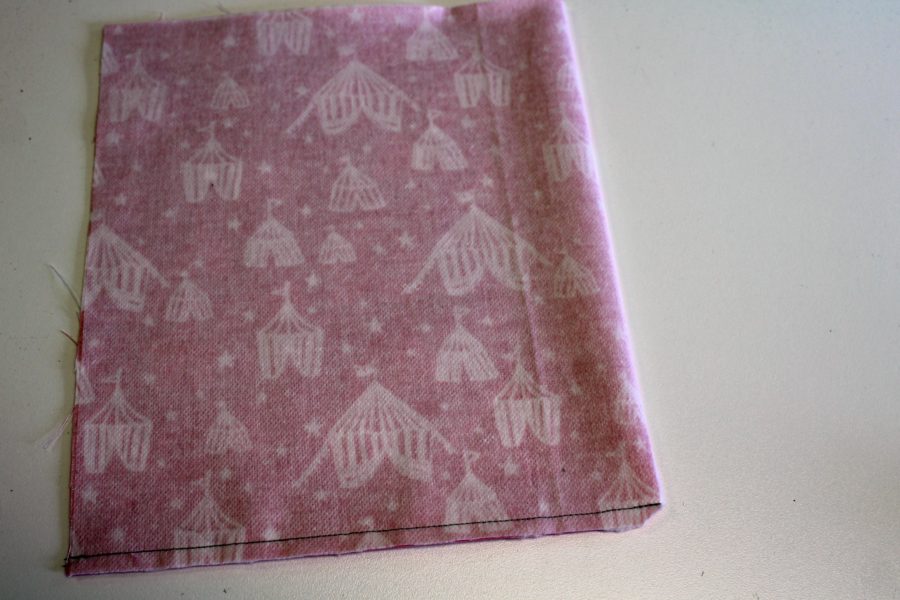
Trim off the folded corner and turn right side out. Next, press the curtains and top stitch on the folded side and bottom. Baste the other 2 sides 1/8” from the edge. Laying the curtains right side up, measure ½” from inside corners and mark a line with erasable fabric marker.
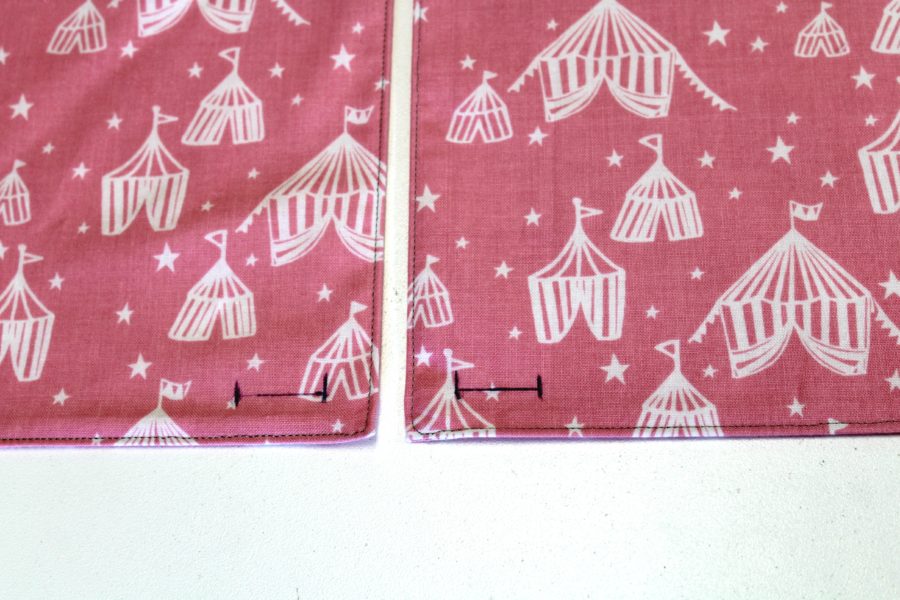
This is where the button holes will be stitched. Stitch and open the buttonholes.
Lay the curtains right side up and fold the buttonhole corner back, as shown with ½” showing on the side and 1 ½” showing at the top. Place a mark in the middle of the buttonhole.
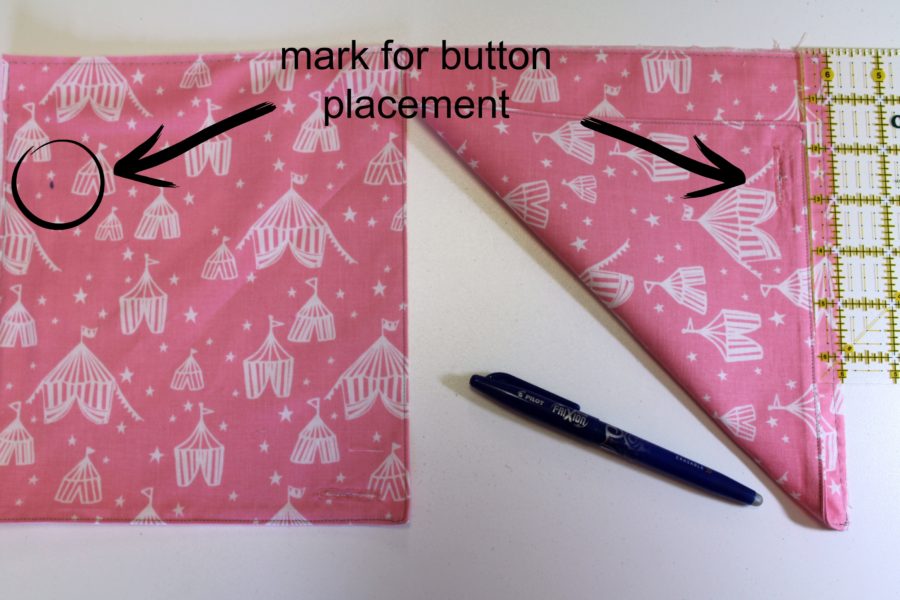
This is the placement of the button. Stitch the buttons on the curtains.
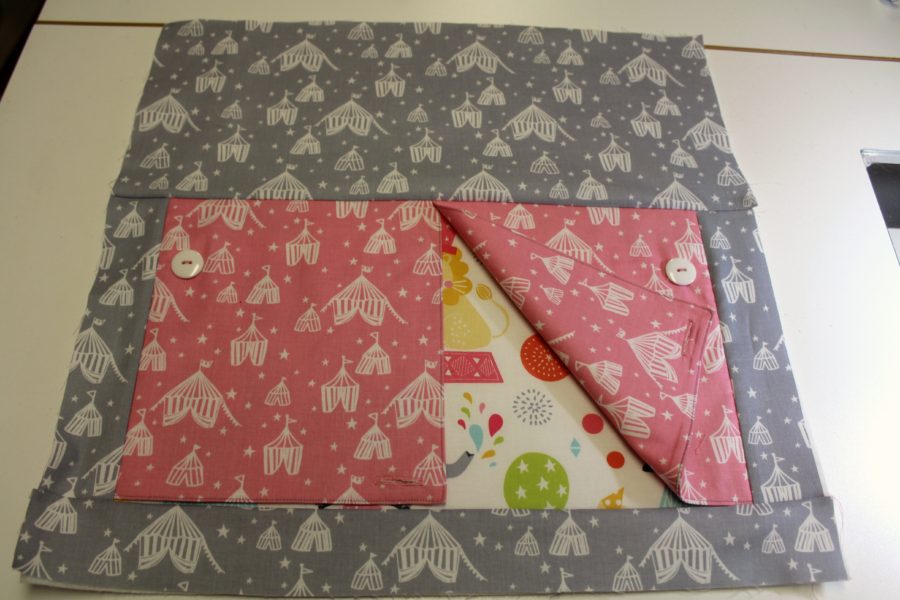
Pin the curtains onto piece D, lining up the sides and top. The curtains will be shorter than piece D to allow for the bottom seams and the curtains will overlap in the middle.
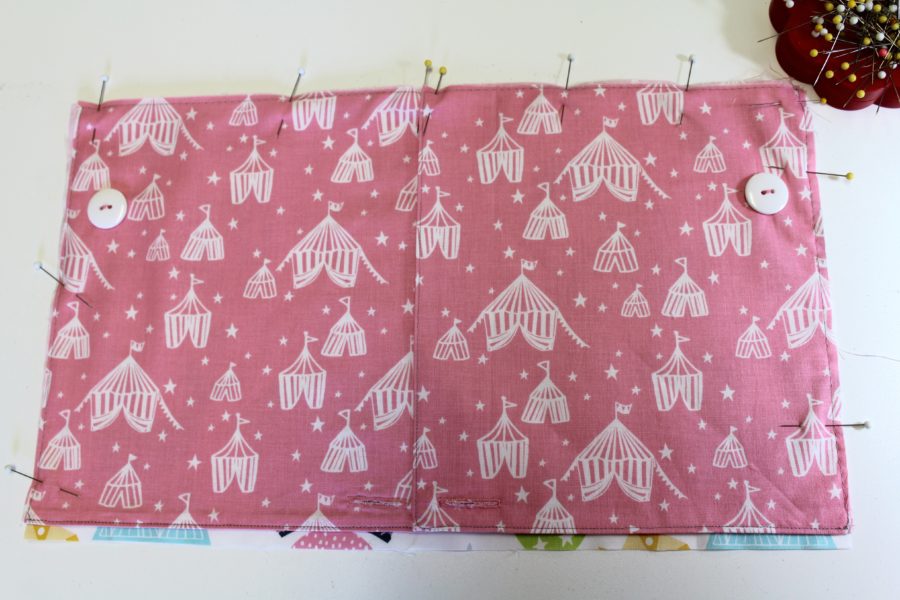
Baste over previous basting 1/8” from the edge on sides and top.
Step 2
Bond the 19” x 19” HeatnBond fusible fleece to the wrong side of the pillow top backing (muslin) following the package instructions. Trim or square the fleece backed muslin to 19” square.
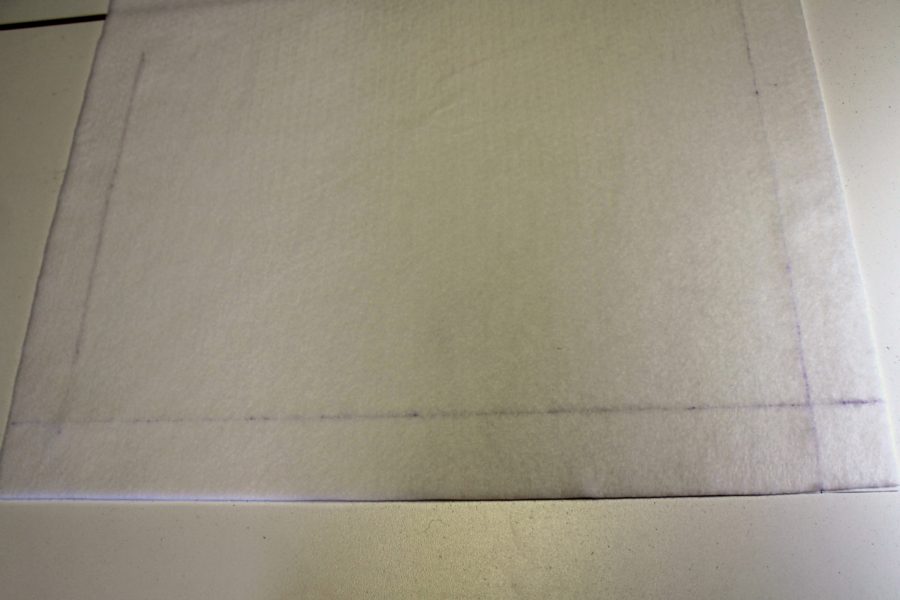
Mark a line 1 ¾” from the bottom on the square on the right side of the fleece with an erasable fabric marker and mark 2 lines 1 ½” from each side for placement of the curtained square D.
This is a “quilt as you go” method and no other quilting will be required once all the pieces are stitched.
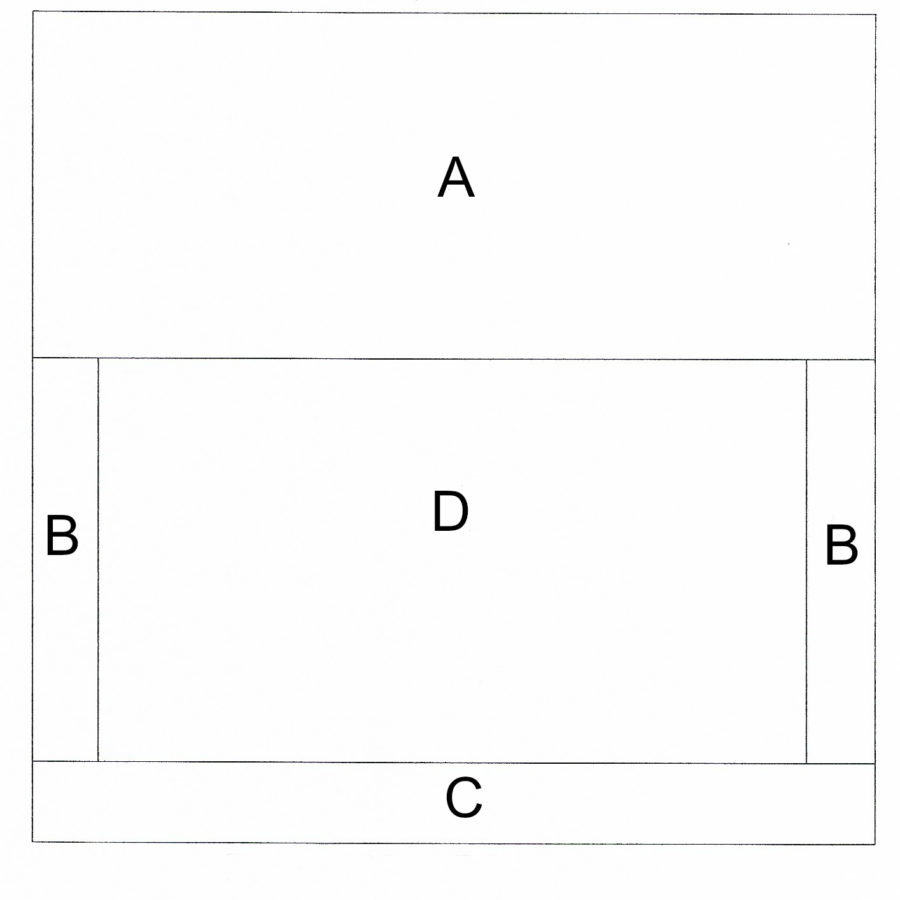 Lay the prepared rectangle D right side up on the marked lines, lining up the bottom with the bottom marked line and the sides with the side marked lines. Make sure the curtains are unbuttoned.
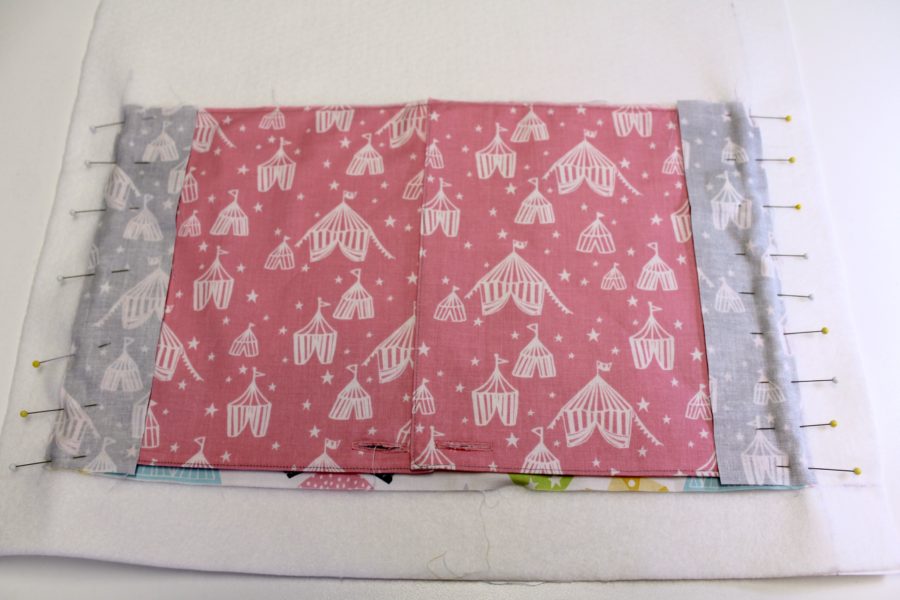
Pin side pieces B to the sides of D right sides together and stitch a ¼” seam on both sides. Press the blocks.
Next, pin A block to the top of D, right sides together and stitch ¼” seam and press. Finally, pin C to D at the bottom and stitch ¼” seam as before with the other pieces and press.
Step 3
Tape the roof pattern together and prepare the roof and flag appliques by tracing the pieces on the paper side of HeatnBond® Lite iron on adhesive. Fuse the pieces onto the wrong sides of the fabrics and cut them out.
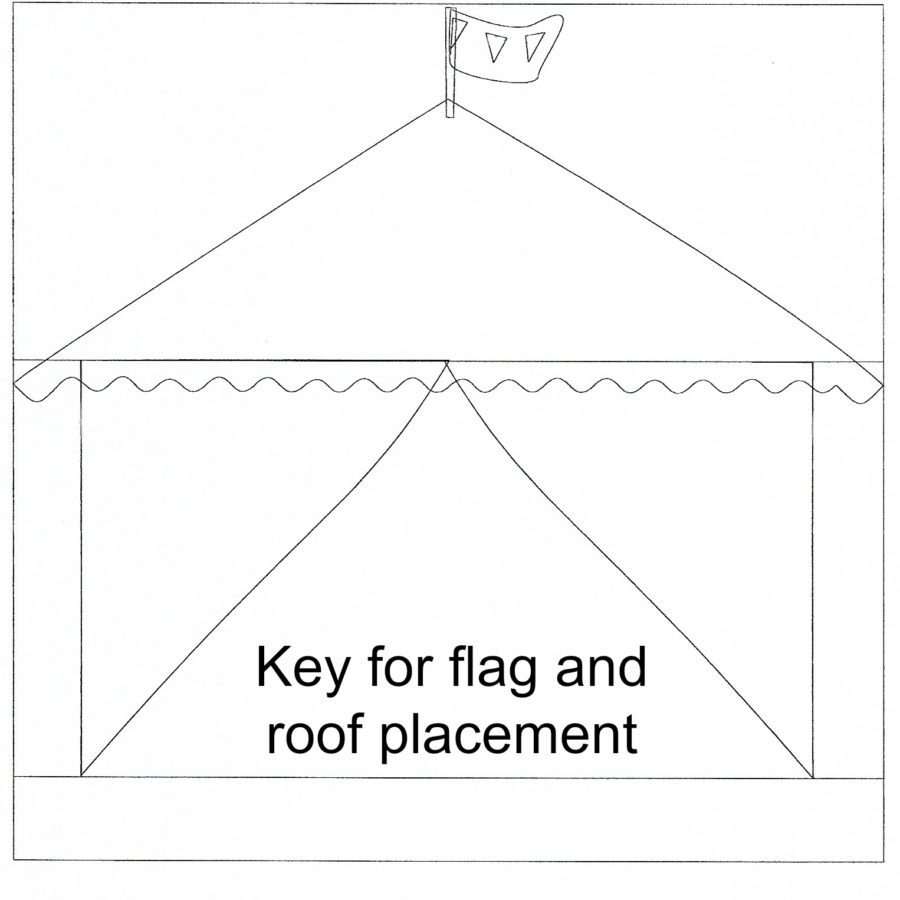 Using the above key, place all of the applique pieces, glue side down on the pillow top and fuse by following the package instructions.
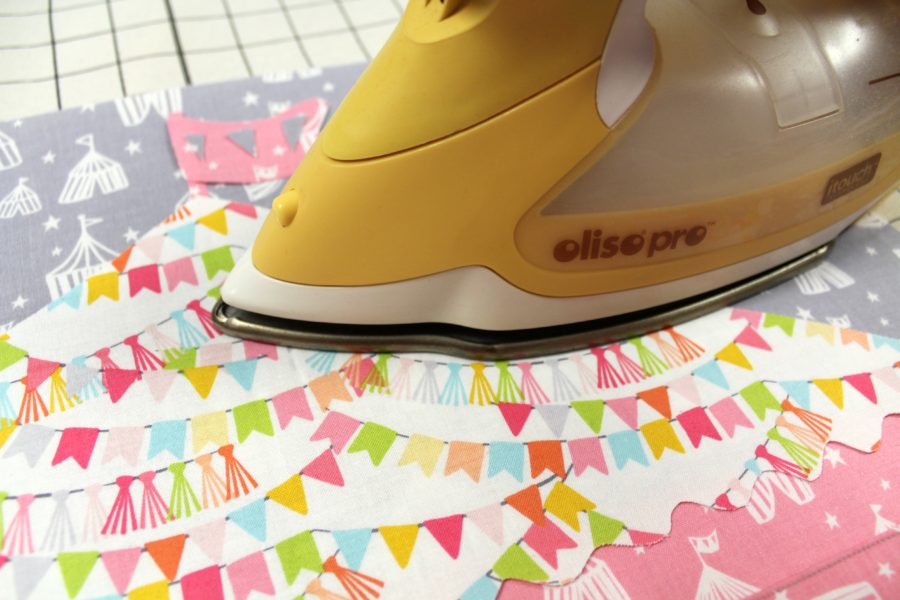
Stitch around the roof and flag with a zigzag, blanket, or straight stitch.
Step 4
Finish the pillow by hemming the two pillow backing pieces on one 14” side. With the pillow top right side down, place the hemmed sides in the middle of the back of the pillow top, right sides up, and pin matching all the raw edges. Baste the back pieces to the pillow front, wrong sides together. Bind the edges with a favorite method.
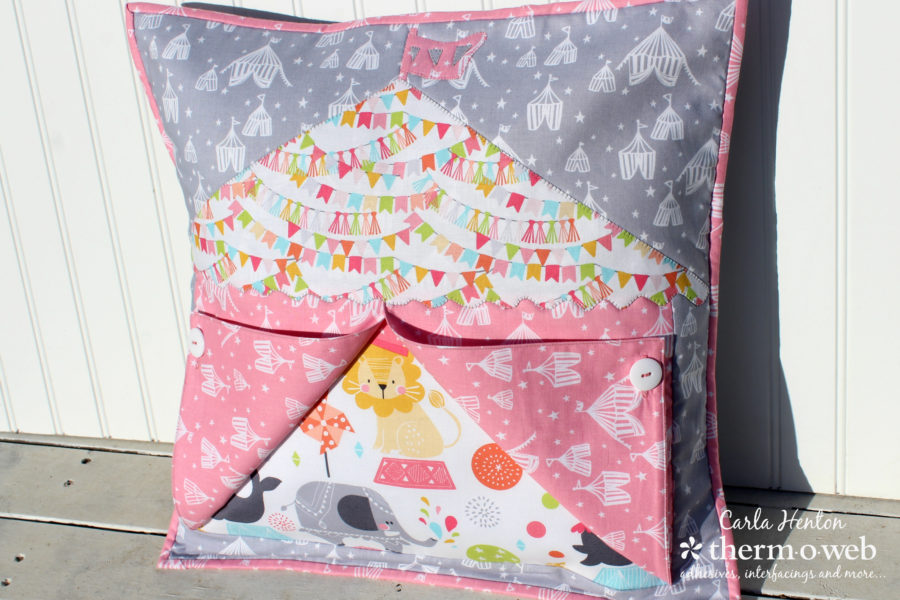
My grandma loved the circus and now that I’m going to be a gLamma, I can’t wait to share this pillow with the new baby.
Carla

Sherry
November 14, 2017 at 9:54 pm (8 years ago)This Circus Pillow is uber cute! Thank you for sharing your tutorial. <3