


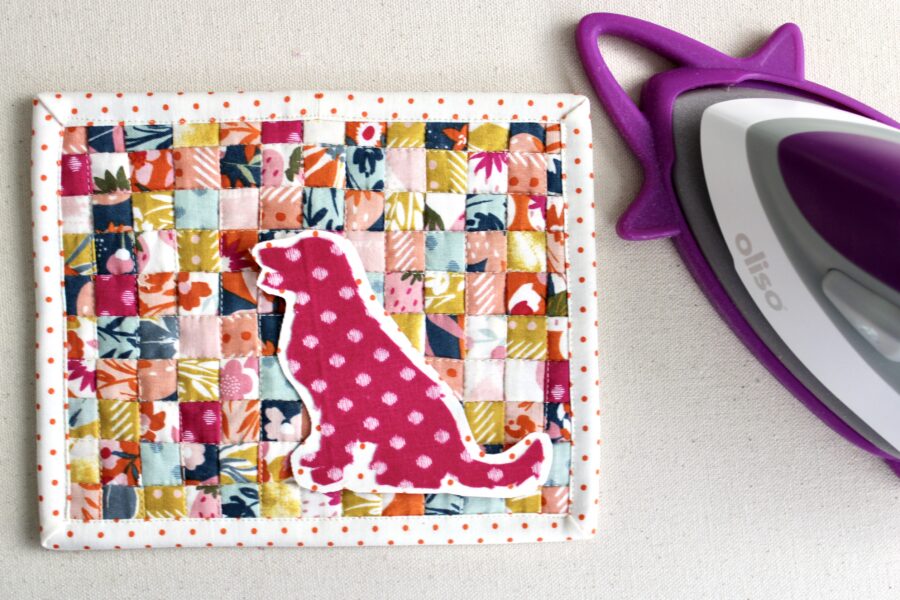
Hello, friends! It’s Julia from Bayhill Studio. Today I’m excited to be sharing a fun little pet themed Mug Rug with you!
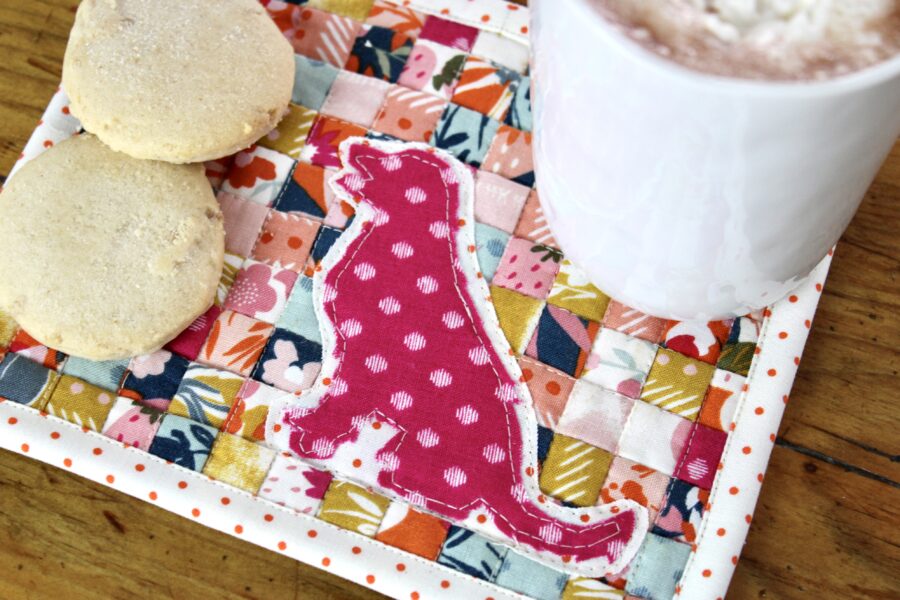
If you haven’t heard of a mug rug, it’s a cross between a placemat and a coaster. I love the compact size. It’s just right for holding a mug and maybe a delicious cookie or two.
Paired with some hot cocoa or other beverage packets, this would make a perfect teacher, coworker, neighbor, best friend, sister, Mother’s Day, or Father’s Day gift!
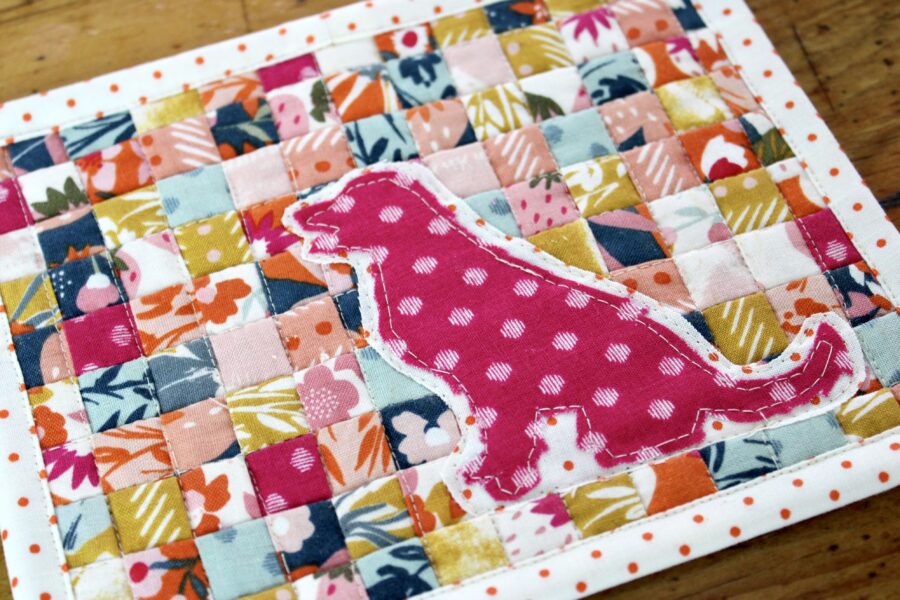
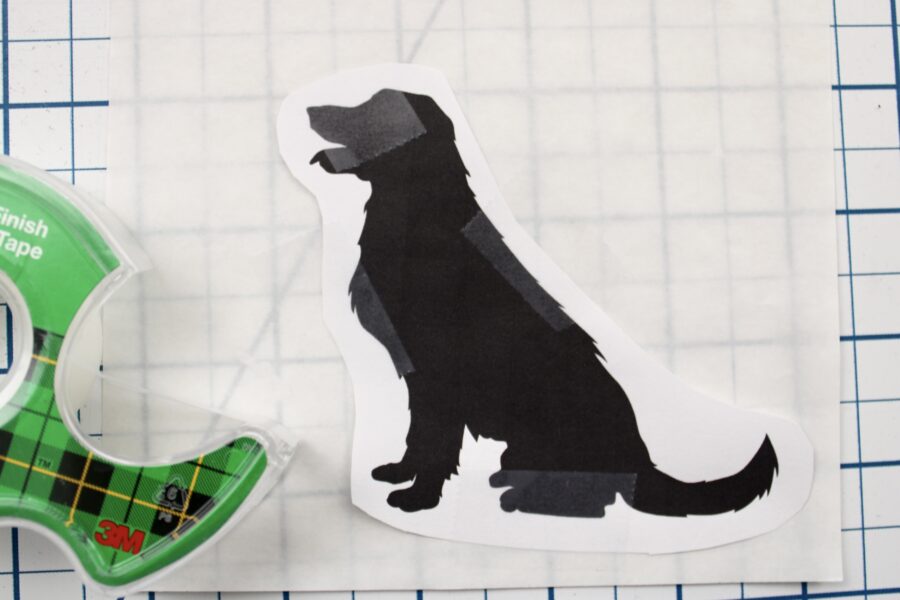
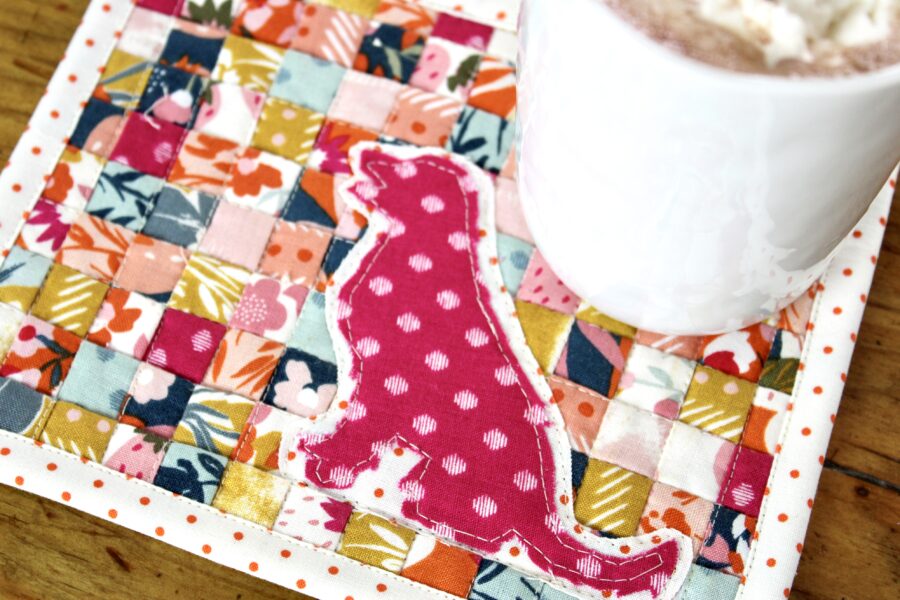
Here is a closer look at this cute little pup. I’m sharing a printable of this dog silhouette, but you can find free clipart for just about any animal by doing a quick internet search.
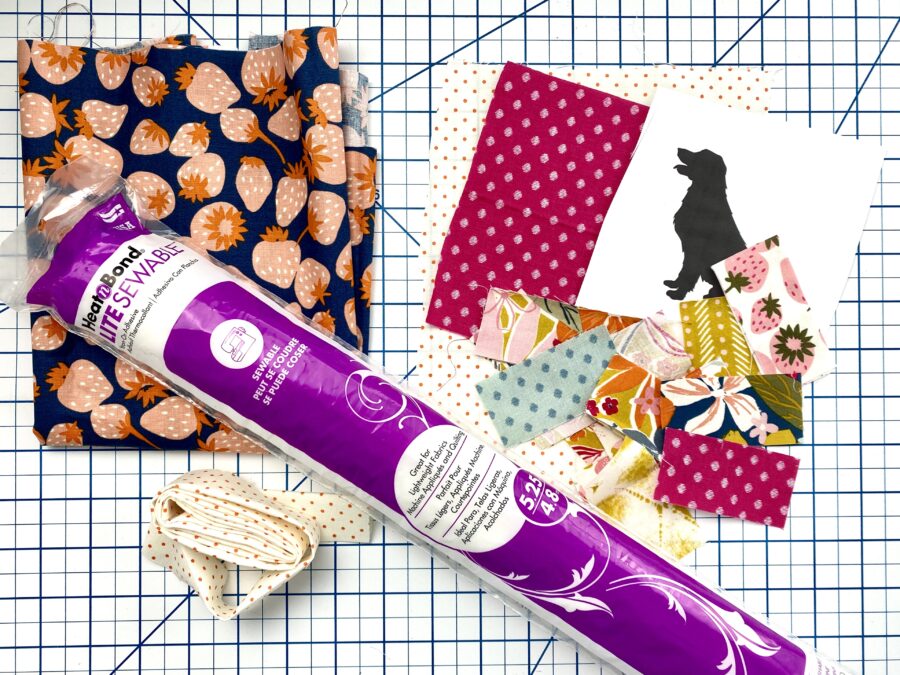
To make this mug rug, you will need:
- HeatnBond LITE Sewable Adhesive
- 8″ x 10″ piece of fabric for front and back OR and 8″ x 10″ piece of fabric for the back and a patchwork piece for the front measuring 6″ x 7″
- 7″ x 8″ piece batting
- 2-1/4″ x 36″ fabric for binding
- Dog Printable (Download HERE) or print your own (note: if you print your own, make sure it measures smaller than your mug rug. Mine measures abt. 3″ x 4″)
- 5″ x 5″ fabric for dog background
- 5″ x 5″ fabric for dog cutout
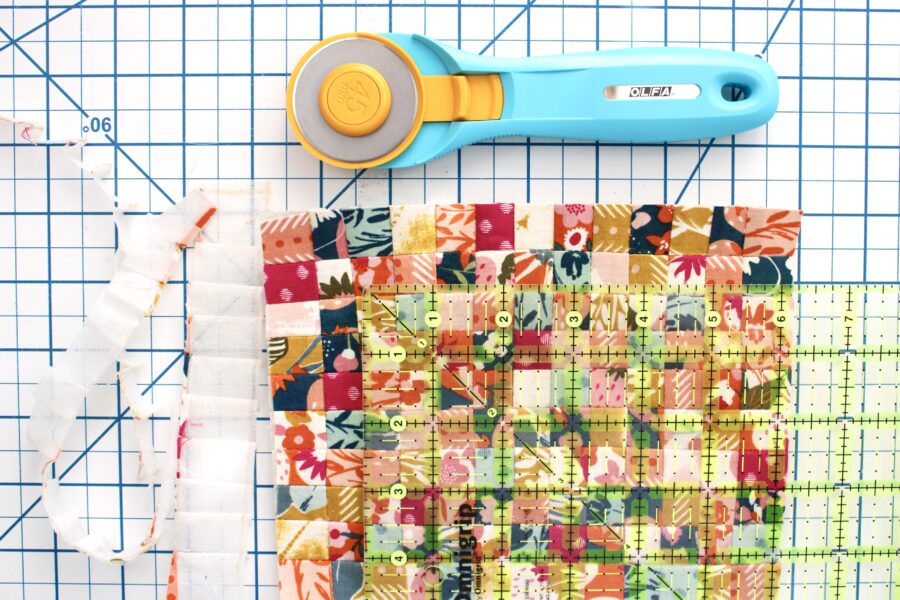
The first step of this project is optional. I decided I wanted the front of my mug rug to be made up of tiny patchwork squares. I recently made a quilt featuring fabrics from the brand new Eden collection designed by Gabrielle Neil for Riley Blake Designs. I’m completely smitten with the prints and colors and couldn’t bring myself to wast a single scrap. So I cut out a LOT of 1″ squares – 130 squares to be exact. I used a fusible grid interfacing, where I arranged my squares, pressed them into place, and sewed the rows. You don’t need to use the interfacing at all. You can just sew the rows together, or you can sew little 4 patch units and piece those together. How you assemble your patchwork front is completely up to you.
The other option, of course, is to skip the patchwork and use a single piece of fabric. This is a HUGE timesaver, and a great idea if you are making multiple mug rugs.
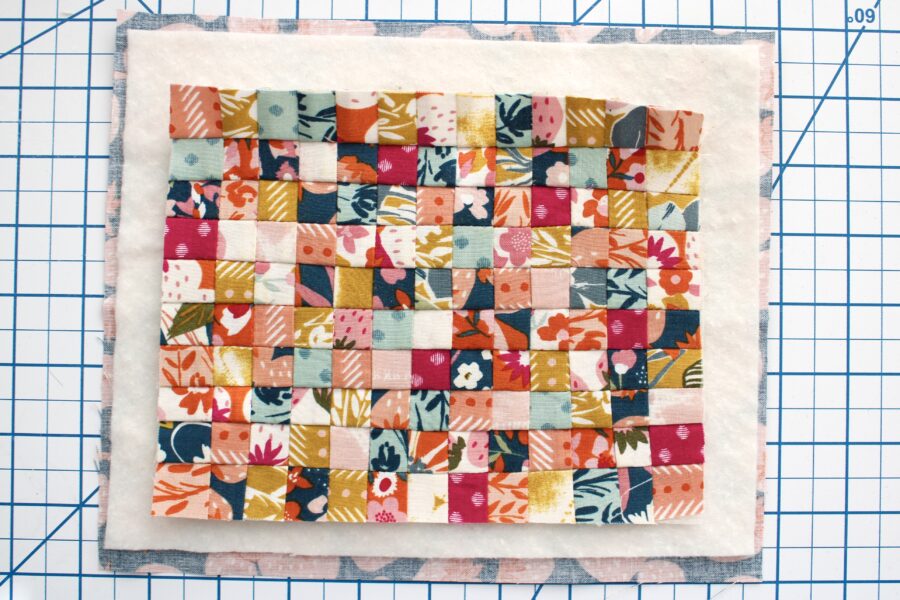
Trim your front piece to measure 6″ x 7″. Create a little quilt sandwich, with the back fabric on the bottom, the batting in the middle, and the patchwork or main fabric piece on the top.
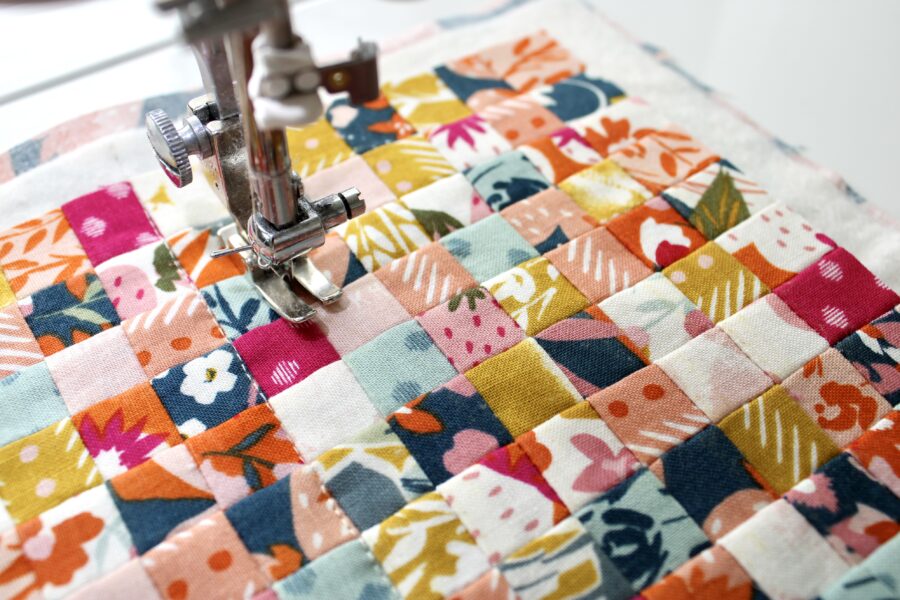
Quilt the mug rug any way you want. I opted for a simple stitch in the ditch, where you stitch right along the seams. This helps keep the stitching nearly invisible so you can focus on the gorgeous fabrics. Typically when I am quilting, I’ll use a walking foot or a free motion quilting foot. For this tiny project, I used my regular presser foot, since the project is too small for fabric to do any shifting around.
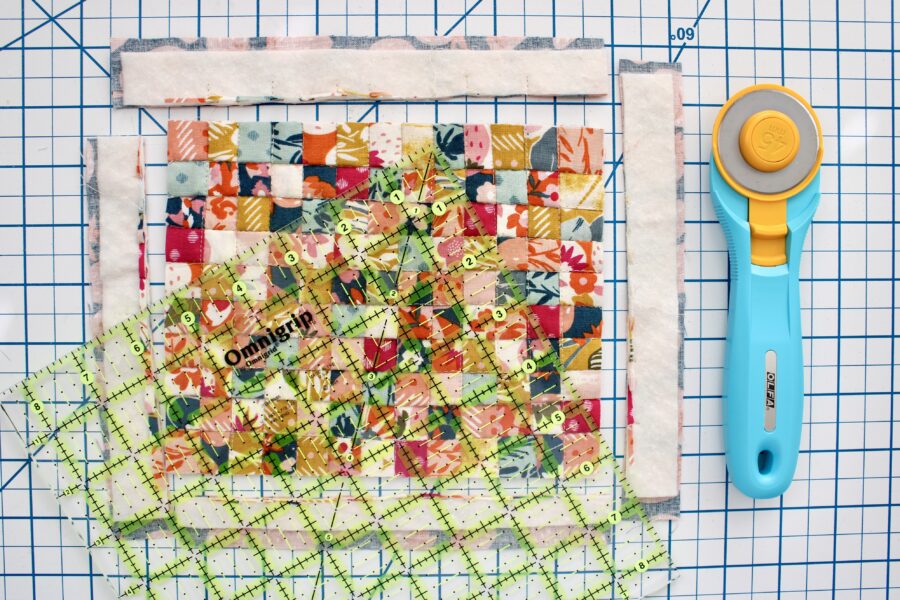
After your piece is quilted, trim the sides. Again, I was aiming for a 6″ x 7″ measurement, but if you need to trim off a little more to square up the edges, like I did here, that’s totally fine.
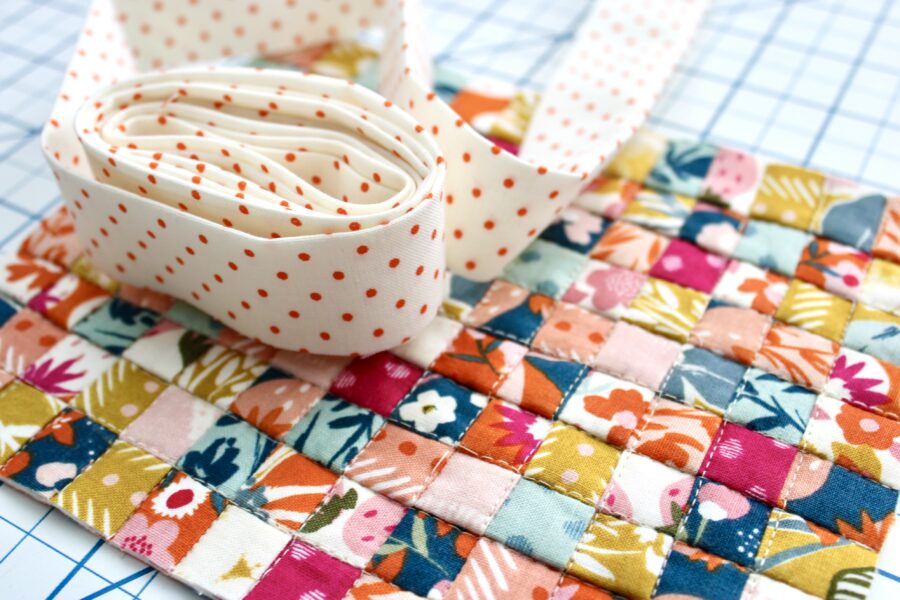
Bind the edges. If you need tips on binding, you can watch my YouTube video on different binding methods HERE.
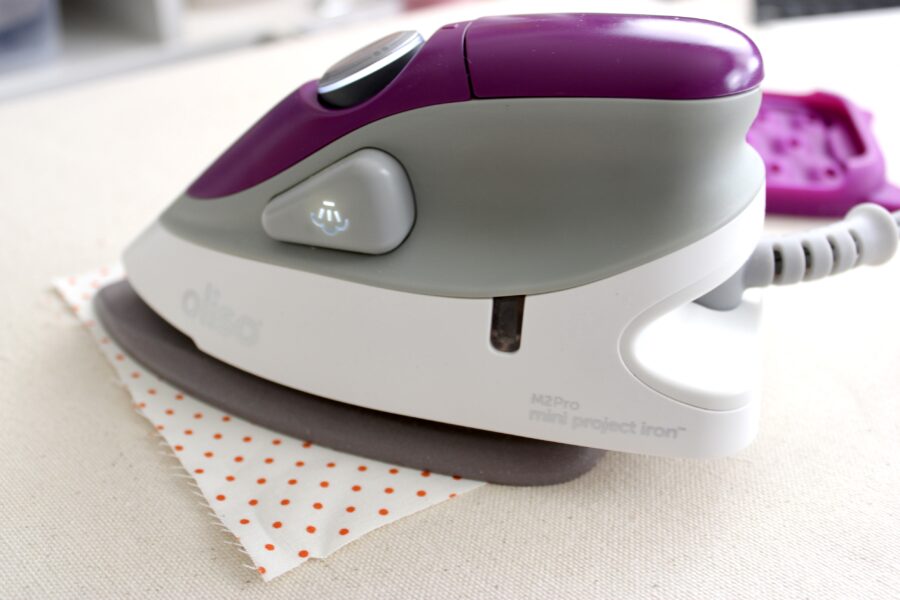
Now it’s time to add our little dog appliqué. Press a piece of HeatnFond fusible adhesive to the wrong side of the dog background fabric layer. The glue side of the fusible adhesive will be facing the wrong side of the fabric.
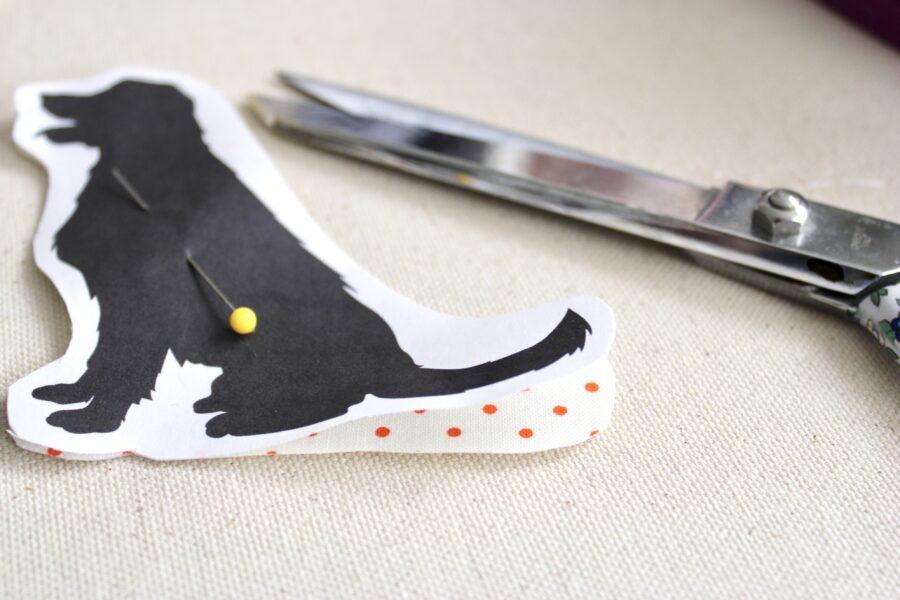
Next, pin the dog printout to the fabric and cut around the dog, leaving about 1/4″ extra space around the dog silhouette. Keep the paper backing on the fusible adhesive and set aside for later.
Now, let’s cut out our pup. There is more than one way to do this step. I was concerned about being able to get the detail in the dog silhouette, so instead of pressing the fusible adhesive to the back of the fabric and cutting out the silhouette like I did in the previous steps, I decided to tape the printout to the glue side of the fusible adhesive, then take a craft blade and carefully cut out the design.
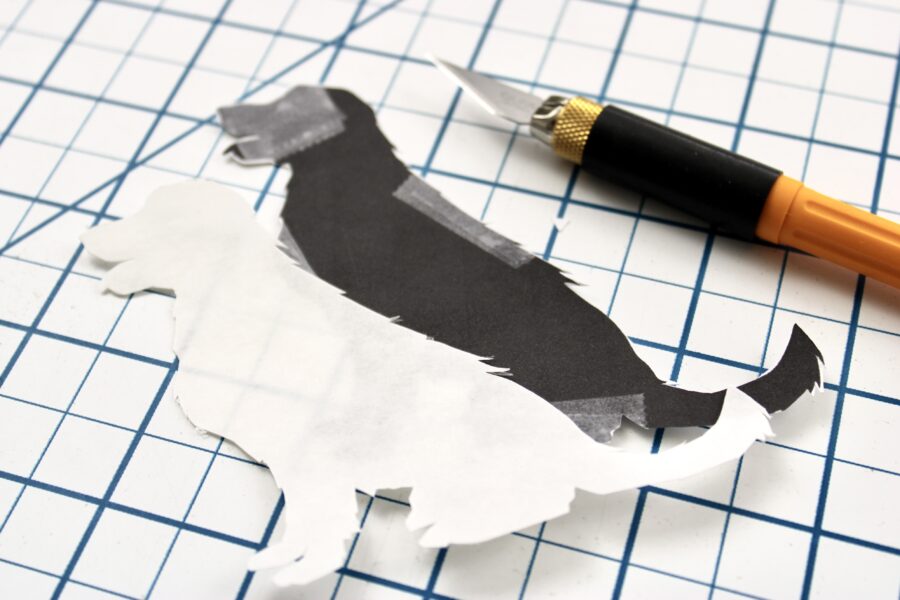
Here is what the cut piece looks like.
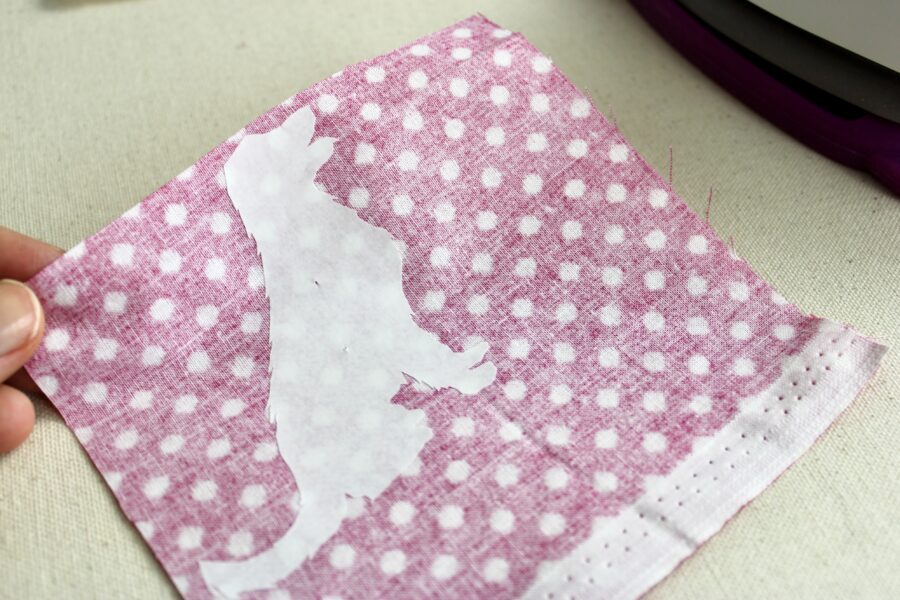
Press the glue side of the dog cutout to the wrong side of your fabric. Then, using a pair of small, sharp scissors, carefully cut around the design.
Peel off the paper backing and press the dog fabric to the background fabric.
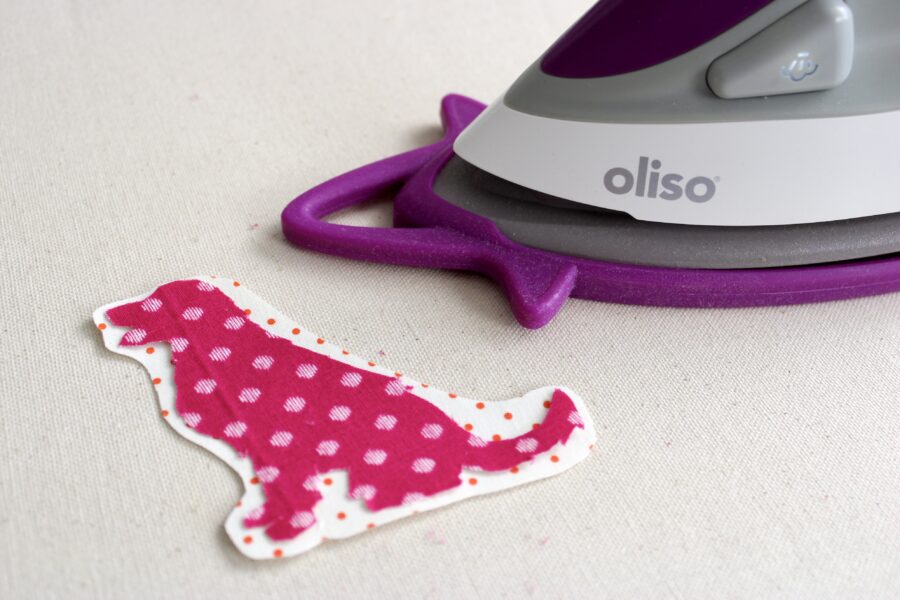
Next, peel off the paper backing from the background fabric and press in place on the mug rug.
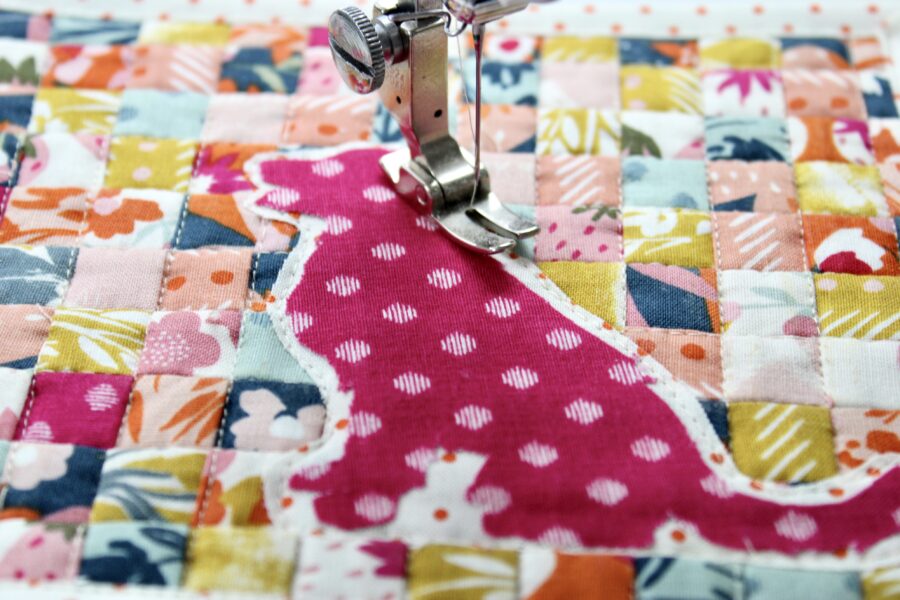
I like to add stitching at this point for durability and for aesthetics. I stitched around the background fabric first.
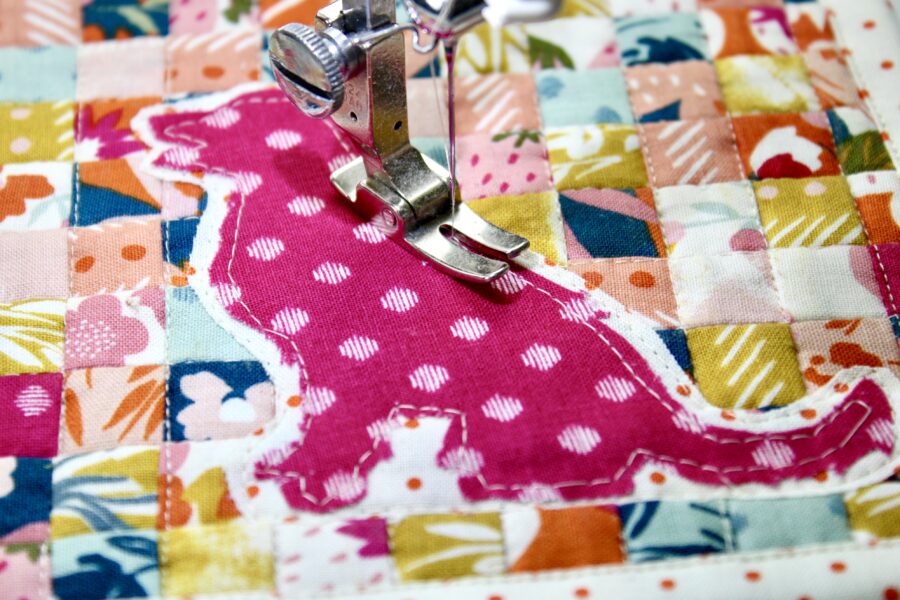
Then I stitched around the top fabric.
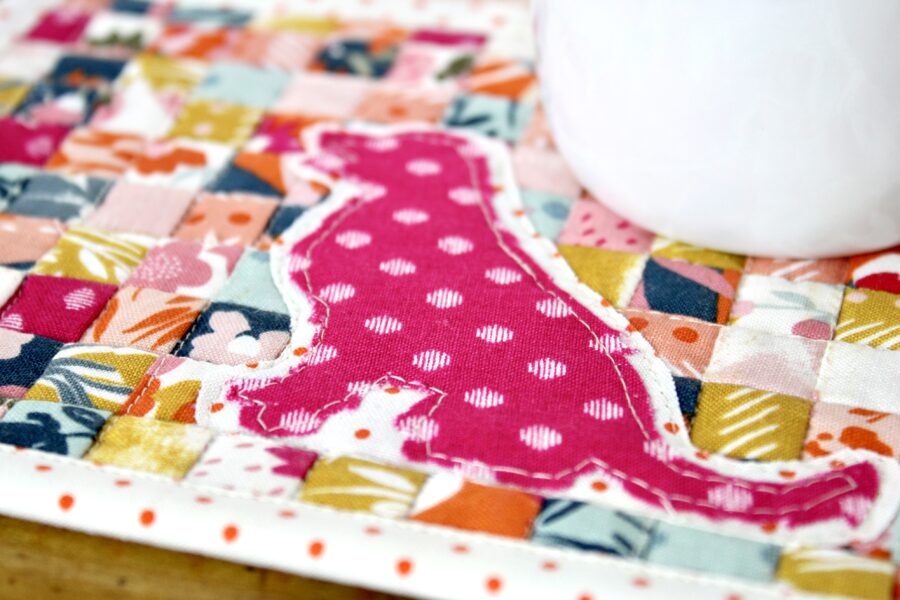
And that’s all there is to it! This is an easy appliqué project that looks amazing!
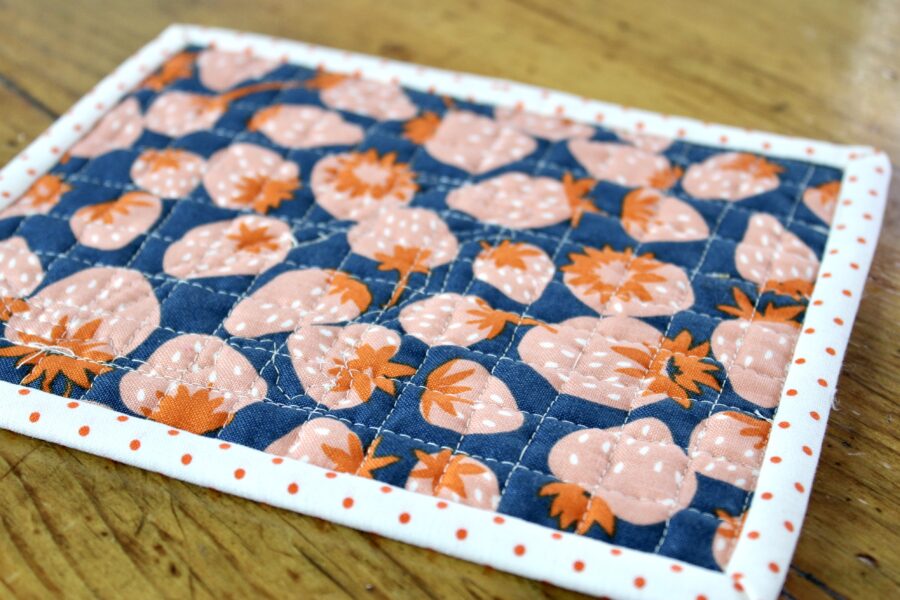
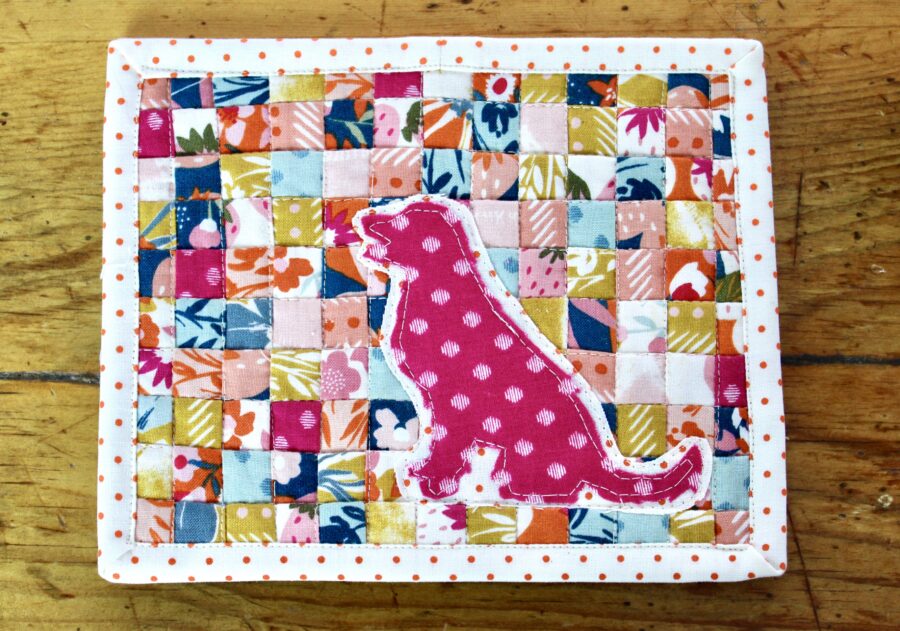
Here is what the back of the mug rug looks like. You can see that if you choose an interesting print like this one, it would be just as nice as going all out with the tiny patchwork design. Both are fabulous!
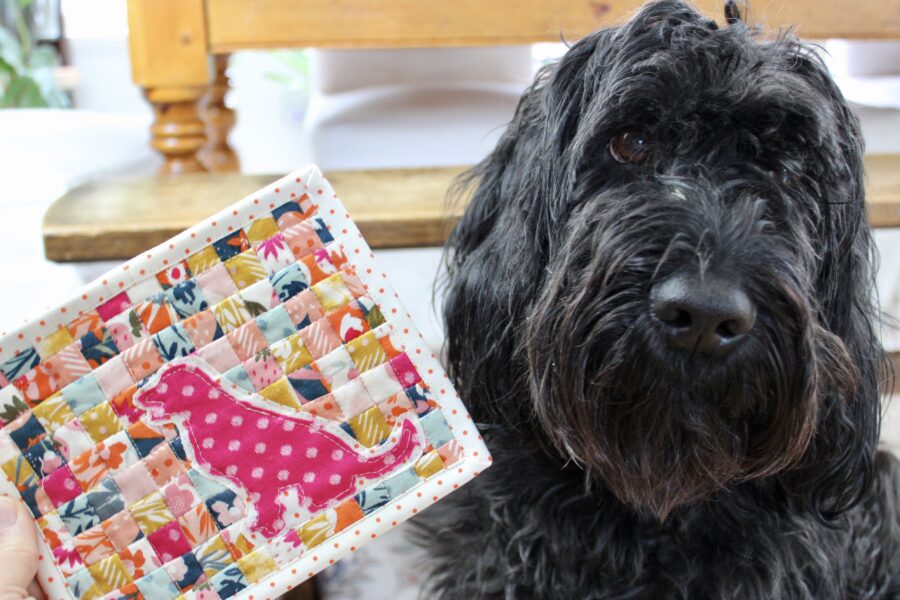
My dog, Tim, approves!
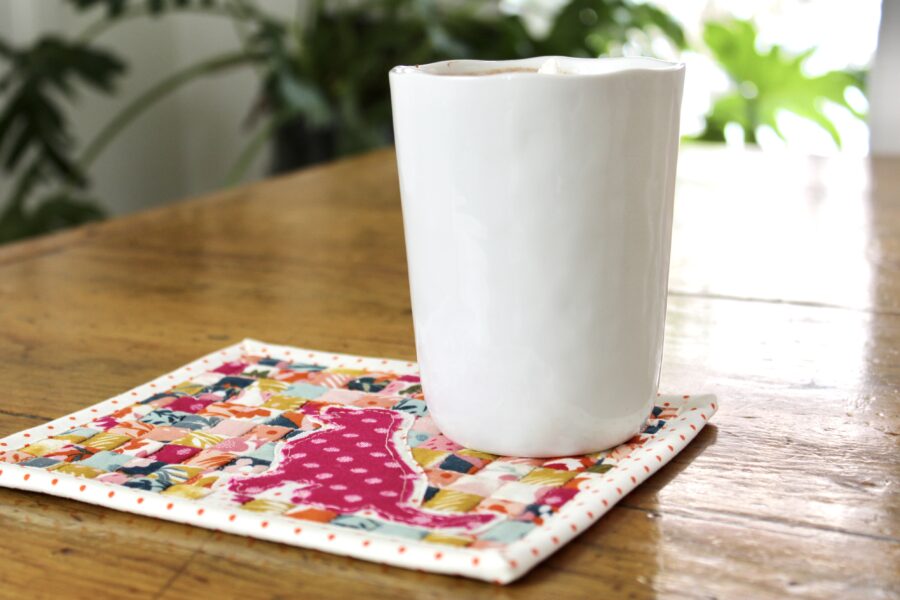
I can’t wait to make more of these to give as gifts.
Thank you for joining me on the Thermoweb Blog! If you are looking for more project ideas and inspiration, follow me on Instagram @bayhillstudio. Have a blessed day!