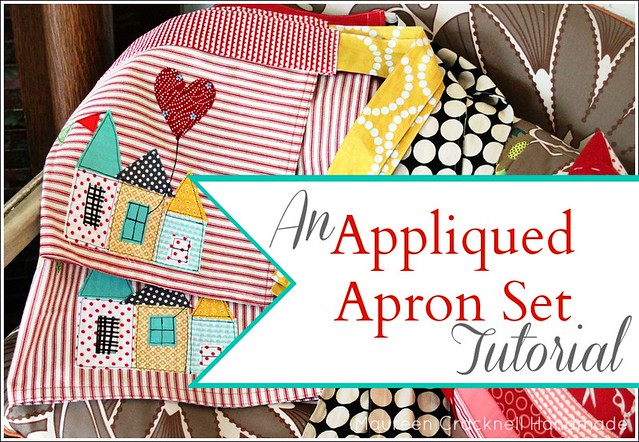
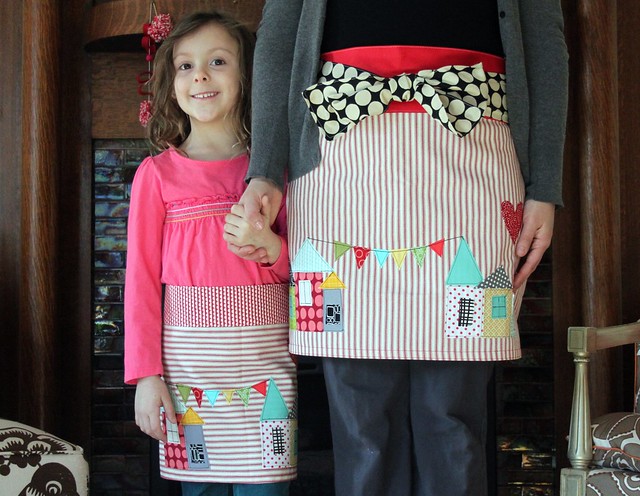
Hi, I’m Maureen from Maureen Cracknell Handmade! Today’s tutorial is for a sweet apron set for an adult and child. I use sturdy ticking fabric along with Therm O Web’s iron-on adhesive HeatnBond® LITE for a simple raw edge applique to add a colorful little village!
What you’ll need : :
- 3/4 yd of ticking fabric
- an assortment of scraps for your applique village
- 1/2 yd piece of HeatnBond® LITE
- 1 – piece of fabric measuring 6″ x 24″ for child apron waistband
- 2 – pieces of fabric measuring 5″ x 18″ for child apron ties
- 1 – piece of fabric measuring 9″x 32″ for adult apron waistband
- 2 – pieces of fabric measuring 8″ x 44″ for adult apron ties (I make mine extra long to tie in front)
- threads — black for applique stitching and an assortment of colors or white to match your apron fabrics
- Sewing pins
- Sharp scissors and/or a rotary cutter/mat set
Cutting and Hemming apron pieces
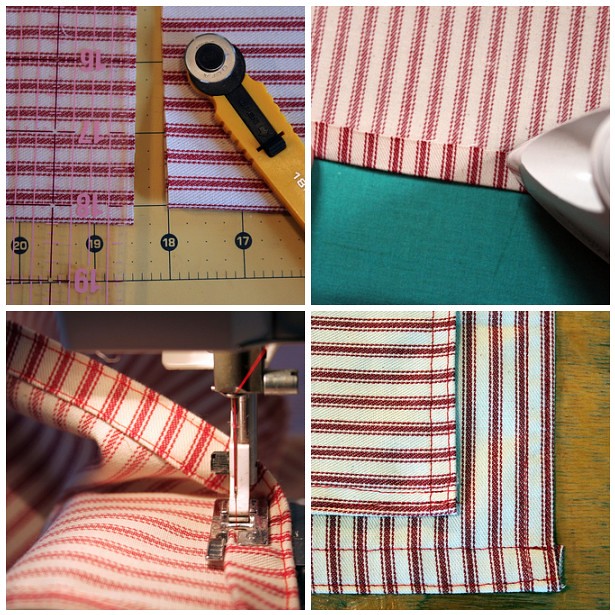
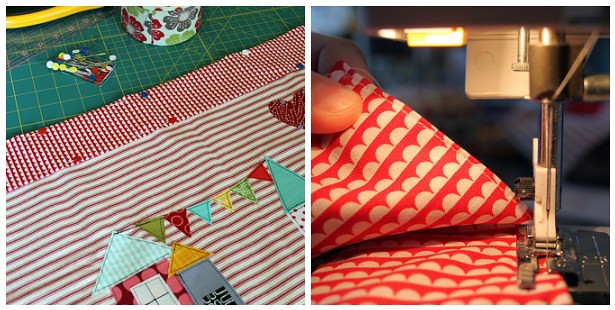
1. Trim selvedge ends from the fabric. 2. First, cut 14″ from one side of the fabric — this will be the fabric for the child apron. Second, cut remaining fabric to measure 18″ x 30″ — this will be the adult apron 3. Hem bottom and sides of these pieces by folding over edge 1/4″, press, fold again, press, and sew a double seam to hem those raw edges
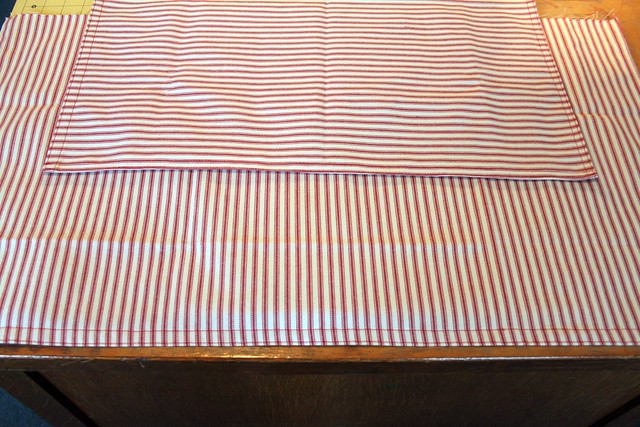
Once finished, the apron pieces should look like this.
Cutting and piecing your scraps using Heat n Bond LITE
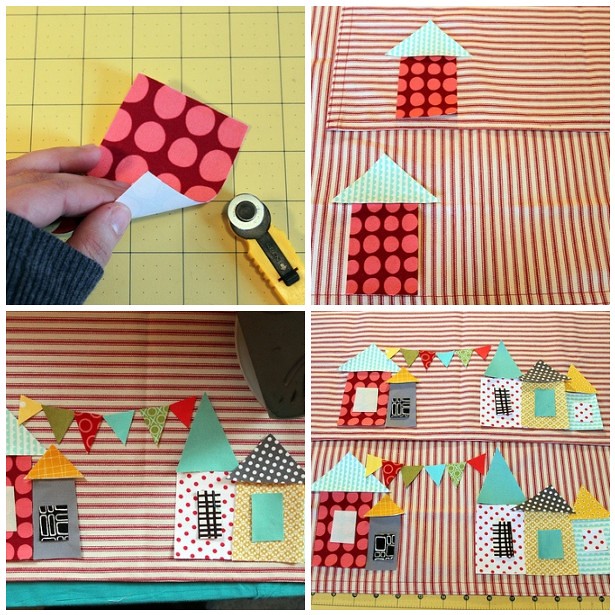
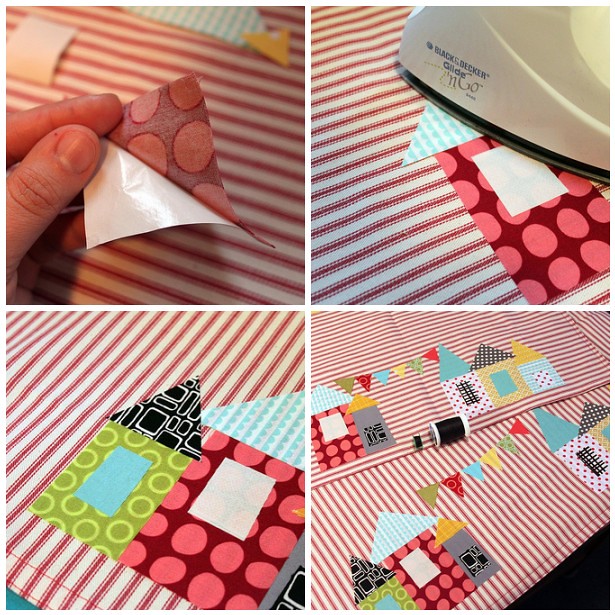
1. Cut a large square from the heat bond light 2. Cut scrap pieces out in the fabrics chosen for the village design 3. With paper side down, arrange scraps on top of the heatnbond 4. Press with iron to adhere fabric pieces to heatnbond
Cutting and adhering the village pieces
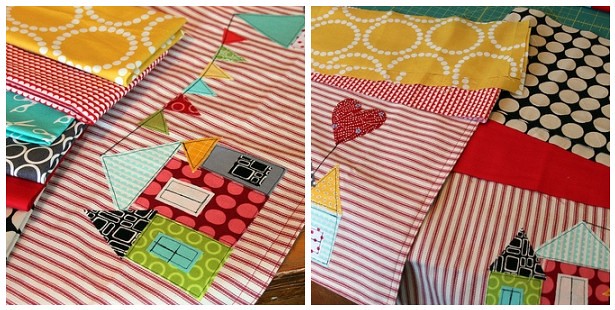
1. Using sharp scissors or a rotary cutter, cut out rectangle, triangle, and square pieces for the village and bunting design 2. Always layout the design first
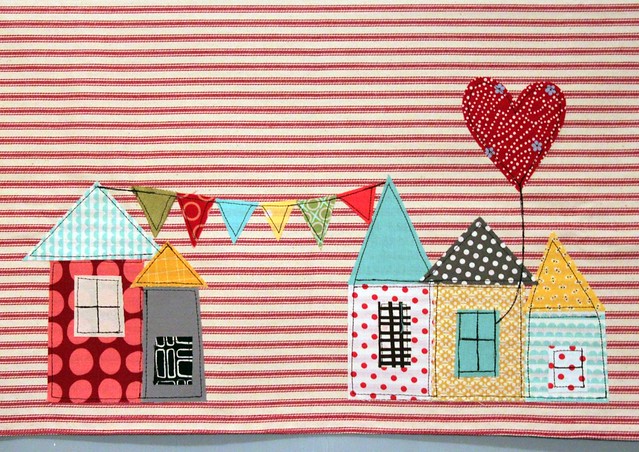
3. Carefully peel off the paper backs of the pieces, use an iron to press in place. This will permanently adhere the village design to the apron. Don’t forget to add the heart! 4. Once the design is adhered to the apron, use black thread to “draw” around the inner edges of each piece added
This is my favorite part! I love the way the black thread makes the applique pieces look like a drawing!
Choose and cut waistband & tie fabrics — see measurements above
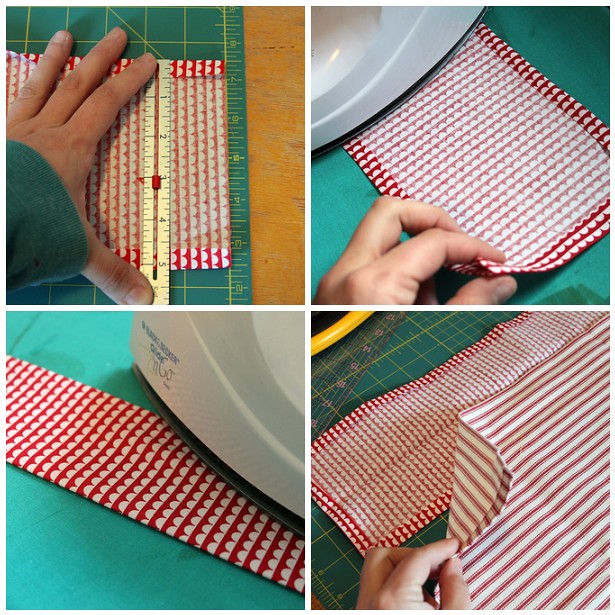
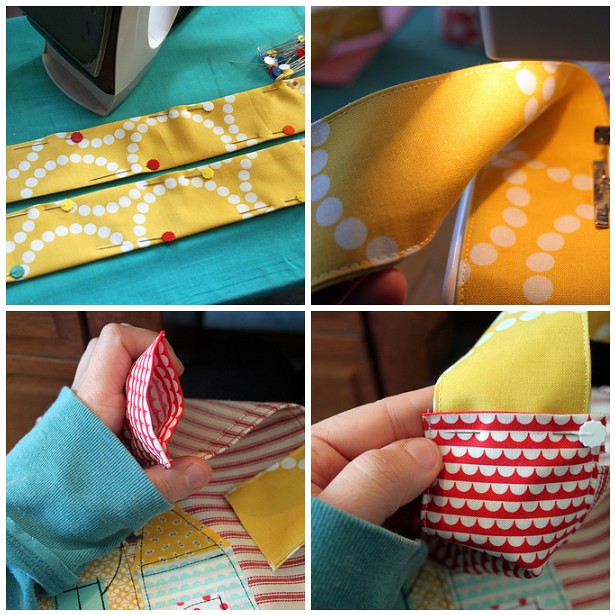
1. Fold in outside edges of the waistband fabric a 1/4″ on each side, press. Do this with all four sides 2. Fold waistband in half, press well 3. Open waistband, place apron piece centered inside the waistband piece
4. Fold over waistband fabric, pin in place 5. Using coordinating thread, sew a seam along top and bottom edges, leaving both ends open
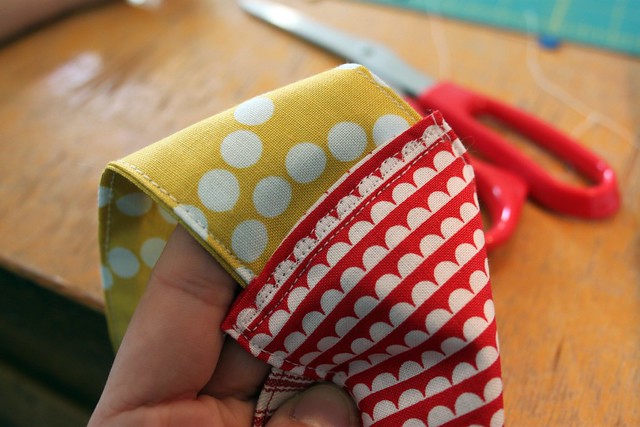
6. Repeat these steps for making the apron ties, be sure to hem the ends of these as well 7. Insert tie pieces into the opening of each side of the waistband, pin in place, sew
Add a few stitches here, this will get pulled at quite a bit when tying the apron on!
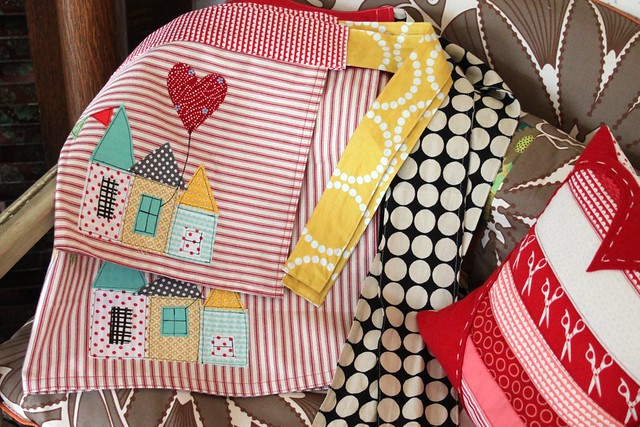
Repeat these steps for finishing the adult size aprons and you’ll have a lovely set to wear with your little(s) or to give as a nice gift!
We love ours!!
I really hope you enjoy this apron project, these are favorites of ours!
Have a lovely day! ♥ Maureen
How would you like to win some of Maureen’s favorite products?
Simply follow the Rafflecopter entry form for a chance to win an assortment of our HeatnBond® products including:
SpraynBond® Basting Adhesive
HeatnBond® Lite
HeatnBond® Batting Tape
HeatnBond® Craft
HeatnBond® Fusible Fleece
HeatnBond® Hem Tape Adhesive
25 Comments on An Appliqued Apron Set Tutorial
1Pingbacks & Trackbacks on An Appliqued Apron Set Tutorial
-
[…] time to blog and sew this morning. Oh, how I’ve missed it! I’m excited to be sharing my Appliqued Apron Set Tutorial over on the Therm O Web blog for the first time since I was recently invited to join their Design […]




Audrey Pettit
July 20, 2013 at 8:34 am (12 years ago)These are so, so sweet and absolutely adorable! I love the mommy/daughter matching set. Such cute fabrics, and the little village scene is SO fabulous!
LeAnn Frobom
July 20, 2013 at 2:02 pm (12 years ago)ADORABLE aprons! I’m a big fan of Maureen’s.
Yenni Beuker
July 20, 2013 at 2:38 pm (12 years ago)Such a lovely wonderful apron set! Love the motif & color, they’re perfect! I’d love to make them from the same fabrics & color, but I don’t know where I can get them.
Brenda Nonamaker
July 20, 2013 at 3:33 pm (12 years ago)Your aprons are so cute and thank you for the tutorial I will love making them. Thank you for the giveaway!…..:)
Sharon Griffith
July 20, 2013 at 10:21 pm (12 years ago)Very cute…Would love t make this for my grand-daughter and myself when we have out playdays….
Lori Kae
July 21, 2013 at 6:24 pm (12 years ago)One can never have too many aprons. I am in love with this one. Thank you for the chance to win some fabulous product.
Ginger
July 21, 2013 at 8:16 pm (12 years ago)I love all the Heat and bond products. I love the iron on vinyl.
Joan
July 22, 2013 at 9:45 am (12 years ago)Love your aprons! Thank you for the giveaway.
Karen
July 22, 2013 at 10:18 am (12 years ago)This is one of my favorites of yours as well!!!! I love everything about it. Totally my style. All of your creations are so lovely.
Vicki H
July 22, 2013 at 10:24 am (12 years ago)Love the Aprons. I have put this on the list to make for my daughter and granddaughter. Thanks.
Marilyn Strain
July 22, 2013 at 10:36 am (12 years ago)I think I’d better start on some of these for Christmas presents.
Jenny Moore
July 22, 2013 at 11:32 am (12 years ago)Love the apron patterns.
Peggy Jebavy
July 22, 2013 at 11:37 am (12 years ago)Love these! I rarely use an apron but they are so cute I may have to start!
Bonnie Greenhalgh Finch
July 22, 2013 at 3:22 pm (12 years ago)Love these aprons! so very sweet! thanks for the giveaway!!
VickiT
July 22, 2013 at 7:10 pm (12 years ago)Maureen ~ Those are just the most adorable aprons! Thank you for the awesome tutorial.
Patty
July 22, 2013 at 7:48 pm (12 years ago)The apron is just darling.
Lisa
July 22, 2013 at 9:41 pm (12 years ago)I seriously need to try this out 🙂 Can’t wait to give it a go! Thanks for sharing your wonderful tutorial!
Connie Rodriguez
July 23, 2013 at 12:05 am (12 years ago)They would be cute for My grandchildren and me, since they love to help me cook when they come over
Louise Chavis
July 23, 2013 at 8:01 am (12 years ago)Love this pattern. Reminds me of when my kids were small and played with colorforms. So, indeed, want to do this as gifts for Christmas as a reminder!
Tami Chaulk
July 23, 2013 at 8:25 am (12 years ago)These aprons are just adorable! Thanks for the tutorial and the chance to win some great products.
Connie
July 23, 2013 at 12:08 pm (12 years ago)Great tutorial, thanks!
Suzanne Beyer
July 24, 2013 at 1:03 am (12 years ago)I love all of your products. Anything that will make my life easier is much appreciated!!!
Terri C
July 25, 2013 at 4:43 pm (12 years ago)I will be doing this for mommy and me aprons for both daughters that have daughters. May have to do a granny and me set too!
Vickie Adkins
July 28, 2013 at 1:52 am (12 years ago)I would love to make the apron for myself and my daughter. Adorable.