 ALL NEW Deco Foil Transfers – Happy Scrapbook Layout by Jessica Michaels
Jessica here jumping in with a quick scrapbook layout featuring the all-new Deco Foil Transfers, stamps and dies!
Happy Scrapbook Layout with Deco Foil
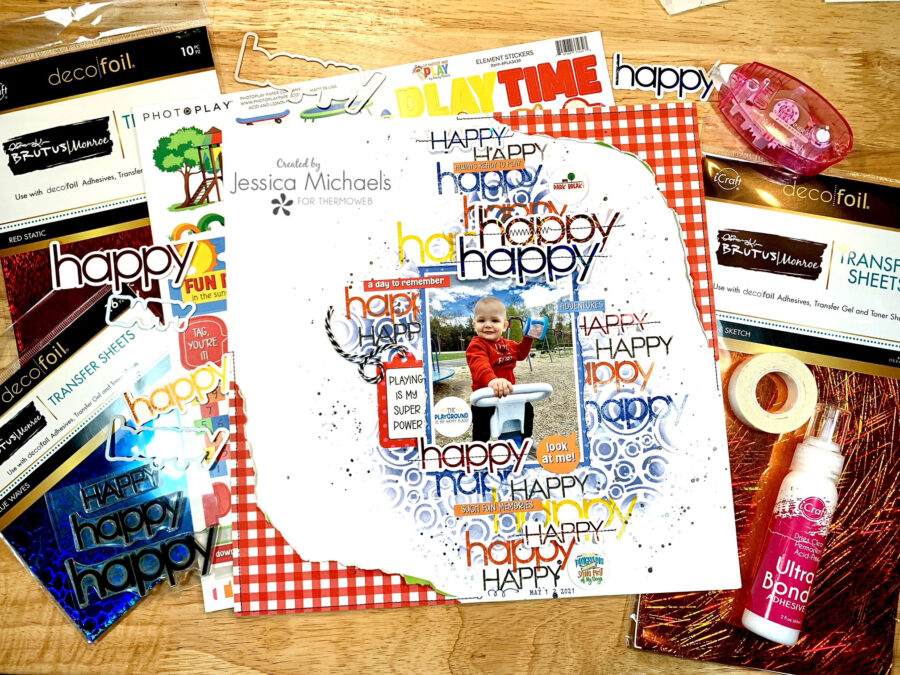
Therm O Web Supplies Used
Memory Runner XL
Memory Runner XL Refill
iCraft Easy Tear Tape 1/2 inch
Brutus Monroe Foil Transfer Sheets, Orange Sketch
Brutus Monroe Foil Transfer Sheets, Blue Waves
Brutus Monroe Foil Transfer Sheets, Red Static
Deco Foil Happy Card Fronts (coming soon!)
Deco Foil Happy Stamps (coming soon!)
Deco Foil Happy Dies (coming soon!)
iCraft UltraBond Permanent Dries Clear Adhesive Pen, 1 fl oz
Other Supplies Used:
Photoplay Paper Go Outside and Play collection
Epoxy Flair from Scrappin Happy Studio
Nuvo Sparkle Spray in Morning Fog
Distress Oxides and inks in Crackling Campfire, Black Soot, Faded Jeans, Mustard Seed, Prize Ribbon
Shimmerz Paintz Inklingz in Oakie Bear Blue
Laminator
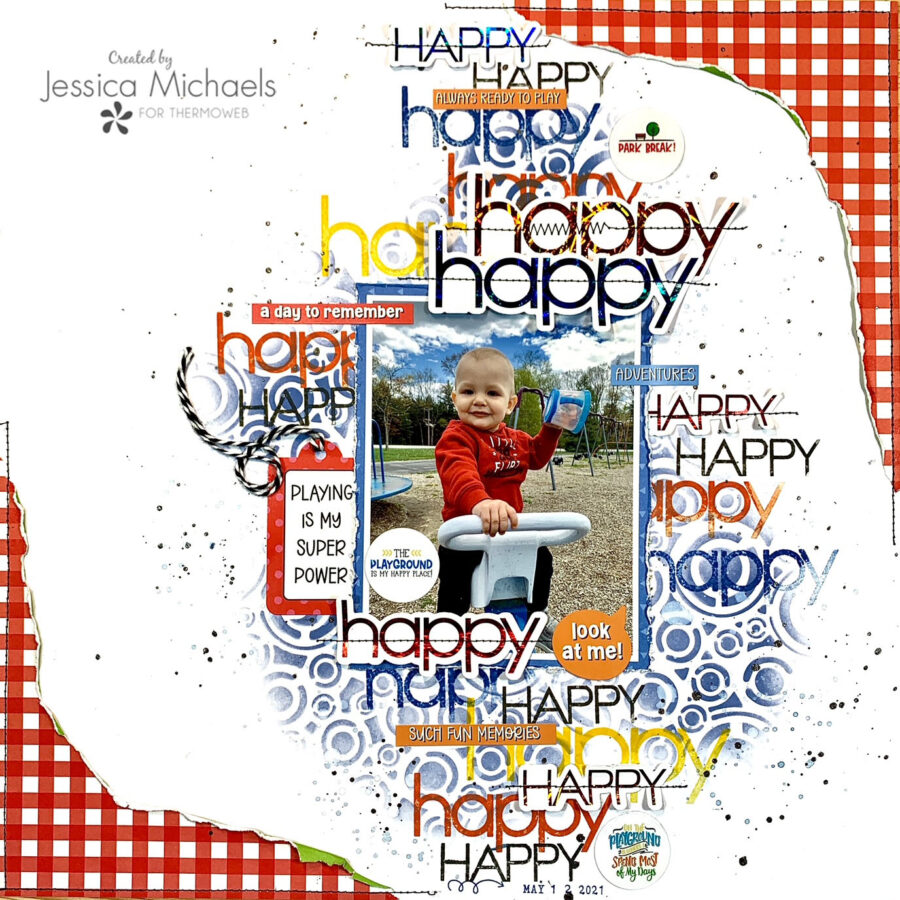
Happy Scrapbook Layout
I started this layout by pulling out the Go Outside and Play collection by Photoplay from one of our previous collaborations as it was just perfect for this sweet photo of my son playing at the park! I ripped some pieces of red gingham paper for the top and bottom corners of my layout and adhered with my tape runner xl.
I then pulled out a stencil by Ciao Bella along with Faded Jeans distress oxide and blended some of the ink onto a piece of white cardstock in random places so they would be behind and around my photo. I’ve also matted my photo with white cardstock, and then a patterned paper from the Photoplay collection, adhering to my page using the easy tear tape.
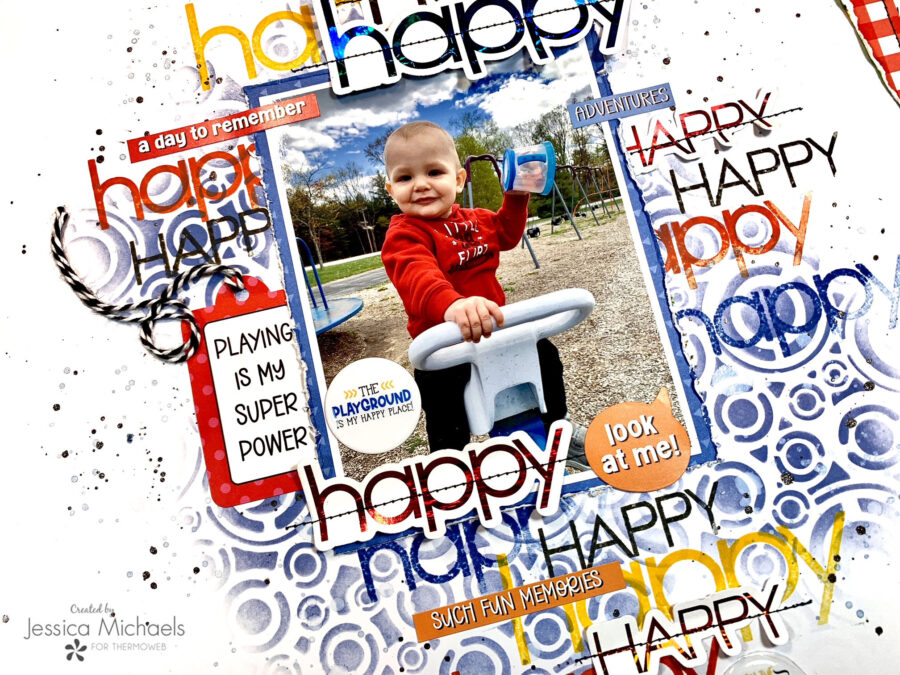
I then pulled out the ALL NEW Deco Foil Happy Stamps, dies and toner card front sheets and went to town! I stamped Happy in various sizes and colors all over the background keeping a vertical design and used Brutus Monroe foil transfer sheets and my hot laminator to foil the toner card front sheets. I just love the sparkle the foil adds to a layout! I then just ran the card fronts through my manual die-cutting machine with the coordinating Happy dies to cut them out. SO QUICK!
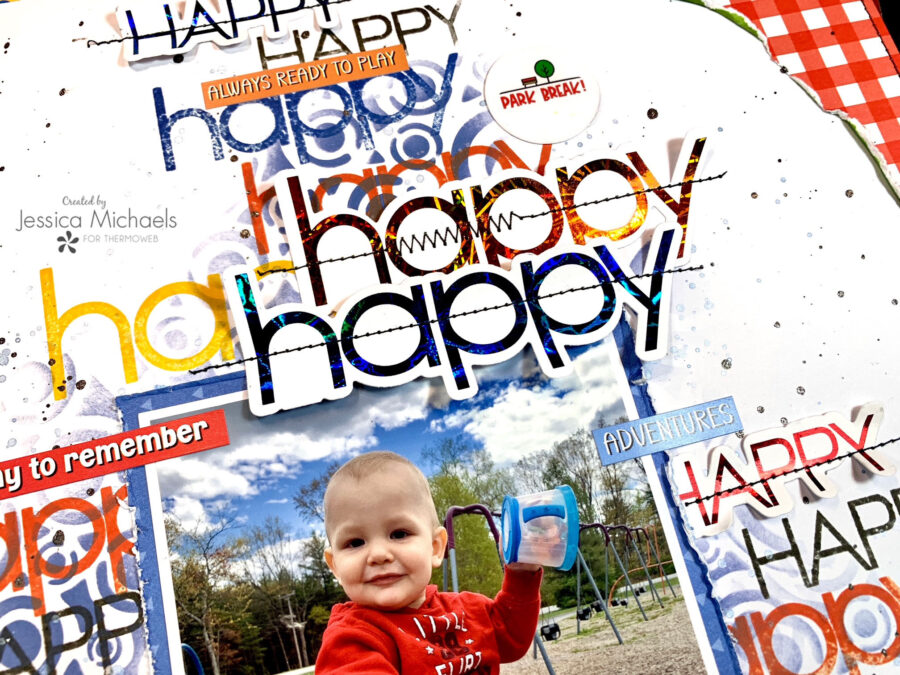 I added some splatters using Nuvo Sparkle Spray in Morning Fog and Inklingz in Oakie Bear Blue. I then attached the die-cut Happy words around my page using just a bit of tape runner and then sewed across them with my sewing machine. I did fluff them up off the page also when I was done for added dimension.
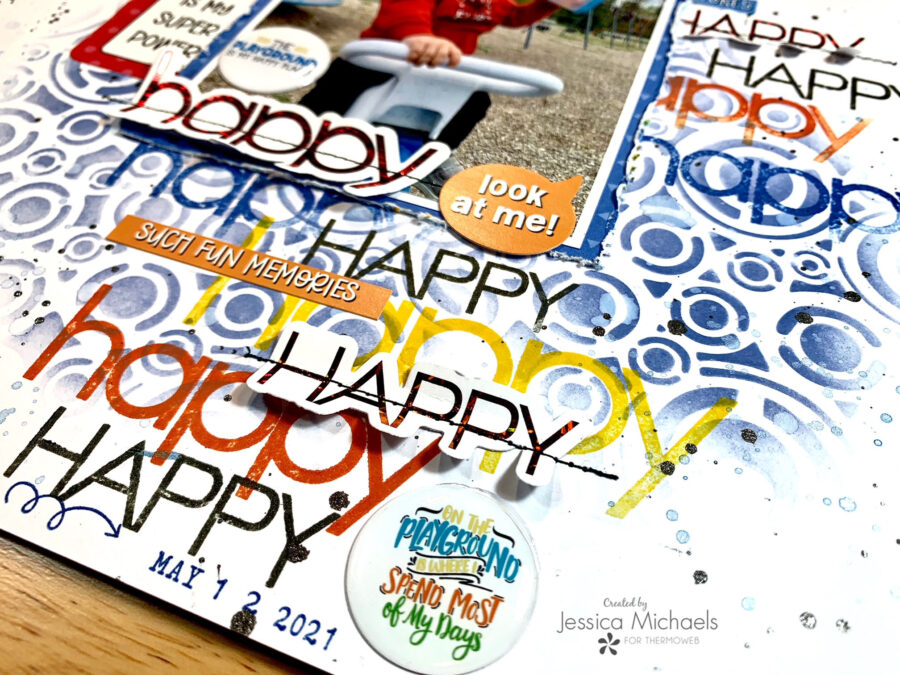
I added a few embellishments from the collection and some epoxy flair from Scrappin’ Happy Studio to finish this one off. This was super fast and anyone can copy these techniques for a quick and fun layout!
I have a process video on YouTube so you can see exactly how this came together!
Happy Scrapbook Layout Video Tutorial
Thank you for being here today and I hope I was able to inspire you to create!
Jessica
This post contains affiliate links. For more information, see our disclosure HERE
While you’re waiting to shop till you drop…take a moment and get entered to win a $40 Gift Card to shop with us! Then be sure to stop by tomorrow for our Instagram Hop, our Facebook Live with Justin and much more!
