When Blend Fabrics asked if I would make alphabet pillows for their booth for Spring Quilt Market I couldn’t have been more thrilled. Carla, here, from Creatin’ in the Sticks and the Blend fabrics are Maude Asbury’s Pen and Paper with whimsical ballpoint pens, paper airplanes, and colorful paperclips. These letter pillows are made sturdy with HeatnBond High Loft Fusible Fleece and HeatnBond lightweight fusible interfacing.
ABC Alphabet Pillows with HeatnBond Interfacing and Blend Fabrics
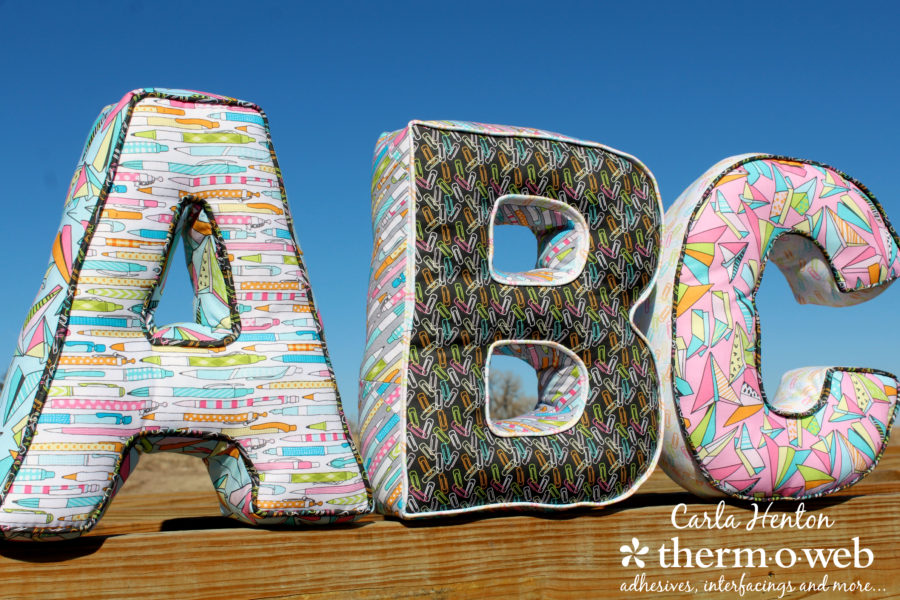
Although I’ve made alphabet letter pillows before, these are quite a bit larger and required bias strips for the sides for the bigger curves. You can find tutorials for JOY Letter Pillows HERE and LOVE letter pillows HERE. The real difference in the ABC pillows is the sides and the patterns for the letters, other than that, you can use those tutorials for your own letters. Let me show you how to make bias strips for the sides of larger letters using HeatnBond interfacing to keep the letters in shape.
ABC Pillows
By Carla Henton at Creatin’ in the Sticks
Finished Size- each letter about 12” x 13”
Supplies:
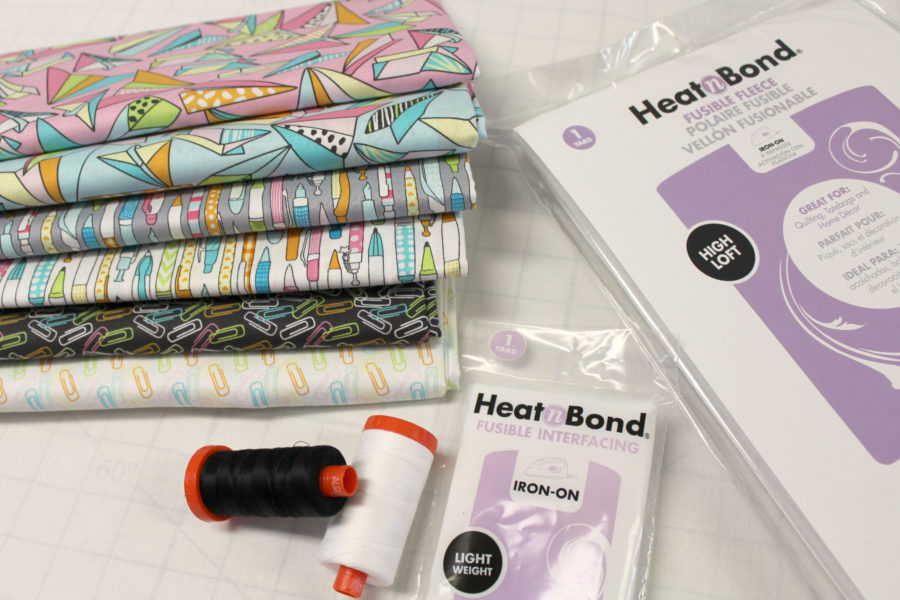
1 – pkg. HEATnBOND® FUSIBLE INTERFACING Light Weight
HeatnBond High Loft Fusible Fleece
Aurifil thread: 50wt #2692, #2024
Piping
Fabric: Maude Asbury’s Pen and Paper
Other supplies:
Scissors
Clips and pins
needle
fiberfill for stuffing the pillow
ruler
iron (I love my Oliso Pro)
sewing machine and other general sewing supplies
Optional: aquarium gravel to weight the letters for display
ABC Alphabet Pillow Instructions:
The letter patterns are made with the font, Franklin Gothic Book and enlarged to about 12″ x 13″. Make the patterns and follow the instructions in the tutorials linked above. The sides of the letters are made with continuous bias strips and the tutorial to make one follows:
Continuous Bias Strip for large letters:
The letter B is about 10″ x 13″ and requires about 68″ of side pieces, including the holes. The sides are 3″ strips for a larger letter, therefore a fabric square of 17 1/2″ is needed to yield 72″ of the bias strip. A 22″ square makes 150″ of the bias strip. The three letters here all require around 60″ of side strip.
Step 1:
Cut a 17 1/2″ square of fabric.
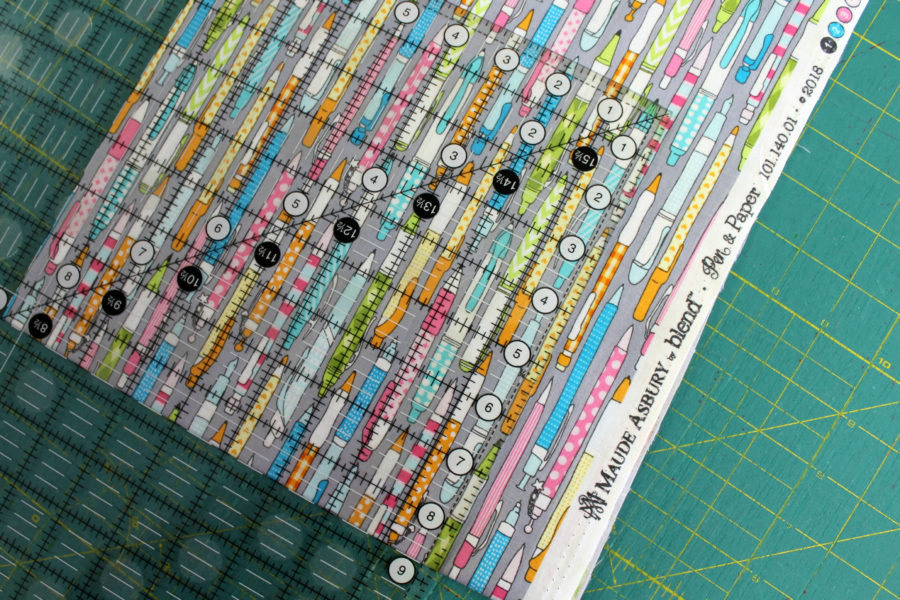
Tip: To cut a square larger than the ruler, fold and press the fabric twice. Next, place the ruler on the folds. 17 1/2″ divided by 2 is 8 3/4″, therefore that is where the ruler is placed to make the cut.
Now, cut the square in half diagonally.
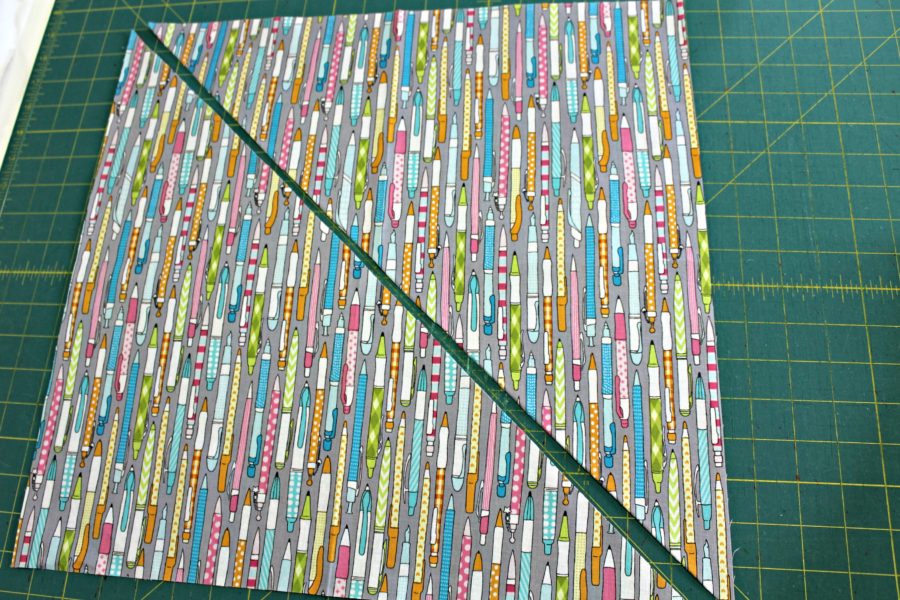
Take the bottom left triangle and flip it over to line up the bottom edge with the top triangle, right sides together, and pin. Make sure to offset the 1/4″ points.
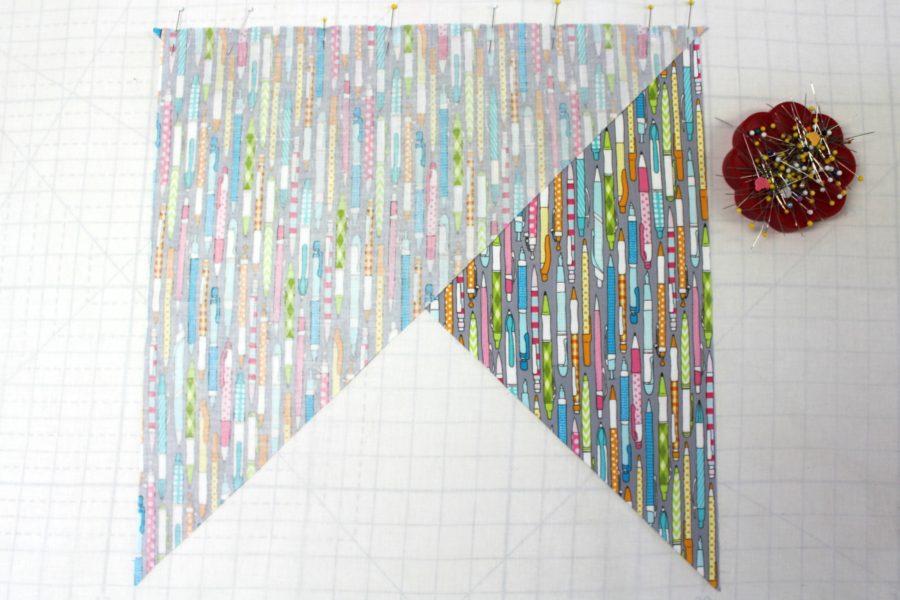
After the unit is pinned, stitch the 1/4″ seam. Next, press the seam open with an iron.
Step 2:
Mark a line every 3″ on the wrong side of the fabric as shown.
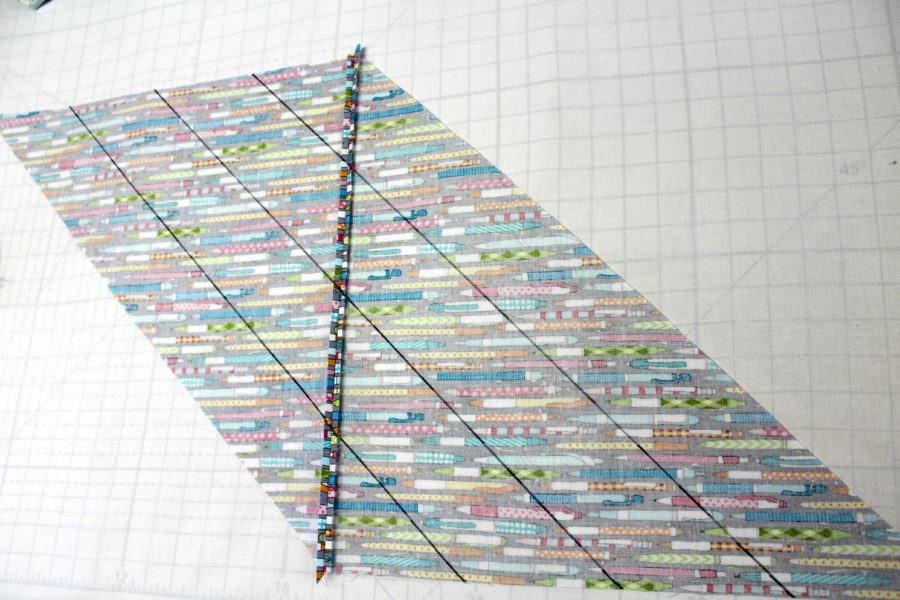
Now, flip the fabric over so the right side of the fabric is showing. Fold one corner over, as shown.
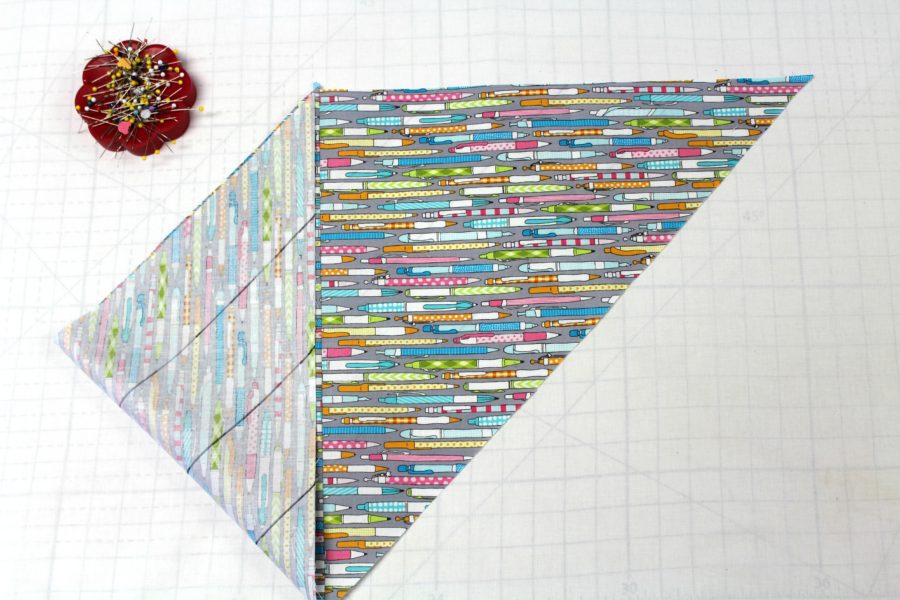
Just as before, fold the other side over.
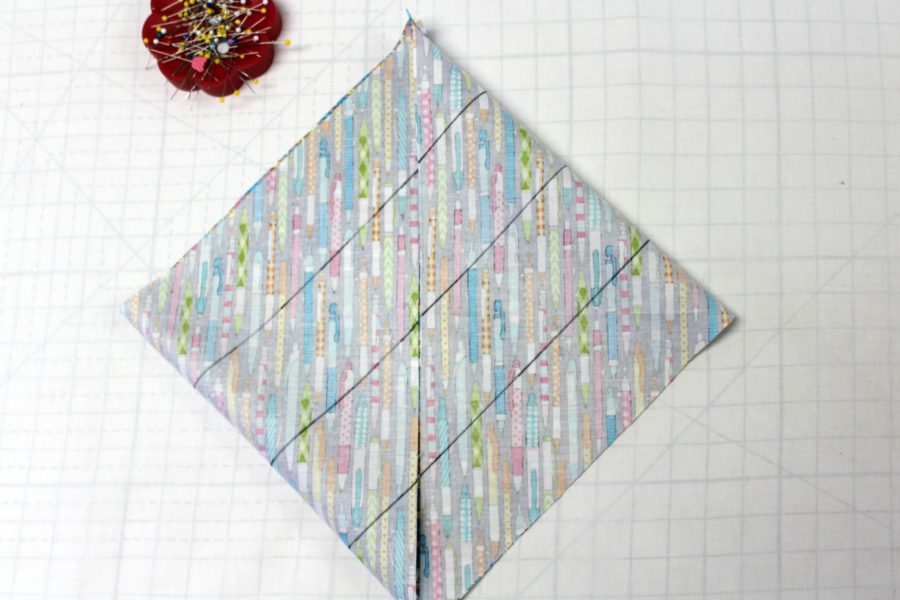
Now, offset the lines.
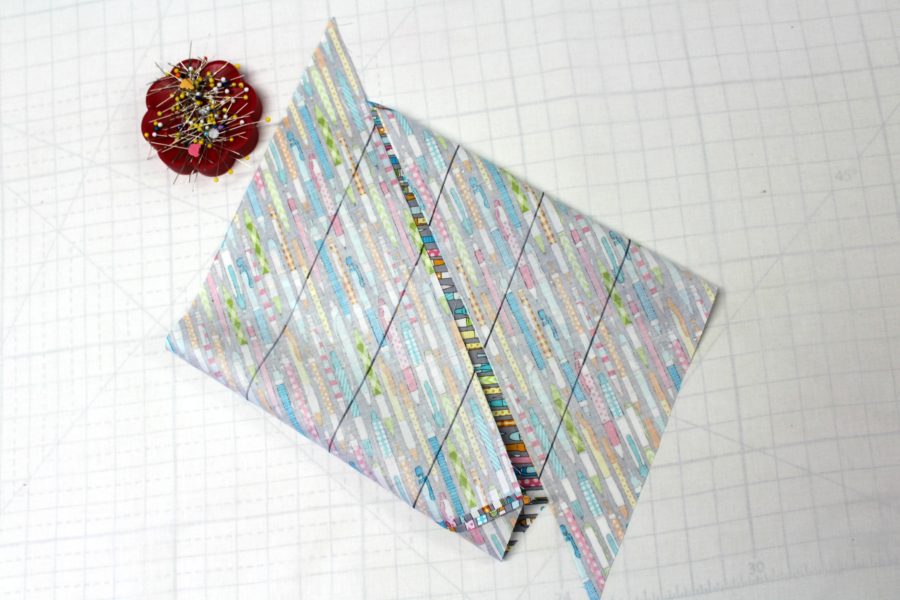
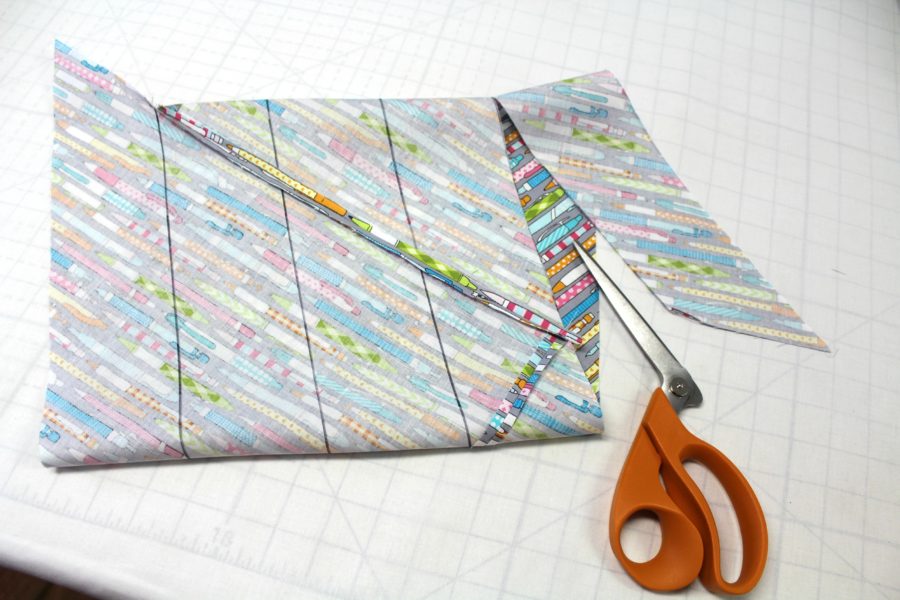
The next step is to pin the raw edges with right sides together. Make sure the lines cross 1/4″ from the raw edge. Stitch the 1/4″ seam and press the seam open. Now cut on the drawn lines to make the 3″ continuous bias strip.
Step 3:
Open the package of HEATnBOND® FUSIBLE INTERFACING Light Weight
and without unfolding the interfacing, cut three 2 1/2″ pieces.
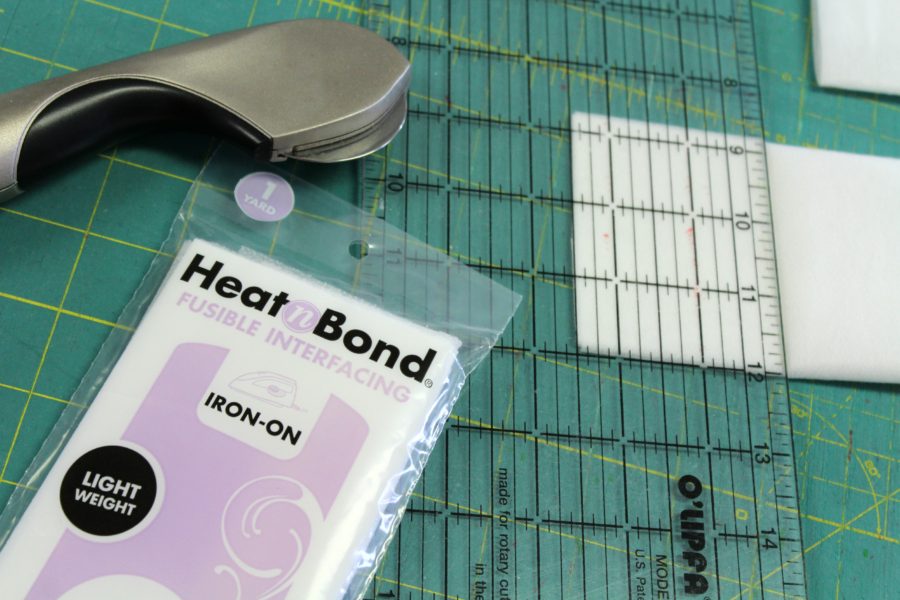
Center the strips of interfacing in the middle and on the wrong side of the continuous strip with the adhesive (bumpy) side down. Follow the package instructions to bond the interfacing to the strip. The interfacing will stabilize the center of the strip but the edges will still be stretchy as they are stitched around the edges of the letters.
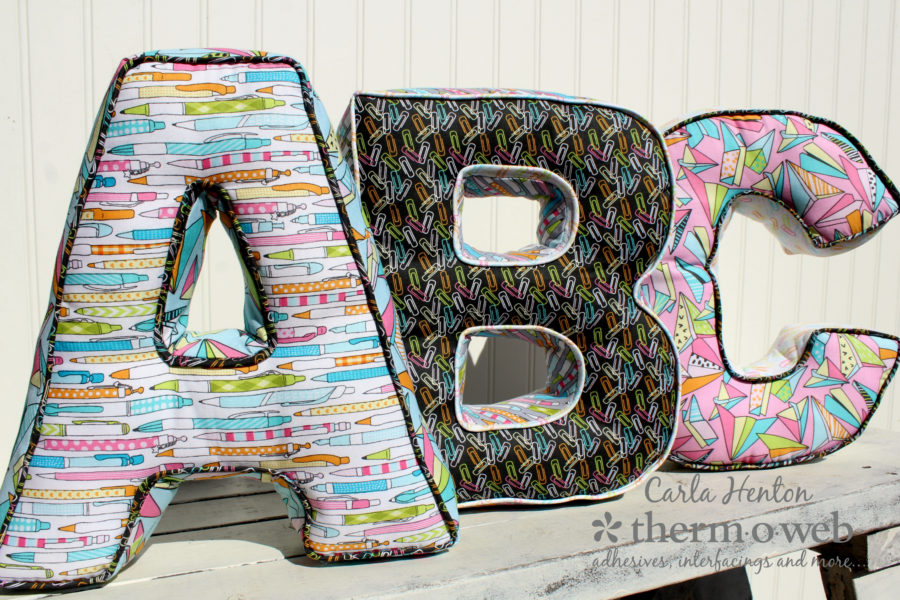
Think of all the possibilities with letter pillows They are so fun in Blend fabrics.
Carla

Carol Kussart
June 5, 2018 at 5:59 am (7 years ago)These pillows are awesome! I love the fabric line–Blend Fabrics should be very pleased, and how neat that they will display them in their booth! Thanks for another great project.