


 Santa is coming! Are you ready to show him some love? Carla at Creatin’ in the Sticks is on the blog today to share a free pattern for this fun and trendy quilted Santa Gnome pillow. Stitch it up with HeatnBond to share the joy of the season. Who wouldn’t love a Quilted Santa Gnome Pillow with HeatnBond?
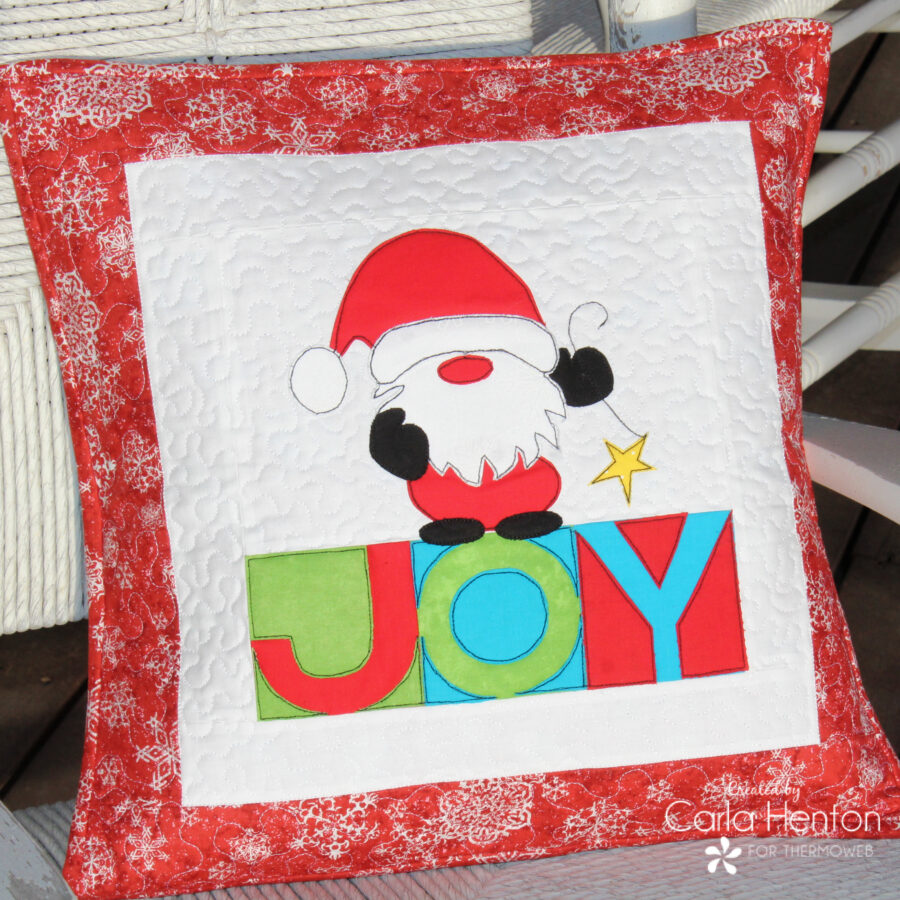
Quilted Santa Gnome Pillow with HeatnBond
by Carla at Creatin’ in the Sticks
Unfinished Size: 16 ½” X 16 ½” Finished Size: 16” X 16”
please read through the complete instructions before starting.
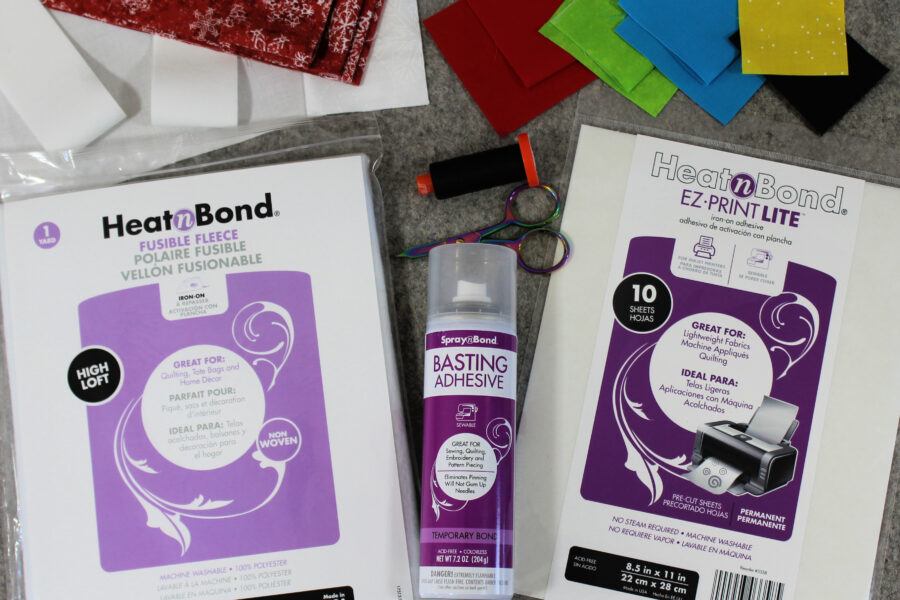
Santa Gnome Pillow with HeatnBond Supplies
Pattern – free download: Santa Gnome Mini Quilt – Creatin in the Sticks
HeatnBond EZ Print Lite iron-on adhesive – 1 sheet,
Cotton Fabric
White fabric:
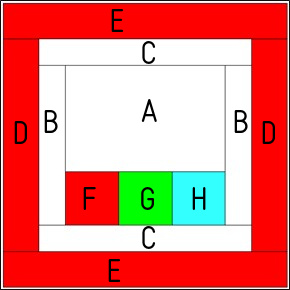
A – One 9 ½” x 6 ½” rectangle for background B -Two strips 2” x 9 ½” and C – two strips 2” x 12 ½” for first border
Small scraps for applique.
Red fabric:
D – Two strips 2 ½” x 12 ½” and E – two strips 2 ½” x 16 ½”
F – One square 3 ½” for background patchwork
Small scraps for applique.
Green fabric:
G – One square 3 ½” for background patchwork
Small scraps for applique.
Teal fabric:
H – One square 3 ½” for background patchwork
Small scraps for applique.
Black and Yellow fabrics:
Small scraps for applique.
Quilt Backing fabric:
One square 17 ½”
Binding fabric:
Two strips 2 ½” x width of fabric
Other Supplies:
Ink Jet Printer, Iron (I love my Oliso), Sewing machine, Aurifil Thread 50 weight #2692,
Sharp scissors, and other basic sewing supplies
Optional Pillow supplies:
2 fabric rectangles for pillow backing – 16 ½” x 10 ½”
One 16” pillow form
Santa Gnome Pillow with HeatnBond Instructions
Prepare Background:
All seams are stitched at ¼” unless stated otherwise.
Stitch the F, G, and H squares right sides together as shown to form a 9 ½” x 3 ½” unit.
Press the seams open. Once the squares are stitched together, sew the A white rectangle to the top of the prepared unit and press. This unit measures 9 ½” x 9 ½”.
Next stitch the B strips to the sides and the C strips to the top and bottom and press. Finally, stitch the D strips to the sides and the E strips to the top and bottom. The final unit should measure 16 ½” x 16 ½”.
Make the Quilt Sandwich:
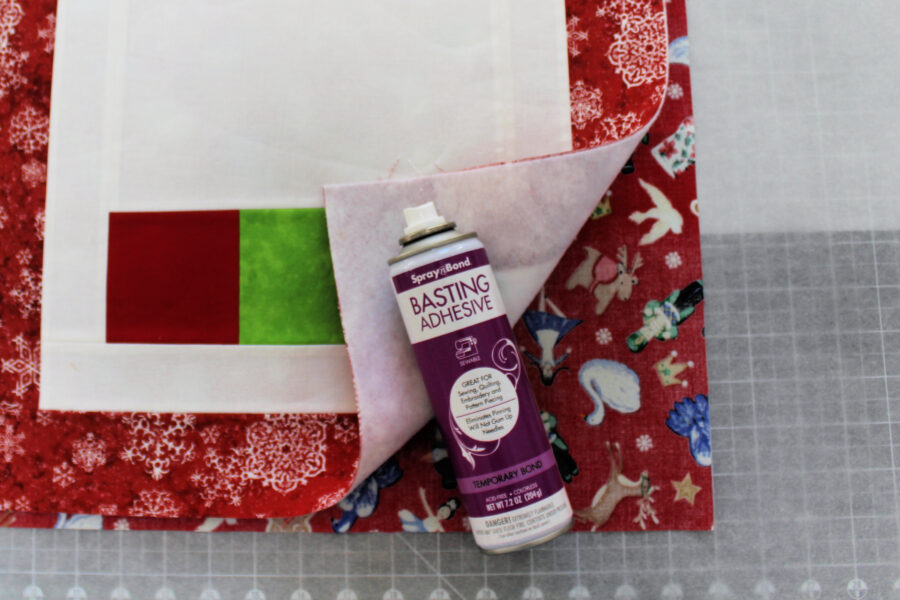
Cut one square of HeatnBond Fusible Fleece 16 ½”.
Follow the SpraynBond basting adhesive package instructions to bond the fleece to the wrong side of the 16 ½” background unit. Before applying the gnome and letter appliques, make the quilt sandwich by attaching the backing fabric with SpraynBond Basting Adhesive. By attaching the backing fabric now, part of the quilting is accomplished while the applique pieces are stitched.
Santa Gnome with HeatnBond Applique Instructions:
Prepare the applique patterns
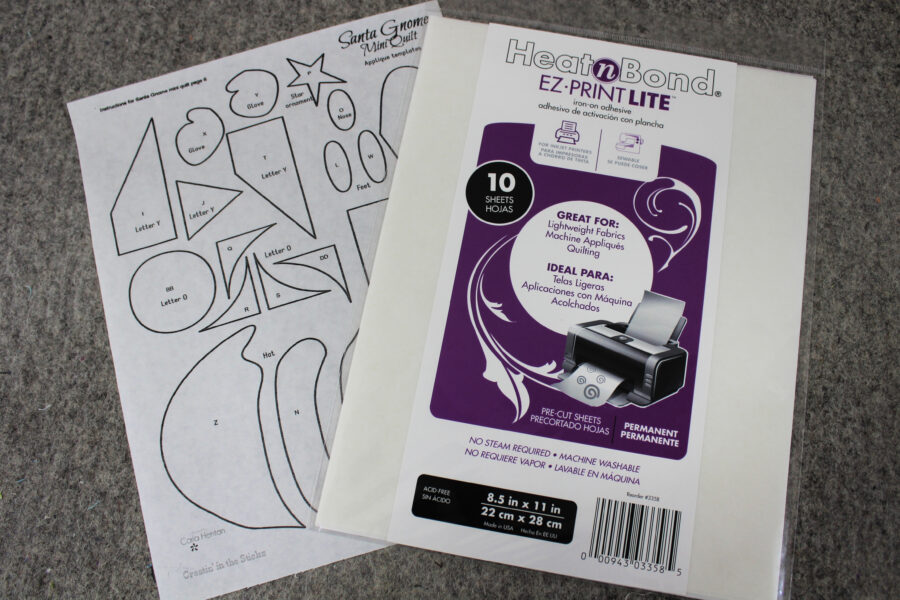
Using HeatnBond EZ Print Lite sheets, the first step is to print the applique pattern pieces (included with the free download above) with your inkjet printer. The patterns have been reversed for you. NO TRACING! How awesome is that?
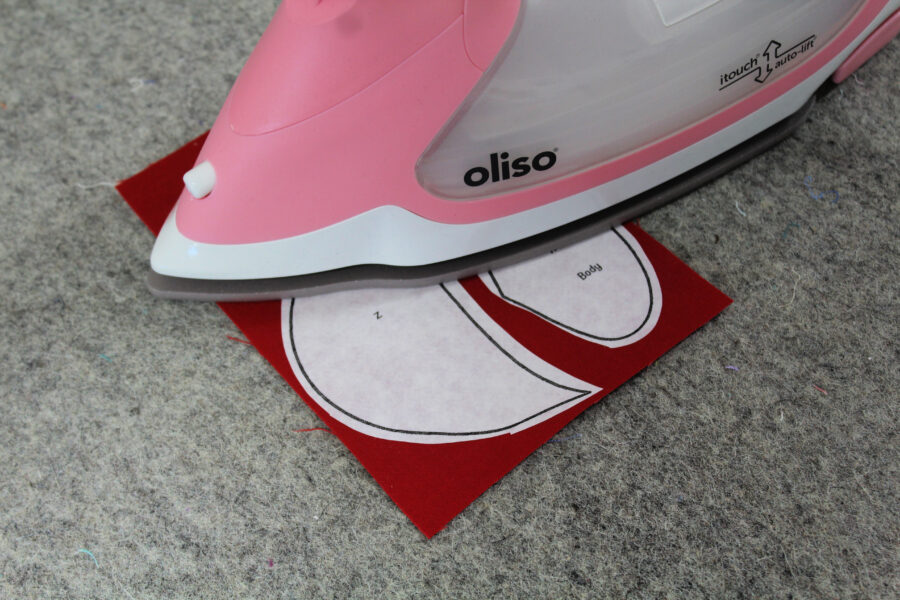
Follow the steps in the HeatnBond EZ Print Lite package instructions for printing and bonding the HeatnBond to the wrong side of the fabrics.
Tip: When a light-colored fabric is used as an applique, prevent “show through” by bonding lightweight fusible interfacing on the wrong side of the fabric before bonding the HeatnBond Lite. Fuse the HeatnBond lite onto the interfacing and continue as with all appliques.
Cut out all applique pieces on the solid black lines, peel off the backing paper, and place the applique pieced with the adhesive side down on the 16 ½” x 16 ½” background fabric unit. The applique template placement key is included in the free download pattern above.
Bond the Applique Pieces to the Background
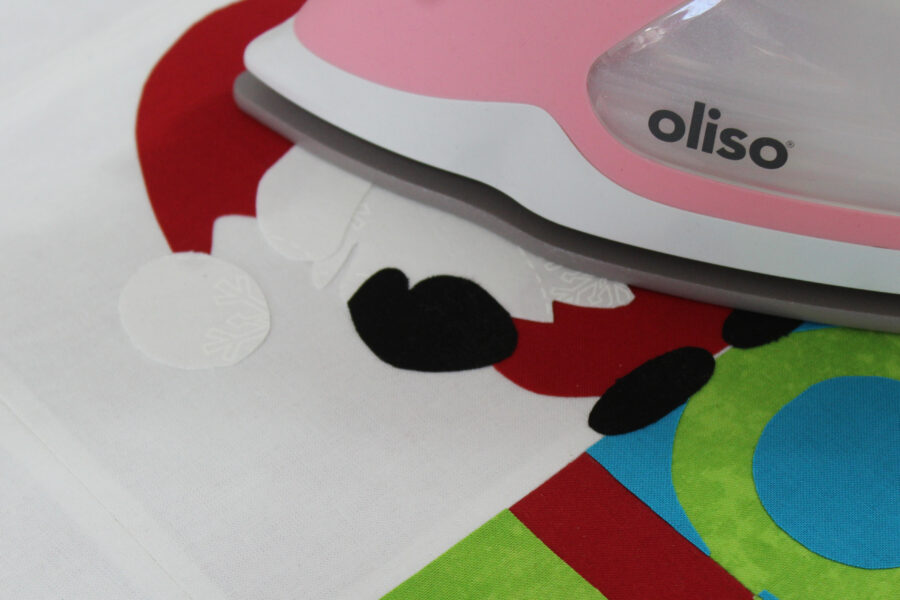
Following the HeatnBond EZ Print Lite package instructions, work in sections to press the applique to the background until the entire applique is fused.
Stitch around appliques
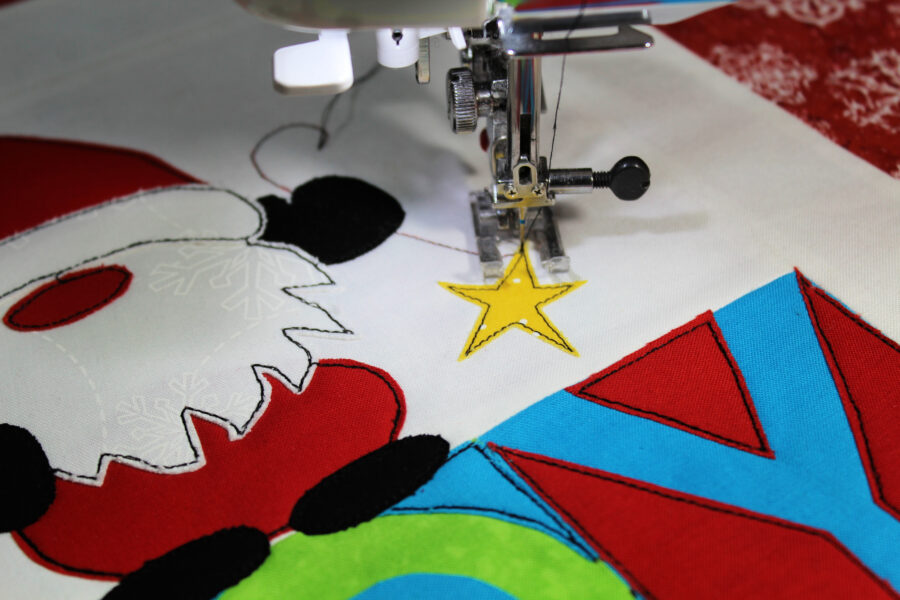
The last step for the applique is to use a straight stitch to stitch around each applique piece twice. Machine stitch the star string using the key as your guide.
Finish:
Quilt as desired and trim away excess backing fabric. If a quilt is desired, add the binding.
Santa Gnome Pillow with HeatnBond Finish
The last steps to finishing the quilt as a pillow cover are to make the back envelope and bind it. Make the envelope back by hemming one 16 ½” side on each of the pillow backing rectangle pieces.
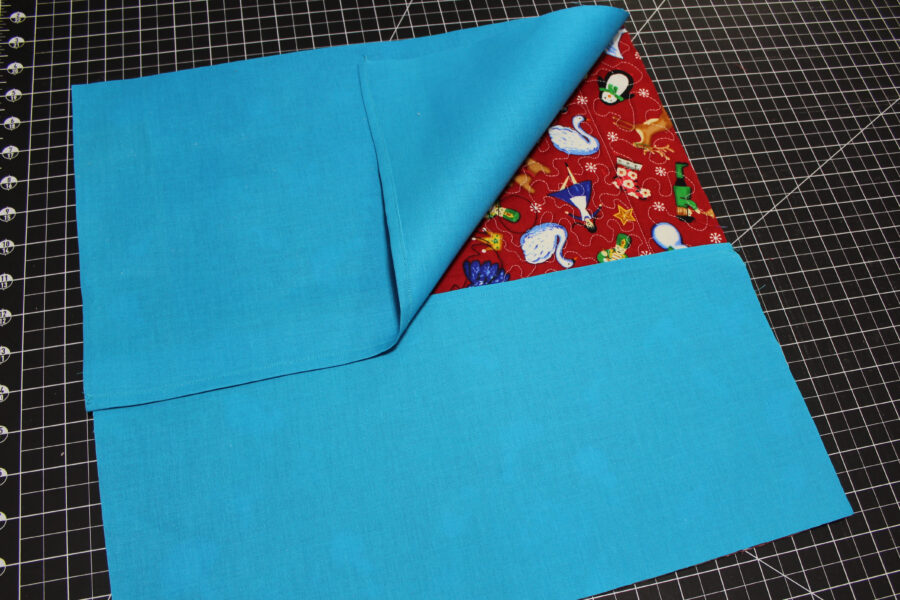
The next step is to place both hems in the middle of the back of the quilt, lining up the raw edges with the quilt top backing fabric. Pin and baste around the pillow cover 1/8” from the edge. Finally, apply the binding and stuff the Quilted Santa Gnome Pillow with HeatnBond cover with the 16” pillow form.
Pure joy!
![]()
So many of you have enjoyed the free gnome quilt patterns I have here on the ThermOWeb blog. Therefore, I thought we should have one for winter too. Thus we have this Quilted Santa Gnome Pillow with HeatnBond.
Be sure to grab the Hello Fall! and the Happy Spring free gnome quilt patterns.
Merry Christmas!
Carla
Carol Kussart
December 13, 2022 at 6:04 am (1 year ago)Sew cute, Carla! I hadn’t been that crazy about gnomes, but they’re growing on me since I’ve made several. Now this cute pillow to add to my collection! Thanks for sharing!
Carla
December 13, 2022 at 7:53 am (1 year ago)Thank you so much!! Be sure to check out my other gnomes too.
Kathleen McCormick
December 13, 2022 at 4:47 pm (1 year ago)This is a fabulous addition to the gnomes you have done before and so perfect for Christmas. They do always make me smile! I may just have to drop everything and make it!
Carla
December 15, 2022 at 5:42 am (1 year ago)Thank you, Kathleen! I can’t wait to see your Santa gnome!