


Hello everyone! Justin here and I am stomping onto the Therm O Web Blog today just roaring with excitement to be sharing the card that I created for our Dinosaur Week! I had so so much fun creating this card, and, for the very first time, I colored my Transfer Gel Blanco to use for my project!
Dino-Mite Birthday Card with Deco Foil
This post uses affiliate links at no additional cost to you! By clicking the links in this post, I earn a small commission should you make a purchase. Thank you in advance!
Let’s start with a list of products that I used to create today’s card:
Therm O Web Products Used:
Deco Foil Transfer Gel Blanco
Deco Foil – Emerald Watercolor
Toner Card Fronts – Rainbows Galore
Deco Foil Transfer Flock – Green Envy
UltraBond Permanent Adhesive
iCraft 3D Foam Tape – 1/16″ in White
Pixie Tape
Other Products Used:
Copic Markers
Dino Friend Stamp Set & Coordinating Dies by PhotoPlay
Distress Inks: Vintage Photo, Ground Espresso, Squeezed Lemonade, Wild Honey, Crackling Campfire, & Uncharted Mariner
Vintage Photo Distress Oxide Ink
Stitched Pond Lawn Cuts by Lawn Fawn
Tropical Leaves Lawn Cuts by Lawn Fawn
Leafy Green Stencil by Miss Ink Stamps
Snowfall Embossing Powder by Kindred Stamps
Embossing Ink Pad by Kindred Stamps
Not So Heavy Metal Sequins
Sandy Beach Cardstock
Of course, I have a step-by-step tutorial to share with you for inspiration on how to make your very own foiled, flocked, and textured dino project!
Dino-Mite Birthday Card Tutorial
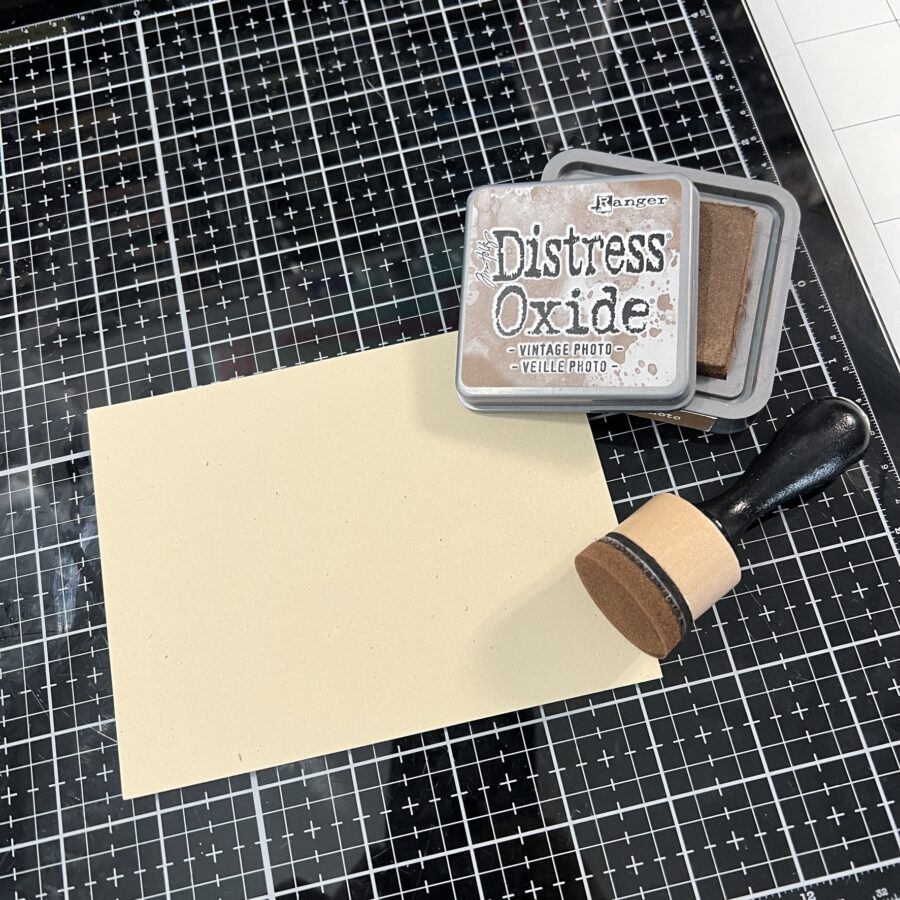
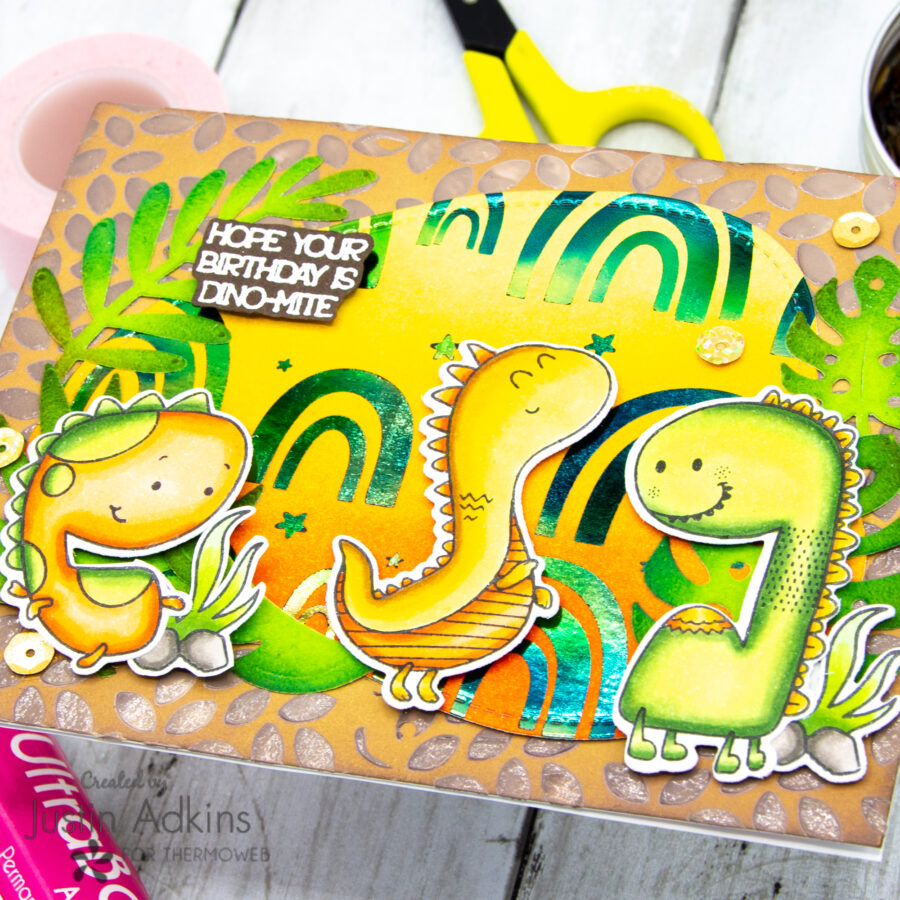
I started this project by coloring up my images, die-cutting them out, and setting them aside. I took an A2-sized piece of Sandy Beach cardstock by Gina K. Designs and ink blended the edges with Vintage Photo Distress Oxide Ink.
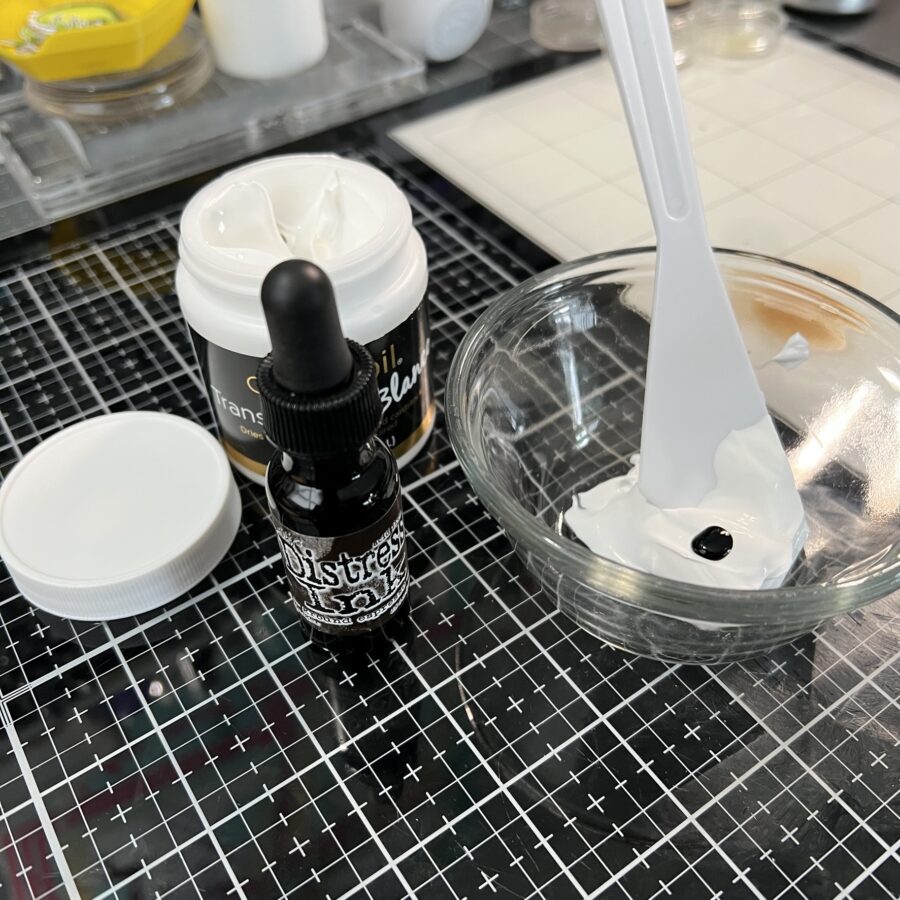
Next, I grabbed a glass dish and put about 1 tablespoon worth of Deco Foil Transfer Gel Blanco, and 10 drops of my Distress Ink Ground Espresso Re-Inker. I mixed this up with a palette tool until the coloring was consistent throughout.
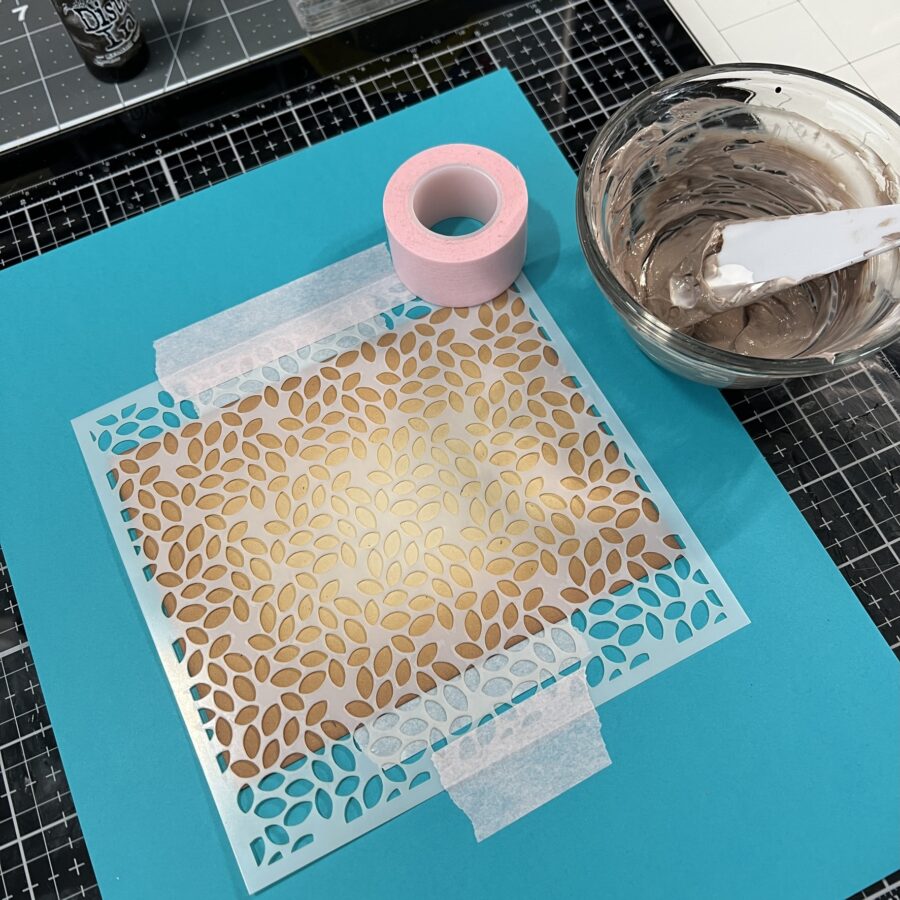
Using Pixie Tape, I tacked down my Leafy Green Stencil to my card front and used my Palette Tool to spread my colored Transfer Gel Blanco. I usually use a Stencil Pal for this step, but I was going for more of a sloppier look for my application and decided to use my palette mixing tool since it had a smaller edge. After applying my Blanco (which was now a taupey-brown), I removed my stencil, set aside my card panel to dry, and washed out my bowl, tool and stencil immediately.
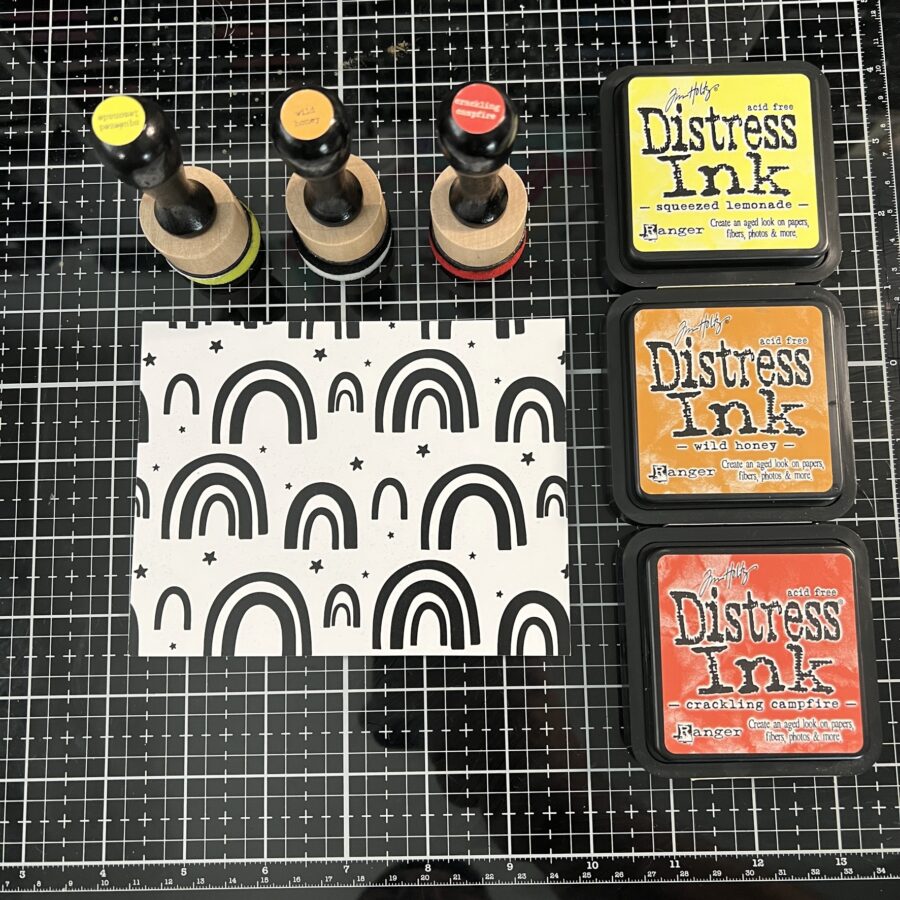
I then moved on to my Toner Card Front panel. I blended Squeezed Lemonade, Wild Honey & Crackling Campfire Distress Ink in a horizontal ombré on top of the starry-rainbow pattern from the Rainbows Galore Toner Card Fronts.
‘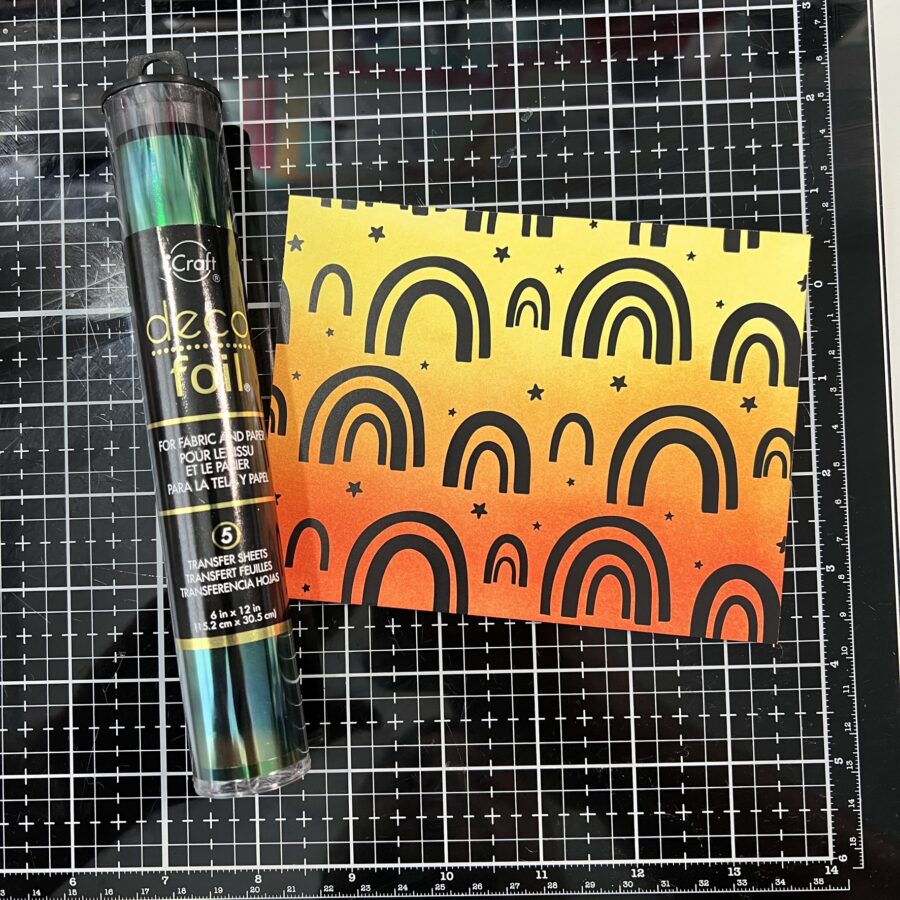
I then used my rotary trimmer to cut a piece of Emerald Watercolor Deco Foil that would fit over my panel. I wiped the top of my toner card front and the back of my foil with a microfiber cloth, placed it into my Craft & Carrier Sheet Sandwich, and processed it through my laminator (which had been turned on and was heating up for about a half-hour at that point).
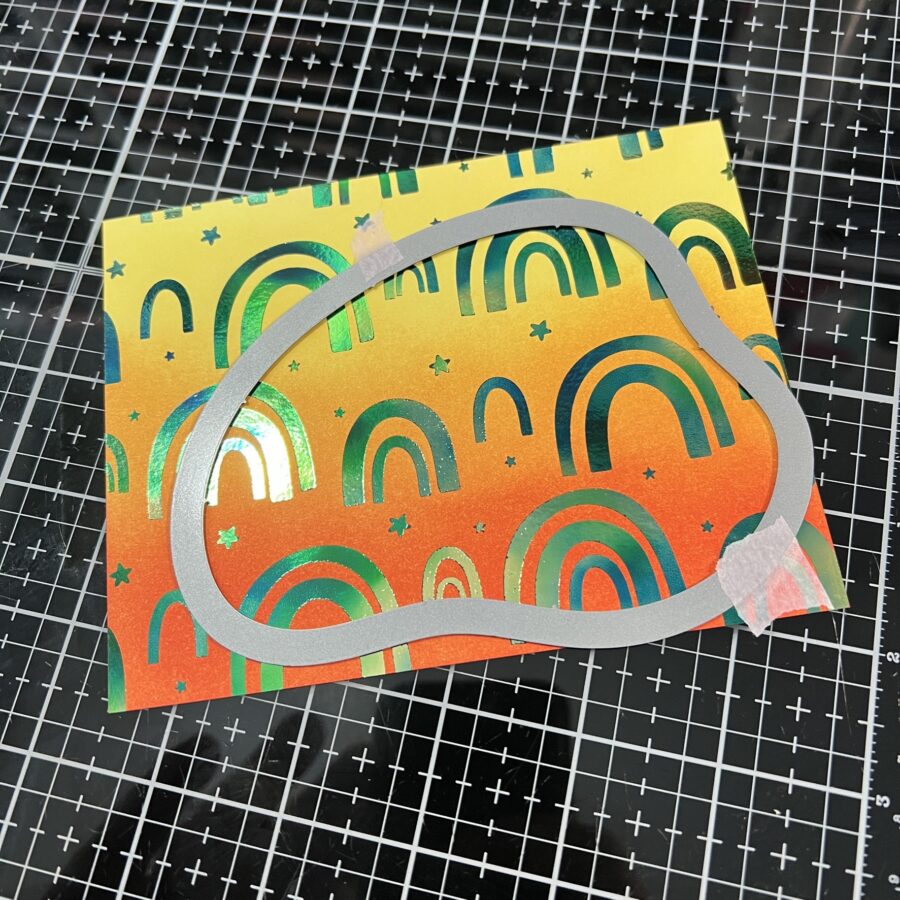
Using my Stitched Pond Die Cut, I die cut the shape from my foiled toner card front by using Pixie Tape to tack down my die.
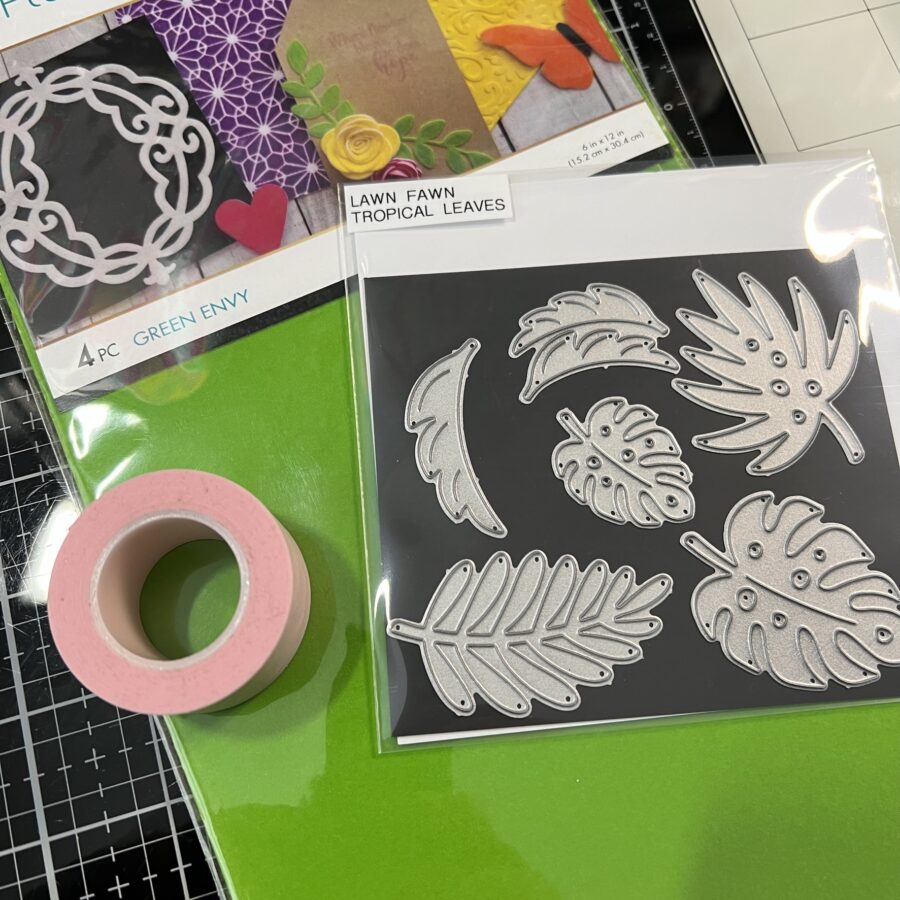
Next, I die-cut 5 different leaves from my Tropical Leaves Die Cut set with Green Envy Flock. I also used Pixie Tape to tack down my dies to the flock as well.
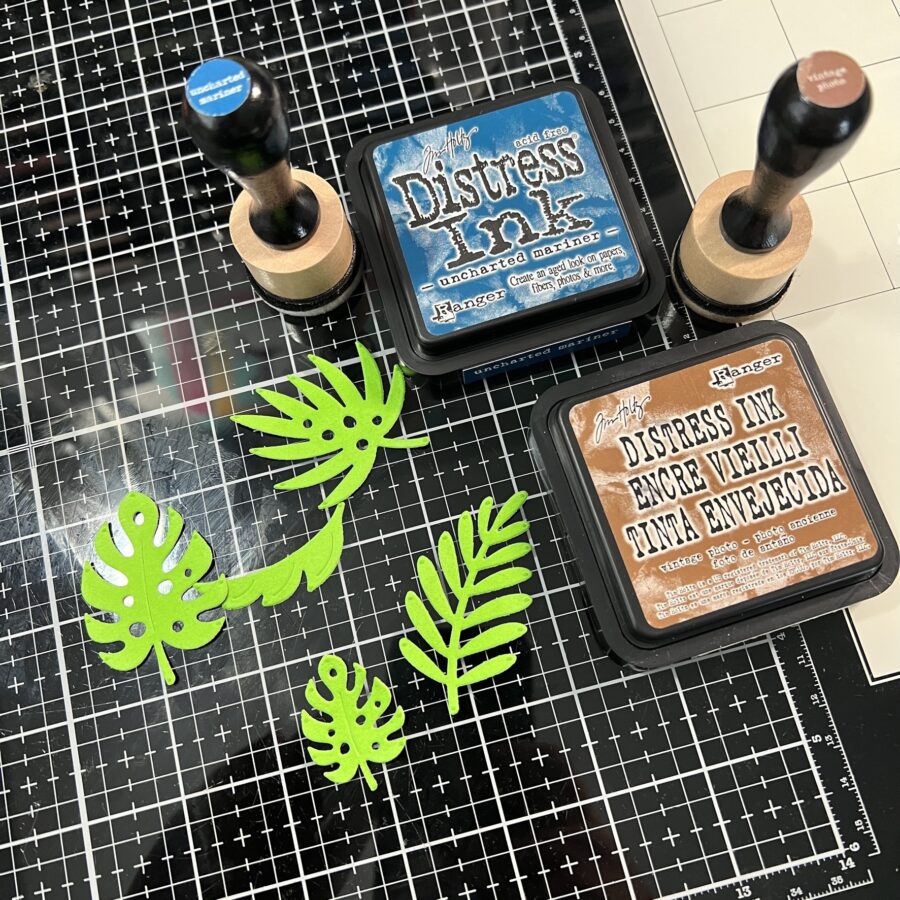
Once die-cut, I used a combination of Uncharted Mariner & Vintage Photo Distress Inks to distress my flocked tropical leaves.
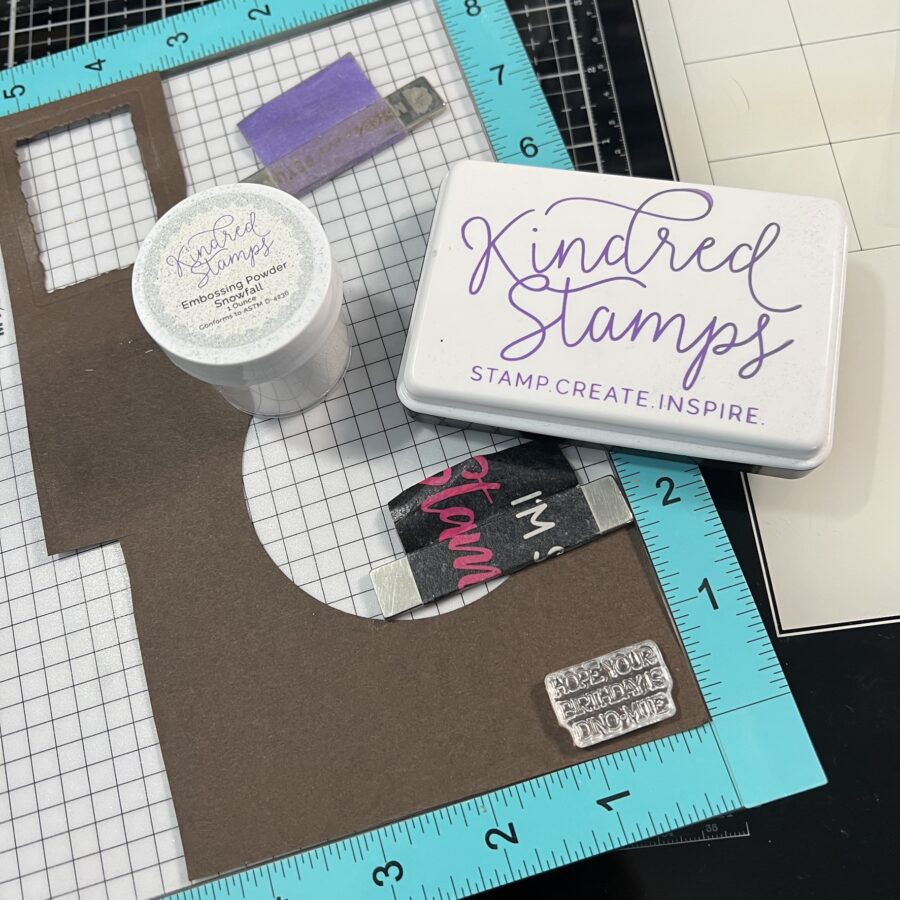
I heat embossed my sentiment in Snowfall embossing Powder onto white cardstock and then fussy cut the sentiment out.
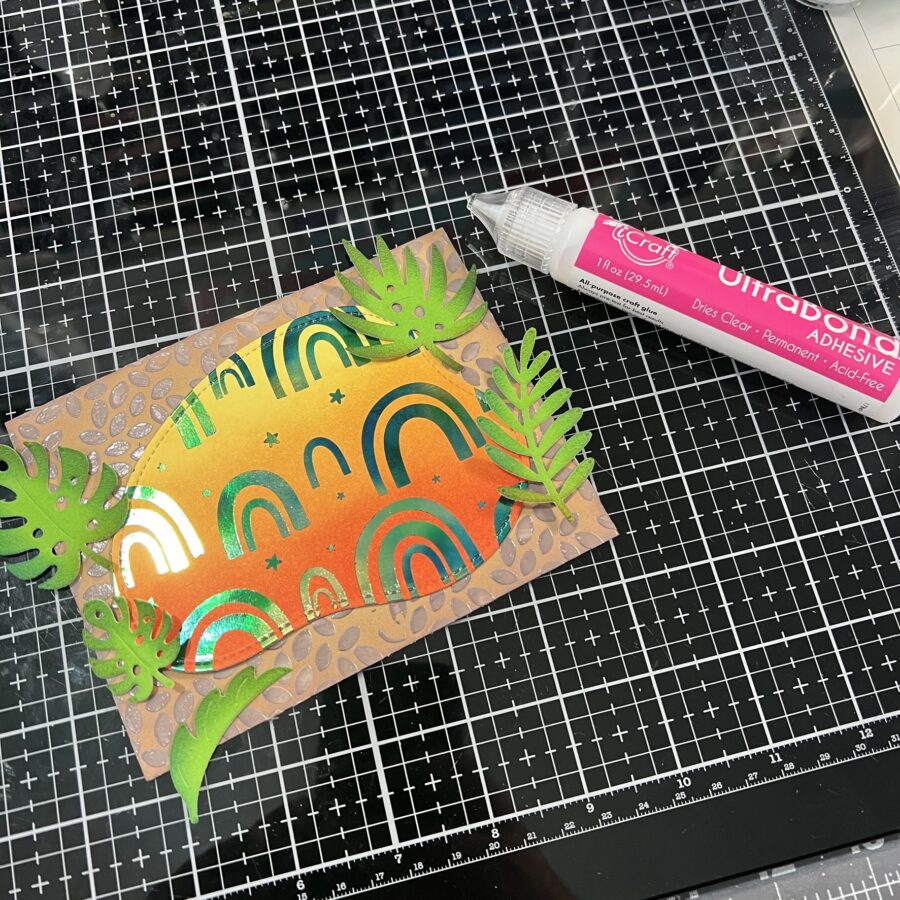
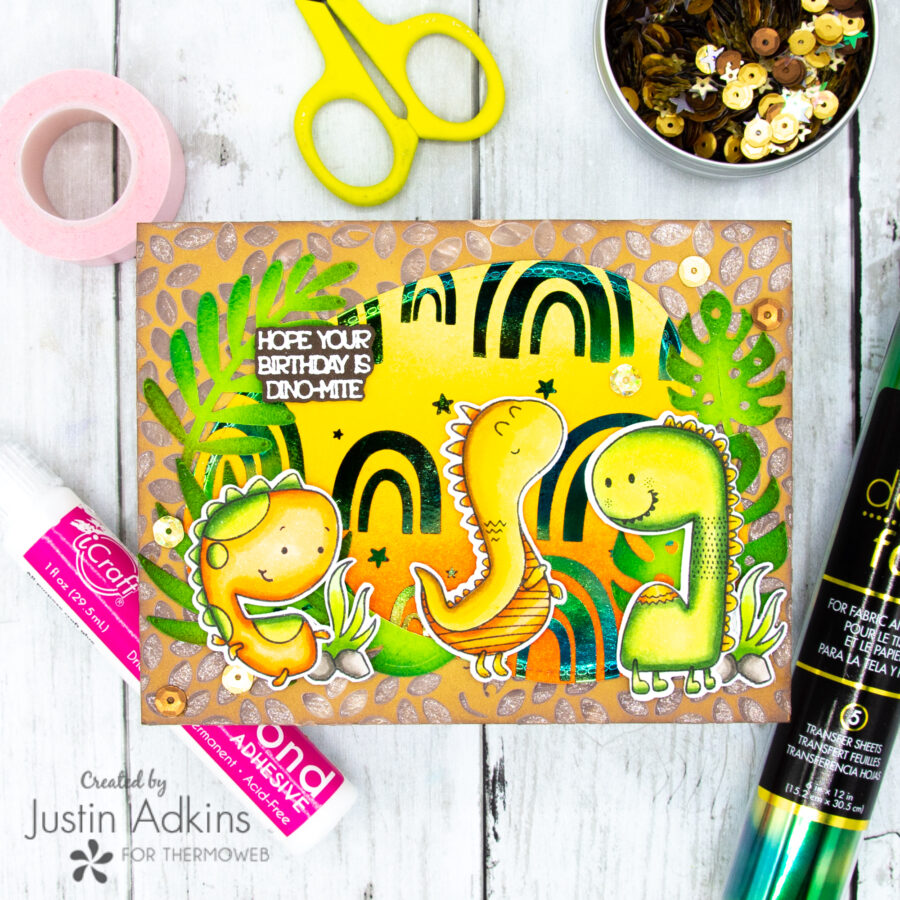
Using UltraBond Permanent Adhesive, I adhered my foiled pond die cut, followed by all (5) flocked tropical leaves to my dried card front.
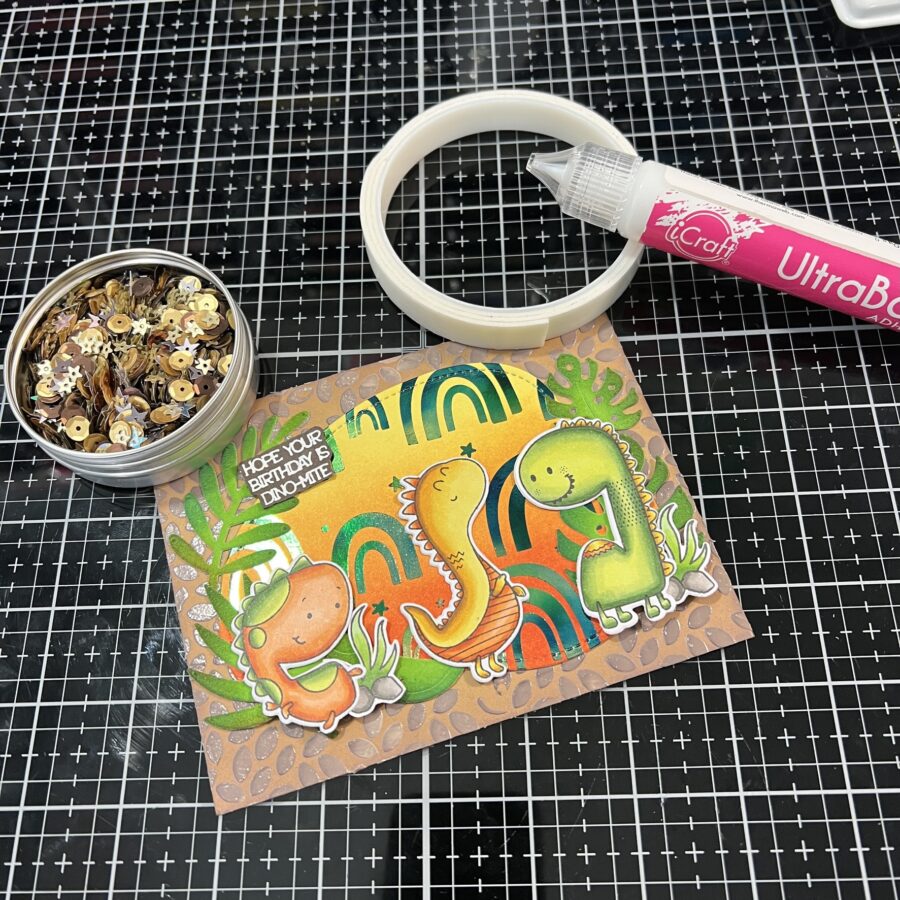
I finished up my card by adhering to my dinosaur images and sentiment with foam tape, and by adhering to a few sequins using UltraBond Permanent Adhesive.
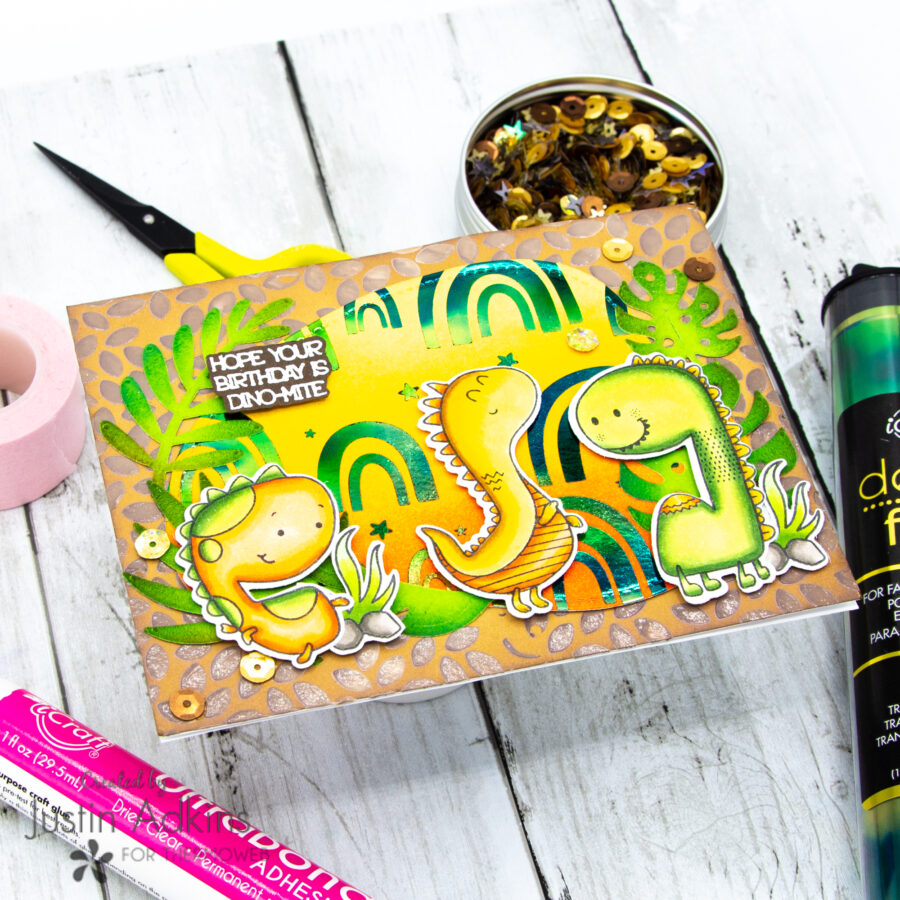
And there you have it! A completed dino-themed birthday card! Below are a few more images of my final result!
Thank you so much for stopping by the Therm O Web blog today! I hope you got some inspiration on your next prehistoric crafty project!
For more crafty inspiration, please follow me on Instagram and check out my personal blog as well!
Thank you again and happy crafting!
Justin
Be sure to join us Wednesday night, July 13th for a Live with Katrina Hunt in our Therm O Web Facebook Group. We’ll be live at 7pm CT and hope you’ll join us. Can’t make it? No worry you can watch the replay! Just click the link to join the fun!
