


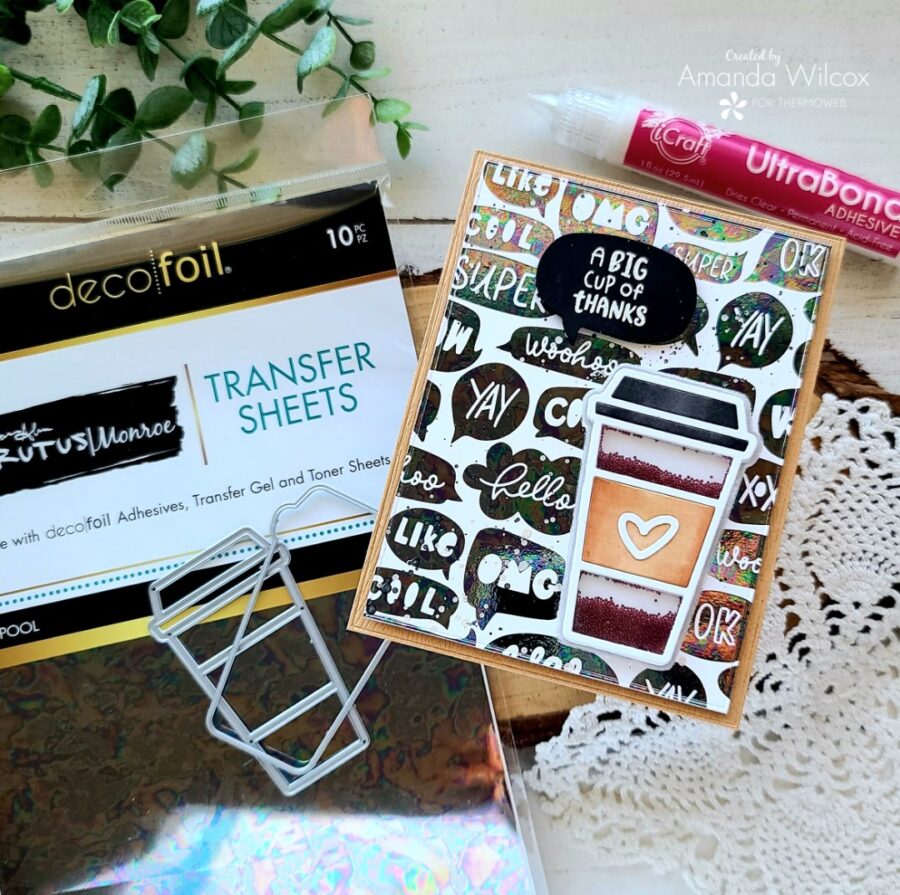
 Hi again! It’s Amanda from Twiddler’s Nook sharing a super fun coffee-themed thank you card with a sweet little shaker cup to add some pizazz to the MIX! Literally, because I’m using one of the new super awesome Brutus Monroe Toner Mixables card fronts too!
Cup of Thanks Shaker Card
Products used today:
Brutus Monroe Toner Mixables – Really Radiant
Brutus Monroe deco foil – tide pool
Deco Foil Parchment Paper
iCraft Ultra Bond glue pen
iCraft XL tape runner
3D foam tape roll
foam squares
Trinity Stamps Cut and Foil Coffee die set
Trinity Stamps Embossed Edge Rectangle dies
Newton’s Nook Speech Bubble dies
Newton’s Nook Newton’s Mug stamps
Twiddler’s Nook Pixie Dust micro beads – Fawn
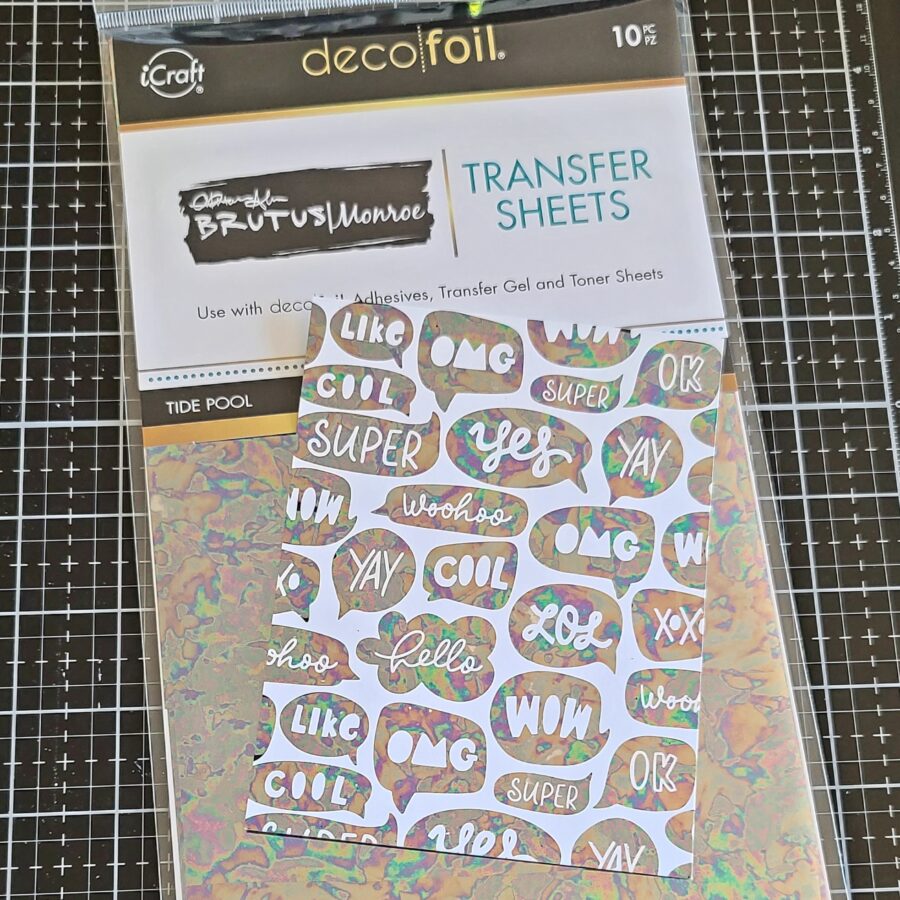
 First things first, I heated up my laminator, chose a toner card front – these speech bubbles just screamed chatting in a coffee shop to me! So fun! And then I landed on the awesome tide pool deco foil transfer sheets! I placed the toner card front and a piece of deco foil in a parchment paper carrier and ran it through my laminator. It’s like magic peeling those apart. Every. Single. Time.

Next, I moved on to creating my shaker piece. I really wanted to try making this fun coffee cup from Trinity Stamps into a shaker so I fudged things a bit. I die cut the shadow from white cardstock and acetate. Then I cut the frame piece from white cardstock 8 times. I used Ultra Bond liquid glue pen to adhere one frame to the front of the acetate and then all the other frames stacked together on the base piece.
I kept one set of the “insides” that come out of the frame when you die cut it. I colored the lid pieces and sleeve with Copic markers – E31 and E34 for the sleeve and T7 and T5 for the lid. Super simple coloring, nothing fancy. I used liquid glue to adhere the colored pieces in their slots on the acetate piece and discarded the white ones. Next, I filled the wells created by my stacked die cuts with microbeads and adhered the acetate piece to the top, and sealed up my shaker mechanism.
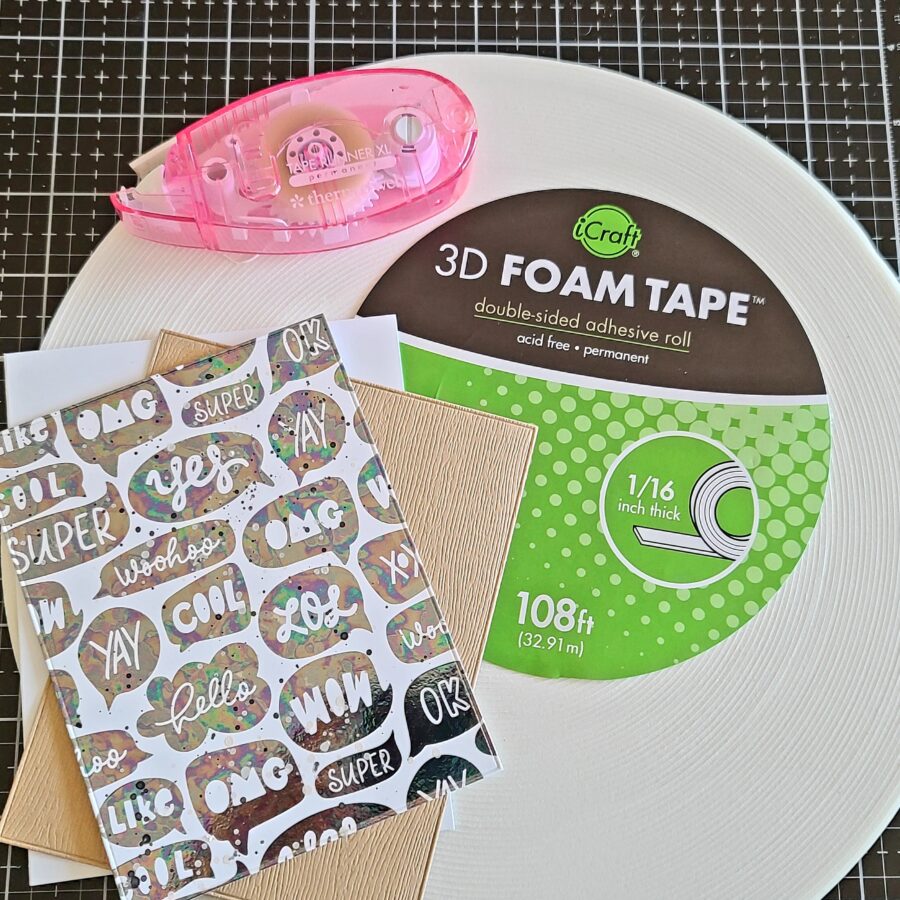
Switching back to the card front – I used the Trinity Stamps Embossed Edge Rectangle dies to cut some woodgrain cardstock to A2 size and used my XL tape runner to adhere it to a white card base. Then I cut the toner card front the size smaller and splattered it with pearl watercolor and black acrylic paint. Then I adhered it with 3D foam tape. This is literally the best foam tape ever! I use it on almost every card!
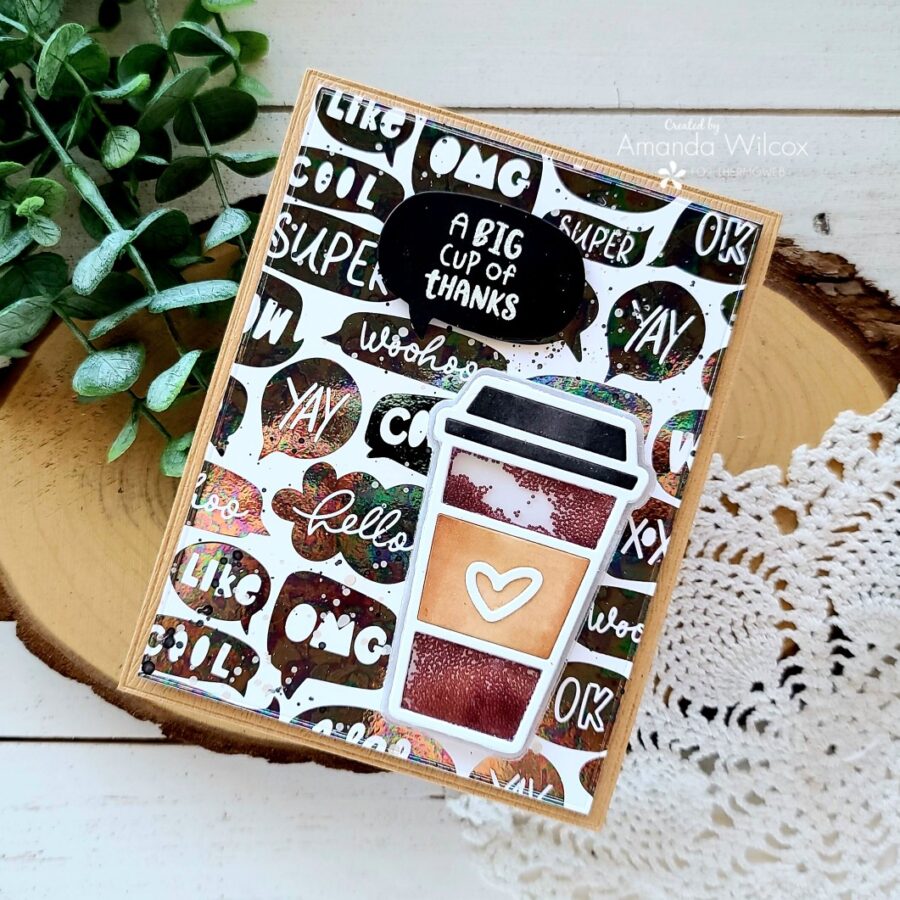
Finally, I used liquid glue to adhere the shaker to the bottom right corner of my card front. For my sentiment, I wanted to keep to the chatting theme so I die cut a Newton’s Nook speech bubble and heat embossed a sentiment in white. Then I popped it up above the coffee cup with foam squares.
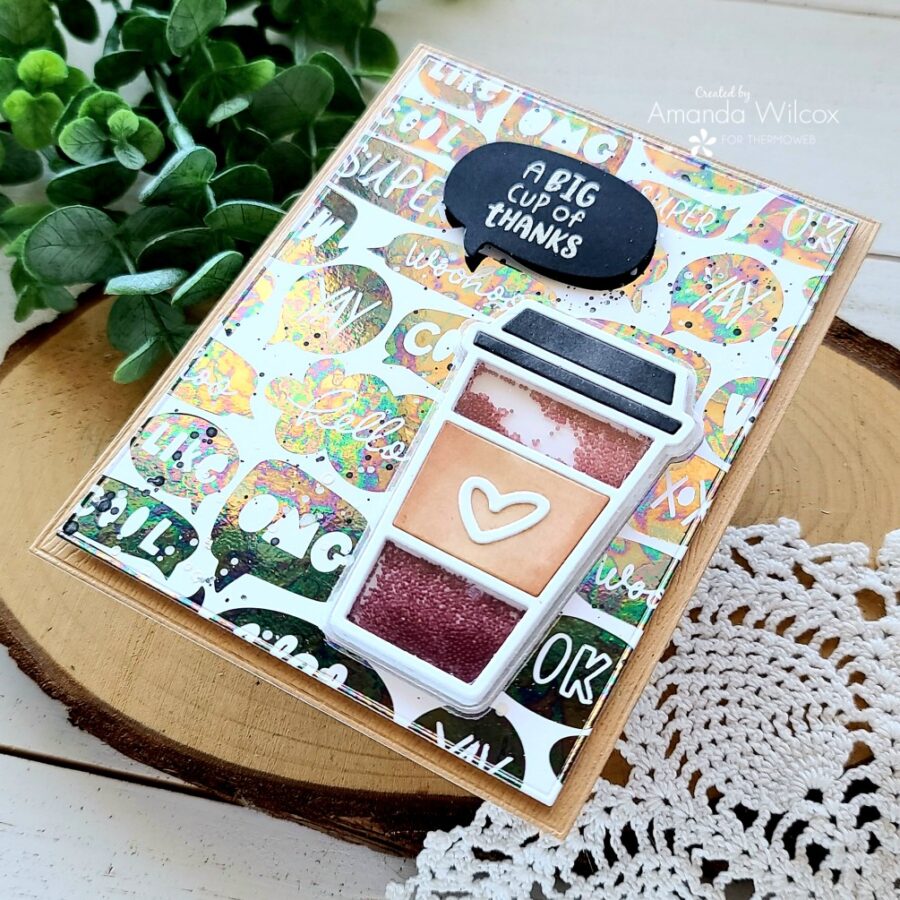
Isn’t this just so great!?! The microbeads move around so well in the shaker. It makes this card way too fun to play with!
I appreciate you sharing your time with me. Have a fabulous day!