Hi everyone!
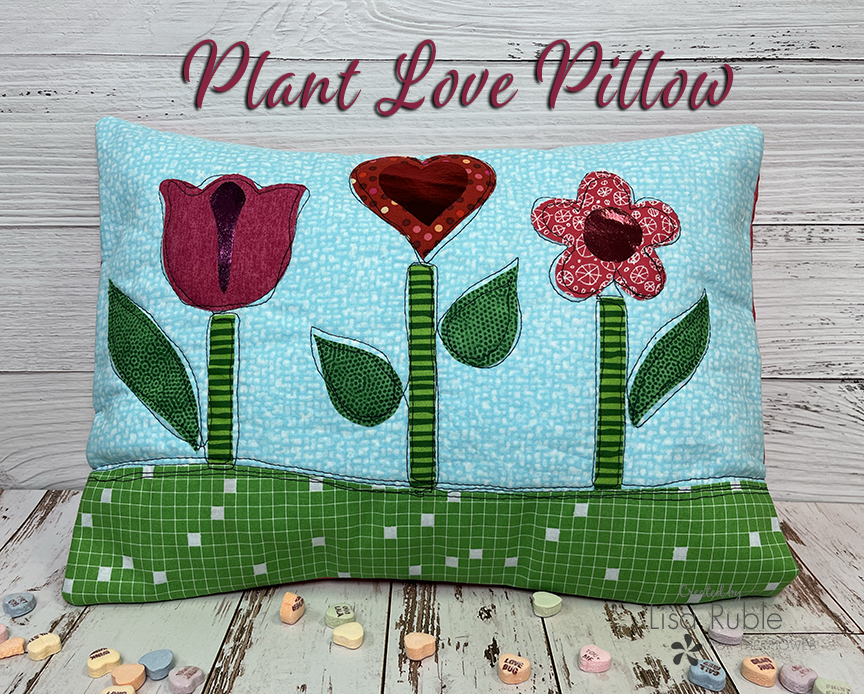
It’s Lisa Ruble here from Quilty Zest. I’m here with a cute Valentine project that could actually be used any time – not just February 14th! Eric Clapton has a song that goes “Plant love and let it grow,” and that sentiment really appealed to me – we can all plant a little love and watch it grow. So I decided to make a pillow that does exactly that.
(I also have a couple friends who are HUGE plant lovers – they are cultivating littile greenhouses on all their windowsills – so they might read this quote a bit more literally…haha!)
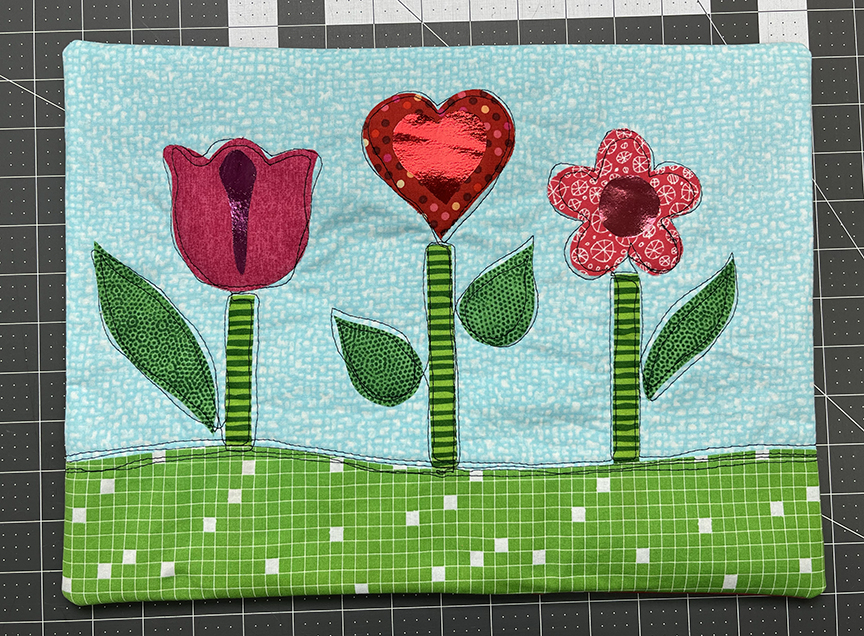
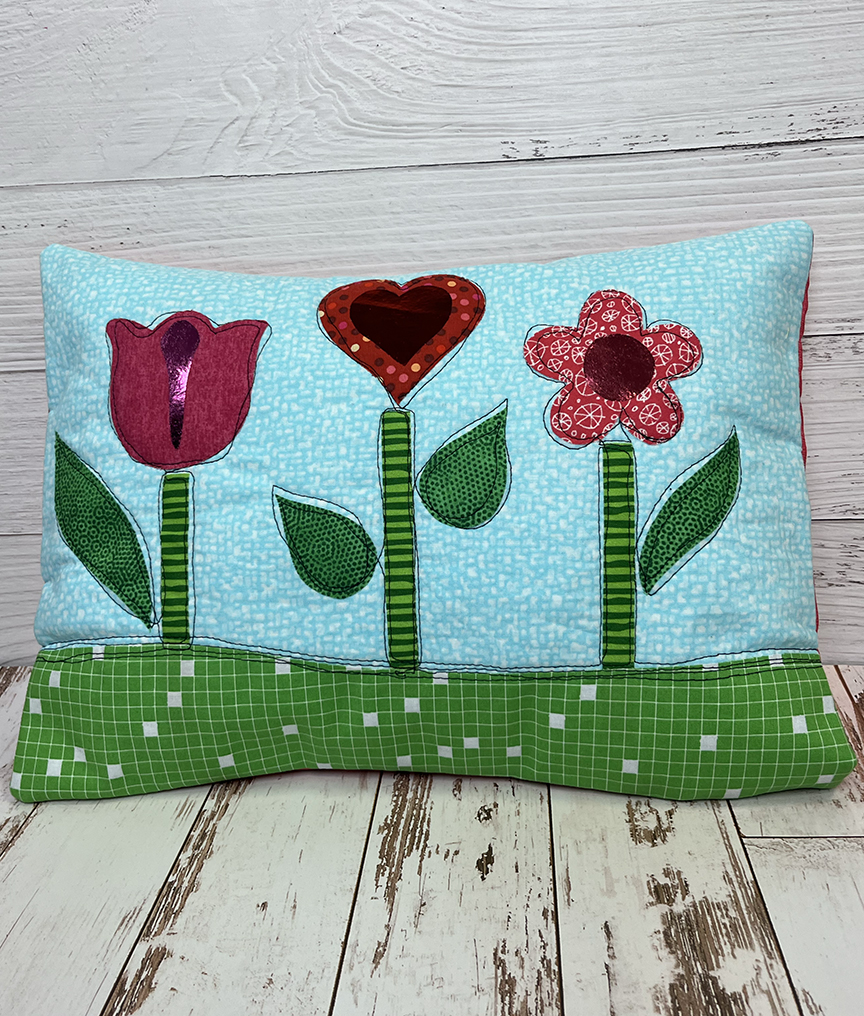
This pillow measures 16″ x 12″, and I used a combination of fabric and foil to create the hearts. I’ve got another idea on what to do with this design – check out my blog to see it (single flowers would make really cute cards too! Let’s take a look at the supplies:
You’ll Need:
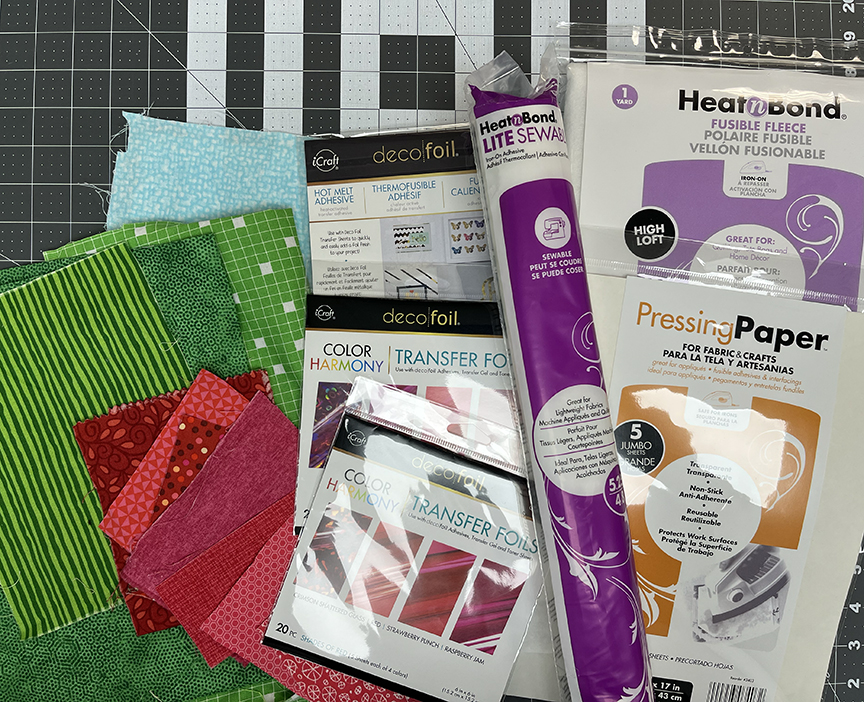
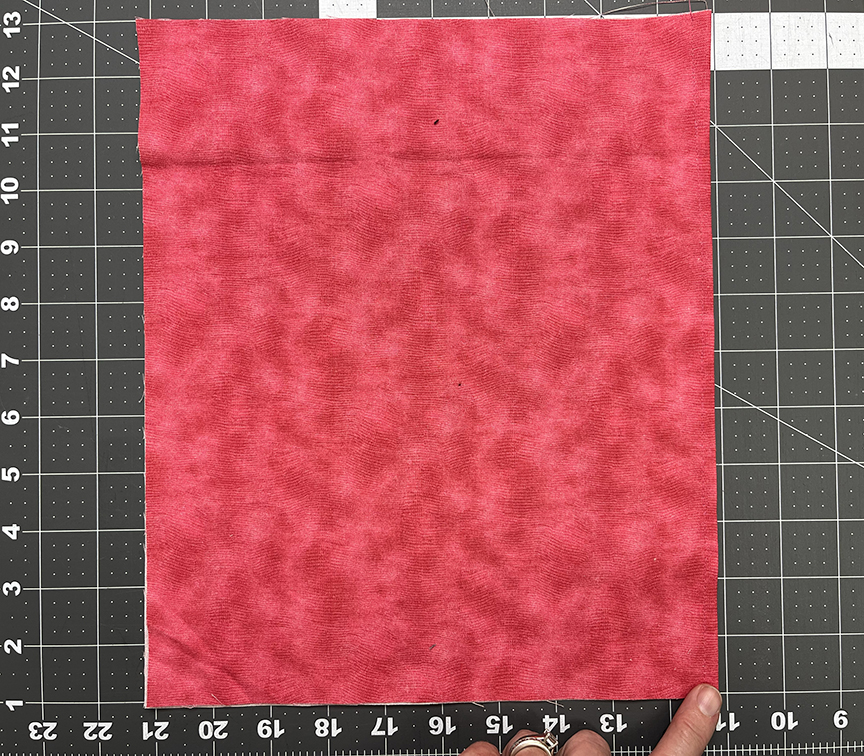
12-1/2″ x 16-1/2″ piece of light blue fabric
1/2 yard of backing fabric
5″ x 16″ piece of green for grass
Assorted pink red and green scraps for flowers, stems and leaves
16″ x 12″ pillow insert
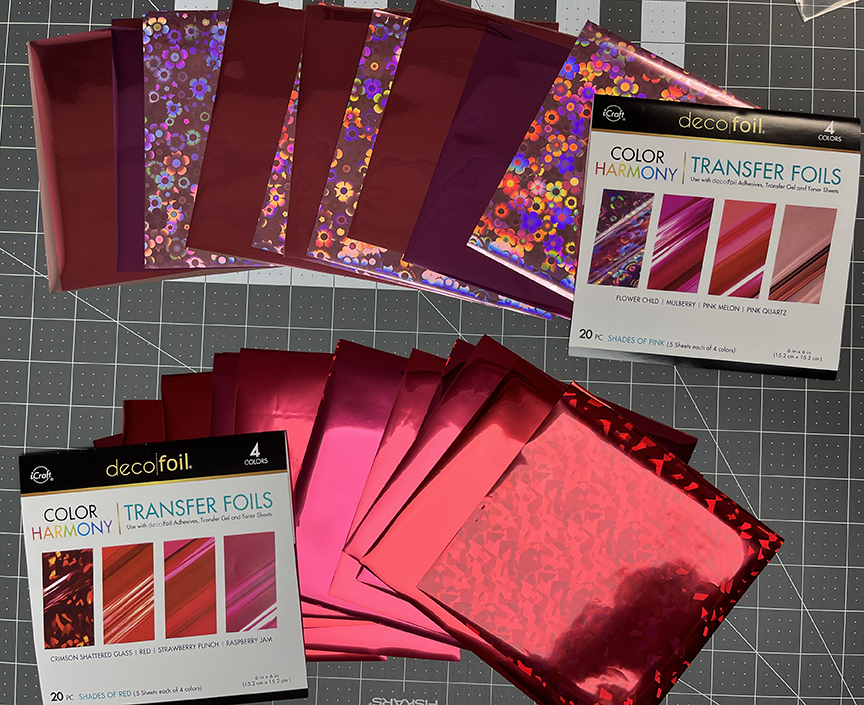
Deco Foil Transfer Foil Shades of Red and Shades of Pink
Deco Foil Hot Melt Transfer Sheets
HeatnBond Lite Sewable Adhesive
HeatnBond Fusible Fleece
Pressing Paper
Here’s a peek at the foils in the Red and Pink packs spread out – lots of fun valentine-y colors to play with! I’ve been dabbling in adding these foils to some of my sewing projects, and it’s so fun – if you haven’t tried them yet, I encourage you to get some to play with. This project just uses a little so you can dip your toes in, but you could easily make the flowers completely out of foil! And just a note if you’re a new foil user – iron temperature matters – the first time I tried these foils, my iron was too hot and I struggled. So pay attention to the directions (which I didn’t!), keep your iron on medium, and you’ll have success!
Click here to download the templates. Note that the templates also include the words “Plant Love” – I didn’t use them on this pillow, but I’m using them on a different version of this design (see it on my blog!) and though you might like them too!
Let’s get started!
Step 1 Trace the main 3 flower shapes and leaves onto HeatnBond Lite. Cut out loosely around the shapes and fuse to your chosen red/pink scraps. Cut out a 2″ x 5″ and 5″ x 16″ piece of HeatnBond Lite. Fuse the smaller piece to your stem fabric and the large piece to your grass fabric.
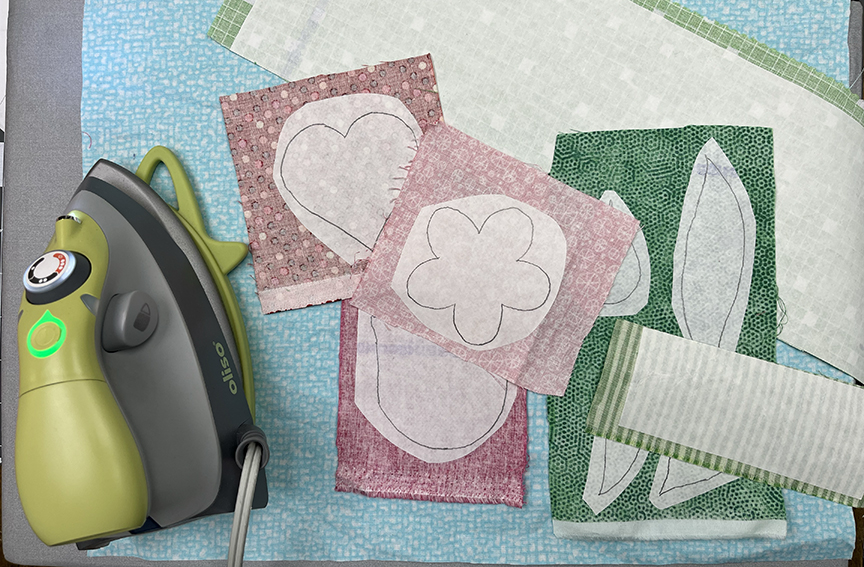
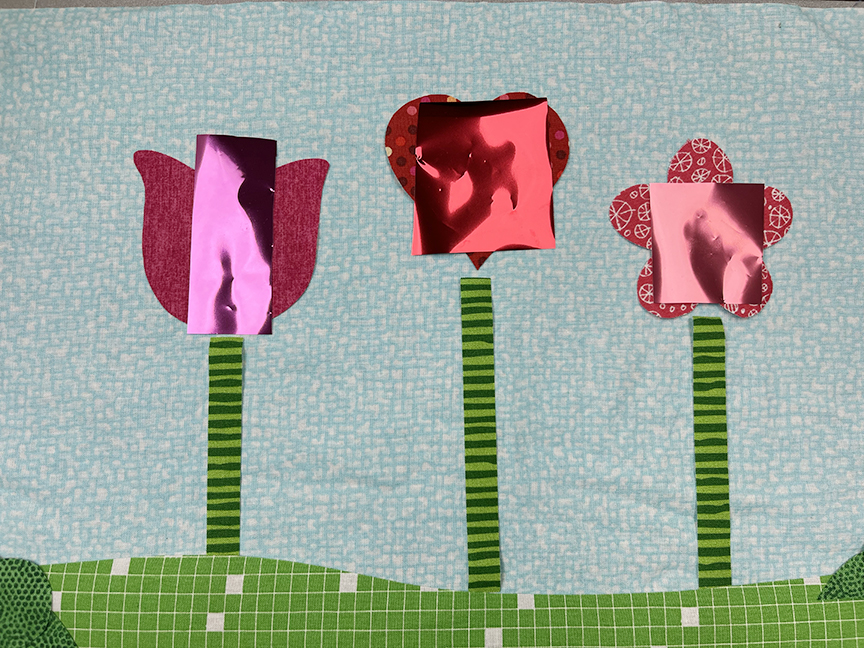
Step 2 Trace the flower accents to the paper side of the Hot Melt Transfer sheet. Cut out each shape on the line. Set aside.
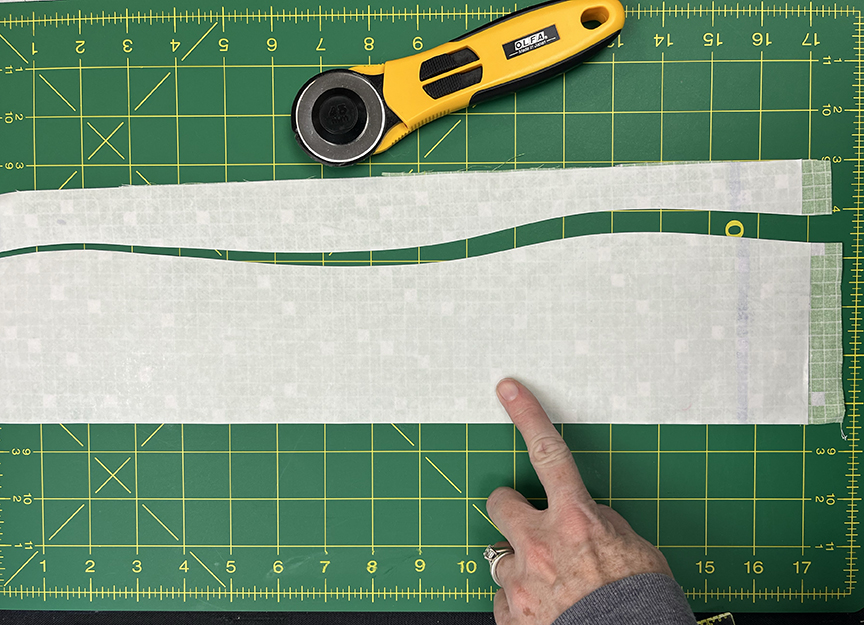
Step 3 Cut a freehand wavy curve across the 5″ x 16″ green fused piece. You will likely trim some off the bottom straight edge as you assemble the pillow top.
Step 4 Lay out the steps, leaves, flowers and grass on the 16-1/2″ x 12-1/2″ blue rectangle. Do NOT remove the paper backings yet.Tip: Fold the blue rectangle in half and finger press to find the center. Position the middle flower stem on this line to center your project on the background.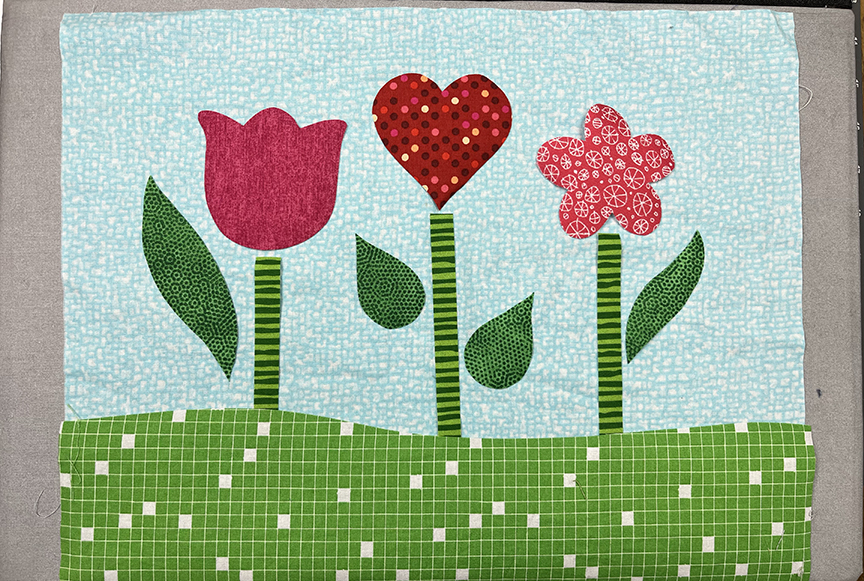
Step 5 Position the Hot Melt cut outs on the flowers (the flowers are still not fused in place and still have their paper backings – this is so you don’t overheat the flower adhesive by melting it twice).

Step 6 Following manufacturer’s directions and using a Pressing Sheet, apply heat to fuse the Hot Melt shapes in place on the flowers. Remove the paper.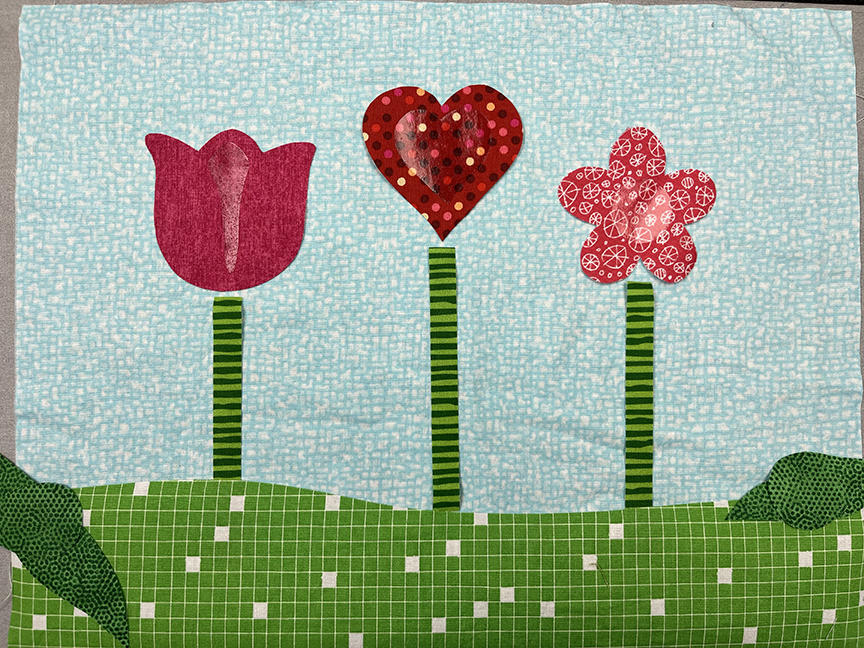
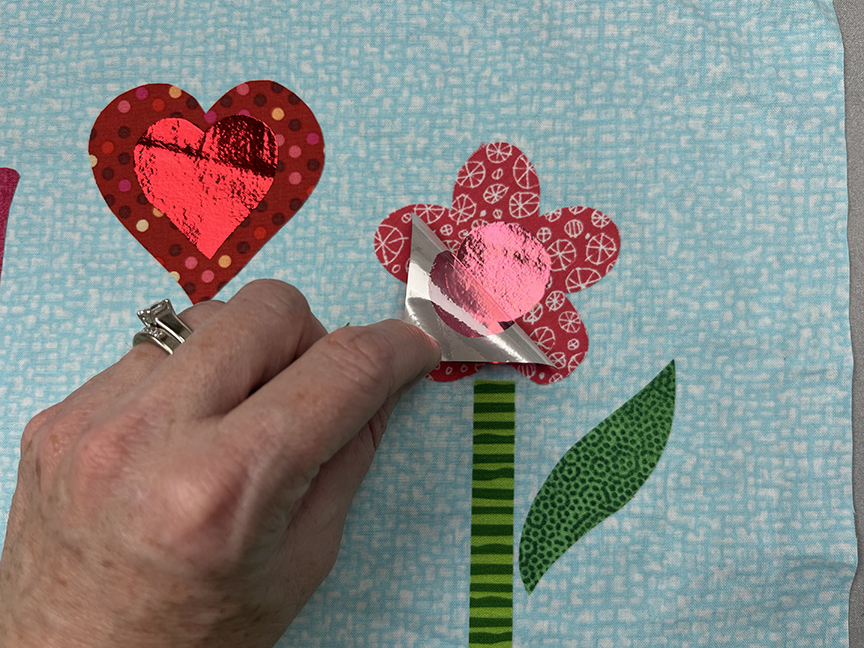
Step 7 Now remove the paper from the flowers and stems (set the leaves aside for the moment). Make sure the flowers and stems are where you want them on the background and then lay the red or pink foil piece on top of the fused Hot Melt shapes. Using Pressing Paper and following manufacturer’s directions, fuse in place. This will fuse both the fabric flower to the background and the foil on top.
Step 8 After the fused area cools, gently peel the foil off, leaving your shapes behind. Then continue fusing the leaves and grass in place on the background, being VERY careful not to touch the foil with heat.
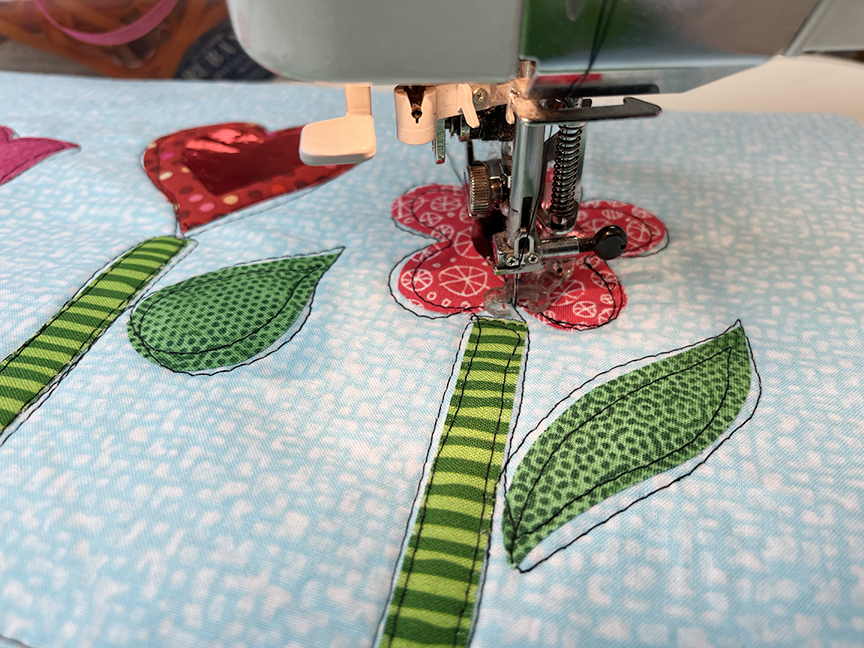
Step 9 Cut a 16″ x 12″ piece of fusible fleece and adhere it to the back side of the blue rectangle. Be careful not to touch the foil with the iron! Machine quilt/add decorative stitches as desired. I used black thread and a free motion foot to loosely “sketch” around each shape. I really like the whimsical look this creates. Trim rectangle to measure 16″ x 12″
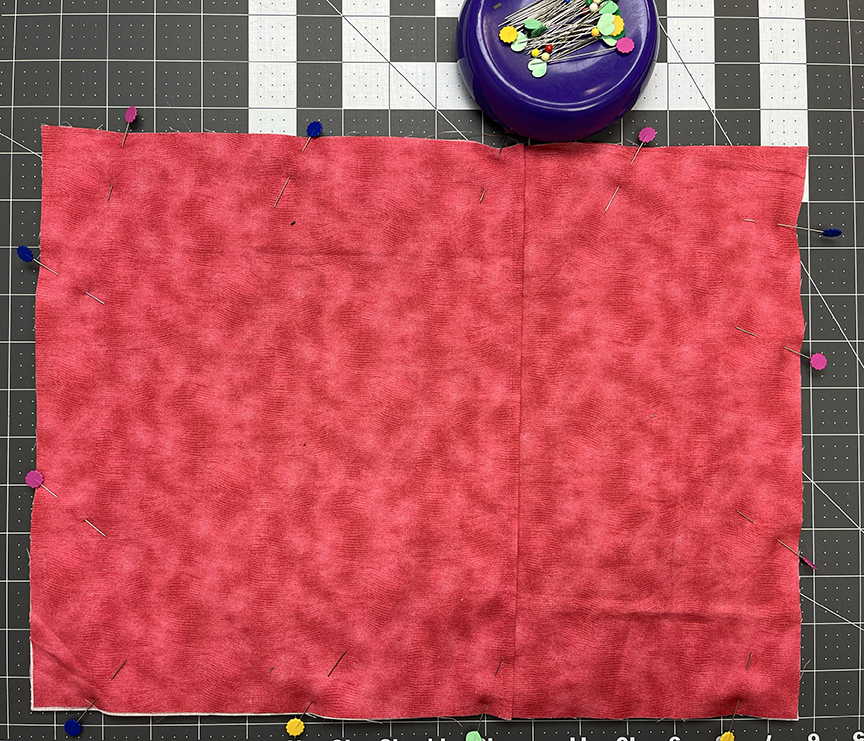
Step 10 Cut (2) 12″ x 20″ pieces from backing fabric. Fold and press each piece in half to measure 12″ x 10″. Topstitch along the fold to create a nice finished edge.
Step 11 Lay the blue rectangle right side up and place a backing piece on the left side, matching raw edges.

Step 12 Repeat on the right side, overlapping the backing pieces in the middle, and pin around all edges to secure. Stitch around the outer edge using a 1/4″ seam allowance.
Step 13 Turn right side out and stuff with the pillow insert. Enjoy!