Hi Friends,
It’s Dawn Gehring, Creative Director here at Therm O Web, jumping in quickly to tell you about an AMAZING GIVEAWAY you can enter now that includes more than $300 worth of fabrics, tools and notions from Therm O Web and our friends Amy Barickman, Colonial Patterns and Oliso. We’ve had so much fun collaborating and drawing inspiration from one another this year that we wanted to celebrate in a big way just in time for back-to-school crafting … and the holidays are just around the corner too!
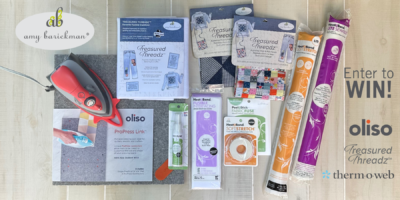
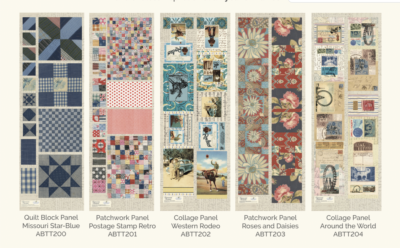
Amy Barickman’s NEW Treasured Threadz Patchwork & Collage Fabric Panels, distributed exclusively by Colonial Patterns, are as innovative as they are beautiful! Available in five different themes, each fabric panel has been curated and designed into an original work of art using Amy’s own collection of rare vintage art, textiles and quilts.
To pair perfectly with the panels, Amy created Treasured Threadz Favorite Fusible Stabilizer to give projects an extra layer of stability and softness, ideal for your hand quilting and embroidery projects. And the Oliso M3Pro Project Iron is the perfect tool for working with all kinds of fusibles, from Amy’s Treasured Threadz Favorite Fusible Stabilizer to our HeatnBond Iron-On Adhesives and Fusible Interfacings.
Amy’s newest blog post highlights some of the projects our Therm O Web Design Team has created this year using Treasured Threadz Fabric Panels and Favorite Fusible Stabilizer. All of the details for entering the giveaway are also in Amy’s blog post, so be sure you enter and follow the instructions to earn some bonus entries, as well. Contest ends September 2nd and the winner will be notified via email on September 3rd. Good luck!
ENTER HERE >
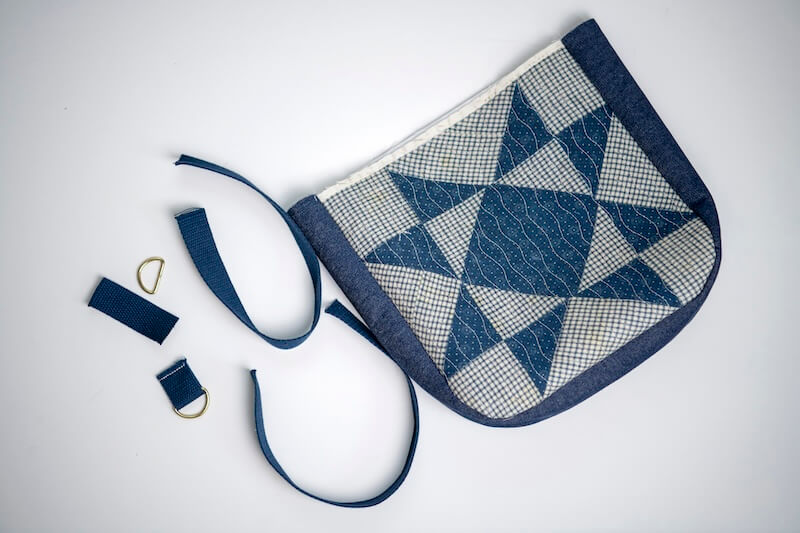
Now, let’s learn how to make this Missouri Star Blue Bag by Lisa Summerhays! It’s easy to sew and a lot faster to “piece” together than you might think.
____________________________________________________________
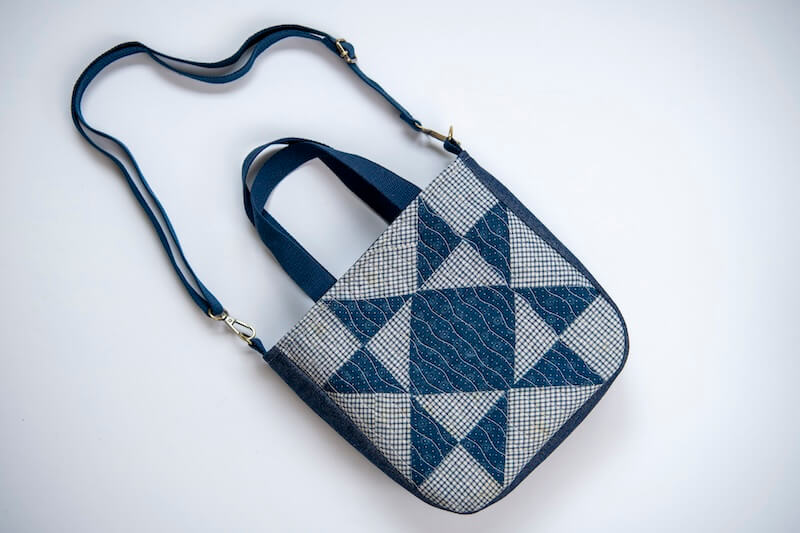
Today we are going to whip up the cutest bag that looks tricky due to the cheater print panel by Treasured Threadz but is really a pretty fast sew. I use a premade bag strap to make it as fast and easy as possible. Let’s get started.
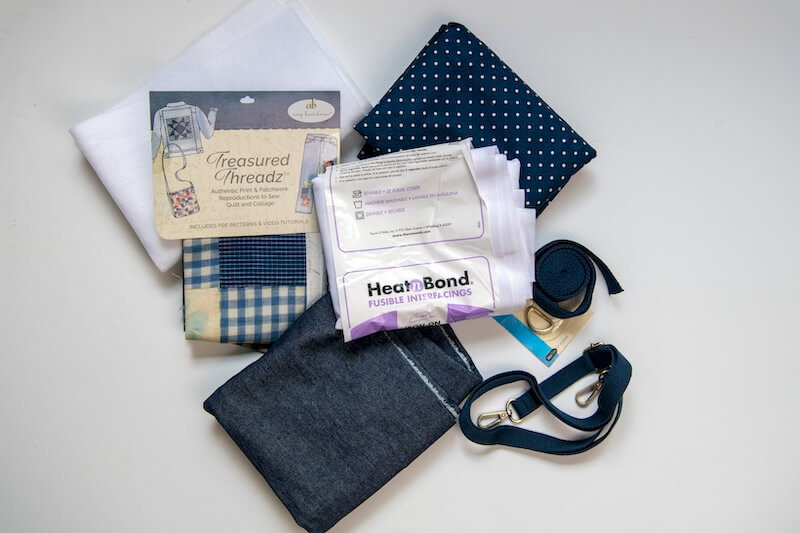
Supplies:
- Treasured Threadz Quilt Block Fabric Panel (Missouri Star Blue)
- Treasured Threadz Favorite Fusible Stabilizer
- Medium-weight woven upholstery fabric, faux leather, or cork, 1/8 yd
- Lining fabric, 1/2 yd
- HeatnBond Soft Woven Fusible Interfacing, 1/2 yd
- Strap webbing pieces, two each: 14″ long, 2.5″ long
- 1” D-rings, two
- Adjustable Purse Strap (I buy mine on Amazon)
- Oliso M3Pro Mini Project Iron
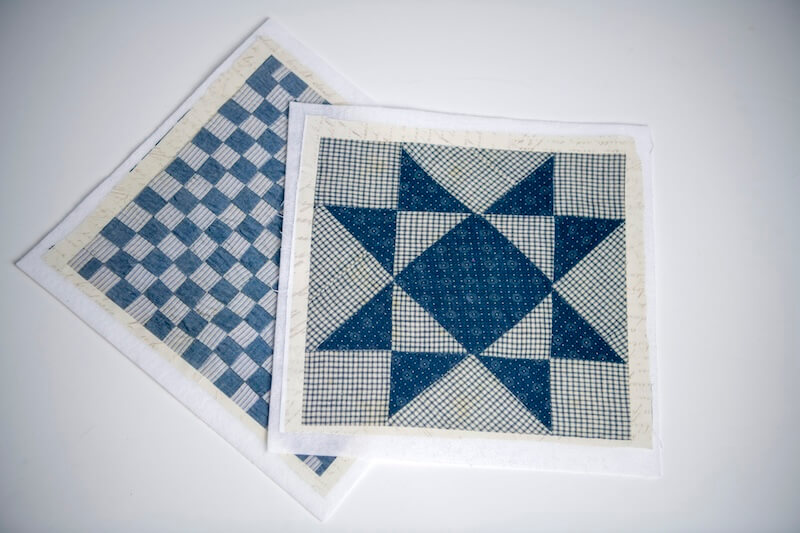
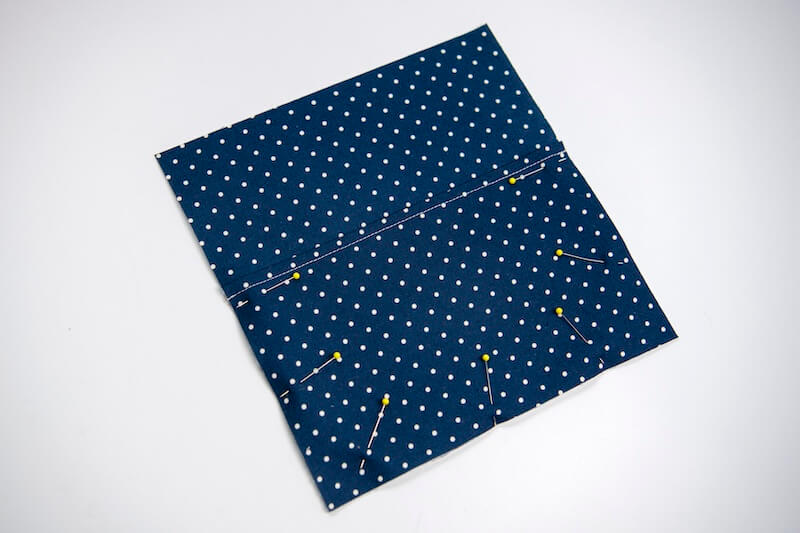
Cut out two 12” squares from your Treasured Threadz Favorite Fusible Stabilizer. Choose two of the larger blocks from the Treasured Threadz panel and cut them out, leaving negative space around the block. Fuse the panel blocks to your squares and then take them to your sewing machine and quilt them.
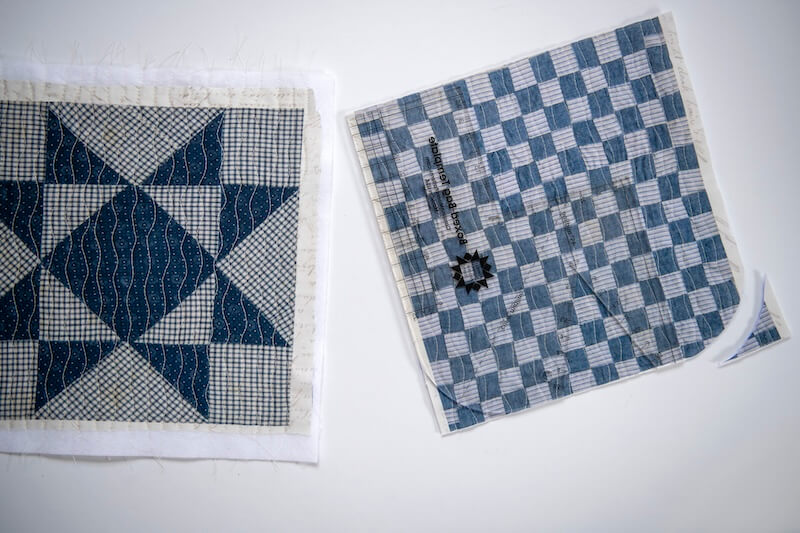
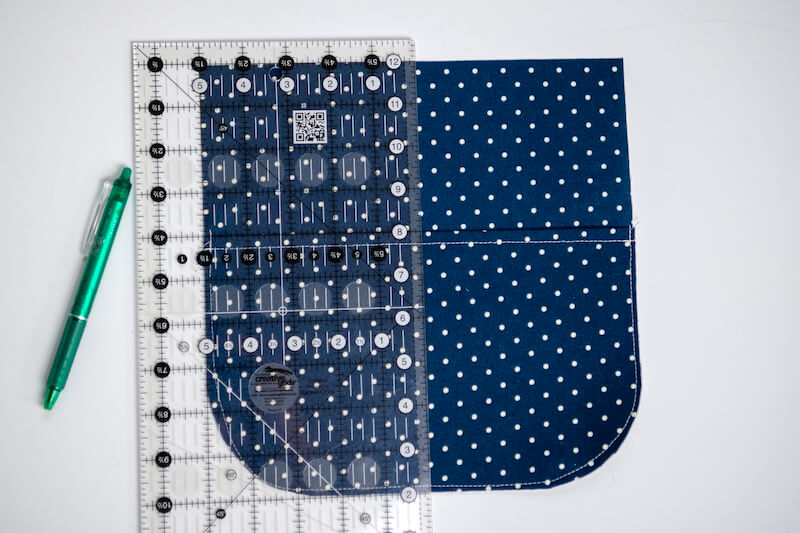
Trim the blocks down to 10” squares. Round the bottom corners on both panels. I use an acrylic template but you can use a cup or jar as well.
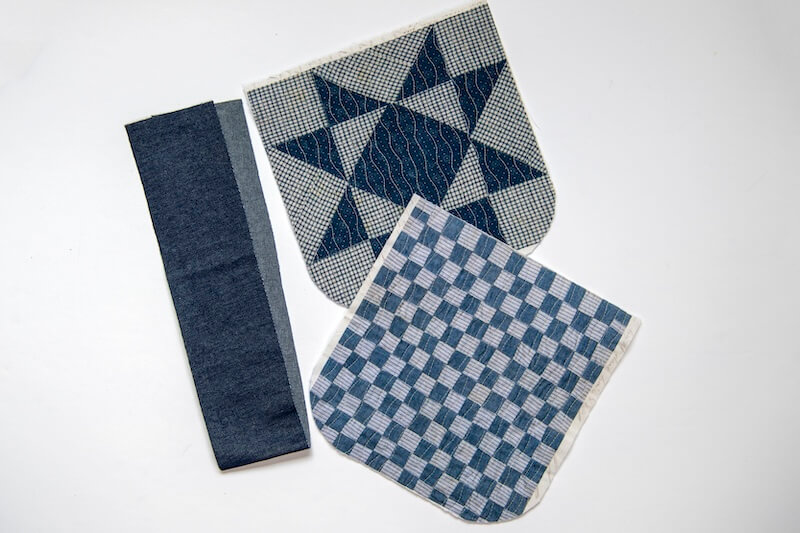
Take your medium-weight fabric and cut a gusset piece 3.5” x 28” long.
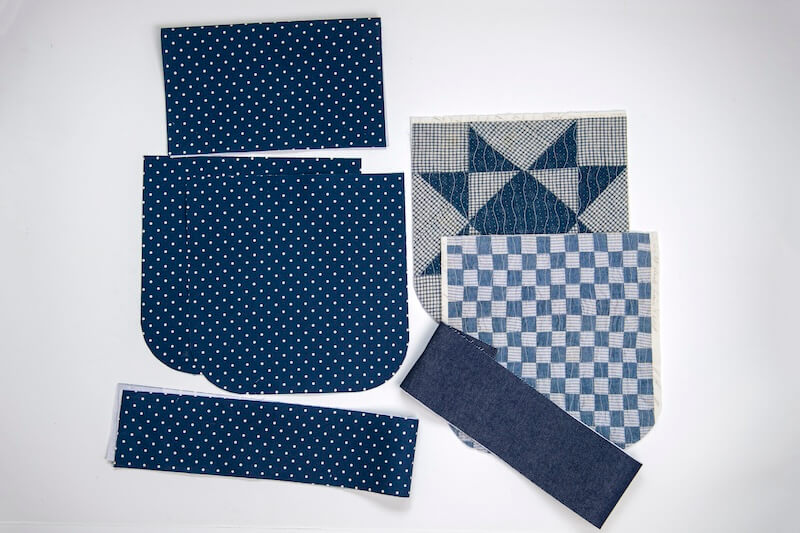
Iron your woven interfacing to your lining fabric and cut out the same pieces, two 10” square panels with rounded corners on the bottom and a 3.5” x 28” gusset. Cut an additional 10” wide by 12” tall rectangle to create a pocket, as well.
Take your pocket panel and fold it in half with right sides facing out (so now it measures 10” x 6”). Top stitch the folded edge. Take one of your lining panels and lay the pocket overtop with right sides facing up. Pin with the raw edges of the pockets on the sides and bottom lining up with the lining panel. Tack in place. Trim the sides of the pocket to match the rounded edge of the lining.
Next, take a ruler and measure in 5-inches from one side of the panel to the center of the pocket and mark a line. Take to your sewing machine and sew directly on that line from the top of the pocket to the bottom making sure to back stitch at the beginning and the end. This is to break up the pocket into two sections which also keeps the pocket from gaping open when our bag is finished.
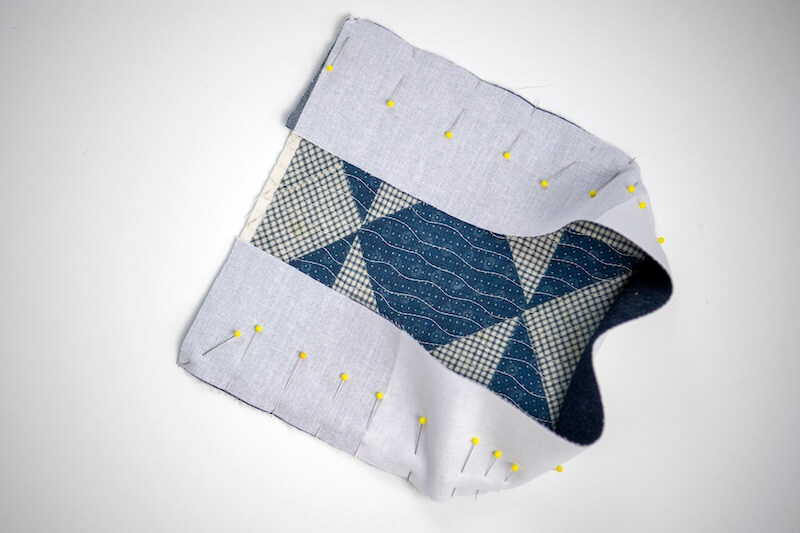
Alright, set your lining pieces aside. First you will sew the outside of your bag together. Grab your main panels and gusset. Start with one panel and begin pinning one end of your gusset to the top edge on one side, right sides together, around the bottom to the other top edge. If there is excess gusset since we each rounded the bottom corners a bit differently, just trim the excess (shouldn’t exceed 1″). You’ll need to do the same to the lining gusset later as well. Sew the gusset in place.
Take your second panel and pin on the opposite side of the gusset. Sew.
Turn your main bag right side out. Grab your D-rings and webbing. From your webbing, you need two 2.5” pieces and two 14” long pieces. The shorter ones go on our D-rings. Loop the webbing through your D-rings then fold the webbing in half. Tack the ends together. Repeat with the second D-ring.
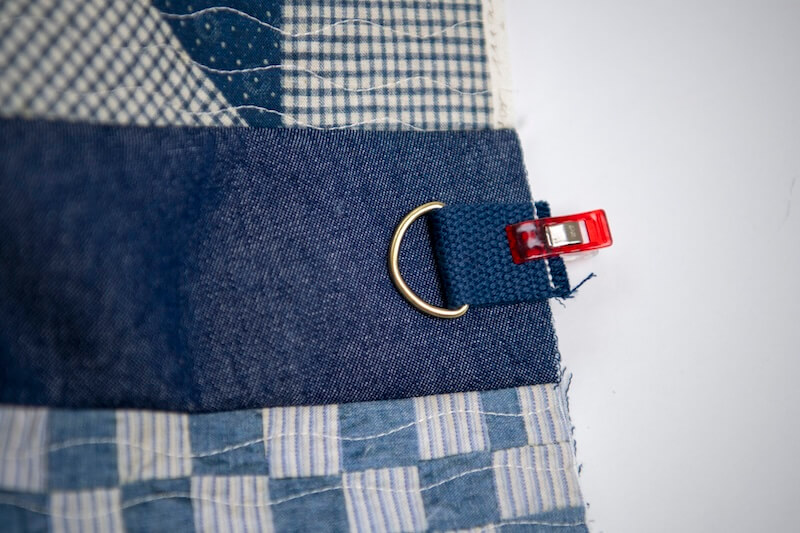
Take your D-rings and find the center of your gusset along the top edge. Center your webbing with the raw edge facing up and the D-ring facing down toward the bottom of your bag and tack in place. Repeat with the second D-ring/webbing on the other side.
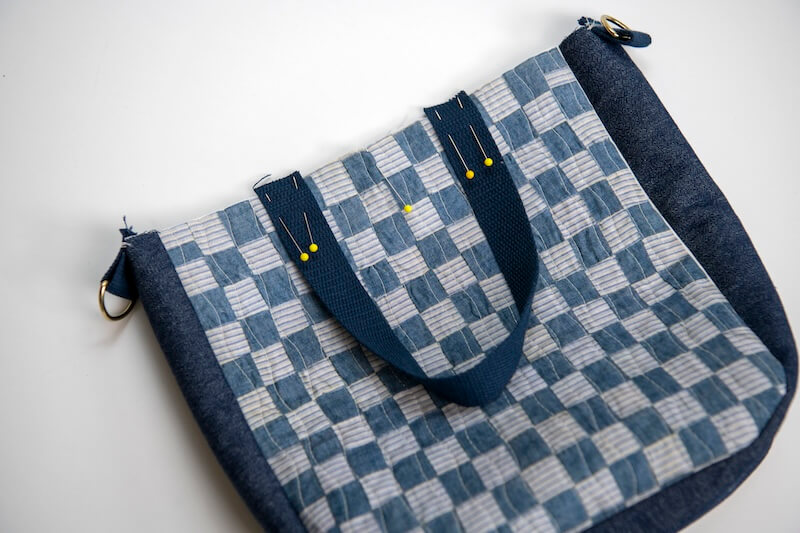
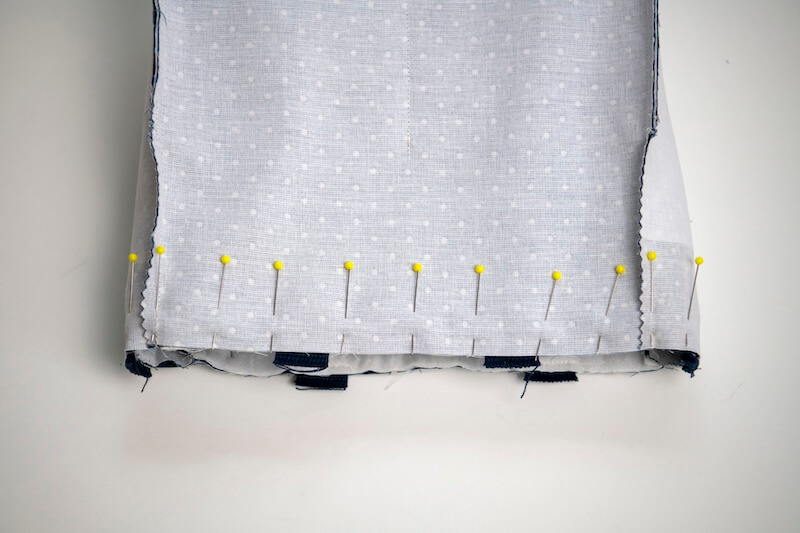
Next let’s find the placement for our webbing handles. Find the center of your bag panel (the center pin shown in the photo). Measure out 1.5” to the left and pin the end of your first webbing handle at that point. Measure out 1.5” to the right of the center point and pin the other end of your webbing at that point, making sure it isn’t twisted. Tack in place. Repeat on the other panel with your second handle. **You can leave off these handles if you want just a crossbody bag.
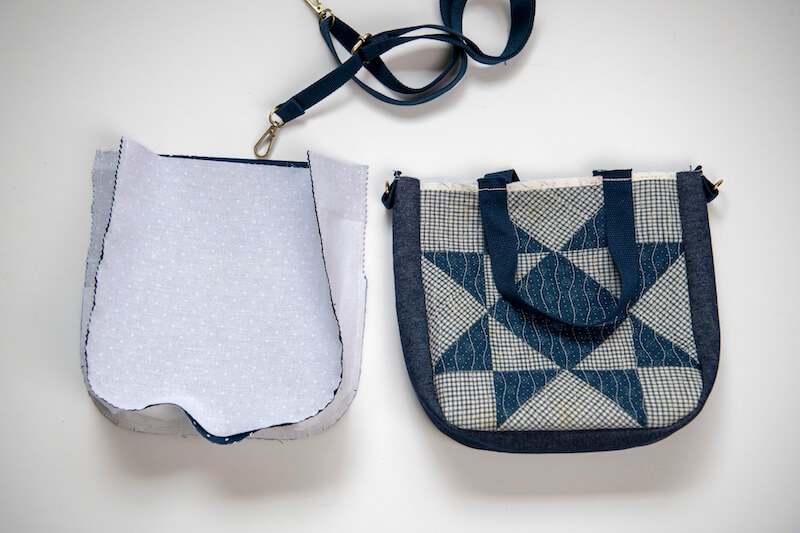
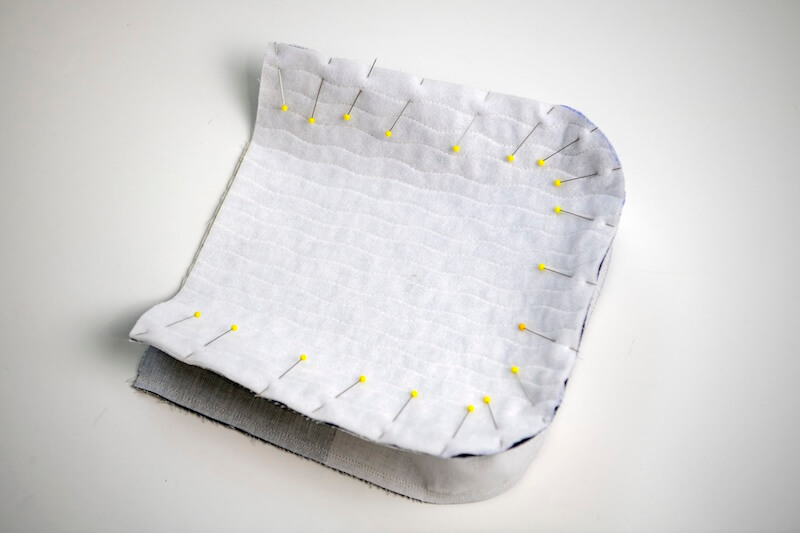
Alright, almost done. Grab your lining and sew the panels and gusset together just like we did the outside of our bag, however, this time make sure to leave an opening along the bottom of the panel without the pocket. This is for turning our bag right side out later.
Next place your main bag inside of your lining, right sides together. Pin all along the top edge. Take to your sewing machine and sew around the perimeter.
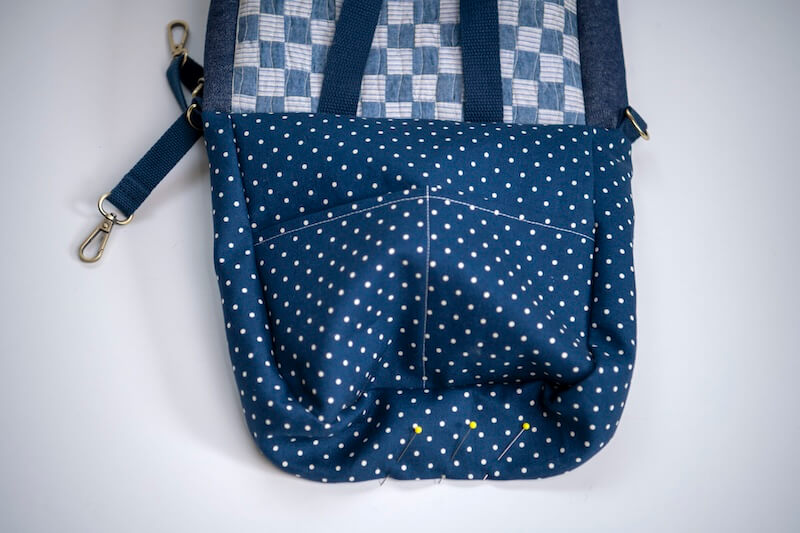
Turn your bag right side out through the opening. Sew your opening closed. Press the top edge of your bag well with your Oliso M3Pro Mini and sew around the perimeter; the M3Pro is a versatile mini-iron that is perfect for bags and other smaller projects. Lastly, clip your crossbody bag strap and you’re done.
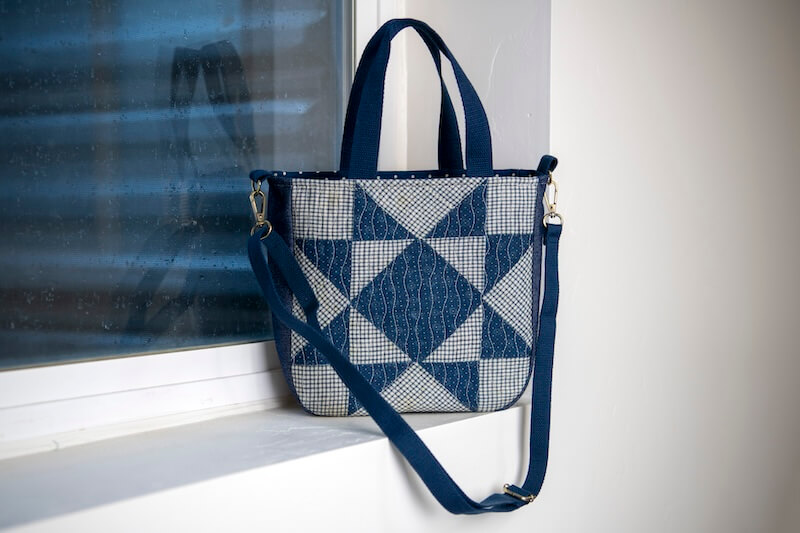
So fun! I hope you love your fun little new bag. I love how each Treasured Threadz panel I sew with make my project quick, easy, and more impressive looking than the skill level and time it took to sew it up. Win!