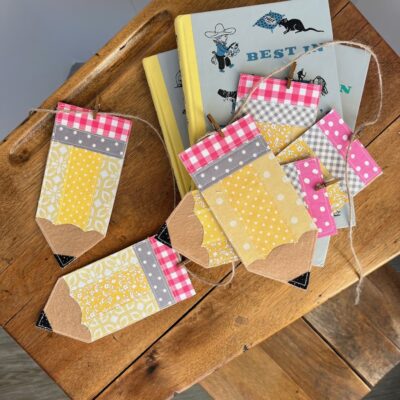
Hello friends! I know that none of us want to think of the start of school being right around the corner; but maybe you’re like me and you have a teacher friend that is in the process of getting her classroom ready… if so, then I’ve got the best simple sewing project for you!
I wish I could take the credit for this pencil bunting idea, but I cannot. I purchased a pattern for it some time ago and decided to finally make it. You can find the pattern by clicking here. However, it’s a very simple design… you could easily draw it up yourself. Either way, I’ll step you through the process today!
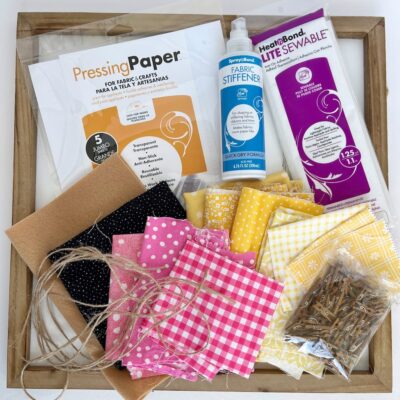
Supplies
- Pressing Paper
- SpraynBond Fabric Stiffener
- HeatnBond Lite Sewable Interfacing
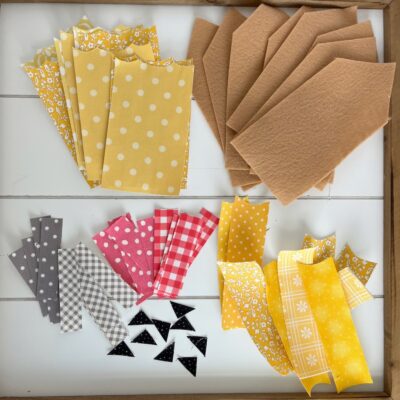
- Fabric Scraps in: pinks, yellows, grey, black
- Tan Felt
- Twine
- Mini Clothespins
Instructions
Once you have purchased the pattern and printed the pattern template sheet, cut out each of the pattern pieces and then we are ready to get started!
Step One:
Determine how many individual “pencils” you intend to make. Press your fabric scraps. Lay a pattern template on the fabric and make a quick calculation of the amount you will need depending on how many pencils you are making (this doesn’t have to be exact!). Rough cut your fabric accordingly and iron a piece of HeatnBond Lite Sewable Interfacing to the back of each fabric scrap (paper side facing up).
Step Two:

Trace around your pattern onto the paper backing. Cut on those lines. Set aside.
Step Three:
Follow the above step for all pattern pieces. You do NOT need to have interfacing on the back of the felt piece.
Step Four:
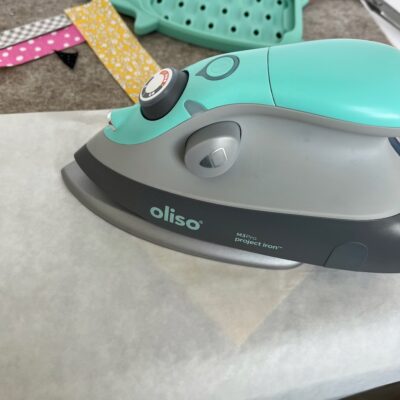
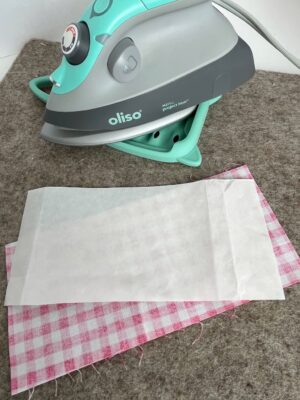
Remove the paper backing from each interfaced fabric piece. Using the pattern photo, lay each piece on top of the felt and iron these in place. Be sure to use Pressing Paper, so that your iron does not stick to the felt. It also allows you to hold the iron in place a few extra seconds and assures that the fabric pieces will fully adhere.
Step Five:
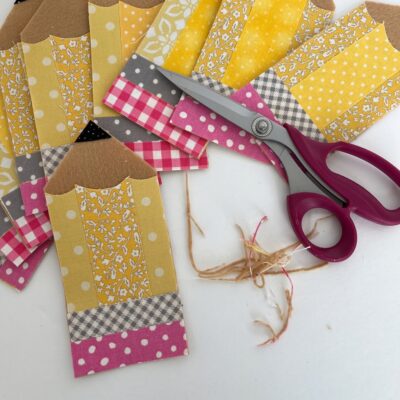
Carefully trim off any felt that is sticking out beyond the edge of the fabric pieces.
Step Six:

Now it is time to sew the fabric in place! I sewed a simple top stitch on all the raw edges. It only takes a few minutes and is worth it.
Step Seven:
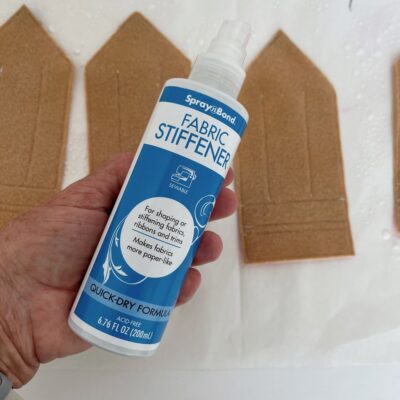
This step is optional, but I felt it was a complete game changer so I highly recommend it. Follow the instructions on the back of the SpraynBond Fabric Stiffener and spray onto the felt backing of each pencil. It doesn’t take much to make a difference. Leave it to dry. Once it was completely dried, I carefully ironed the felt of each pencil. Be sure to use the Pressing Paper.
Step Eight:
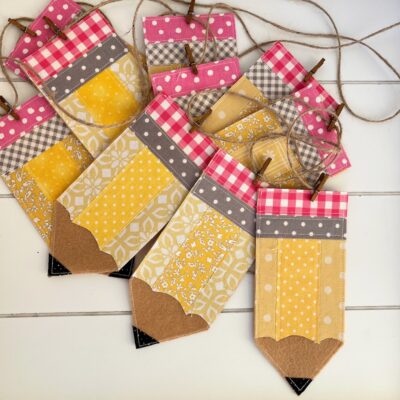
Attach each pencil to the twine with the miniature clothespin! How adorable is this?!
I’m so excited to wrap mine up and gift it to my young teacher friend!