Hello friends, this is Jennifer Long from Sew A Story, a fabric designer with Riley Blake Designs and doll and quilt pattern designer.
Who doesn’t love the refreshing taste of pineapple when it’s blistering hot outside! That beautiful yellow color when you cut a ripe pineapple open just makes me so happy! Don’t you wish you could have that happy pineapple feeling all year round? Well, make this Stuffed Pineapple tutorial with me and you can! Keep reading…

Be Creative
Make this pineapple into a doorstop or bookend, just add extra weight to it. Or enjoy it as a “home decor” decoration or fun stuffie for your child to play with–it’s all up to you!

Let’s get creative! Just gather the supplies below, then join the Sew A Story Pattern Club for access to the patterns and files. Don’t forget to share your project on social media using the hashtag #SewAStory and tag @beesewinspired.
What You Need:
Tools
-
Sewing Machine or Embroidery Machine
-
Rotary Cutter
-
Quilting Ruler
-
Self-Healing Mat
-
Iron and Wool Mat
-
Scissors
-
Hand sewing needle
Downloads
You’ll need the Pineapple Pattern Template or the Pineapple SVG Cut Files from the Sew A Story Pattern Club, Annual Membership.
First, join the Annual Membership here. As a special discount for my Thermoweb friends, you can get 50% off your first year of the Pattern Club by using the discount code TOWPatternClub (all one word) at checkout.
Then, log into the SewAStory.com website and visit this blog to access your Pineapple Templates!
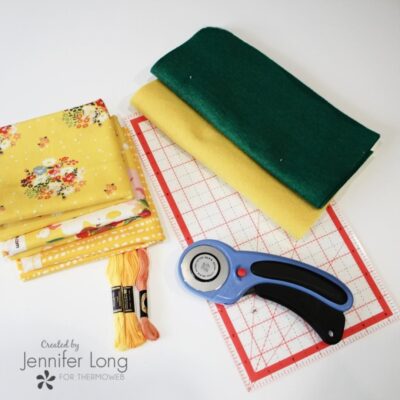
Materials
-
(1) each Green and yellow (8×11) pieces of wool felt
-
1 fat quarter of fabric for the pineapple main body
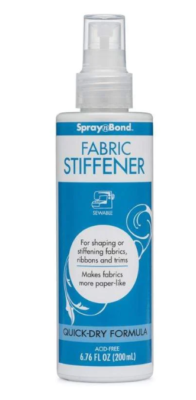
- Spray n Bond Fabric Stiffener
-
Embellishments
-
Embroidery Thread in matching colors
-
Thread
-
Polyester Fiber Fill
-
Rice or Plastic pellets to keep you pineapple bottom heavy and right side up!
Instructions:
1. Download the Pineapple Pattern inside the Pattern Club Annual Membership. You can choose either the PDF Pattern to hand cut your shapes, or the SVG Cut File and follow the directions to have your Cricut Maker cut the felt shapes. Make sure to use your rotary blade and set the fabric to felt.
2. Start by preparing the pineapple leaves. Cut out 6 to 8 leaves using the green felt. You want to cut some of them in half length wise, cut another few of them 3/4 of the way and others will be kept full length. For my pineapple I cut a total of 8 leaves, kept 2 full length, cut 2 in half and the others at different lengths and then arranged them from shortest to longest. Lay them out on a piece of paper and spray them with,Spray n Bond Fabric Stiffener according to the manufacturers directions. Let dry.

3. Once arranged from shortest to longest, overlap slightly each leaf using pins or clips to keep them in place and stitch along the bottom edge to keep all these leaves together.
4. Starting with the side with the longest leaves, roll the set of leaves to create the pineapple top. Hand stitch to secure the roll in place making sure to go all the way through the full diameter and every layer. Set the pineapple top aside while you get your other pieces ready.

5. Cut out 2 pieces for the base of the pineapple. Lay them flat with wrong sides together. Stitch them together using a 1/4″ seam allowance, leave a small opening to be able to add the rice or plastic pellets.

6. Using a small funnel add about 1/4 cup rice (or plastic pellets). Hand stitch or machine stitch the small opening closed. Set the base aside until the pineapple body is ready.

7. Sew up the darts with right sides together at the bottom and top of both pineapple pieces. With right sides together matching up the top and bottom of the pineapple body sew only one side of the pineapple shape. Set your machine to a long stitch and baste the top and bottom of the pineapple, make sure to leave a tail to those basting stitches to be able to form gathers at the top and slight gathers at the base.

8. Starting at 3/4″ from the top, place the felt texture pieces points towards the base of the pineapple. I used 32 of these felt pieces, you may wish to use a little more or maybe less depending on the texture you want on your pineapple.

9. Once all your texture pieces are sewn on to the pineapple body you can start adding the cross stitch detail. Fold down the two top corners, using embroidery floss or pearled cotton stitch through all the layers creating added detail to the pineapple texture.

10. Now that the texture detail is completed, fold the body right sides together lining up the top and bottom of the pineapple. Stitch the side seam leaving an opening on the side about 3 inches long.

11. Place the pineapple base at the bottom of the pineapple body, pull slightly on the basting stitches if needed to aline the edges. Pin or clip in place. Stitch together using a 1/4″ seam allowance.

12. Insert the pineapple leave at the top of the pineapple body. Pull on basting stitches for a nice snug fit. Hand stitch the leaves into place. Make sure to use tiny stitches for extra strength and durability.

13. Turn the shape right side out and stuff to desired firmness. Using a ladder stitch, close the side of your new Happy Pineapple.

Thank you for joining me today on the Thermoweb Blog.
I can not wait to see your finished Stuffed Pineapples! Please tag me @sewastory_jenniferlong so I can cheer you on!
You can also join my Facebook group to share your progress!
Happy sewing!
–Jennifer