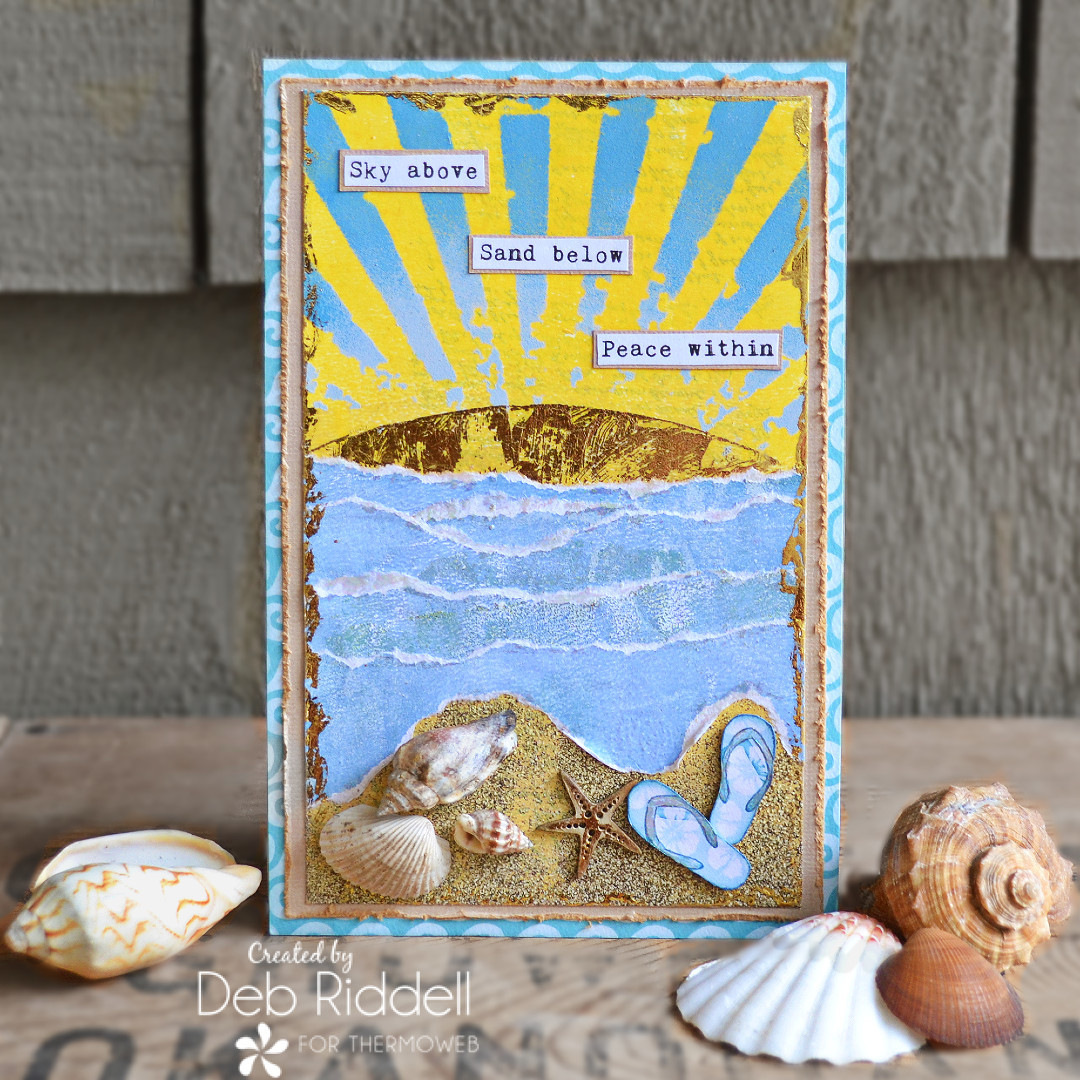
 Hello everyone, thanks for stopping by today. It’s Deb here, we are celebrating Spring Break this week on Therm O Web’s blog and to kick us off I have a beach-themed mixed media plaque to share with you created with Deco Foil Transfer Foils, Duo Transfer Gel, and the Deco Foil Clear Transfer Adhesive Pen.
Peace Within Mixed Media Plaque
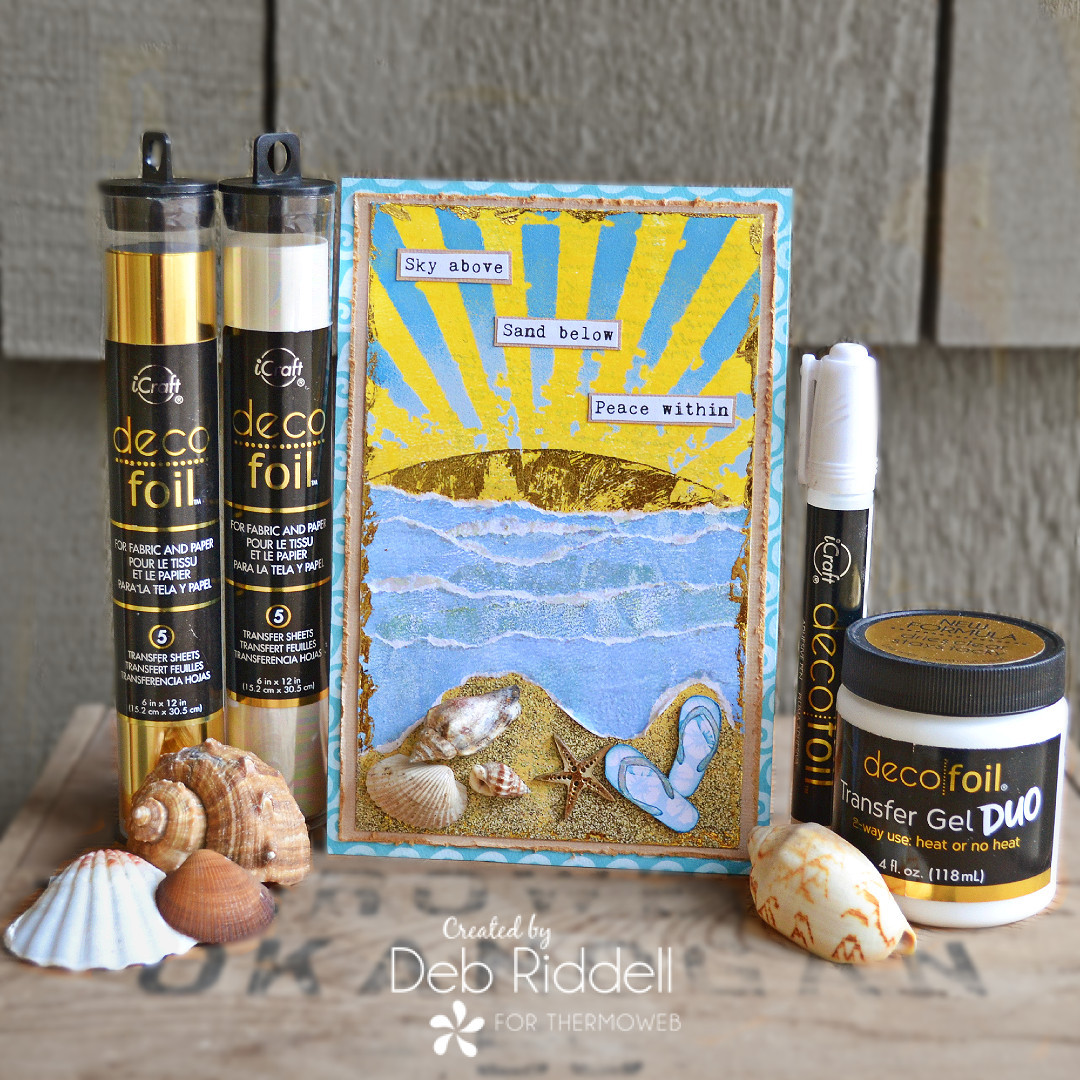
Therm O Web supplies used:
Deco Foil Transfer Sheets – Amber Watercolor
Deco Foil Transfer Sheets, Gold
Deco Foil Transfer Sheets, Opal
Deco Foil Transfer Gel DUO, 4 fl oz
Deco Foil Clear Transfer Adhesive Pen
iCraft Ultra Bond Permanent Dries Clear Adhesive, 2 fl oz
iCraft Easy-Tear Tape, 1/2 in x 25 yd
iCraft Removable Purple Tape Roll, 1.5 in x 15 yds
Gina K. Designs Double-sided Adhesive Foam Squares, White
Other supplies used:
Cardstock – white, tan/beige
Scrapbook paper – blue wave pattern (Carta Bella ‘Summer Splash’ SBSPL 83003 used here)
Copy paper
5″ x 7″ Gel Plate (note: if you don’t have a gel plate you can simply paint the acrylic paint with a paintbrush)
Paint brayer
Acrylic paints – shades of blue, yellow, tan, and green
Sun rays stencil – similar to Stampers Anonymous ‘Rays’ stencil THS503
Fine script stamp
Permanent blue stamping ink
Sand/beige textured embossing powder – similar to Seth Apter Dirty Sand embossing powder
Embossing ink
Assorted seashells
Small chipboard starfish
Flip flops image
Computer and printer
Heat tool
Paintbrush
Scissors
Peace Within Mixed Media Plaque Instructions
Stamp onto your gel plate with a fine script stamp and permanent blue ink. Let the ink dry on the gel plate then roll on yellow acrylic paint at the top of the plate and tan/sand acrylic paint at the bottom, blending them in the middle. Immediately pull a print onto white cardstock (my cardstock was cut to 4 1/2″ x 6″). And yes, I realize that the gel printed stamping is backward but it’s just for a little visual interest 😉 If you don’t have a gel plate, apply the acrylic with a paintbrush and lightly stamp overtop with the script stamp if desired.
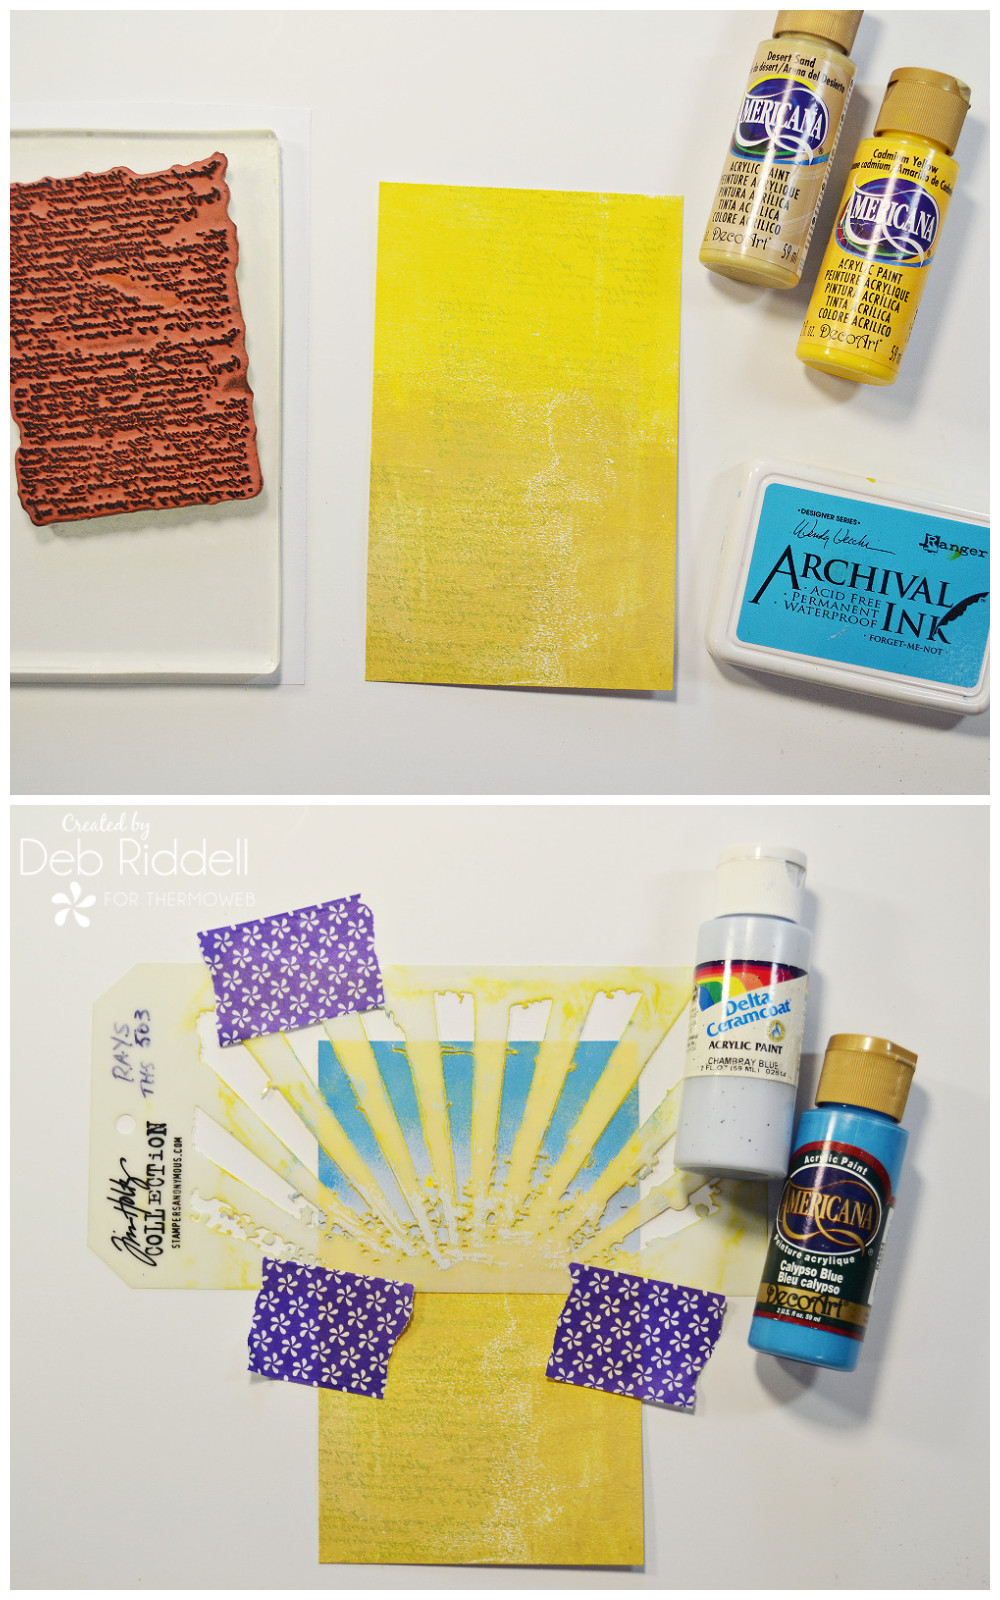
Apply Deco Foil Transfer Gel DUO
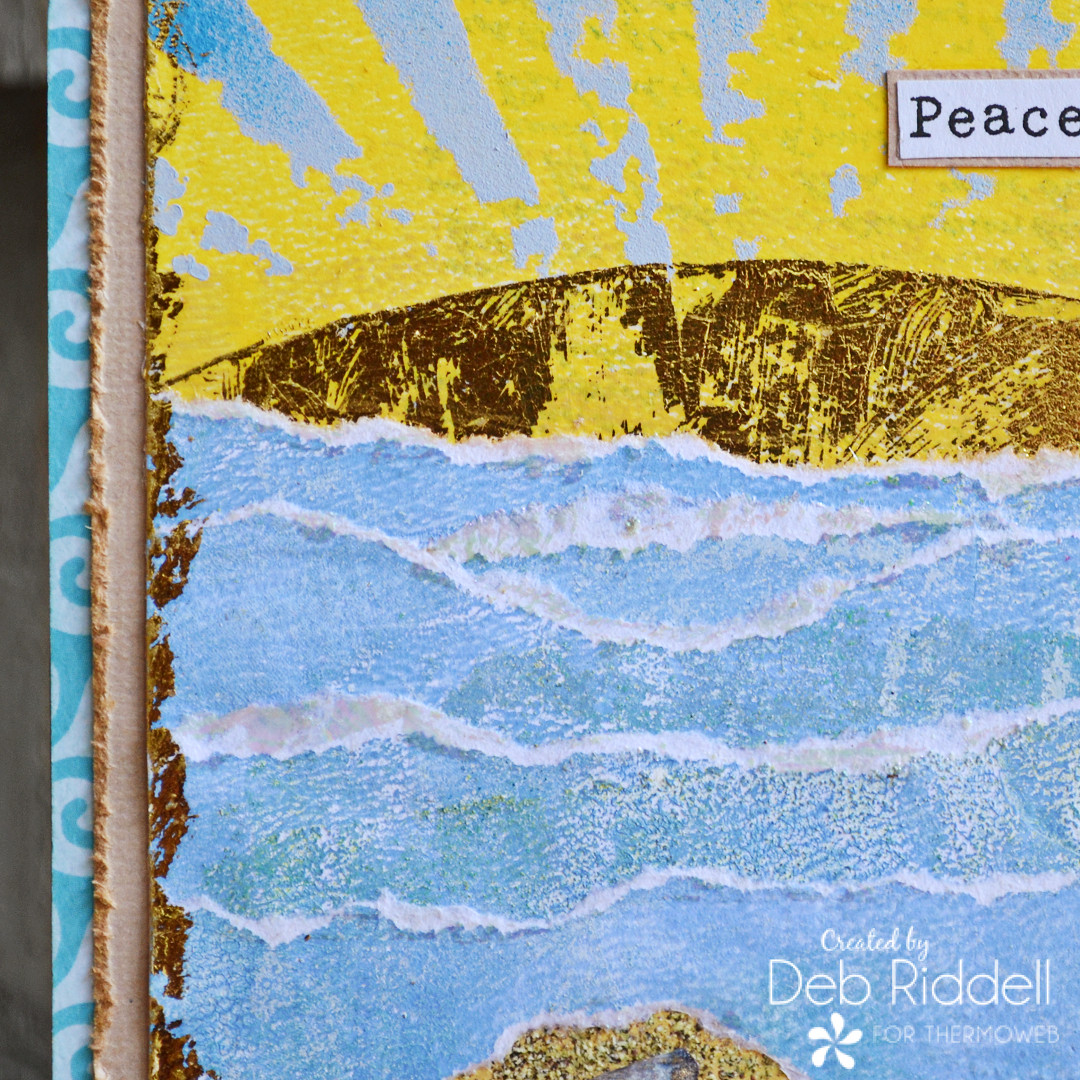
Stencil the sun rays onto the top third of the gel plate print with shades of blue acrylic, starting with light blue near the ‘horizon’ and darker at the top.
Create a semi-circular mask by tracing a plate or other round object onto copy paper and cutting it out. Align the top of the mask arc with the bottom of the blue stenciled areas, secure in place with Purple Tape, and apply a very thin layer of Deco Foil Duo Transfer Gel below the masked area with your finger. Don’t go too far down your gel plate printed background, you only need to cover a couple of inches below the mask.
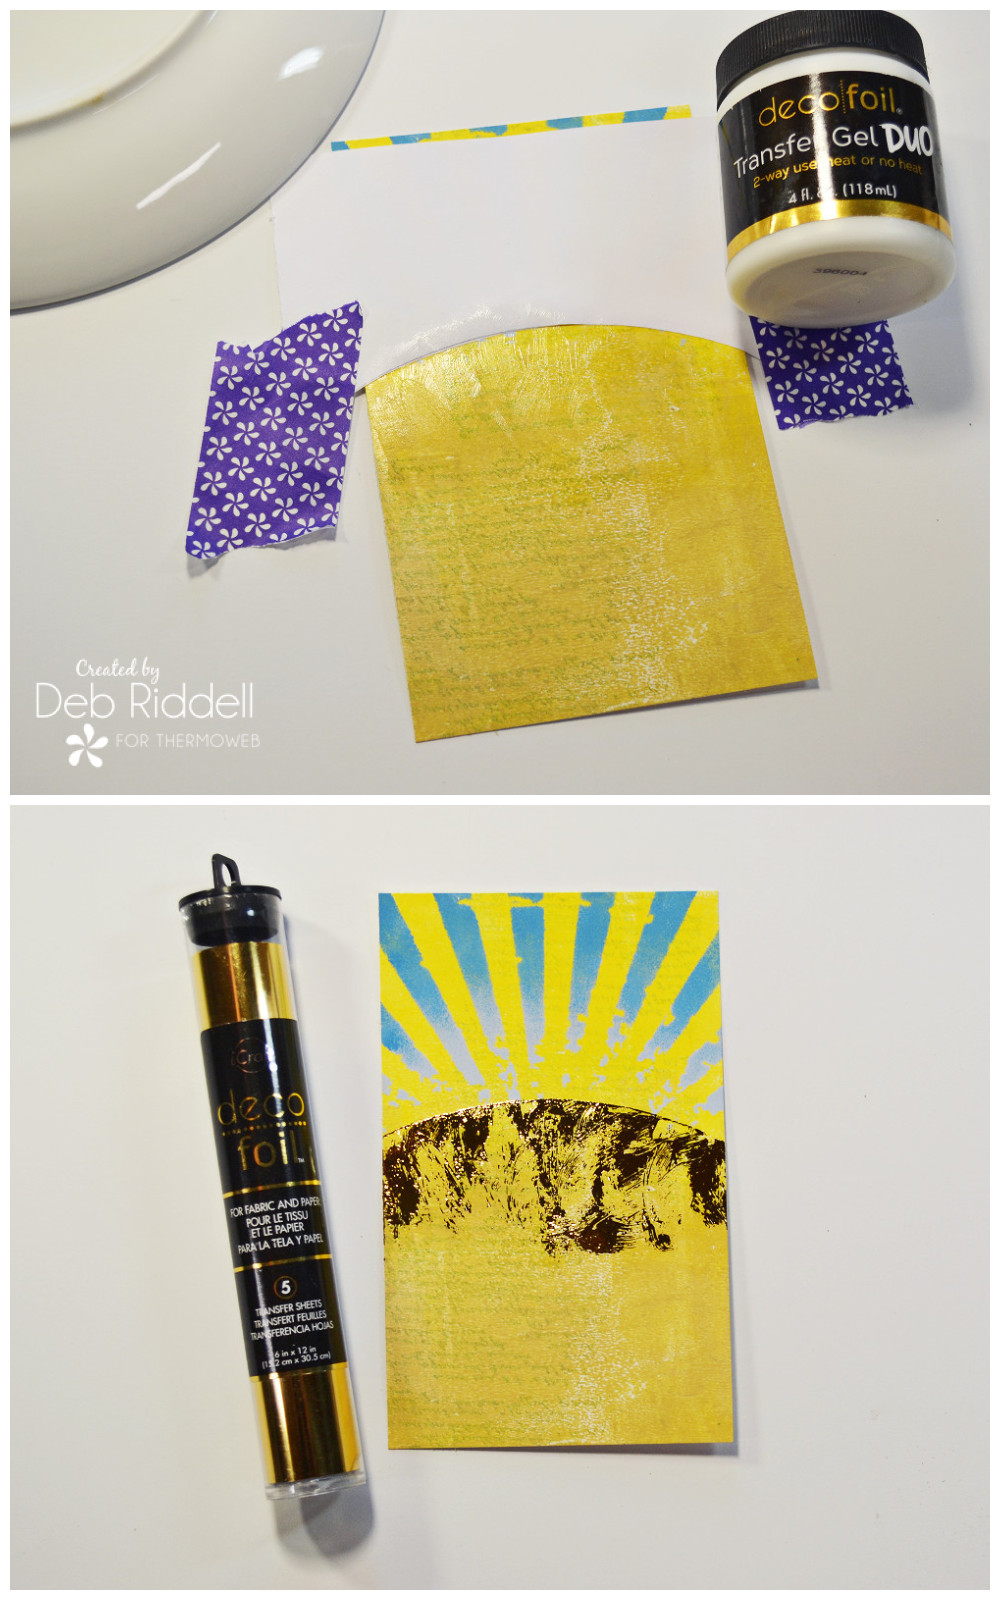
Burnish on the Deco Foil
Let the Duo Transfer Gel dry (only takes a few minutes as it is a very thin layer), then burnish on Gold Deco Foil Transfer Foil with a soft cloth. I love the distressed lost and found edges look you achieve when applying the Duo Transfer Gel with your finger!
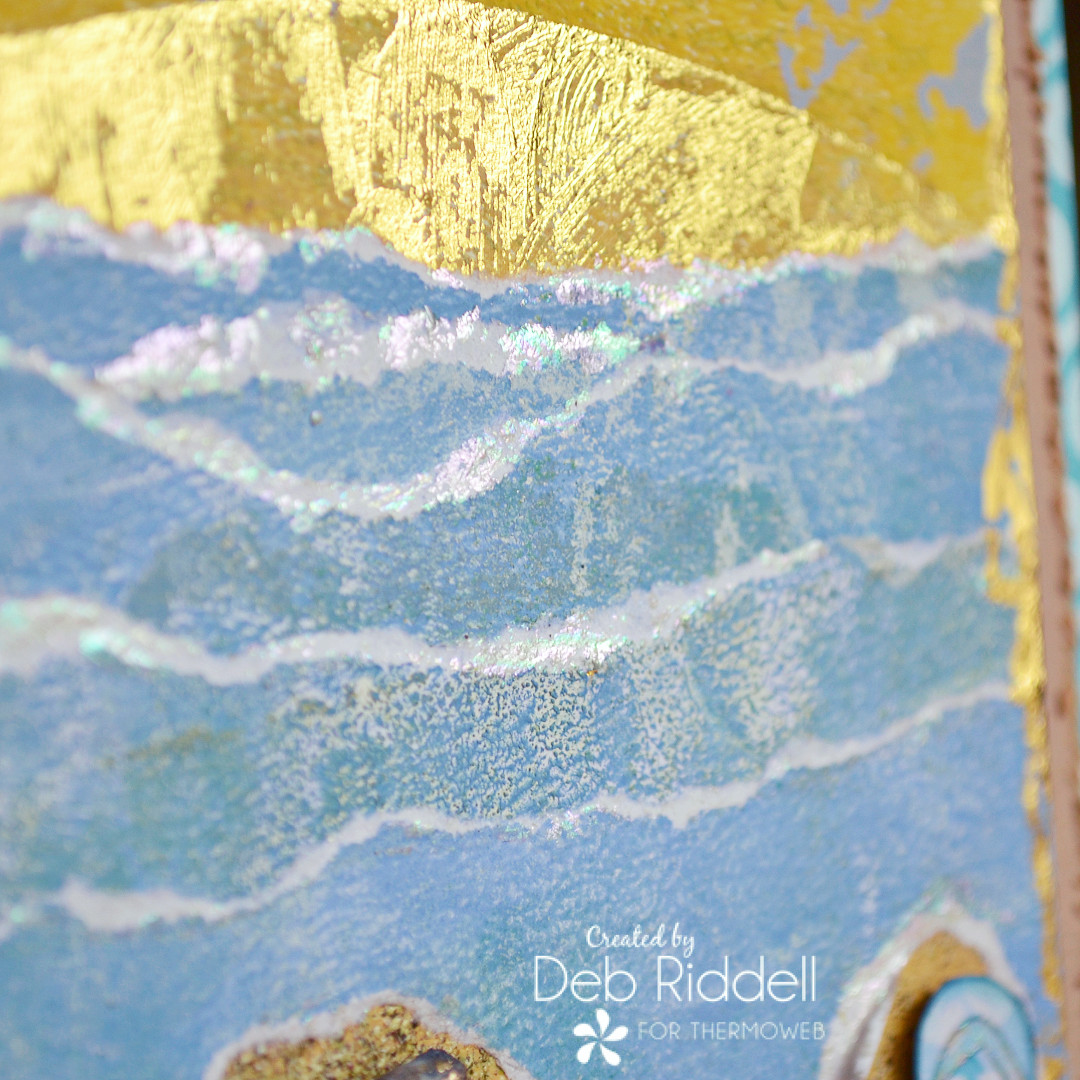
Apply acrylic paint to your gel plate in shades of blue, green, and a touch of yellow, with blue being the predominant color, and pull a print or two onto copy paper. Again, if you don’t have a gel plate apply the paint with your paintbrush to the copy paper in a slip slap manner, blending the colors. Tear thin strips from the gel printed copy paper, making sure to leave a nice white edge on one side. Apply adhesive with the Deco Foil Clear Transfer Adhesive Pen to the exposed white edges, let dry for a few seconds and then burnish on Opal Deco Foil Transfer Foil with a soft cloth.
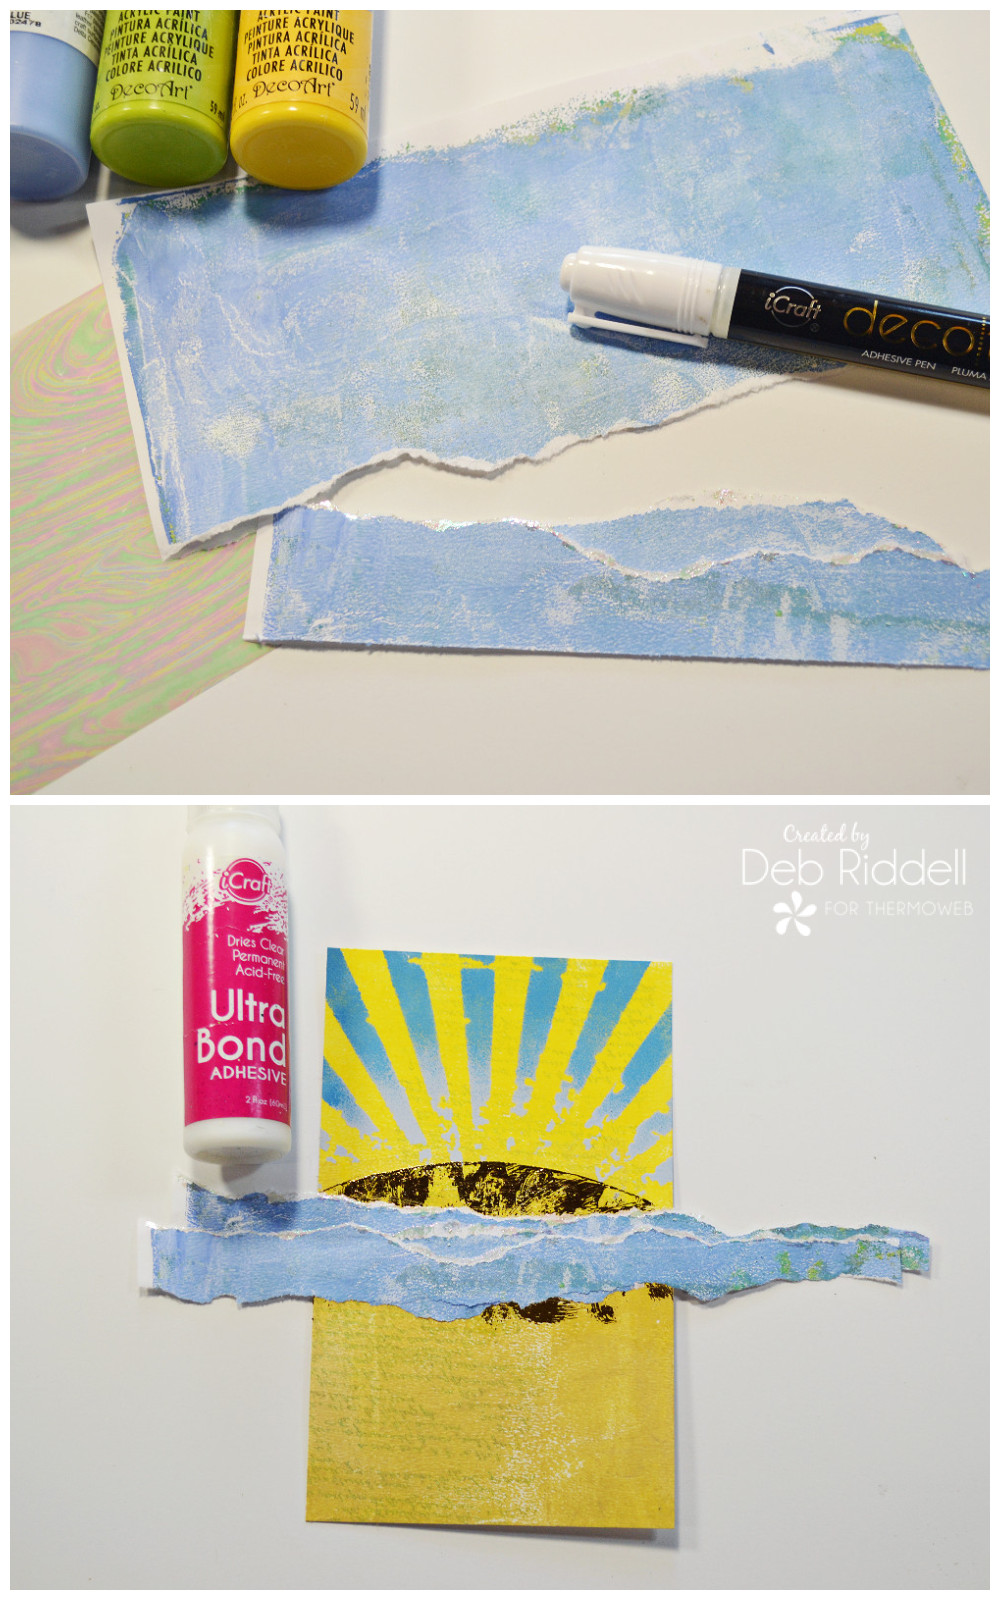
Apply Water Strips with Ultra Bond Adhesive
Start applying your strips of ‘water’ below the gold foiled sun with iCraft Ultra Bond Adhesive, overlapping them to look like waves with the Opal foiled areas mimicking the sunlight reflecting off of the wave tops. Apply three or four strips to get started, then it’s time to add the ‘sand’ on the beach!
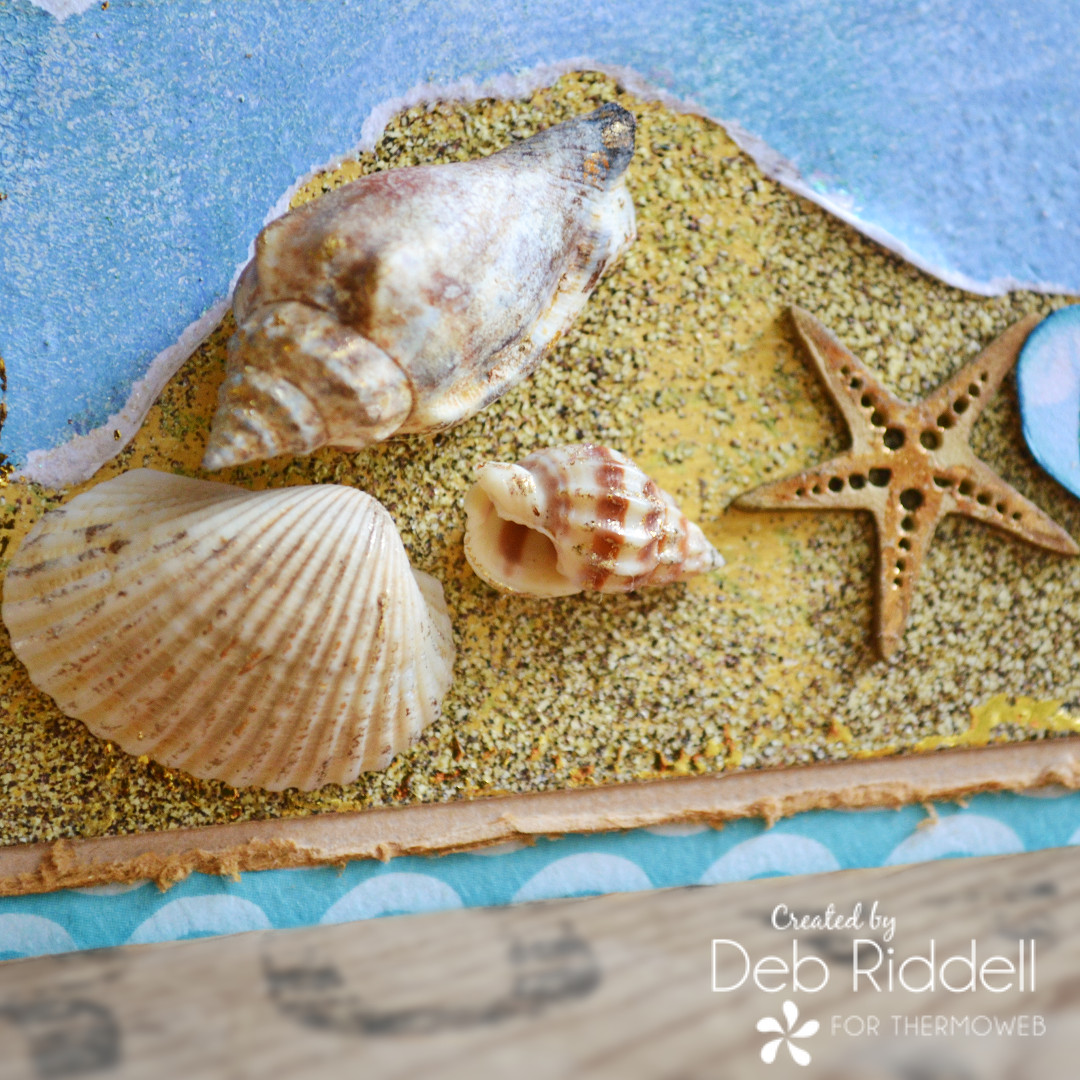
Stamp an embossing ink pad along the bottom third of the gel plate printed background. Sprinkle on the Dirty Sand embossing powder then brush bits off here and there before you heat it so that you can still see some of the background. Heat the embossing powder with your heat tool to activate it. You can add more ‘sand’ if you feel it needs it by reapplying the embossing ink and brushing off the excess embossing powder before heating it.
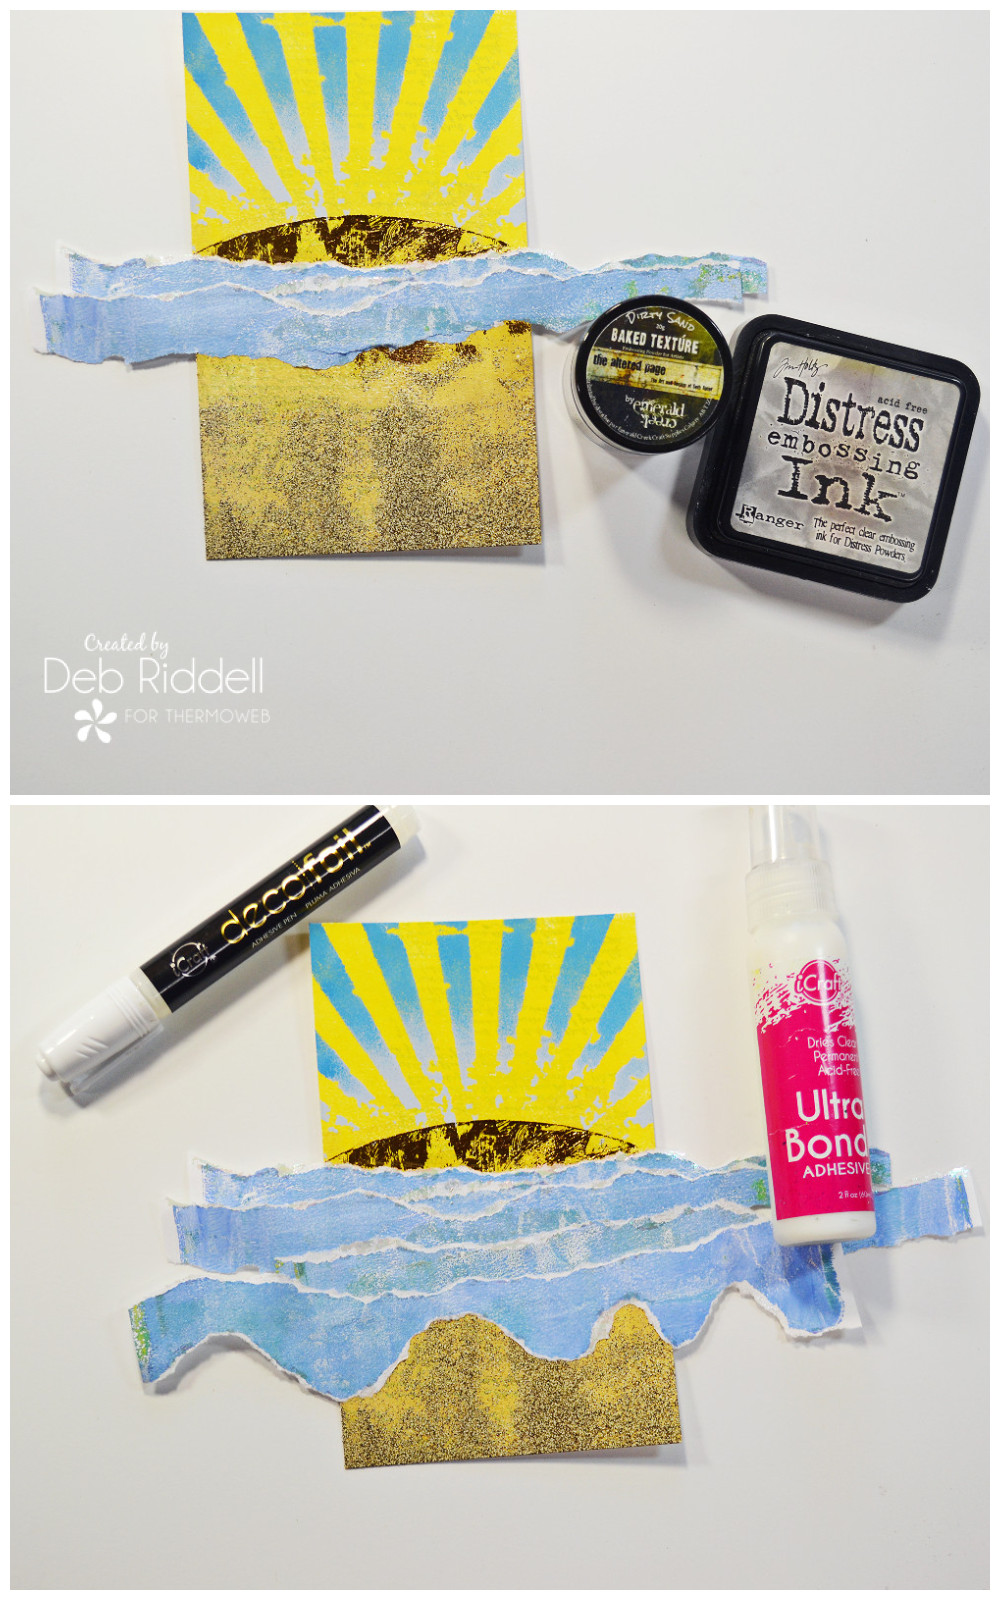
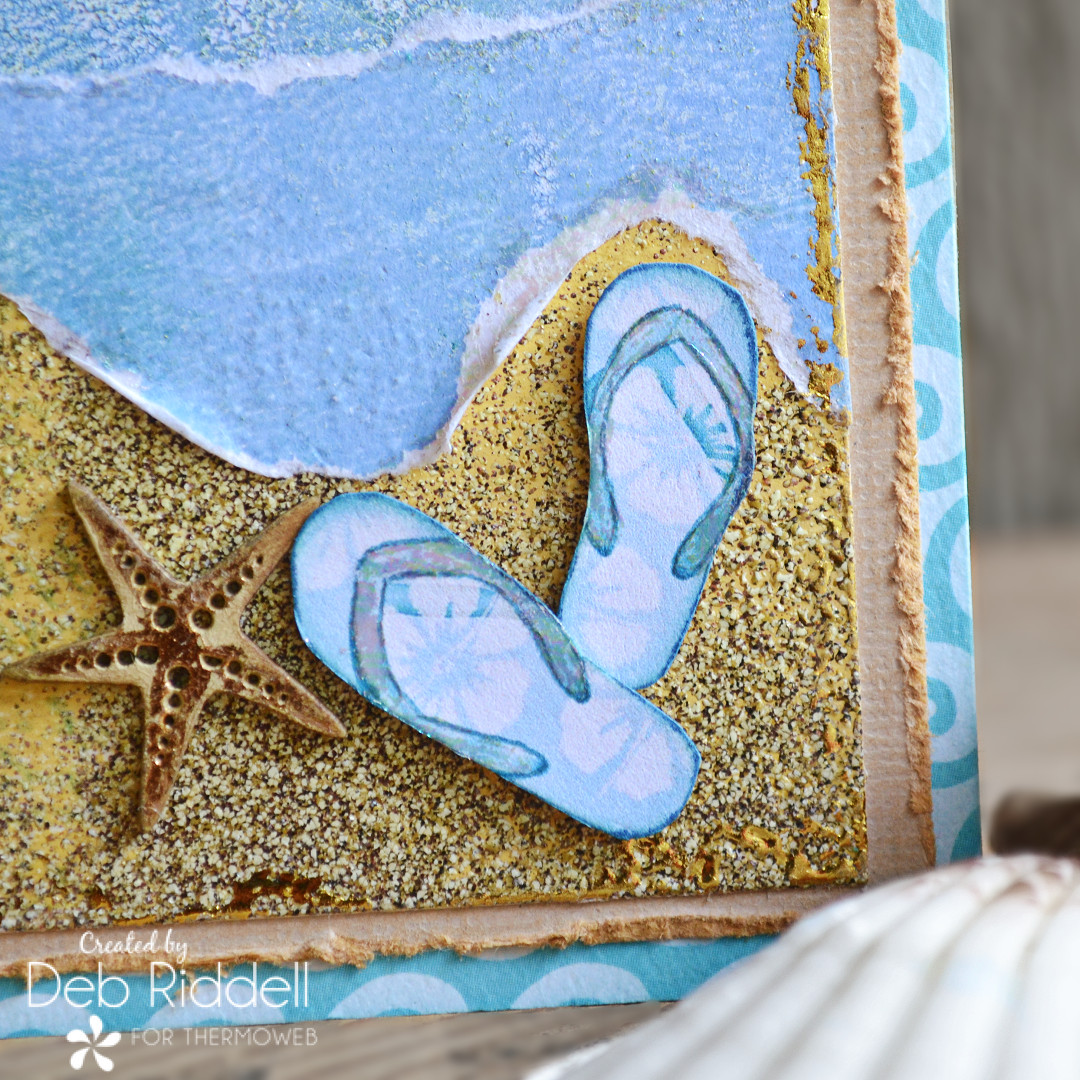
Continue to add more strips of ‘water’ to the background with iCraft Ultra Bond Adhesive. For the last strip, tear white edges on both the top and the bottom to mimic where the waves are washing up onto the beach. Be sure to foil both the top and the bottom edges of the final ‘wave’ with the Opal foil. Trim off the excess on both sides of your background once the glue has dried.
Randomly apply adhesive all around the edges of your background with the Deco Foil Clear Transfer Adhesive pen. Allow to dry till tacky (just takes a few seconds), then burnish more Gold Deco Foil Transfer Foil around the edges of your background.
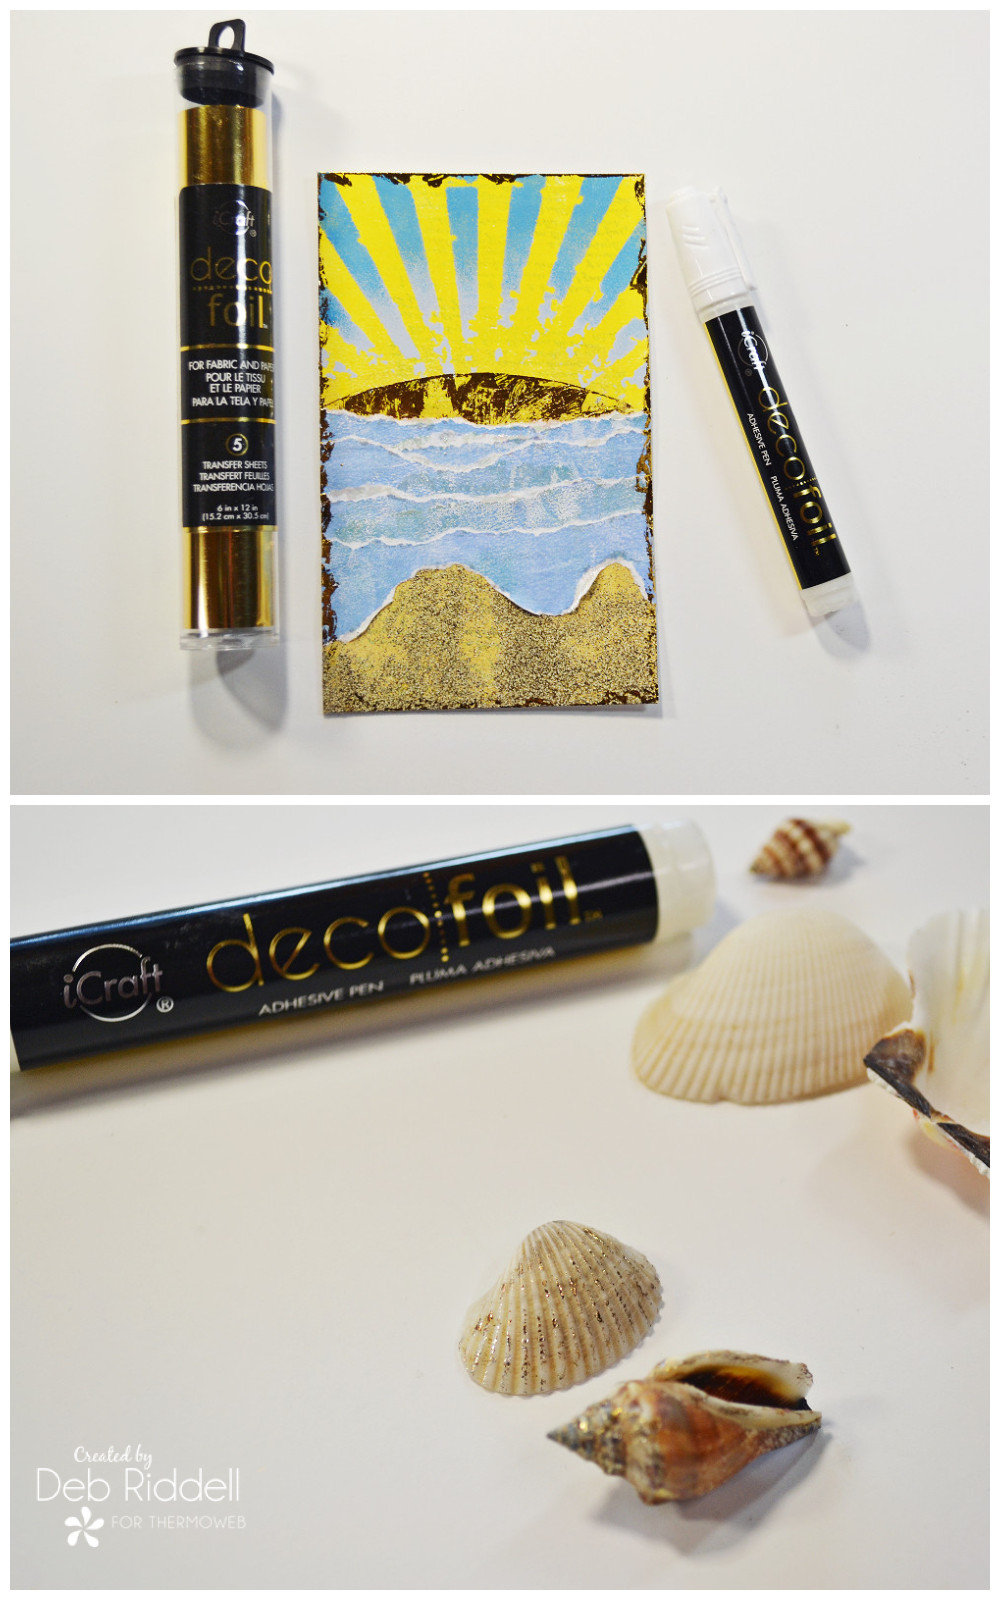
Let’s add a bit of sparkle to the seashells to mimic the glints of mica that you sometimes see in beach sand. Apply adhesive to the raised areas on the shells with the Deco Foil Adhesive Pen, let dry till tacky then wrap the seashells in a piece of Amber Watercolour Deco Foil and burnish well with a soft cloth. Beautiful!
Paint the chipboard starfish with a sand/tan colored acrylic paint then apply the adhesive with the Deco Foil Adhesive Pen once the paint has dried and burnish on some Amber Watercolour Deco Foil.
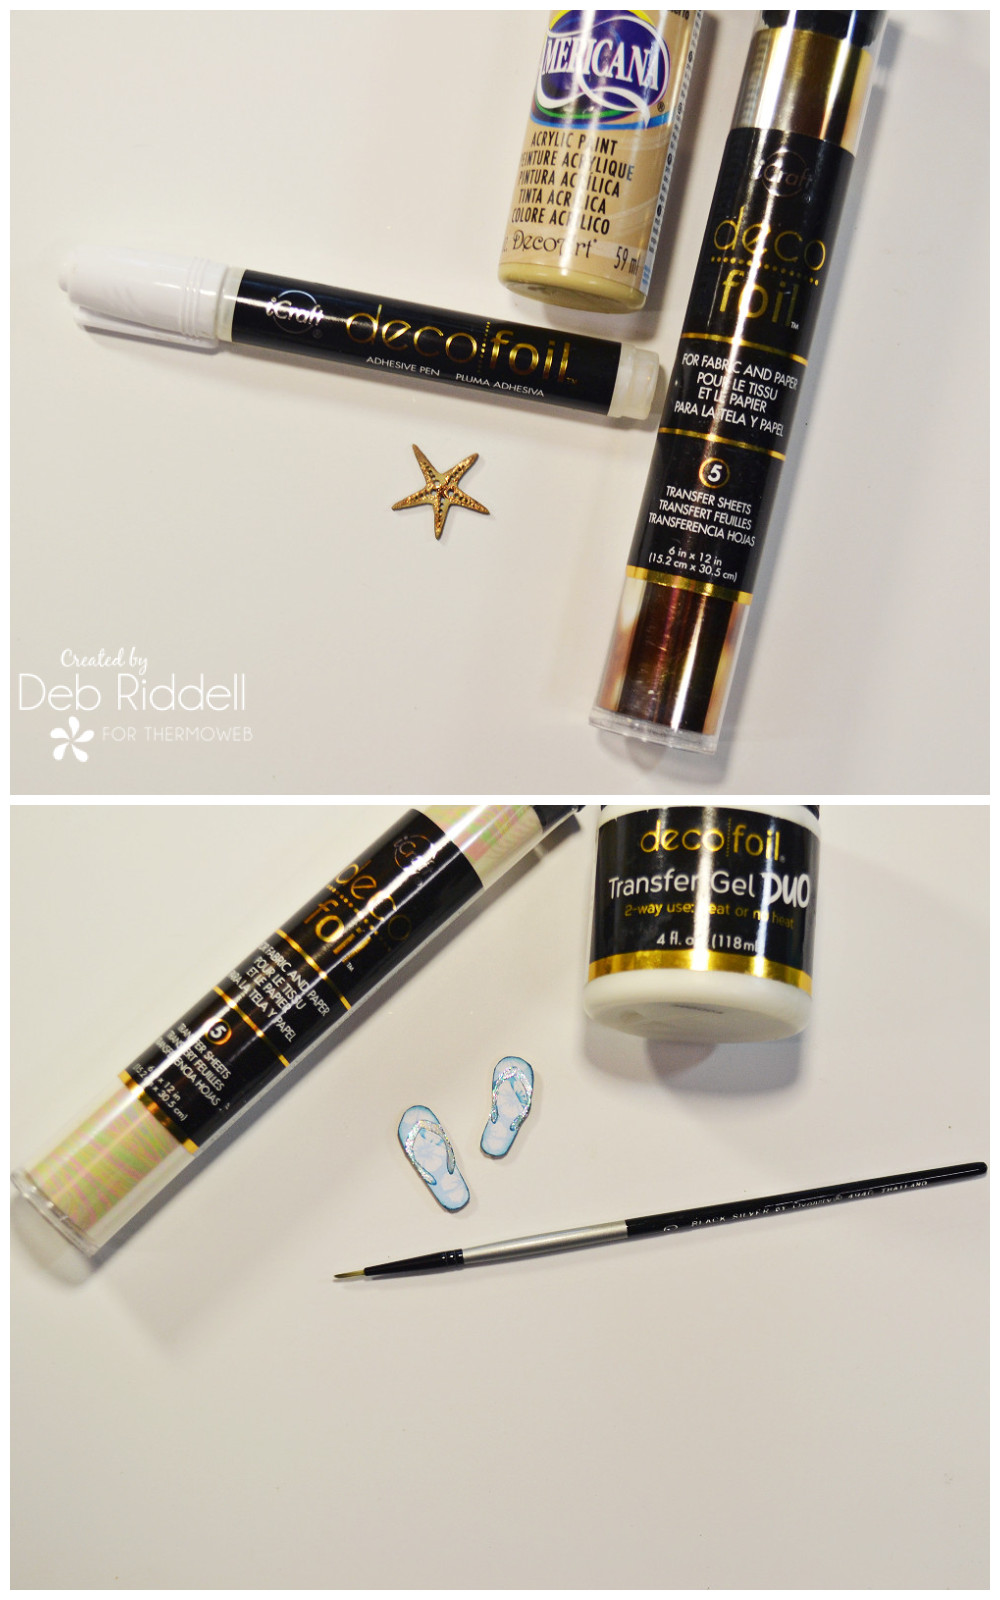
Find a flip flop image on the web (or if you have some scrapbook paper with a flip flop pattern cut them out!). Resize the web image if necessary (I made my flip flops about 1″ long), print them out onto cardstock, and fussy cut. To add a bit of interest, paint a thin layer of Deco Foil Duo Transfer Gel onto the flip flop straps and burnished on Opal Deco Foil once it has dried (or you can also use the Deco Foil Adhesive Pen if your straps are wider than mine were).
Before adding your embellishments, layer up the gel plate printed background onto a piece of tan cardstock (tattered around the edges if you like) and then onto a piece of blue wave-patterned scrapbook paper with your 1/2″ Easy-Tear Tape, leaving about a 1/4″ to 1/3″ reveal between the layers.
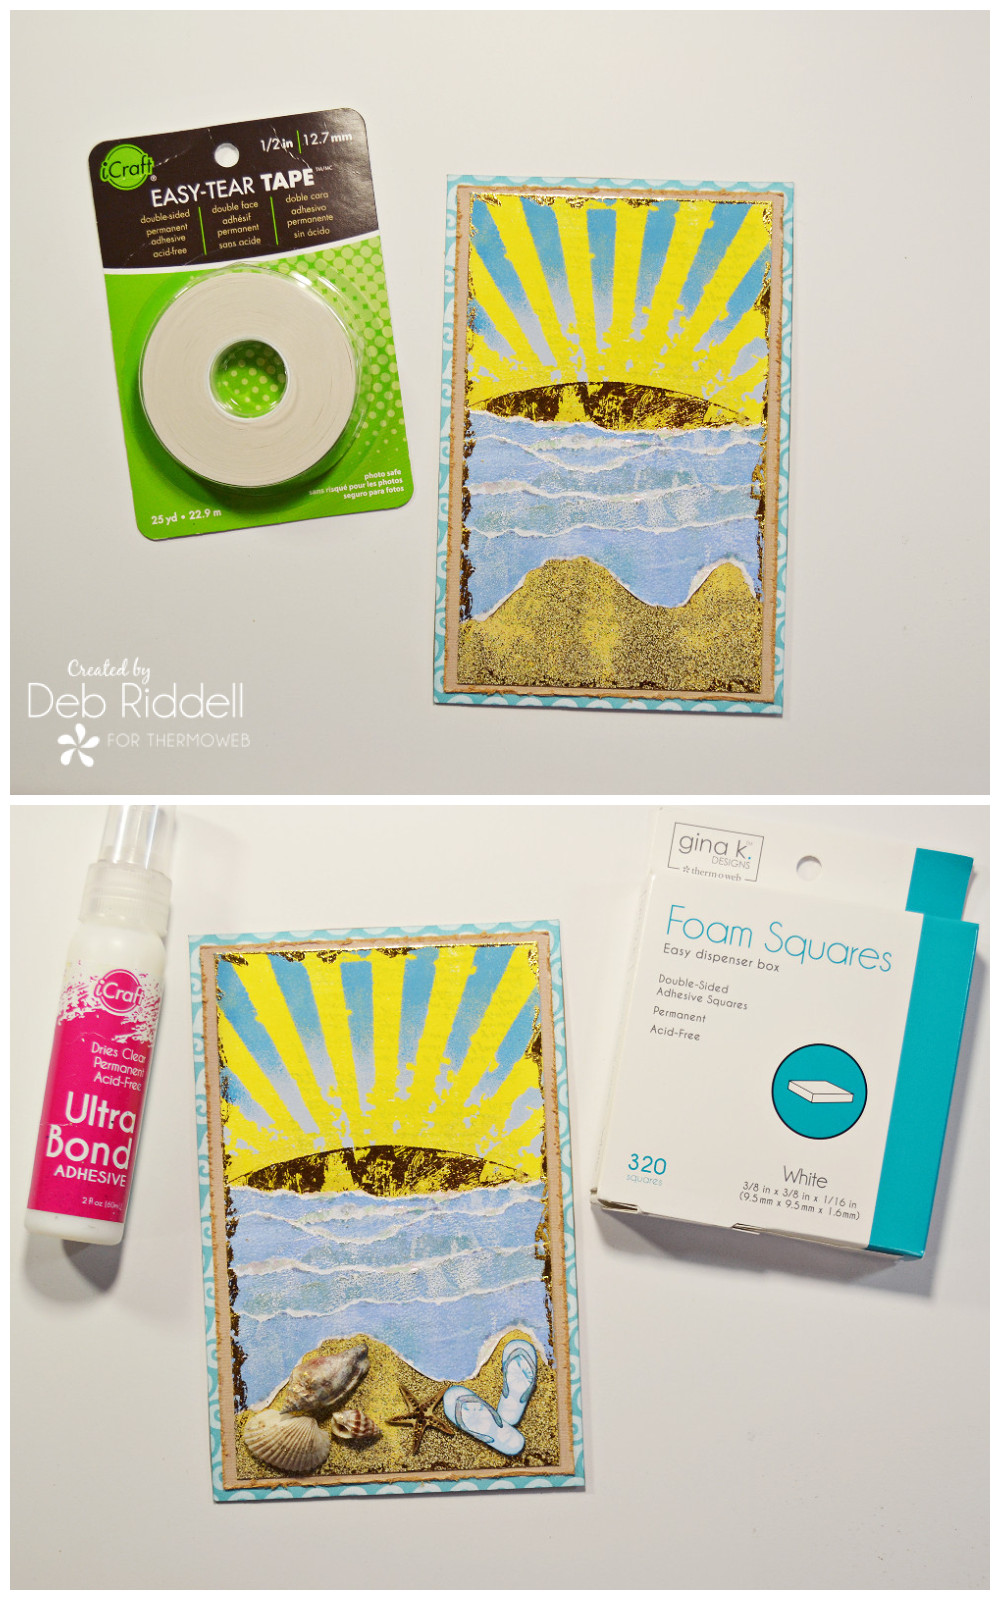
Adhere the seashells, starfish, and flip-flops onto the ‘beach’ with either iCraft Ultra Bond Adhesive or Gina K. Designs Foam Squares.
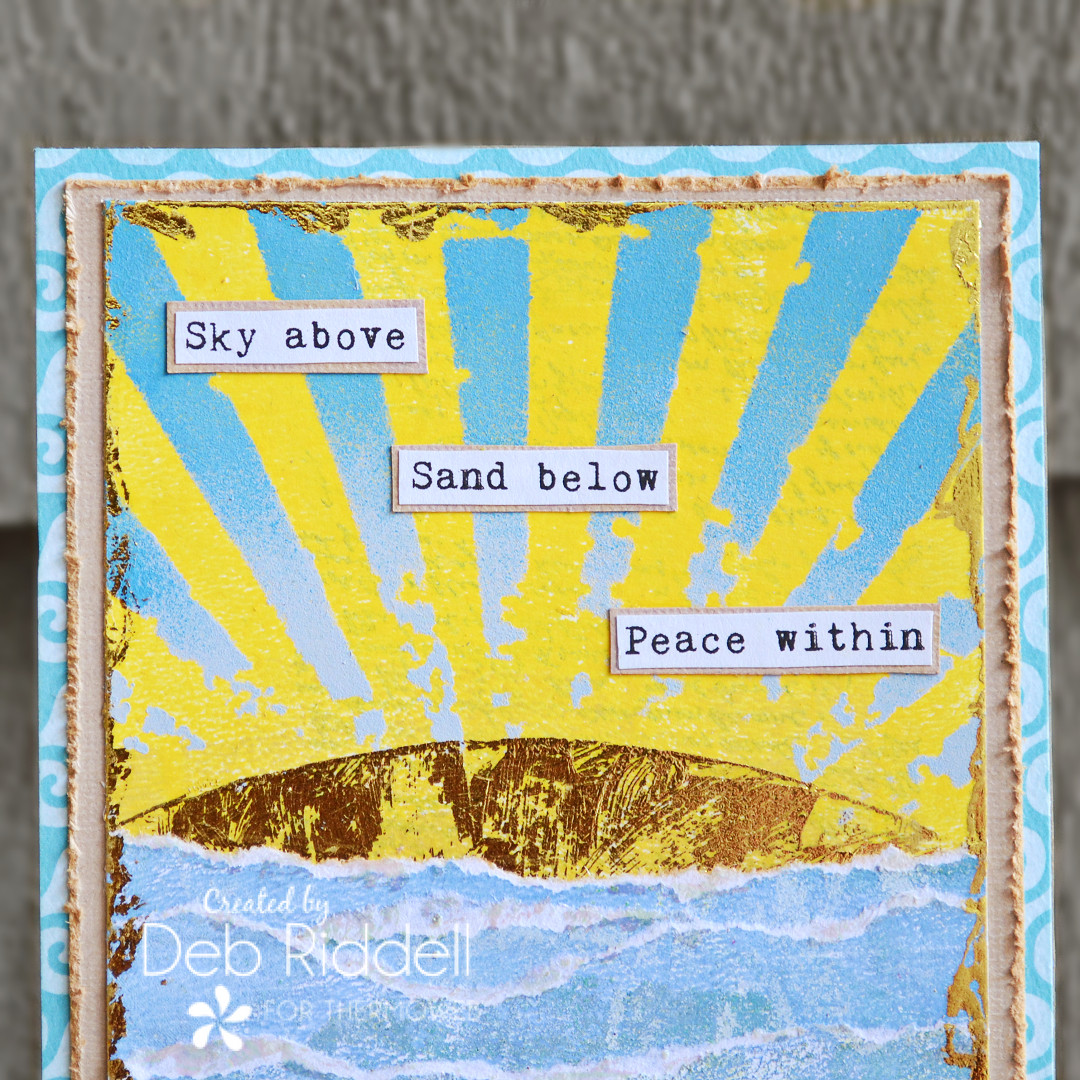
Print the sentiment onto copy paper with your computer (or stamp a sentiment if you prefer), cut out the words, and mount them onto pieces of tan cardstock. Apply the sentiment to your plaque with iCraft Ultra Bond Adhesive and you are done!
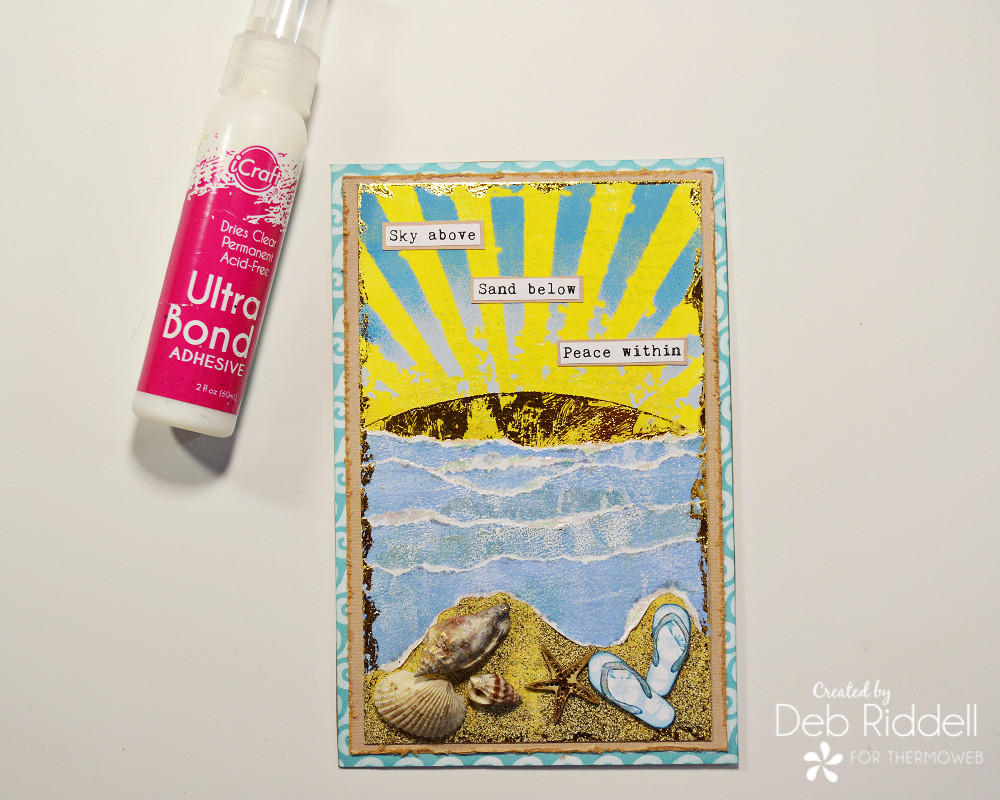
Here are a few closeups of the finished plaque.

I hope that you’ve enjoyed seeing how it came together and that I’ve been able to show you some new ways (and places!) you can use your Deco Foil Transfer Foils and Adhesives. Thanks as always for stopping by today and happy creating,
Deb xo

cakewizzardhotmailcom
April 7, 2021 at 8:20 am (4 years ago)I loved your sea and sand mixed medium card. Your directions were clear. Gave me so many new ideas.
Deb Riddell
April 7, 2021 at 3:15 pm (4 years ago)So glad you liked it cakewizzard, can’t wait to see what you create! Deb xo