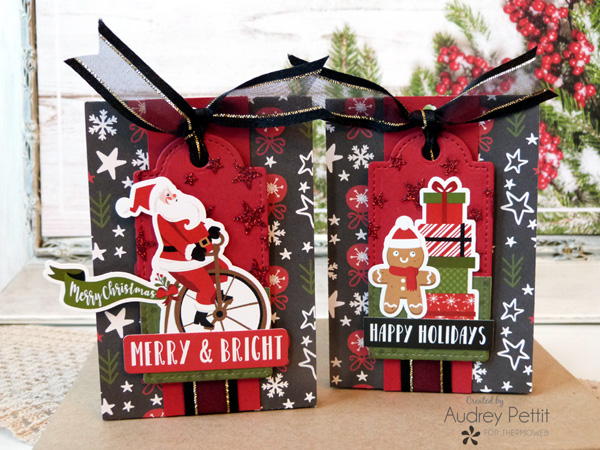
Gift cards are always a popular gift item at the holidays, but let’s face it…. those plain little envelopes they come in often feel a bit lackluster. So today I’ve got a super quick and easy packaging idea for dressing up those gift cards and turning them from ho-hum to a big Ho Ho Ho!
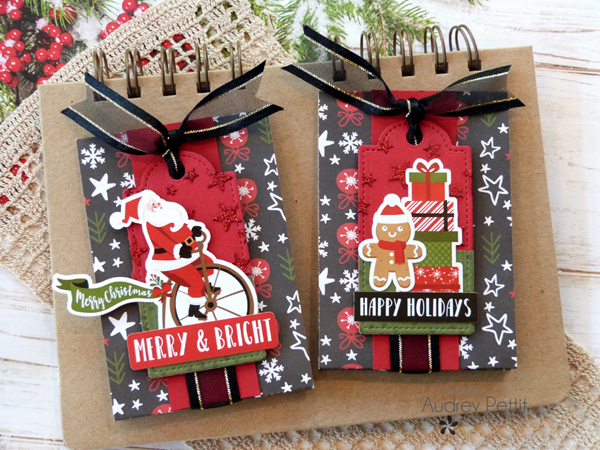
Gift Card Holders
by Designer Audrey Pettit
ThermOWebSupplies:
Gina K Designs Premium Cardstock Red Velvet
Gina K Designs Glitz Glitter Gel Red Velvet
Gina K Designs Wafer – Thin Die Set Decorative Tag
Gina K Designs Sheer Satin Fancy Ribbon Black/Gold
iCraft Easy-Tear Tape Adhesive 1/8″
iCraft Purple Tape
Memory Tape Runner XL
Gina K Designs Foam Squares
Patterned Papers, Stickers: Echo Park Paper My Favorite Christmas
Stencil: Stamper’s Anonymous
12″ ScorePal
Holiday Gift Card Holders
These gift card holders are easy to make for any holiday or special occasion throughout the year. Simply change out the papers and embellishments that you use to customize these to your needs.
I’ve got the complete step-by-step, so let’s take a closer look.
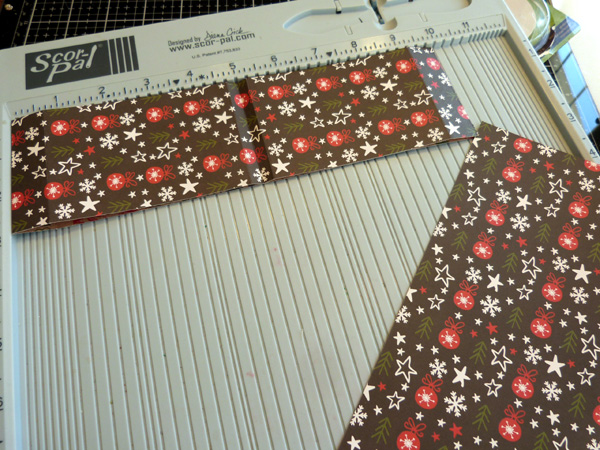
To begin, cut strips of patterned paper or cardstock that are 2.75″ x 10″. Place the paper up against the top left corner of a scoreboard, and score along the 10″ length at 3/4″, 4 3/4″, 5″, 5 1/4″, and 9 1/4″. Fold the paper along all the score lines.
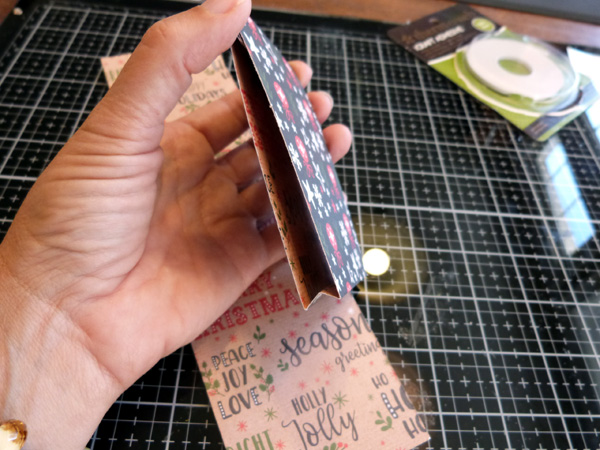
Bend the two 1/2″ flaps at both ends of the paper inwards. Create a W fold at the bottom.
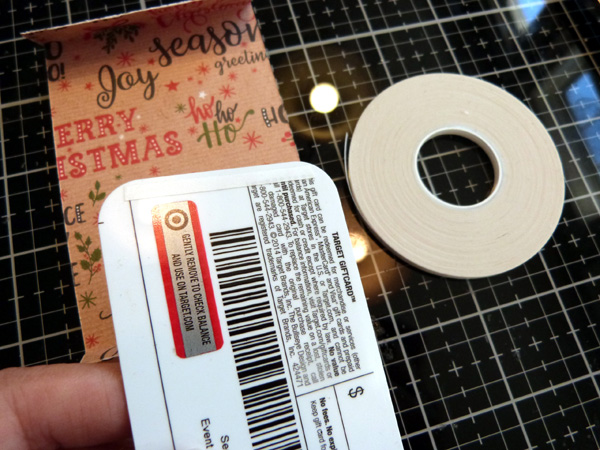
Place a strip of 1/8″ iCraft Adhesive on the back top edge of a gift card. Peel off the protective liner, and adhere the card against the back flap- making sure to place the gift card towards the bottom edge of the flap. This is because we need room to punch a hole above the gift card. Now place another strip of iCraft Adhesive onto the front top edge of the gift card. Peel off the protective liner, and close the gift card holder to secure it against the adhesive.
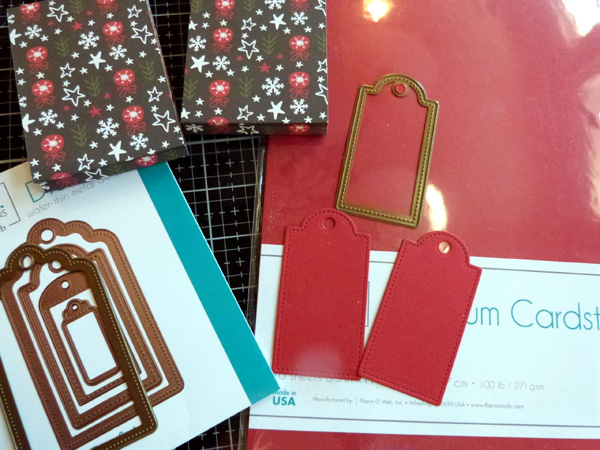
Die-cut the second largest tag shape from the Decorative Tag die set from Red Velvet cardstock.
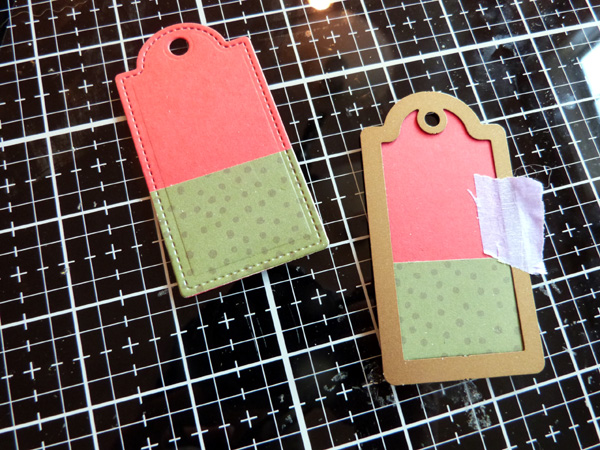
Adhere a strip of green patterned paper across the bottom of the tags. Place the tag die back until you feel the die fall into the previous cuts. Hold the die in place with a piece of Purple Tape, and run the tag through your die cutting machine again. This will add the pretty stitched edging to the entire tag.
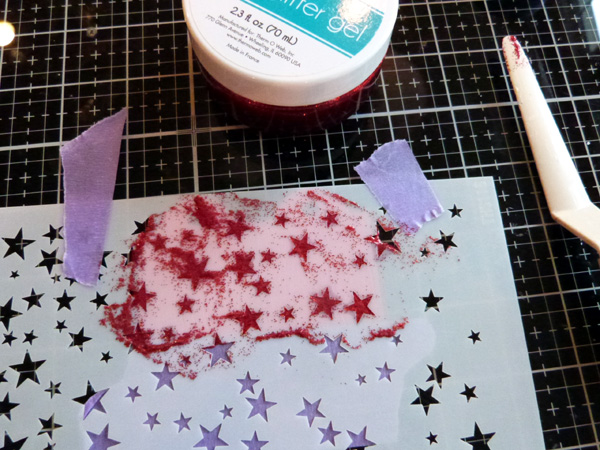
Mask off the patterned paper portion of the tags with Purple Tape. Add a star stencil over the red top portion, and hold it secure with more Purple Tape. Apply Red Velvet Glitz Glitter Gel through the stencil with a palette knife. Scrap any excess back into the jar, and remove the stencil from the paper immediately. Wash the tool and stencil with warm soapy water while setting the tags aside to dry.
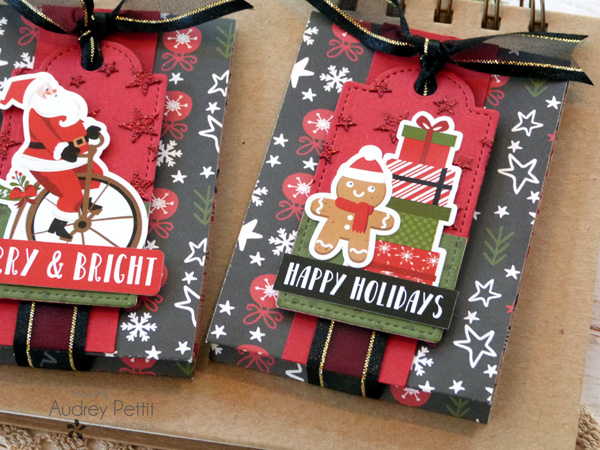
Trim a 1.25″ strip of Red Velvet cardstock, and adhere the paper down the center of the gift cardholder. Trim the edges, as needed. Punch a hole in the very top of the holder. Thread the ribbon around the holder and through the hole. Thread the tag into the ribbon, and then tie the ends into a simple knot. Trim the ends of the ribbon into a V-notch. Place a couple of Foam Squares behind the bottom of the tag to hold them in place. Add stickers to embellish the tags.
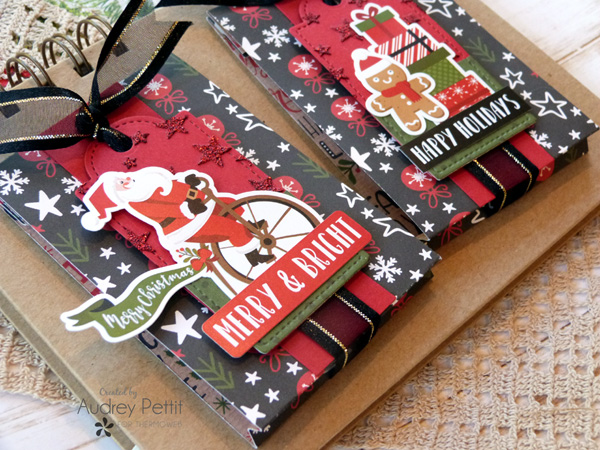
Easy and fun gift card holders! Enjoy!
Save

Denise Bryant
November 19, 2019 at 2:27 pm (6 years ago)These are so pretty! Love the papers and dies, and of course that yummy Glitz Glitter Gel!