This week, we are so excited to be teaming up with our friends at Brutus Monroe, creating projects mixing Brutus’ clear stamps and stencils with Therm O Web’s amazing line up of products. Today I have some bright and happy cards and tags to share with you, inspired by my favorite colors of spring. First up, this be happy, be bright, be you card.
Be Happy, Be Bright, Be You Card & Tag Set with Brutus Monroe
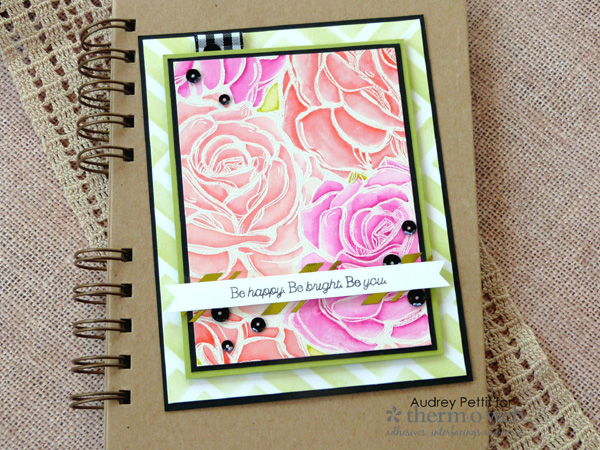
Be Happy, Be Bright, Be You Card by Designer Audrey Pettit
Supplies:
Therm O Web Gina K Designs Premium Cardstock: Luxury White, Black Onyx, Jelly Bean Green
Therm O Web Gina K Designs Fancy Foils- Jelly Bean Green
Therm O Web Designer Toner Sheets- Pinstripes
Therm O Web Gina K Designs Gingham Fancy Ribbon
Therm O Web Gina K Designs Premium Dye Ink- Jelly Bean Green
Therm O Web iCraft Purple Tape
Therm O Web iCraft Deco Foil Double-Sided Adhesive Foam
Therm O Web Mixed Media Adhesive
Therm O Web Memory Tape Runner XL
Therm O Web Royal Sovereign Laminator
Brutus Monroe Clear Acrylic Stamps- Rose Garden, Floral Frame
Brutus Monroe Mixed Media Stencil- Tile
Brutus Monroe Detail Ink- Raven
Brutus Monroe Water Brush
Strathmore Bristol Smooth Cardstock
Zig Clean Color Markers
Clear Embossing Ink: Tsukineko
Embossing Powder, Mini Ink Blending Tool: Ranger Ink
Sequins
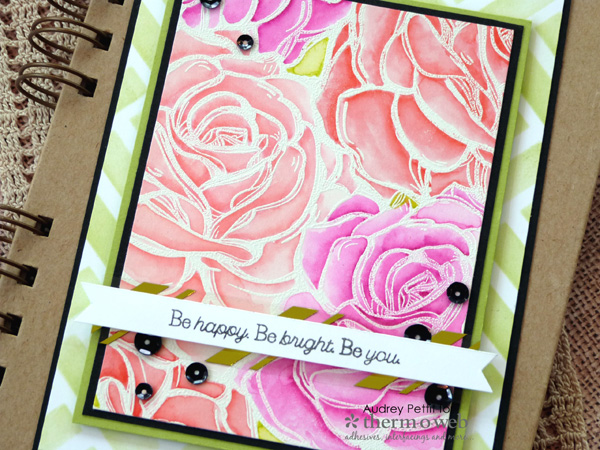
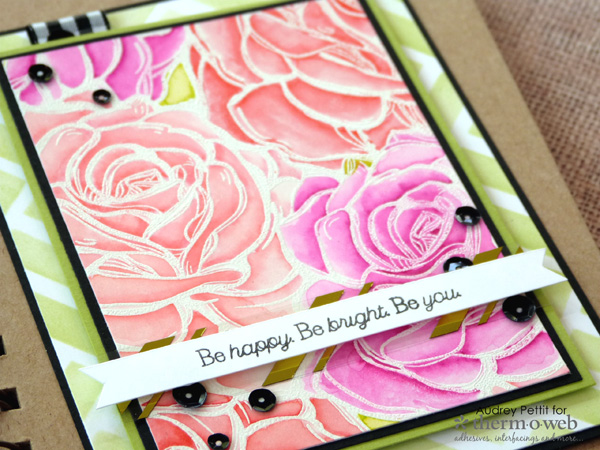
This card features the gorgeous Rose Garden clear stamp and lots of layers of crisp Therm O Web premium cardstock… accented with a small touch of foil, too. Let’s take a closer look.
Be Happy, Br Bright, Be You Card Instructions: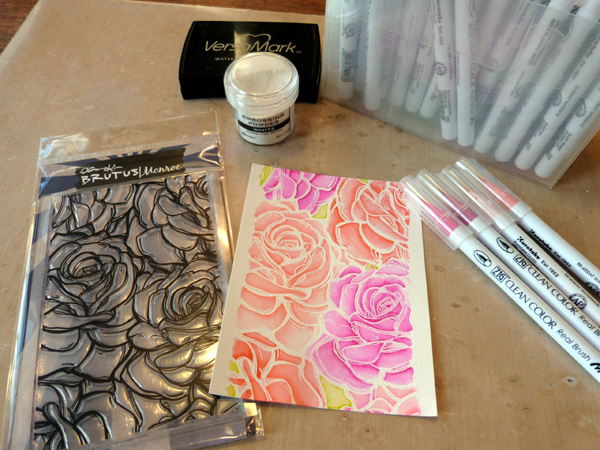
To begin, trim an A2 panel from Bristol Smooth cardstock or watercolor cardstock. Stamp the Rose Garden stamp onto the paper using clear embossing ink, and then heat set it with white embossing powder. Watercolor the flowers using Zig Clean Color Markers and the Brutus Monroe water brush.
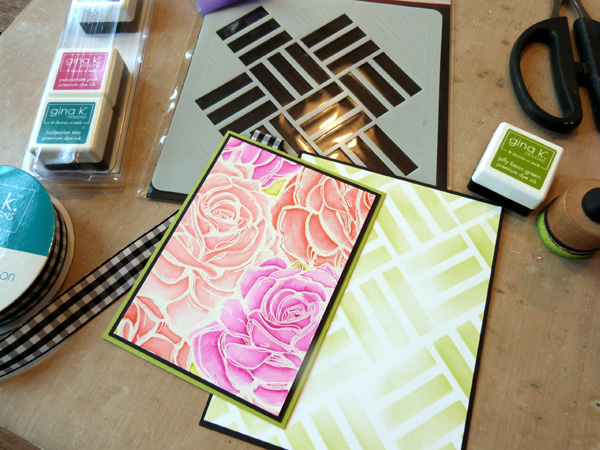
Trim down the panel, and layer it first onto Black Onyx Premium Cardstock, and them onto Jelly Bean Green cardstock. Cut a panel of black cardstock to fit an A2 card base and a slightly smaller layer of white cardstock. Place the Tile Mixed Media Stencil onto the white cardstock, and hold it in place with a bit of Purple Tape. Using a mini ink blending tool, blend Gina K Designs Jelly Bean Green premium dye ink over the stencil. Adhere the black cardstock to the card base, followed by the stenciled panel. Fold a 1.5″ length of gingham ribbon in half, and secure it to the back of the watercolor panel using a bit of Mixed Media adhesive.
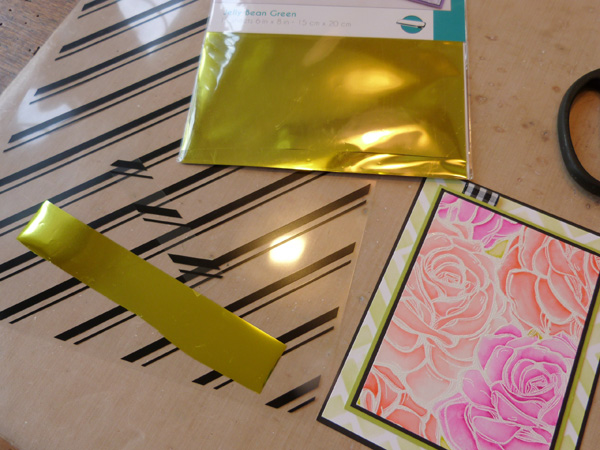 Trim a 1″ x 3.25″ strip of Pinstripes Clear Designer Toner Sheet. Trim a slightly larger piece of Gina K Designs Jelly Bean Green Fancy Foils. Turn on your laminator and let it come to temperature.
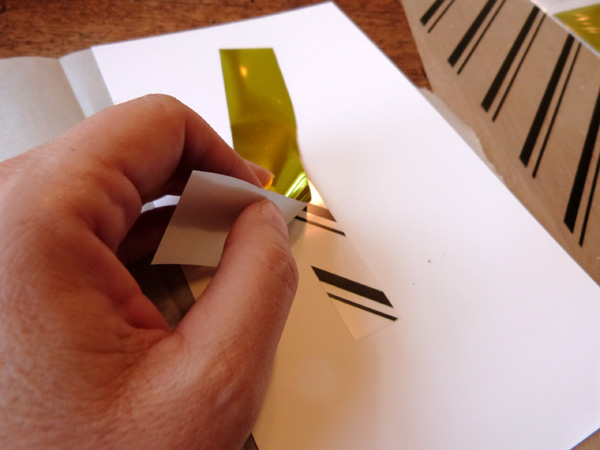
Place a scrap of cardstock between the sheets of a folded piece of parchment paper. Place the toner sheet onto the cardstock, with the toner side up. Place the Fancy Foil onto the Toner Sheet, with the colored side up, and the silver side down. Run this sandwich through the laminator.
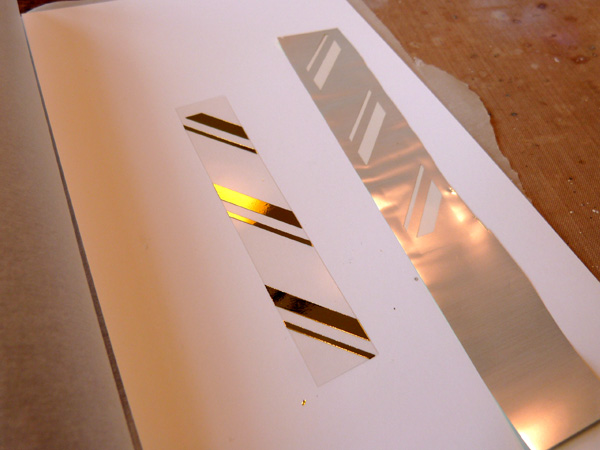
Peel off the Fancy Foil to reveal your foiled design. Place a thin line of Mixed Media adhesive in the center of this strip, and adhere it across the bottom of the floral panel.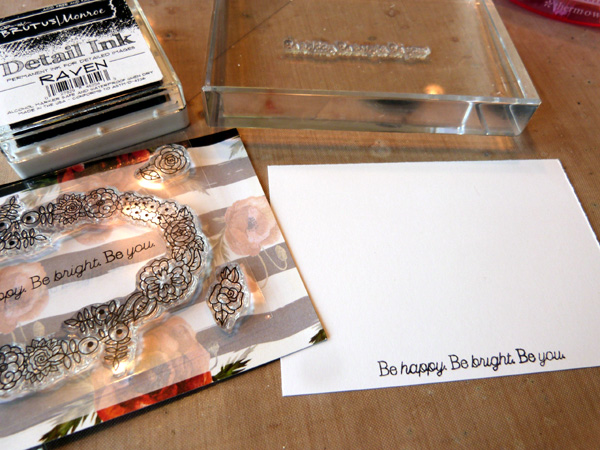
Stamp the sentiment from the Floral Frame stamp set in Raven Detail Ink onto white cardstock. Trim it into a thin banner strip. Add Double-Sided Foam Adhesive to the back of the sentiment strip, and the back of the floral panel too. Adhere the sentiment to the middle of the foiled Toner Sheet strip, and the floral panel to the center of the card. Add sequins to the card, adhered with a dab of Mixed Media adhesive.
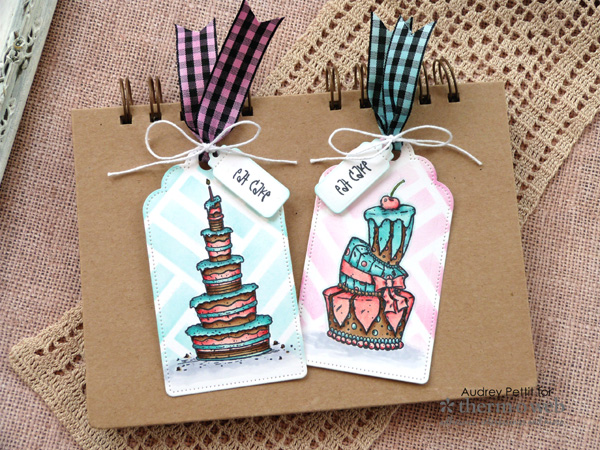
Eat Cake Tag Set
Supplies:
Therm O Web Gina K Designs Premium Cardstock- Luxury White
Therm O Web Gina K Designs Die Set- Decorative Tags
Therm O Web Gina K Designs Gingham Fancy Ribbon
Therm O Web Gina K Designs Premium Dye Ink- Turquoise Sea, Passionate Pink
Therm O Web iCraft Purple Tape
Brutus Monroe Clear Stamp Set- Topsy Cakes
Brutus Monroe Mixed Media Stencil- Tile
Brutus Monroe Detail Ink- Raven
Brutus Monroe Masking Paper
Ranger Mini Ink Blending Tool
Copic Markers
Twine
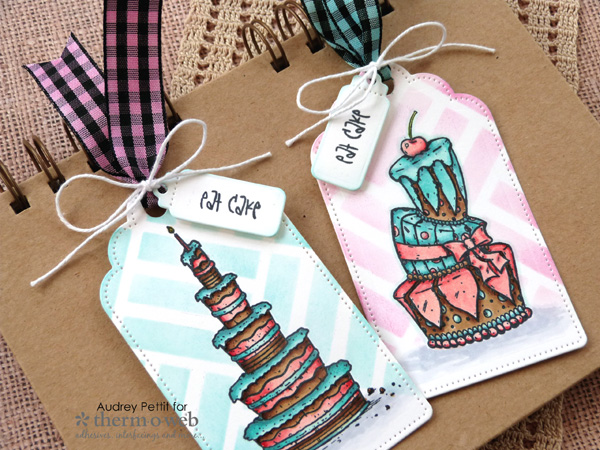
Tags are one of my favorite projects to make, as they always come in handy for dressing up a quick package or gift bag, and look great added to the front of a card, too.
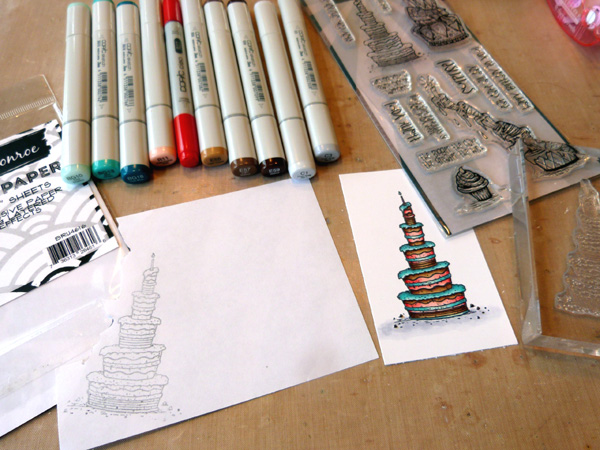
Begin by stamping the cakes onto Luxury White Premium cardstock in Raven Detail Ink, and then stamp the cake again onto Brutus Monroe masking paper before cleaning off the stamp. Color in your images.
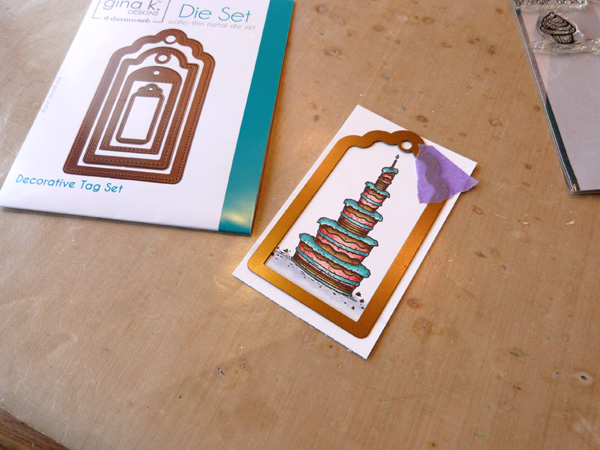
Center the largest die shape from the Decorative Tag die set over the stamped image and hold it in place with a bit of Purple Tape before running it through your die cutting machine.
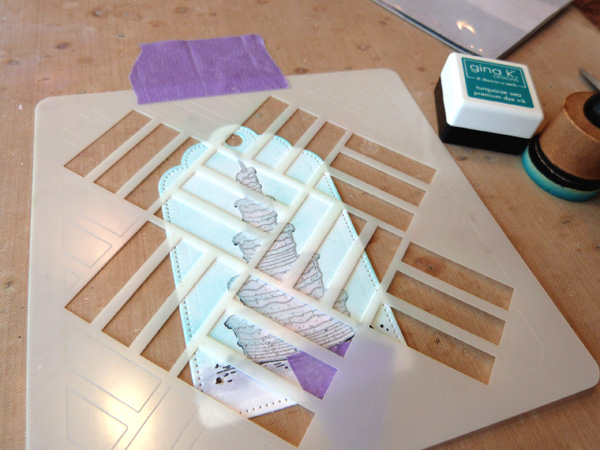
Fussy cut the masked image, and carefully apply it over the stamped image. Tape the Tile stencil in place with Purple Tape, and then apply GinaK Designs dye ink to the tag. Remove the mask, and store it along with your stamps for future use.
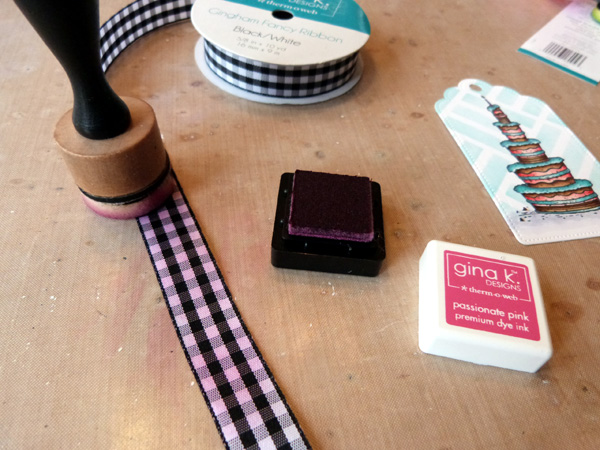
Trim a 5″ length of gingham ribbon, and cut a V-notch into both ends. Add color to the ribbon using GinaK’s dye inks and an ink blending tool. Thread the ribbon through the top of the tag. Die cut the smallest shape from the Decorative Tag set and stamp a sentiment from the Topsy Cake stamp set onto the tag with the Raven Detail Ink. Thread the smaller tag with white twine, and then tie the twine around the gingham ribbon, securing it in place with a big bow. Add a bit of double-sided foam adhesive behind the small tag to keep it in place, if necessary.
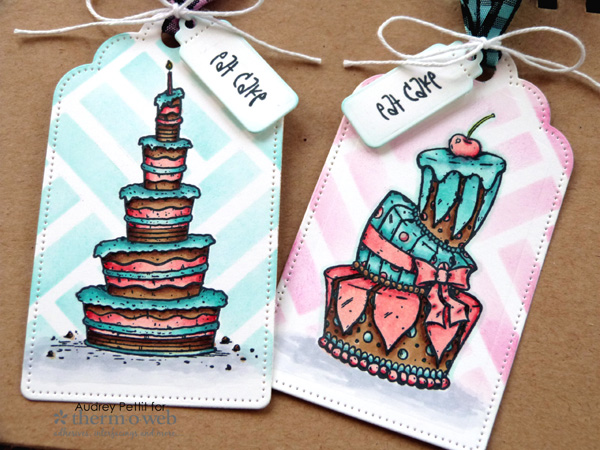
Enjoy!
 We’d like to invite you to enter to win a $25 Gift Certificate to shop our online store! Select just what is on your wish list! From Deco Foil products, to Gina K. Designs, Zots and SuperTape to Rebekah Meier Designs. Follow the Rafflecopter steps to get yourself entered to win. Then when you’re done…head on over to the Brutus Monroe Blog for more inspiration!

kajunhunnie
April 17, 2018 at 8:11 am (7 years ago)Love your card!
Sue D
April 17, 2018 at 12:52 pm (7 years ago)Pretty colors of flowers and cute cake tags.
Cynthia Cole
April 18, 2018 at 9:17 am (7 years ago)Love your pretty card and tags!
Denise Bryant
April 19, 2018 at 9:03 pm (7 years ago)Awesome card and tags! Love that gorgeous stamp with the roses!
denisemouton
April 20, 2018 at 8:52 am (7 years ago)I love the cake tags & that great dyed gingham ribbon — how fun! I would love to have some of the ribbon to give it a try! Thanks for sharing these great designs.