We hope you’ve enjoyed this week! And found some inspiration for some new Christmas Ornaments to make or give this year!
Today is our final day and Designer Audrey Pettit is wrapping up our week in style!
Christmas Rosette Ornament Balls with iCraft Easy-Tear Tape
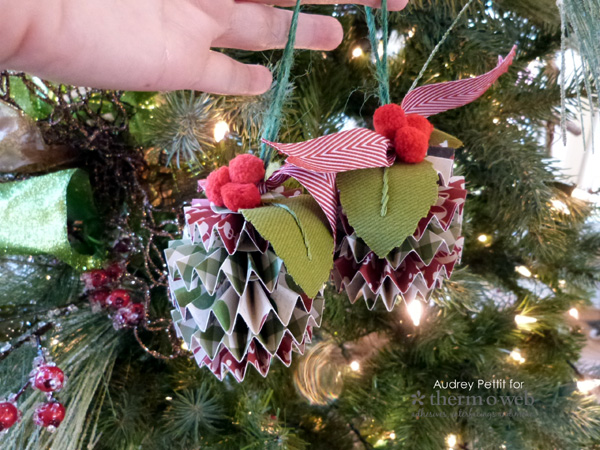
Christmas Rosette Ornament Balls by Designer Audrey Pettit
Supplies:
Therm O Web iCraft Adhesive – 1/4″
Therm O Web Fabric Fuse Liquid Adhesive
Patterned Paper: Simple Stories Very Merry Collection
Fabric: Crossroads Denim Collection by Indygo Junction
Die: Brenda Walton Millinery Leaves by Sizzix
Score-Pal 12″ Scoring Board
Trim, 1 3/8″ Circle Punch: Stampin’Up
Craft Supply: Pom Poms, Twine
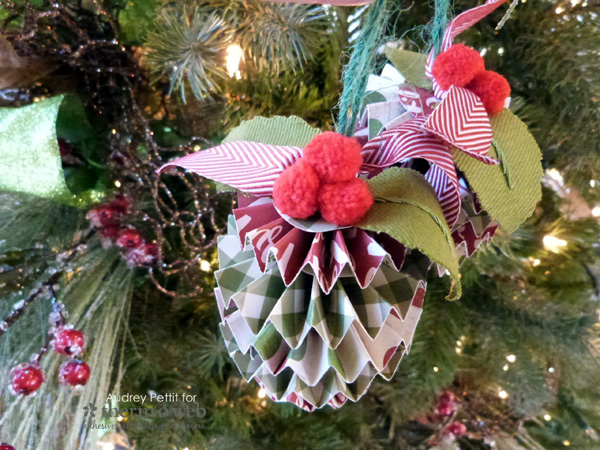
Rosettes are a classic holiday favorite on many decorations. They particularly remind me of the vintage-inspired glittered and be-sparkled ornaments of yore that I love to collect and treasure. This year, I’m giving the traditional rosette a bit of a modern update in this stacked ball design using trendy holiday papers and some simple fabric and trims. So easy to create, and fun for the whole family.
Christmas Rosette Ornament Ball Instructions:
To begin, gather some double-sided patterned papers, Therm O Web iCraft adhesive, and a scoring board, and we’ll get started on making some rosettes.
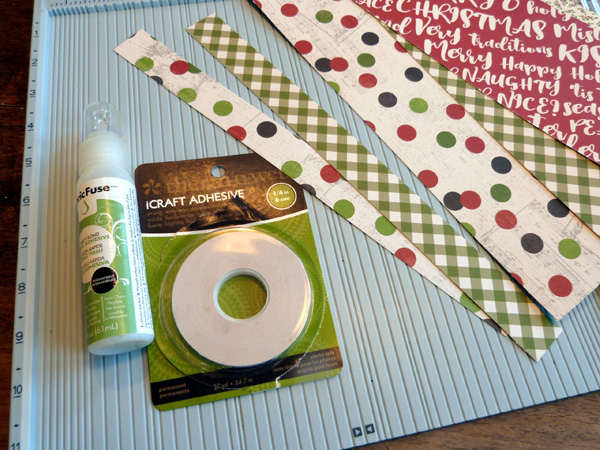
Each ornament ball consists of five layers of stacked rosettes, in two different sizes to give the balls a rounded shape. I used three different patterned papers on each ornament, too, but you can mix it up in any way that you choose. Begin by cutting 12″ paper strips for the rosettes. Cut some thinner strips at 1″, and thicker strips at 1.25″.
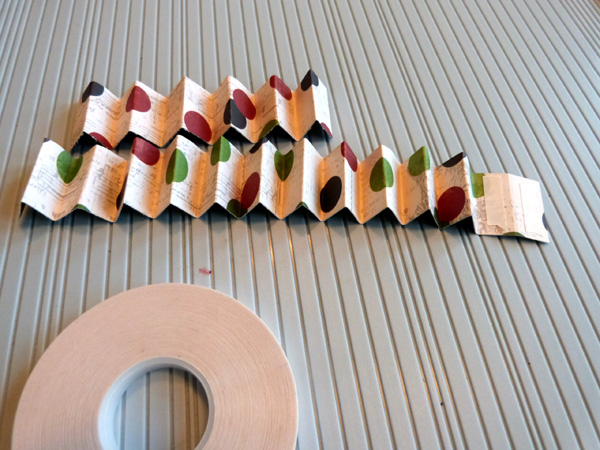
Each rosette is made up of two paper strips…. one 12″ strip, and a second strip cut down to 6″. Using a scoring board, score each strip at .5″ intervals, and then fold the strips accordion-style. Adhere the 6″ strip to the end of the 12″ strip using small pieces of strong iCraft double-sided adhesive tape.
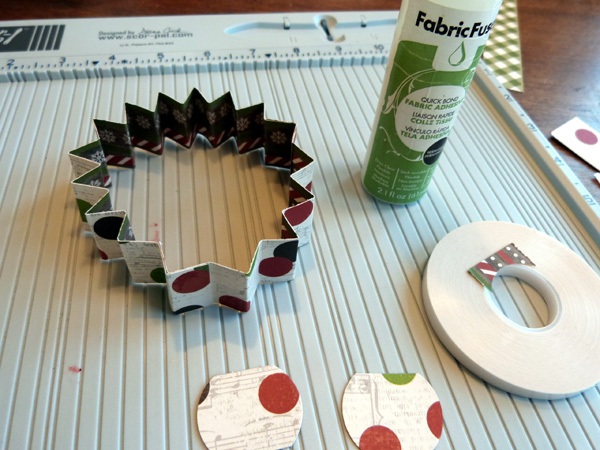
Add additional strips of tape at the end of the strip, and adhere the piece into a ring. Punch two circles from the patterned paper using a 1″ or bigger round circle punch.
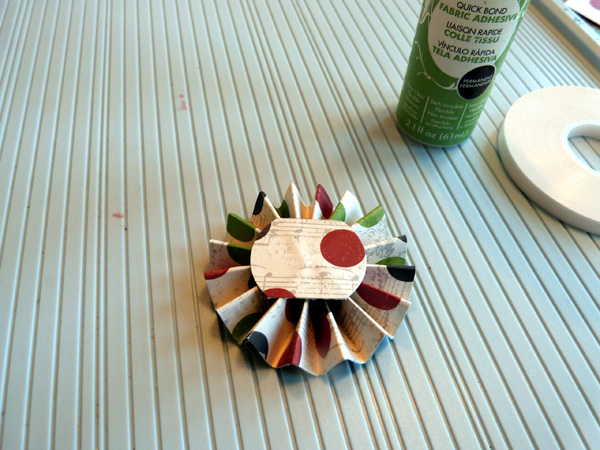
Spread Fabric Fuse liquid adhesive onto the back side of the punched circles. Press the folded ring downward, and pinch the edges together towards the middle to form the rosettes. Secure on the top and bottom sides with the adhesive-covered circles. Hold in place for a few moments until the glue is secure. Now continue the process with the other rosettes.
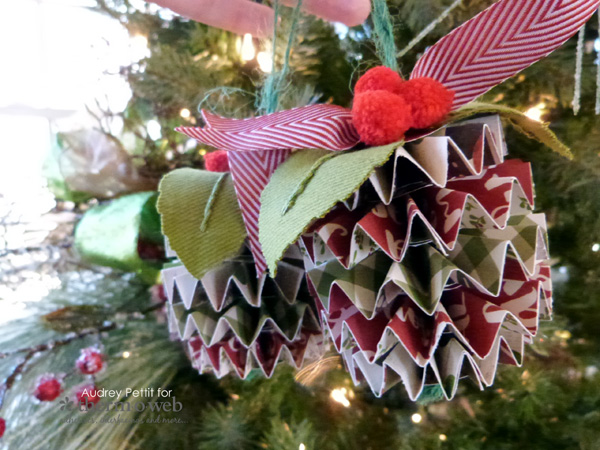
Once you have constructed all of your rosettes, punch a hole through the center of each piece. I used the end of a thin paintbrush, and simply pushed through the center from both the top and the bottom. To thread the layers together, trim a piece of twine that is about 10-12″ long. Fold the twine in half, and tie the ends together into a know. Then thread the individual layers onto the folded twine. Tie a piece of ribbon around the top to secure the layers in place.
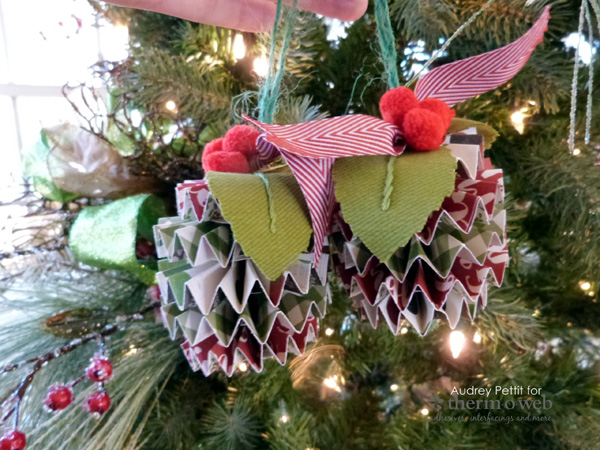
For a final embellishment, I added some die cut fabric leaves and red pom poms to the tops of my ornaments, all easily adhered using Therm O Web Fabric Fuse liquid adhesive.
Enjoy!
 We hope you’ve enjoyed all the projects we’ve shared this week!
We’d like to give you a chance to win some amazing products from Therm O Web along with our generous sponsors and friends in the industry!
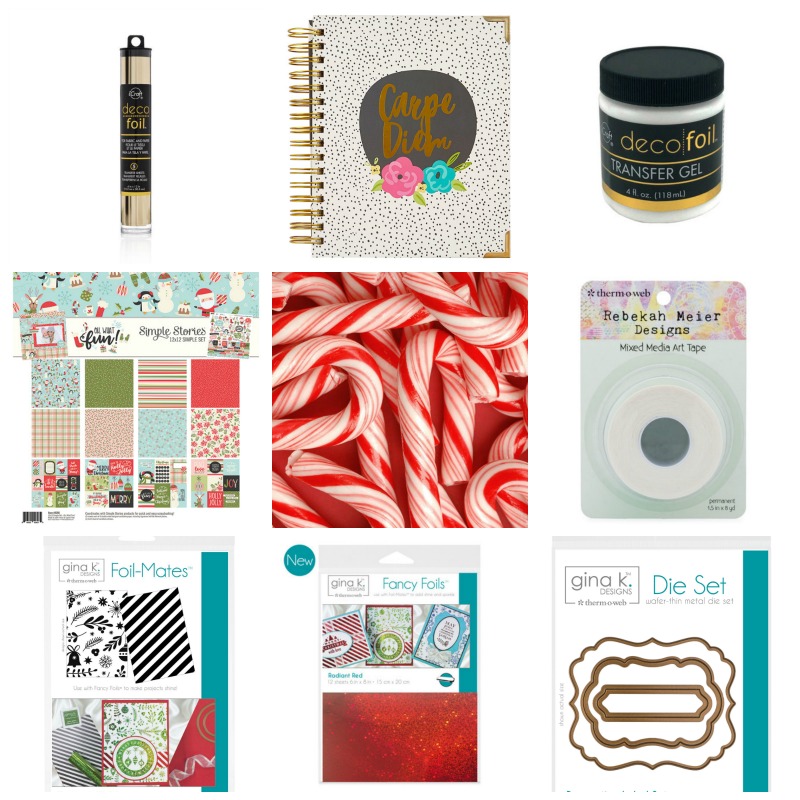 This week we’re giving away a fun mix of items that include:
-Deco Foil Adhesive Pen
-Deco Foil Champagne Transfer Sheets
-Deco Foil Transfer Gel
-Simple Stories Carpe Diem Planner
-Rebekah Meier Designs Mixed Media Art Tape
-Gina K. Designs Foil-Mates, Fancy Foil in Radiant Red and Label Die Set
And that’s not all…we’ll include our iCraft Tape Runner XL and Zots Medium Size Adhesive Dots! Whew! All you need to do is follow this link to enter to win!
