


 Hello and welcome!
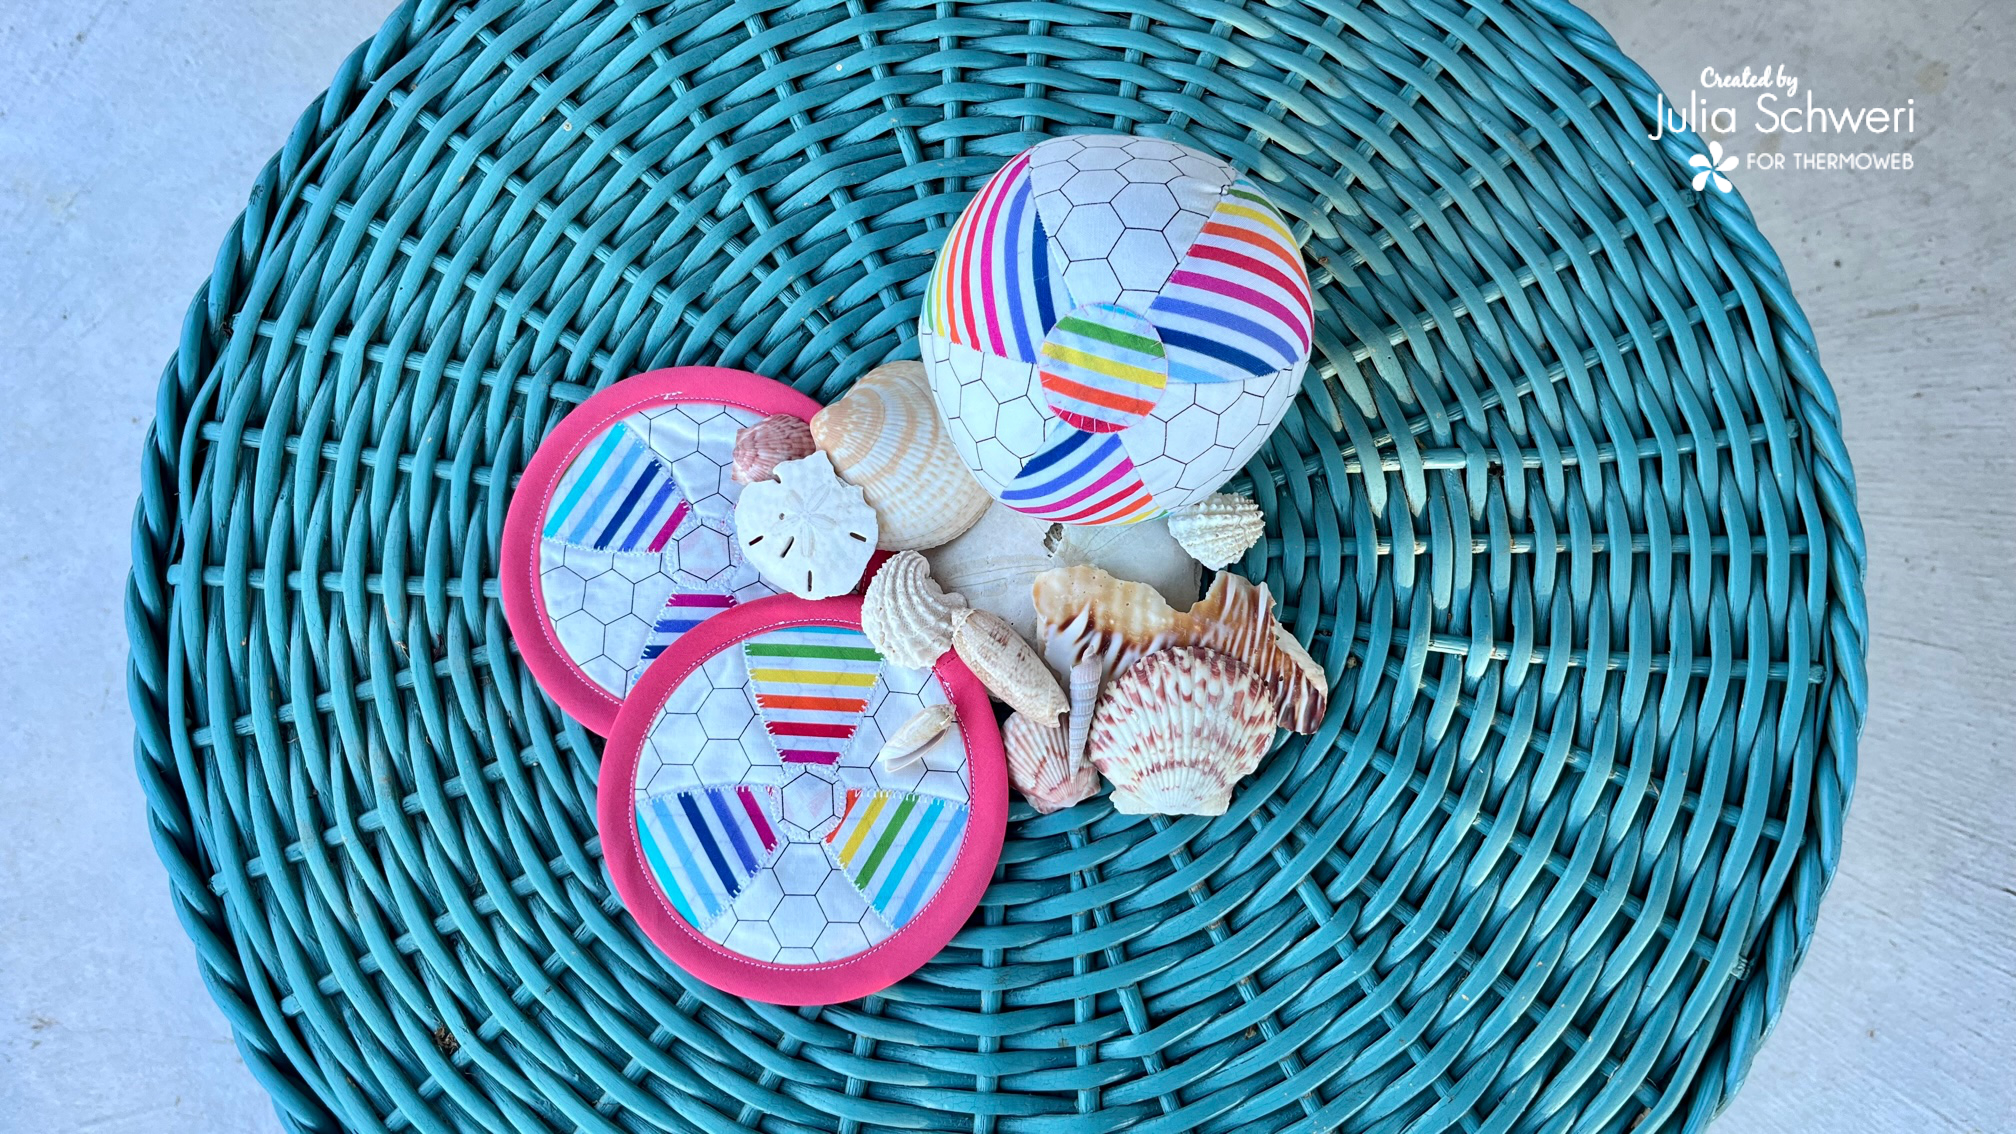
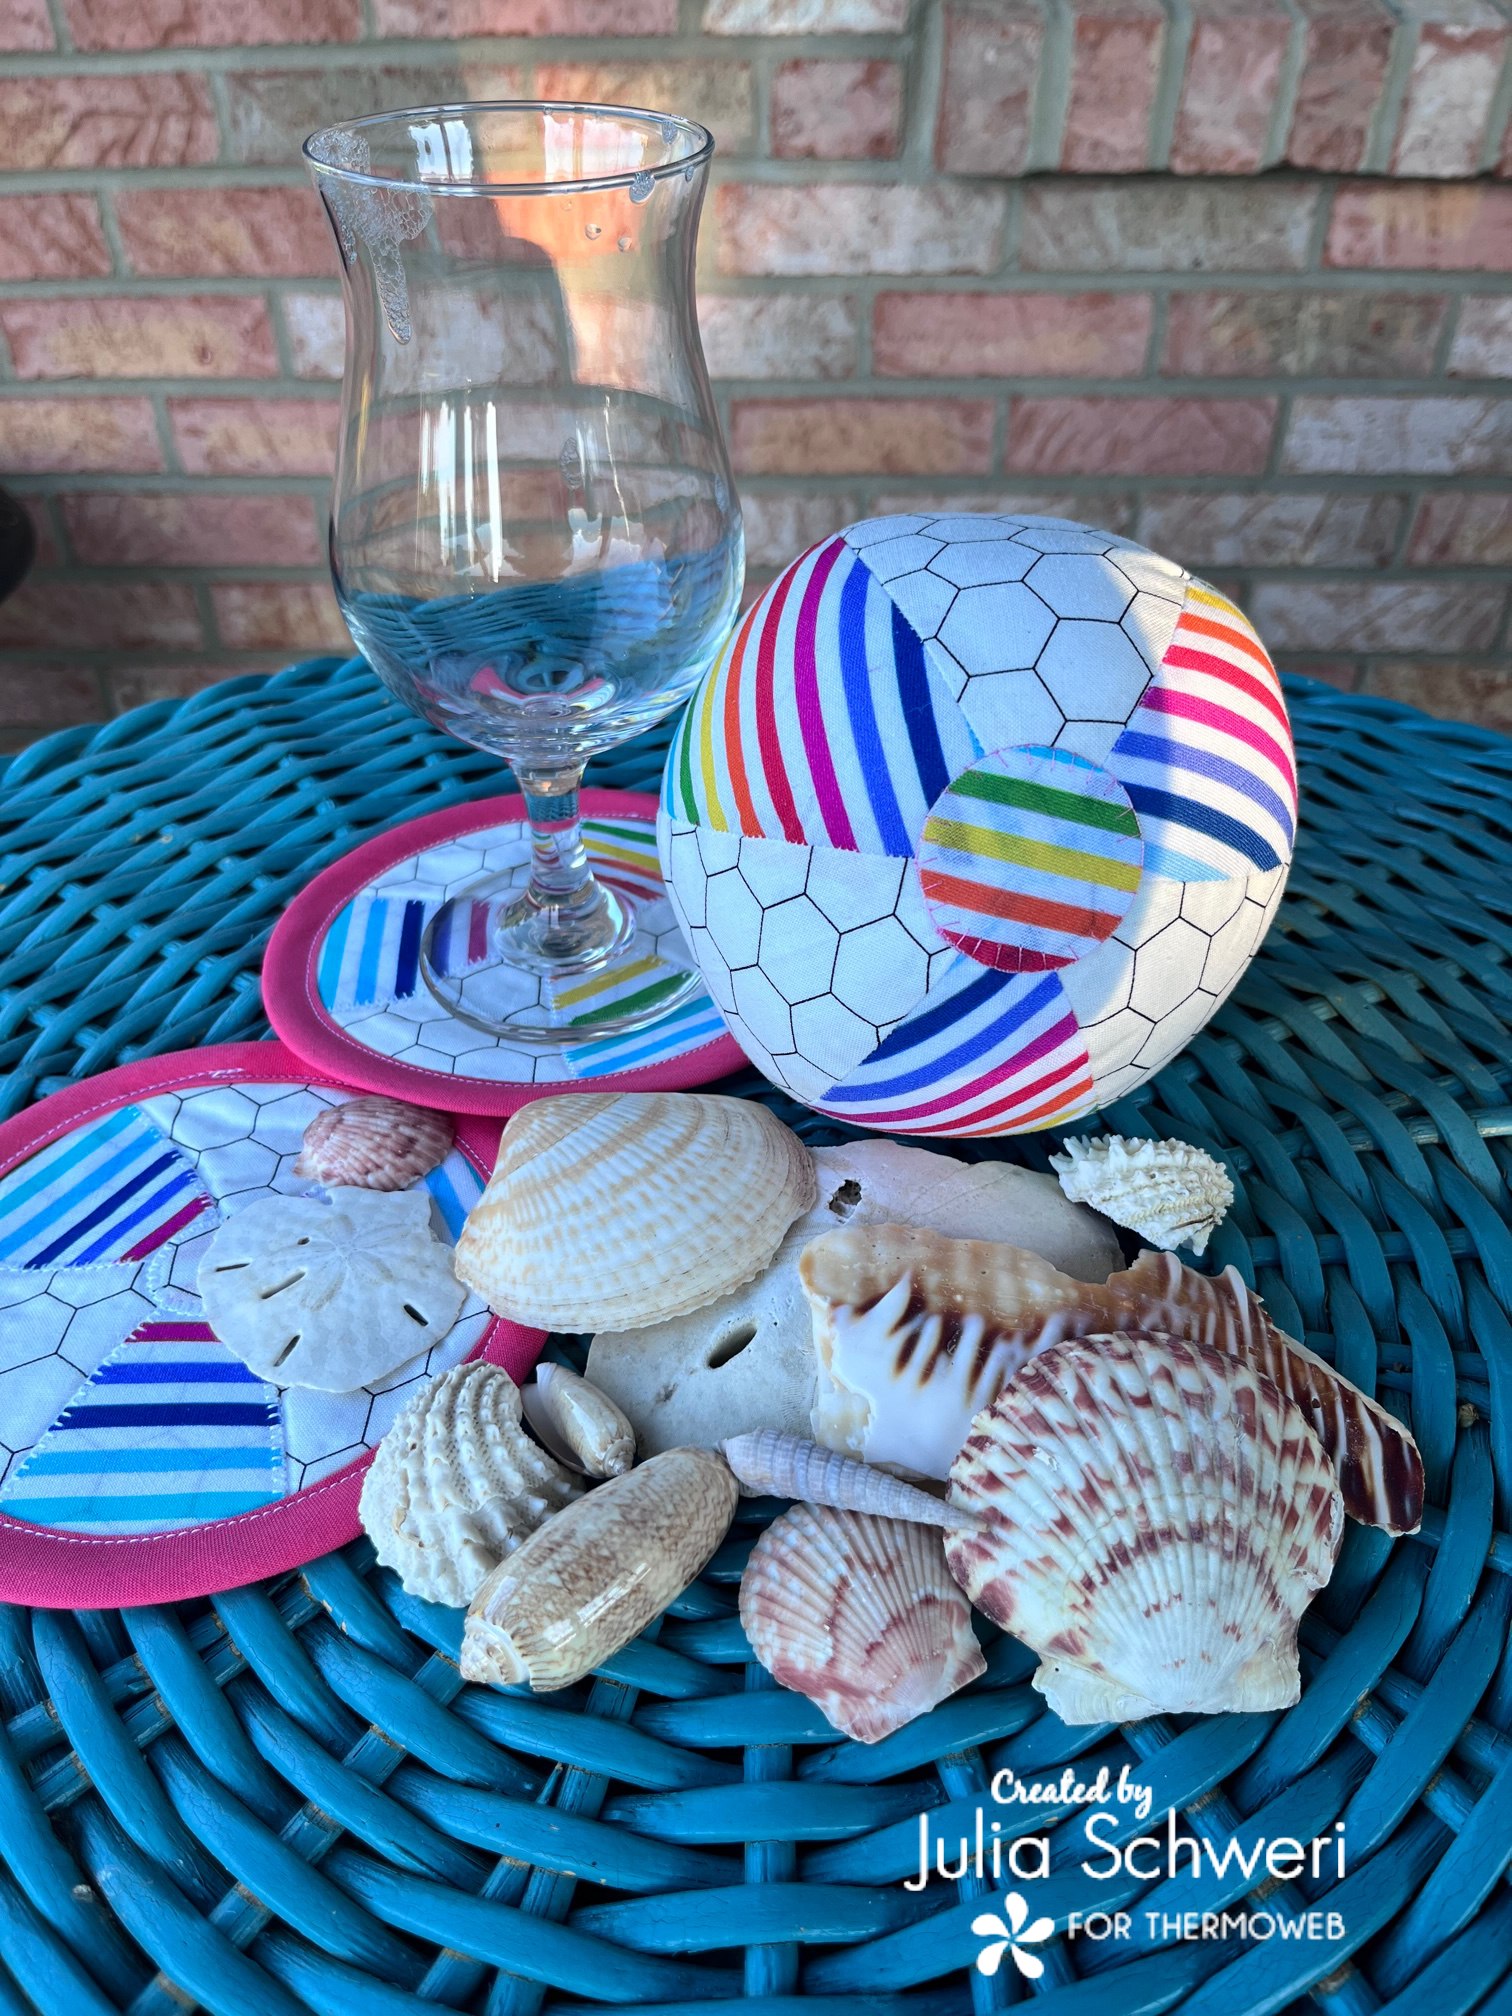
It’s Julia from Inflorescence Designs! I’m so joyful you are visiting today. For today’s project I’m going to show you how I used 2 of my Crafter’s Edge dies and their Crossover II cutting machine to make an adorable beach ball decoration and some matching beach ball coasters!
3D Fabric Beach Ball Home Decor
Advanced beginner pattern: sewing curves, bias binding, hand stitching.
Beach Ball Supplies:
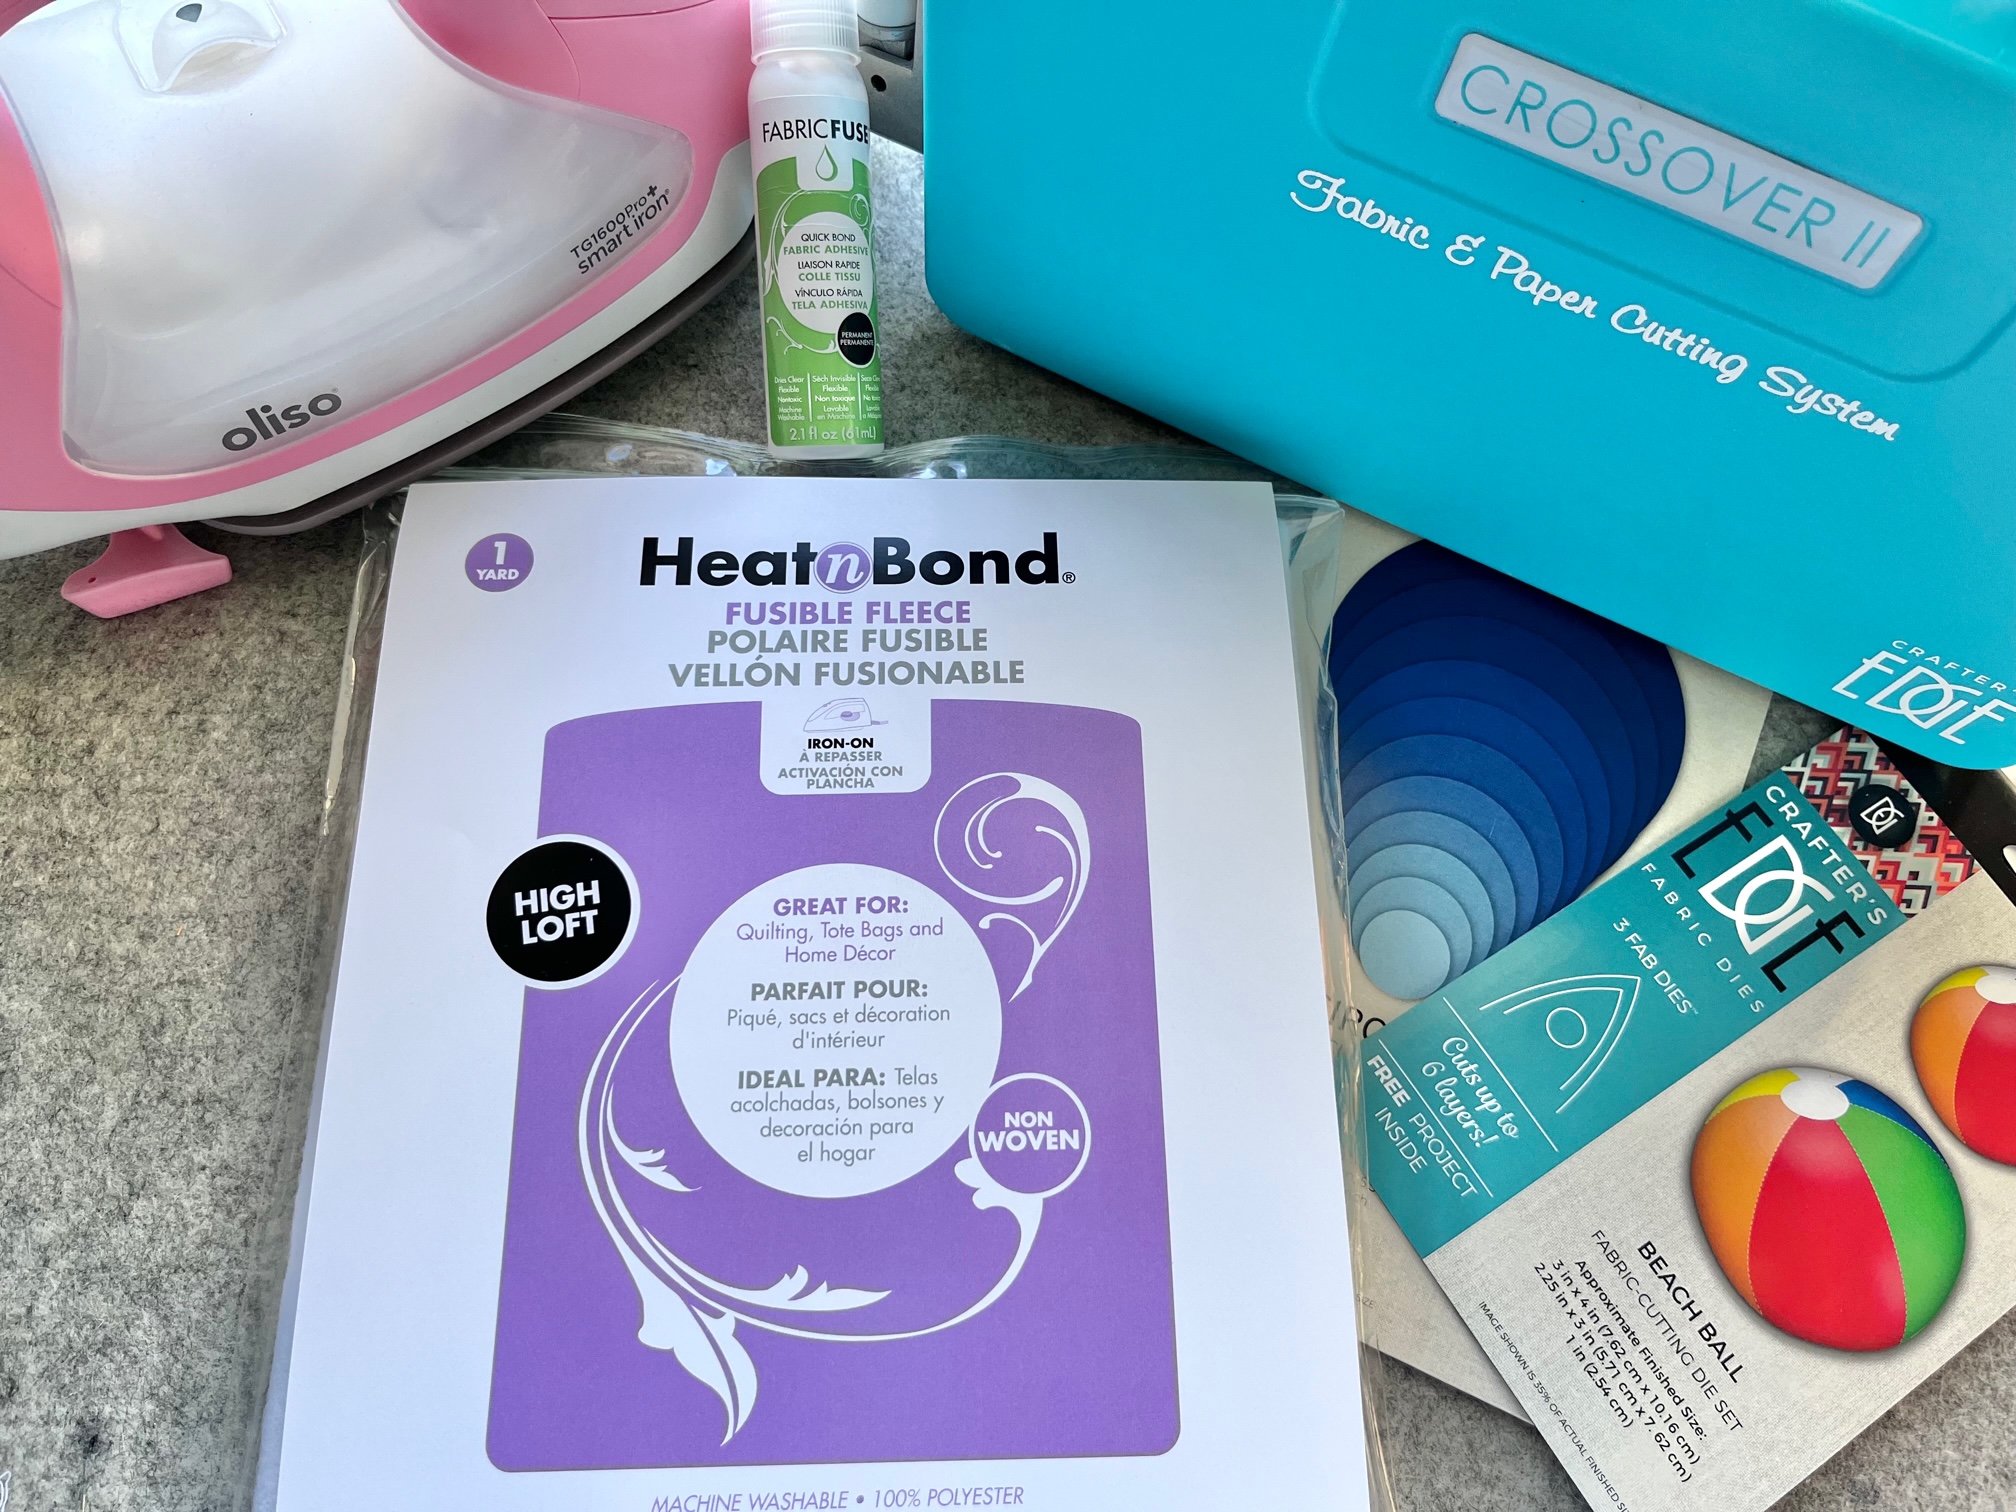
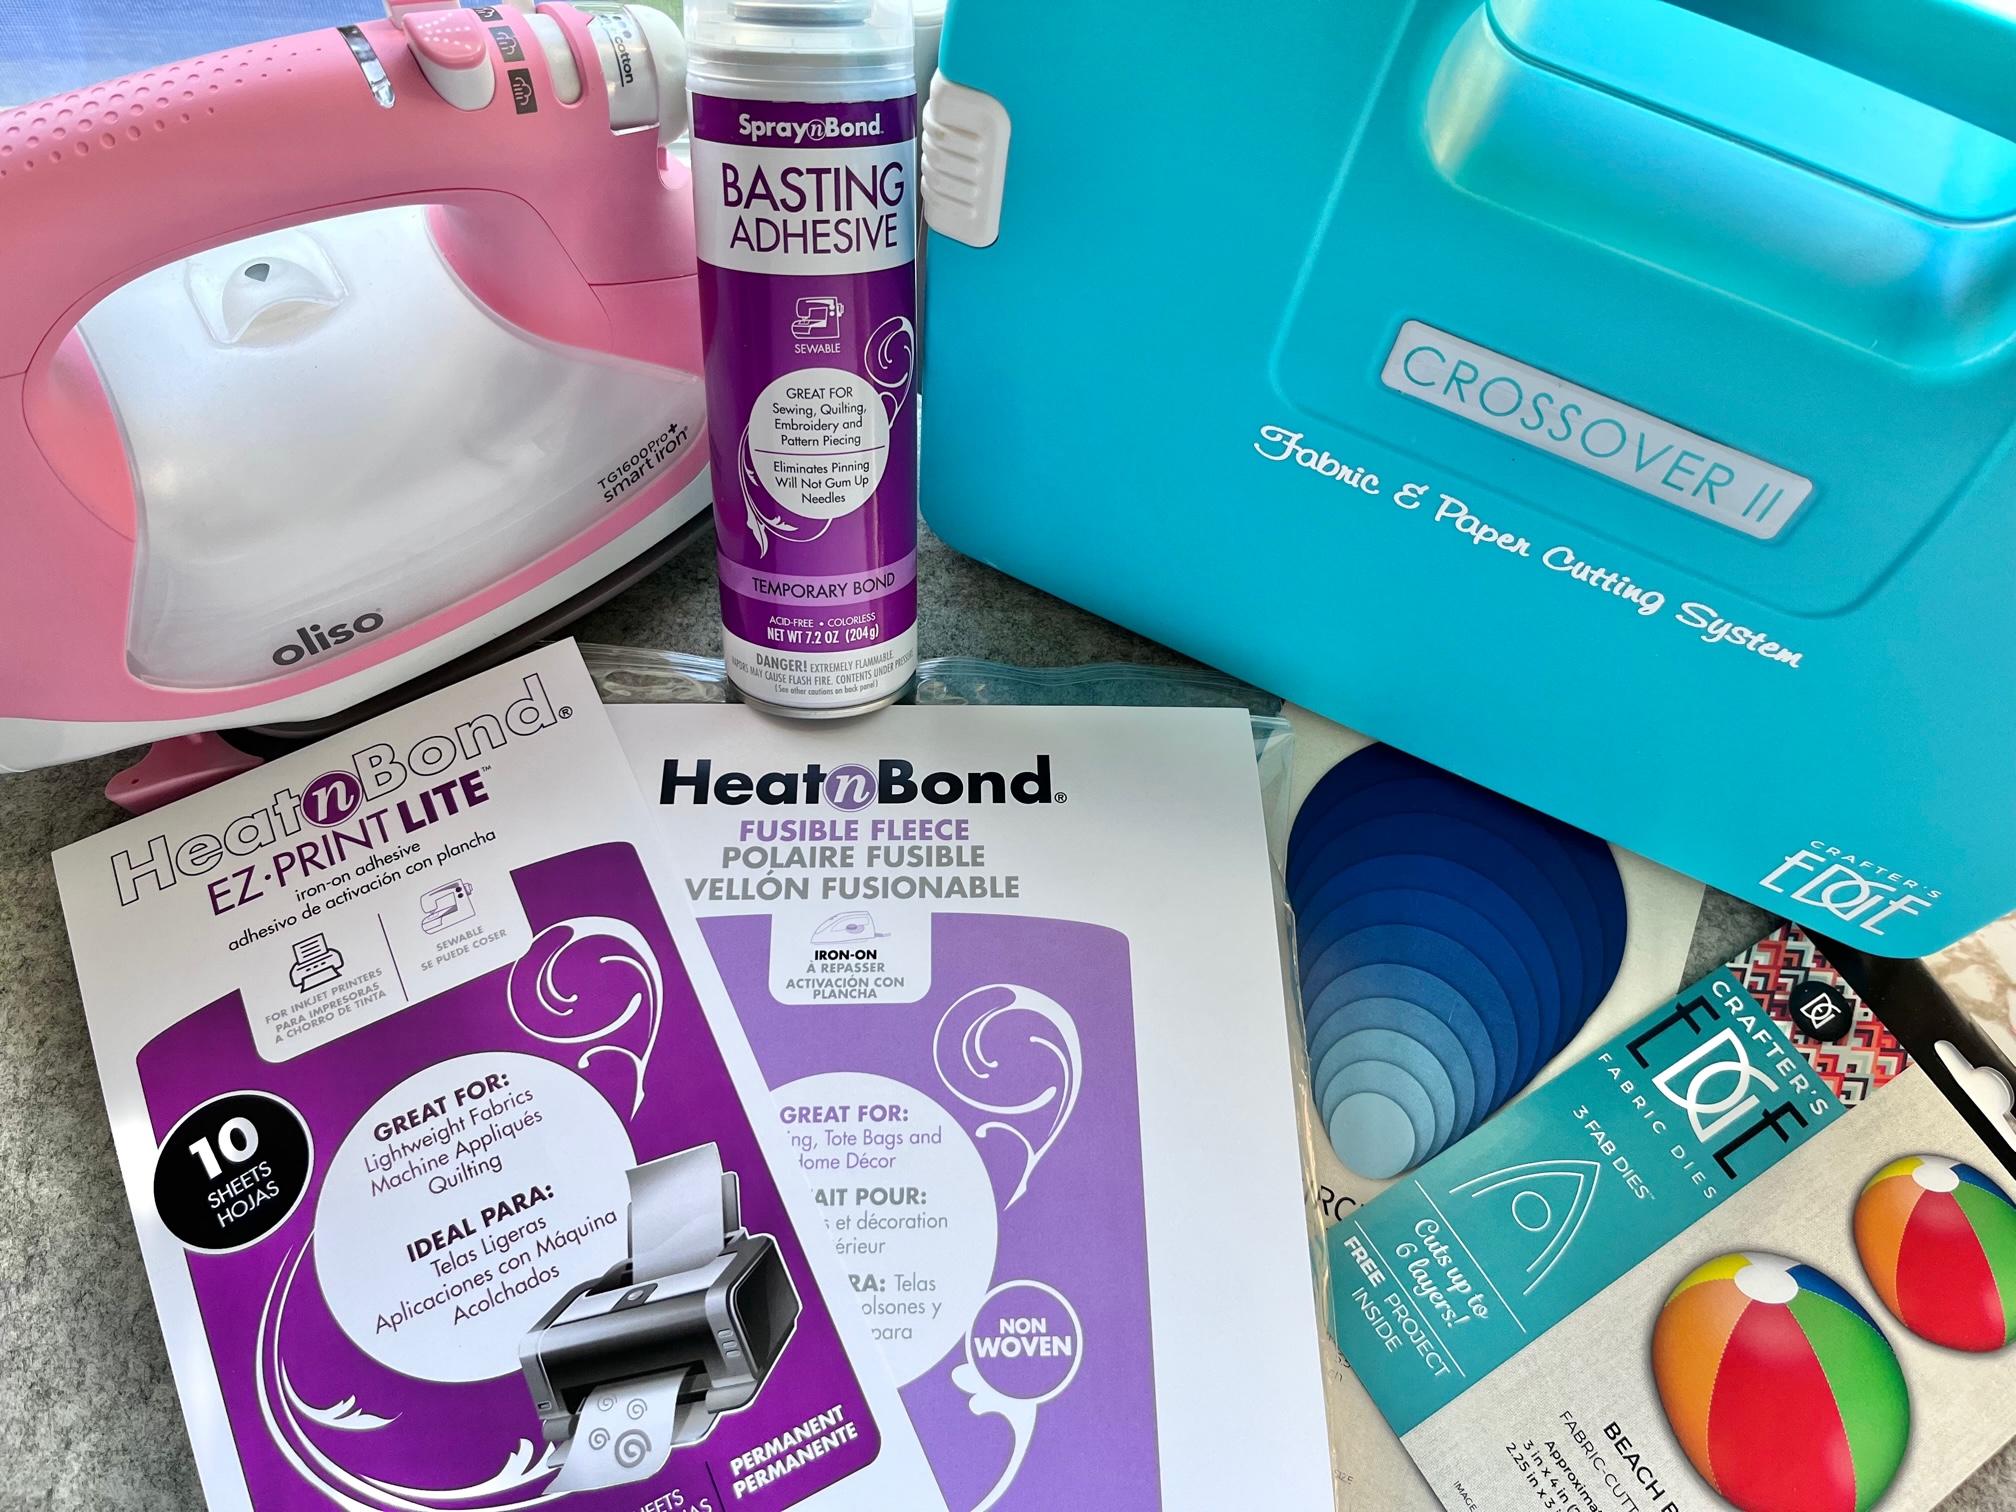
- HeatnBond Fusible Fleece
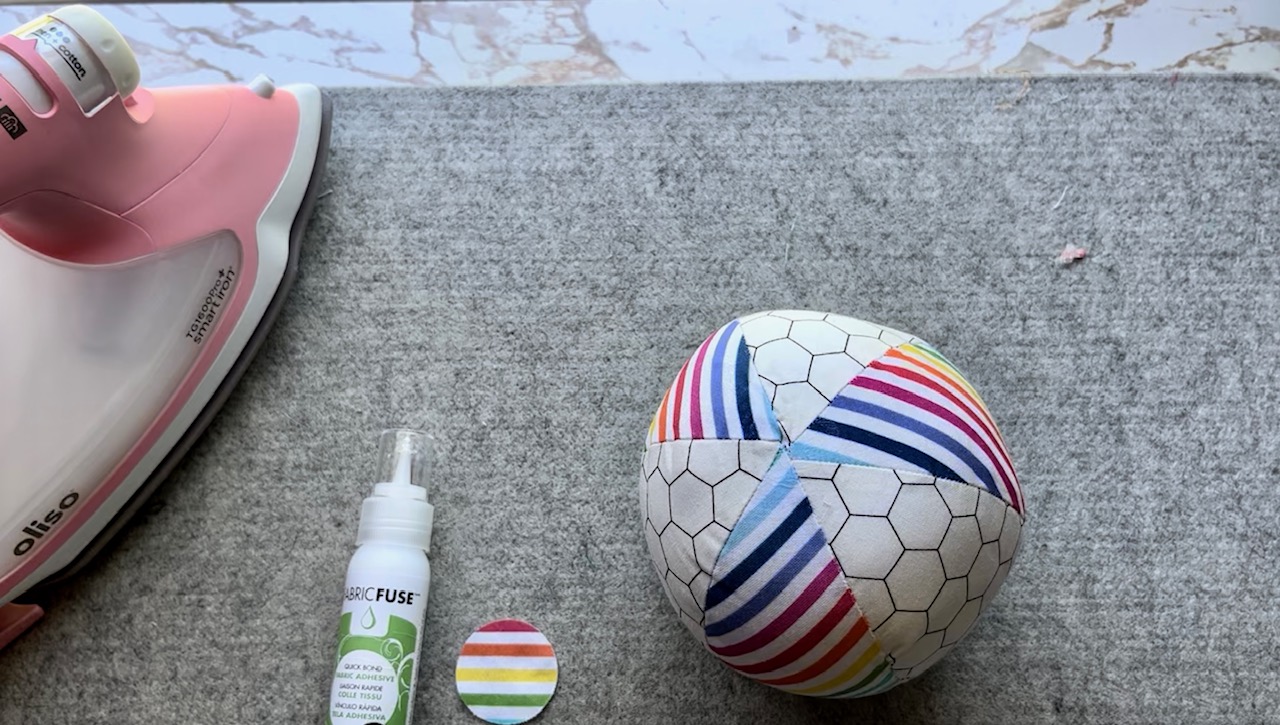
- Thermoweb Fabric Fuse
- Oliso Iron
- Crafter’s Edge Crossover II
- Crafter’s Edge Circle Die Set: 1 1/2″ circle
- Crafter’s Edge Beach Ball Die: Both Large and Small
- Fiber Fill Stuffing
- Fabric for Beach Ball Wedges: You will need 6 wedges. This project can definitely use up some scraps. Each wedge piece needs to be at least 3 1/2″ x 9″.
- Hand Sewing Needle and thread
- Basic Sewing Notions
3D Fabric Beach Ball Instructions:
Begin by…
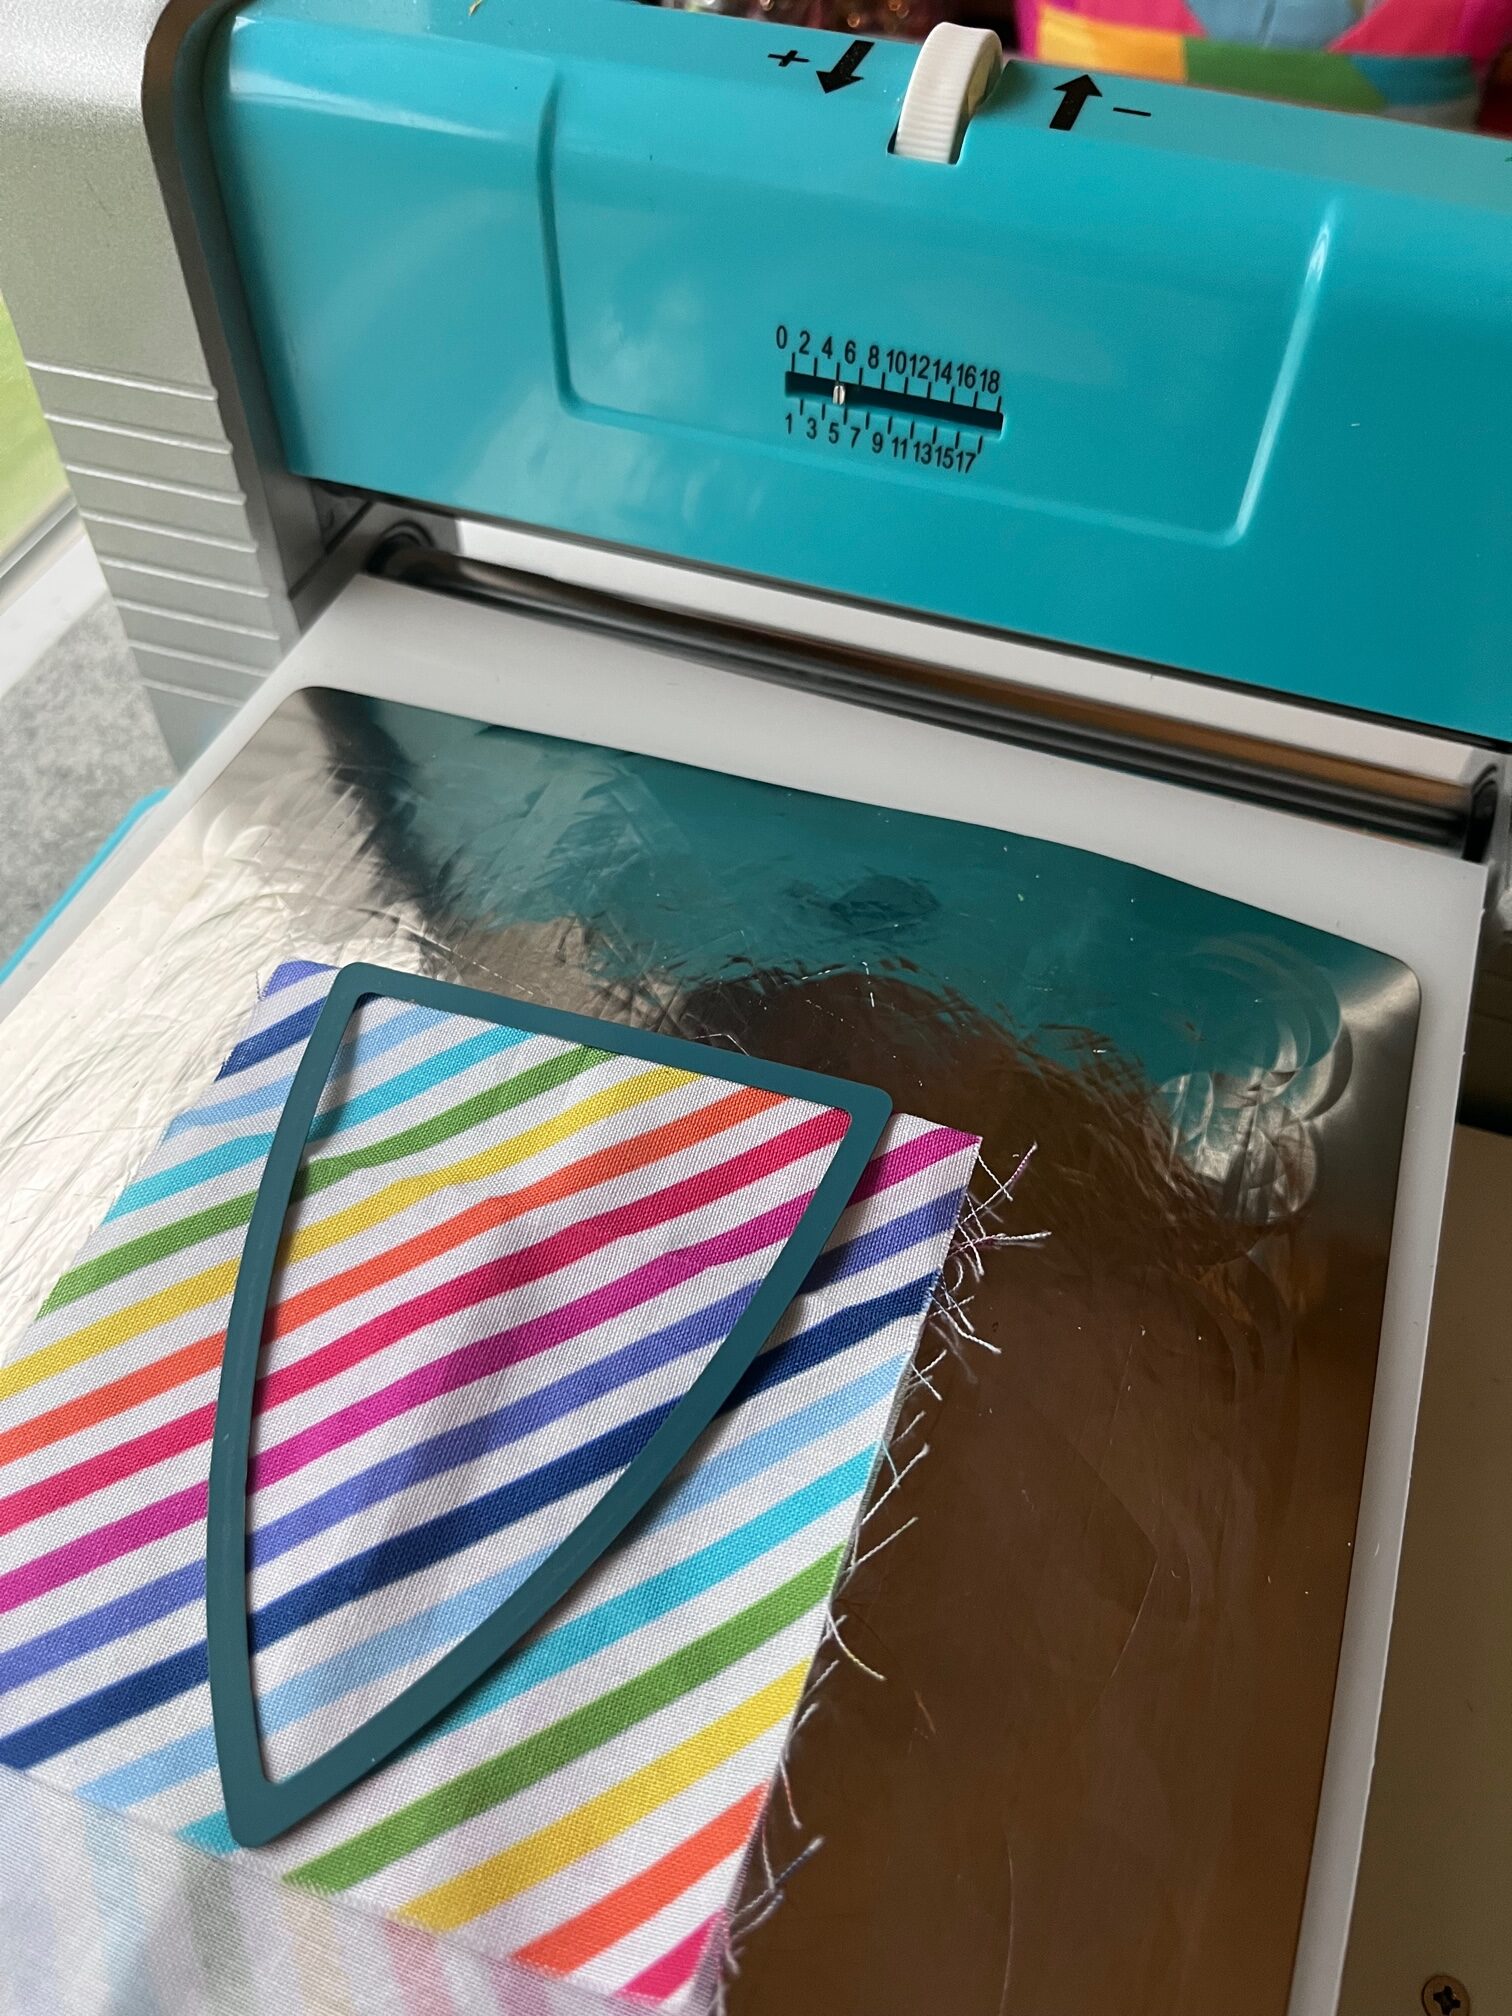
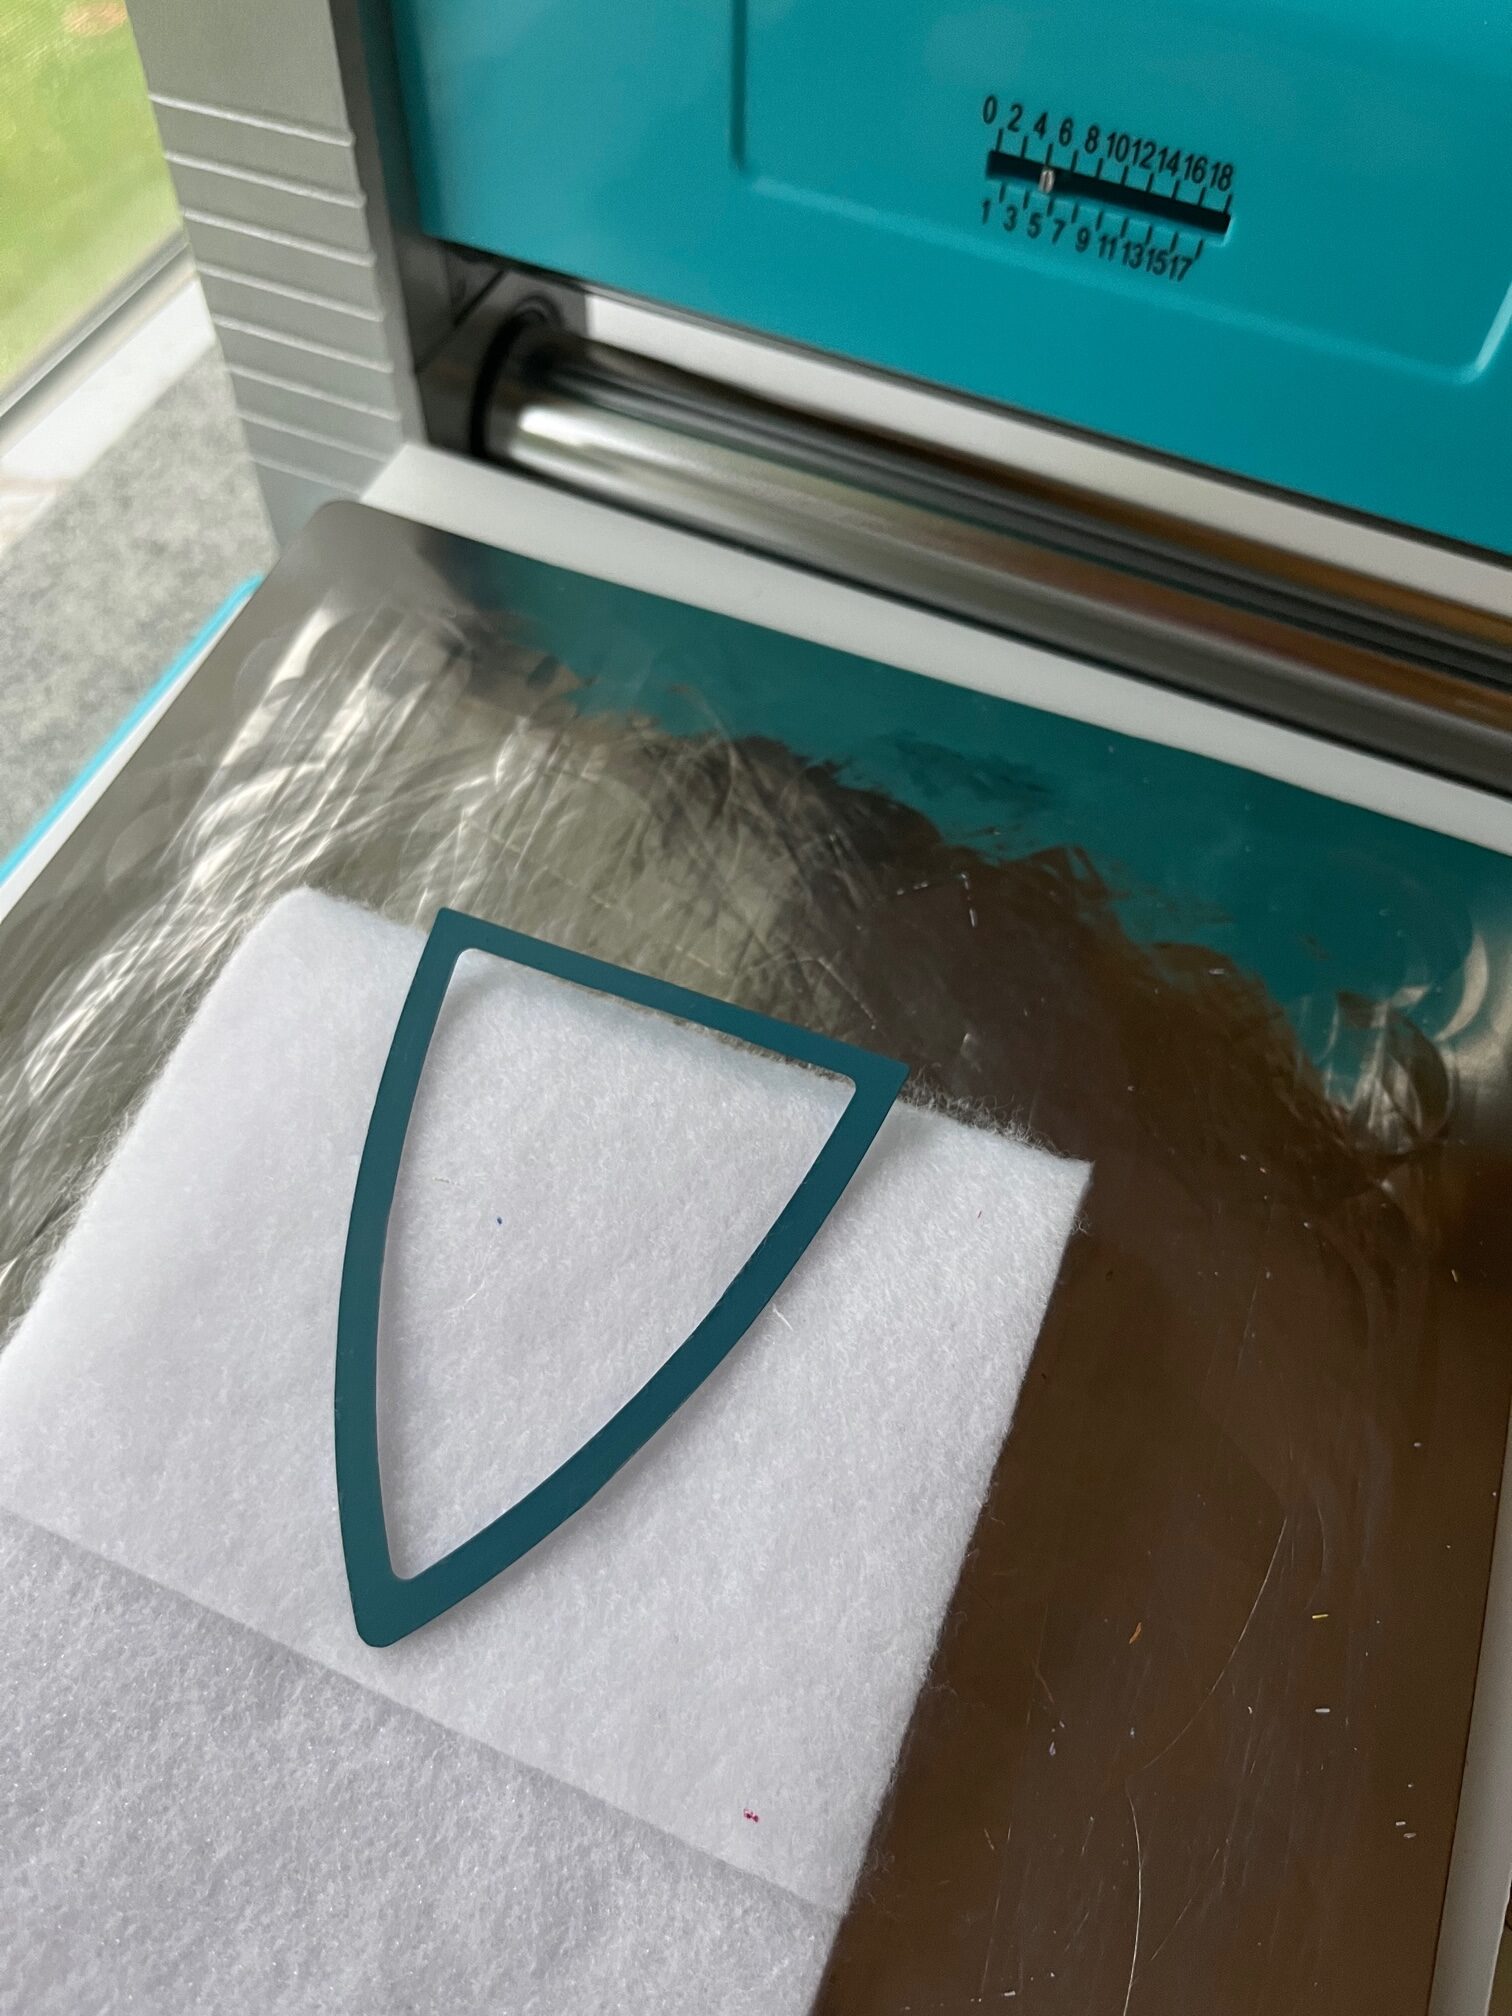
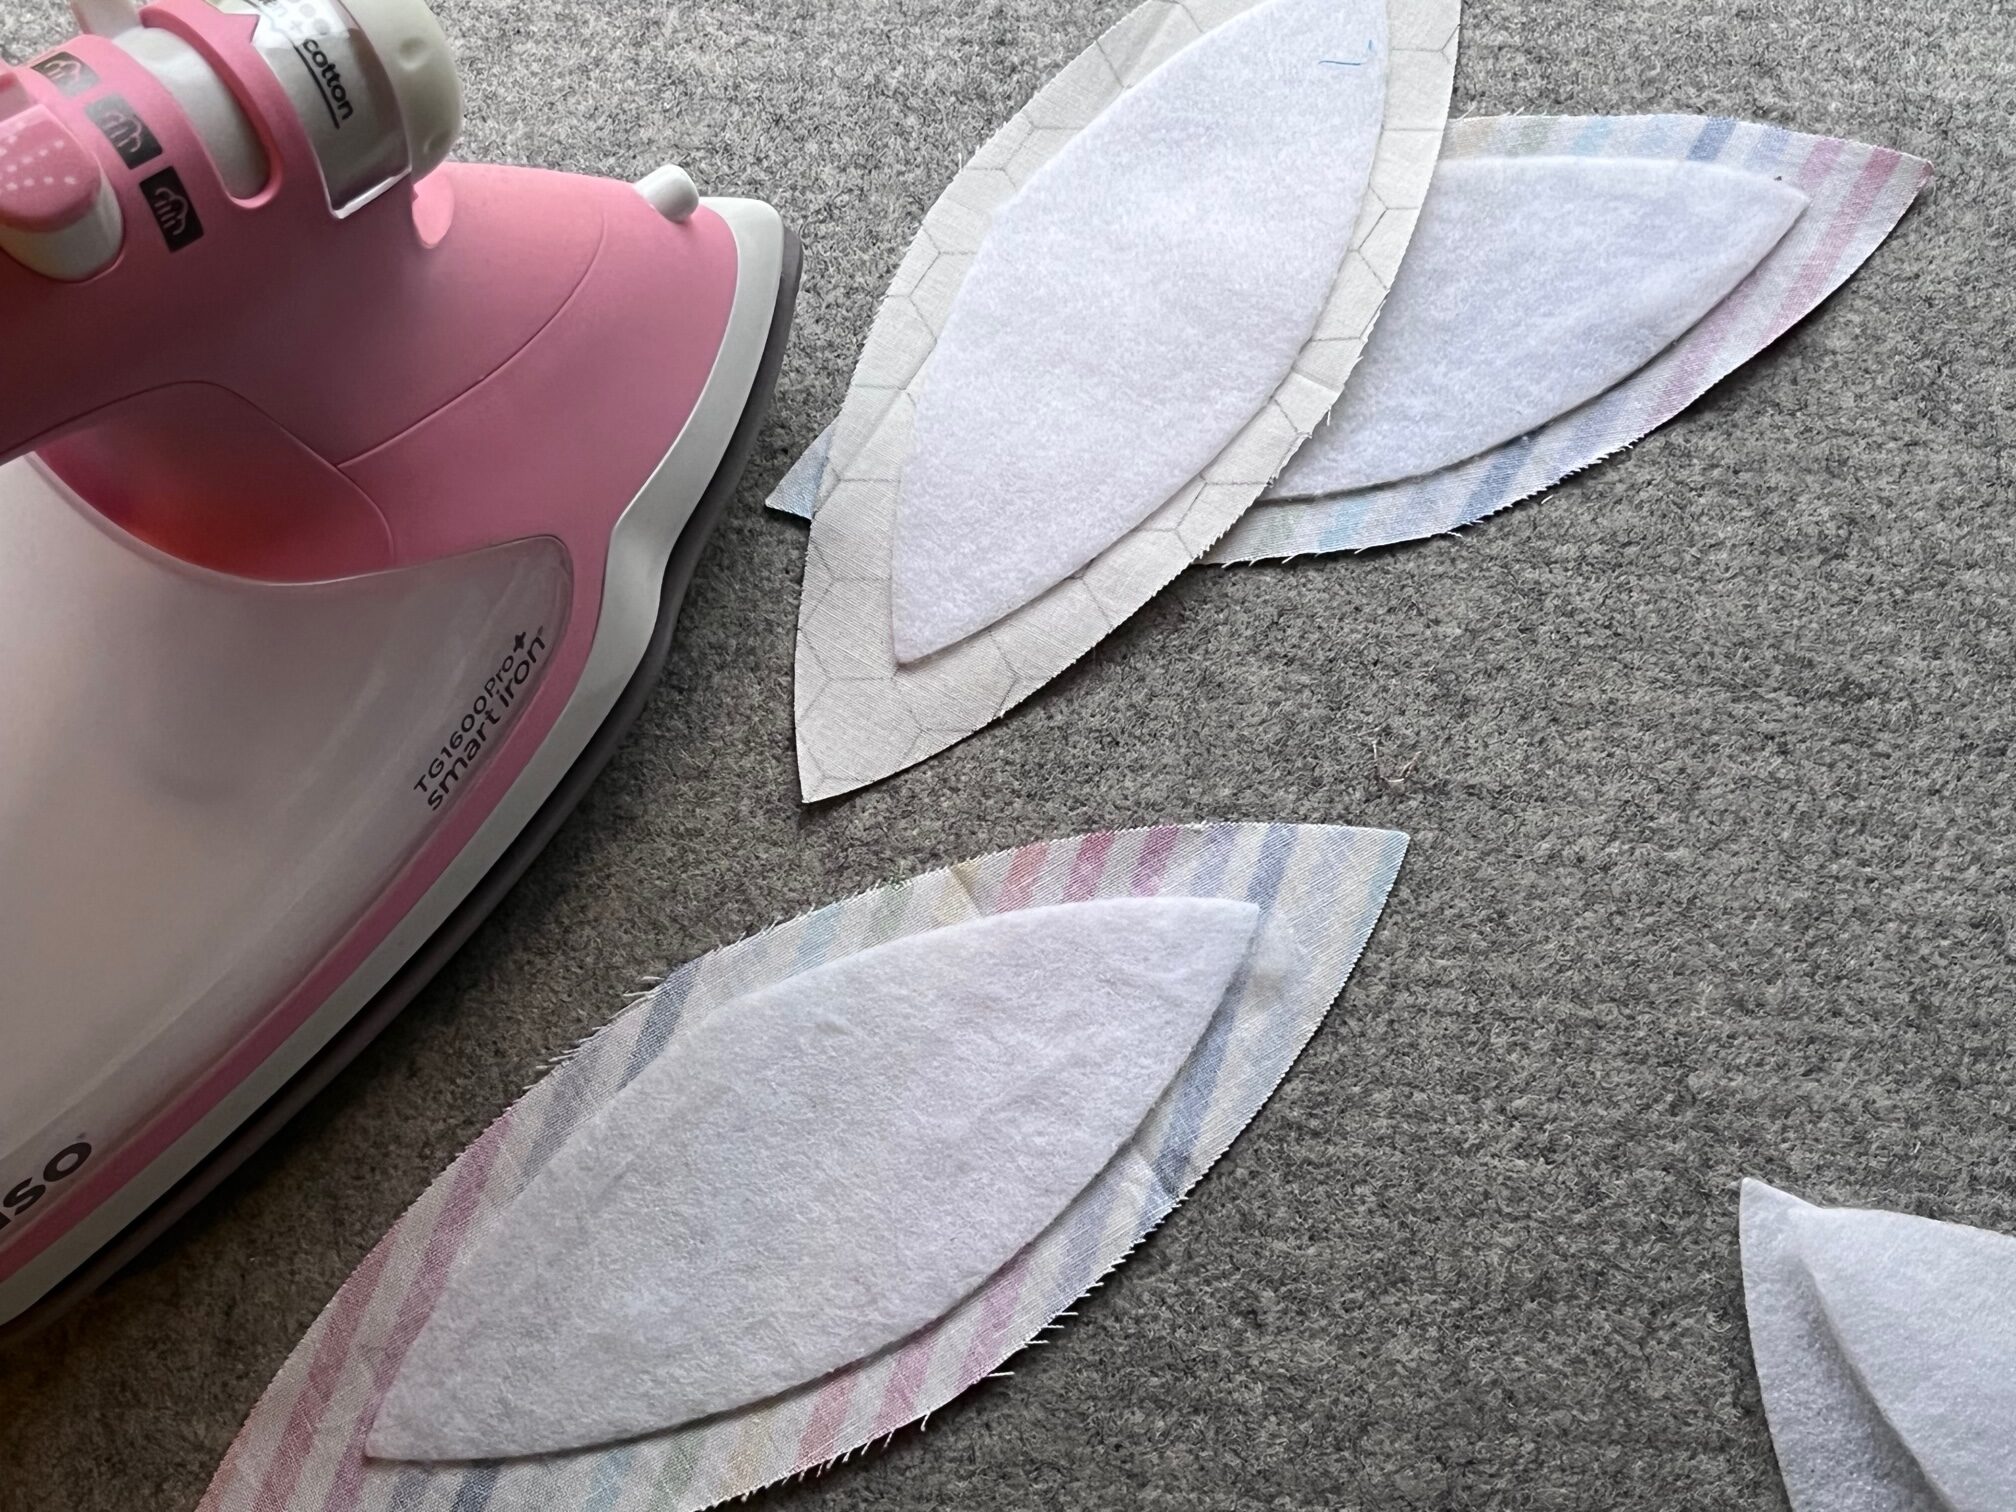
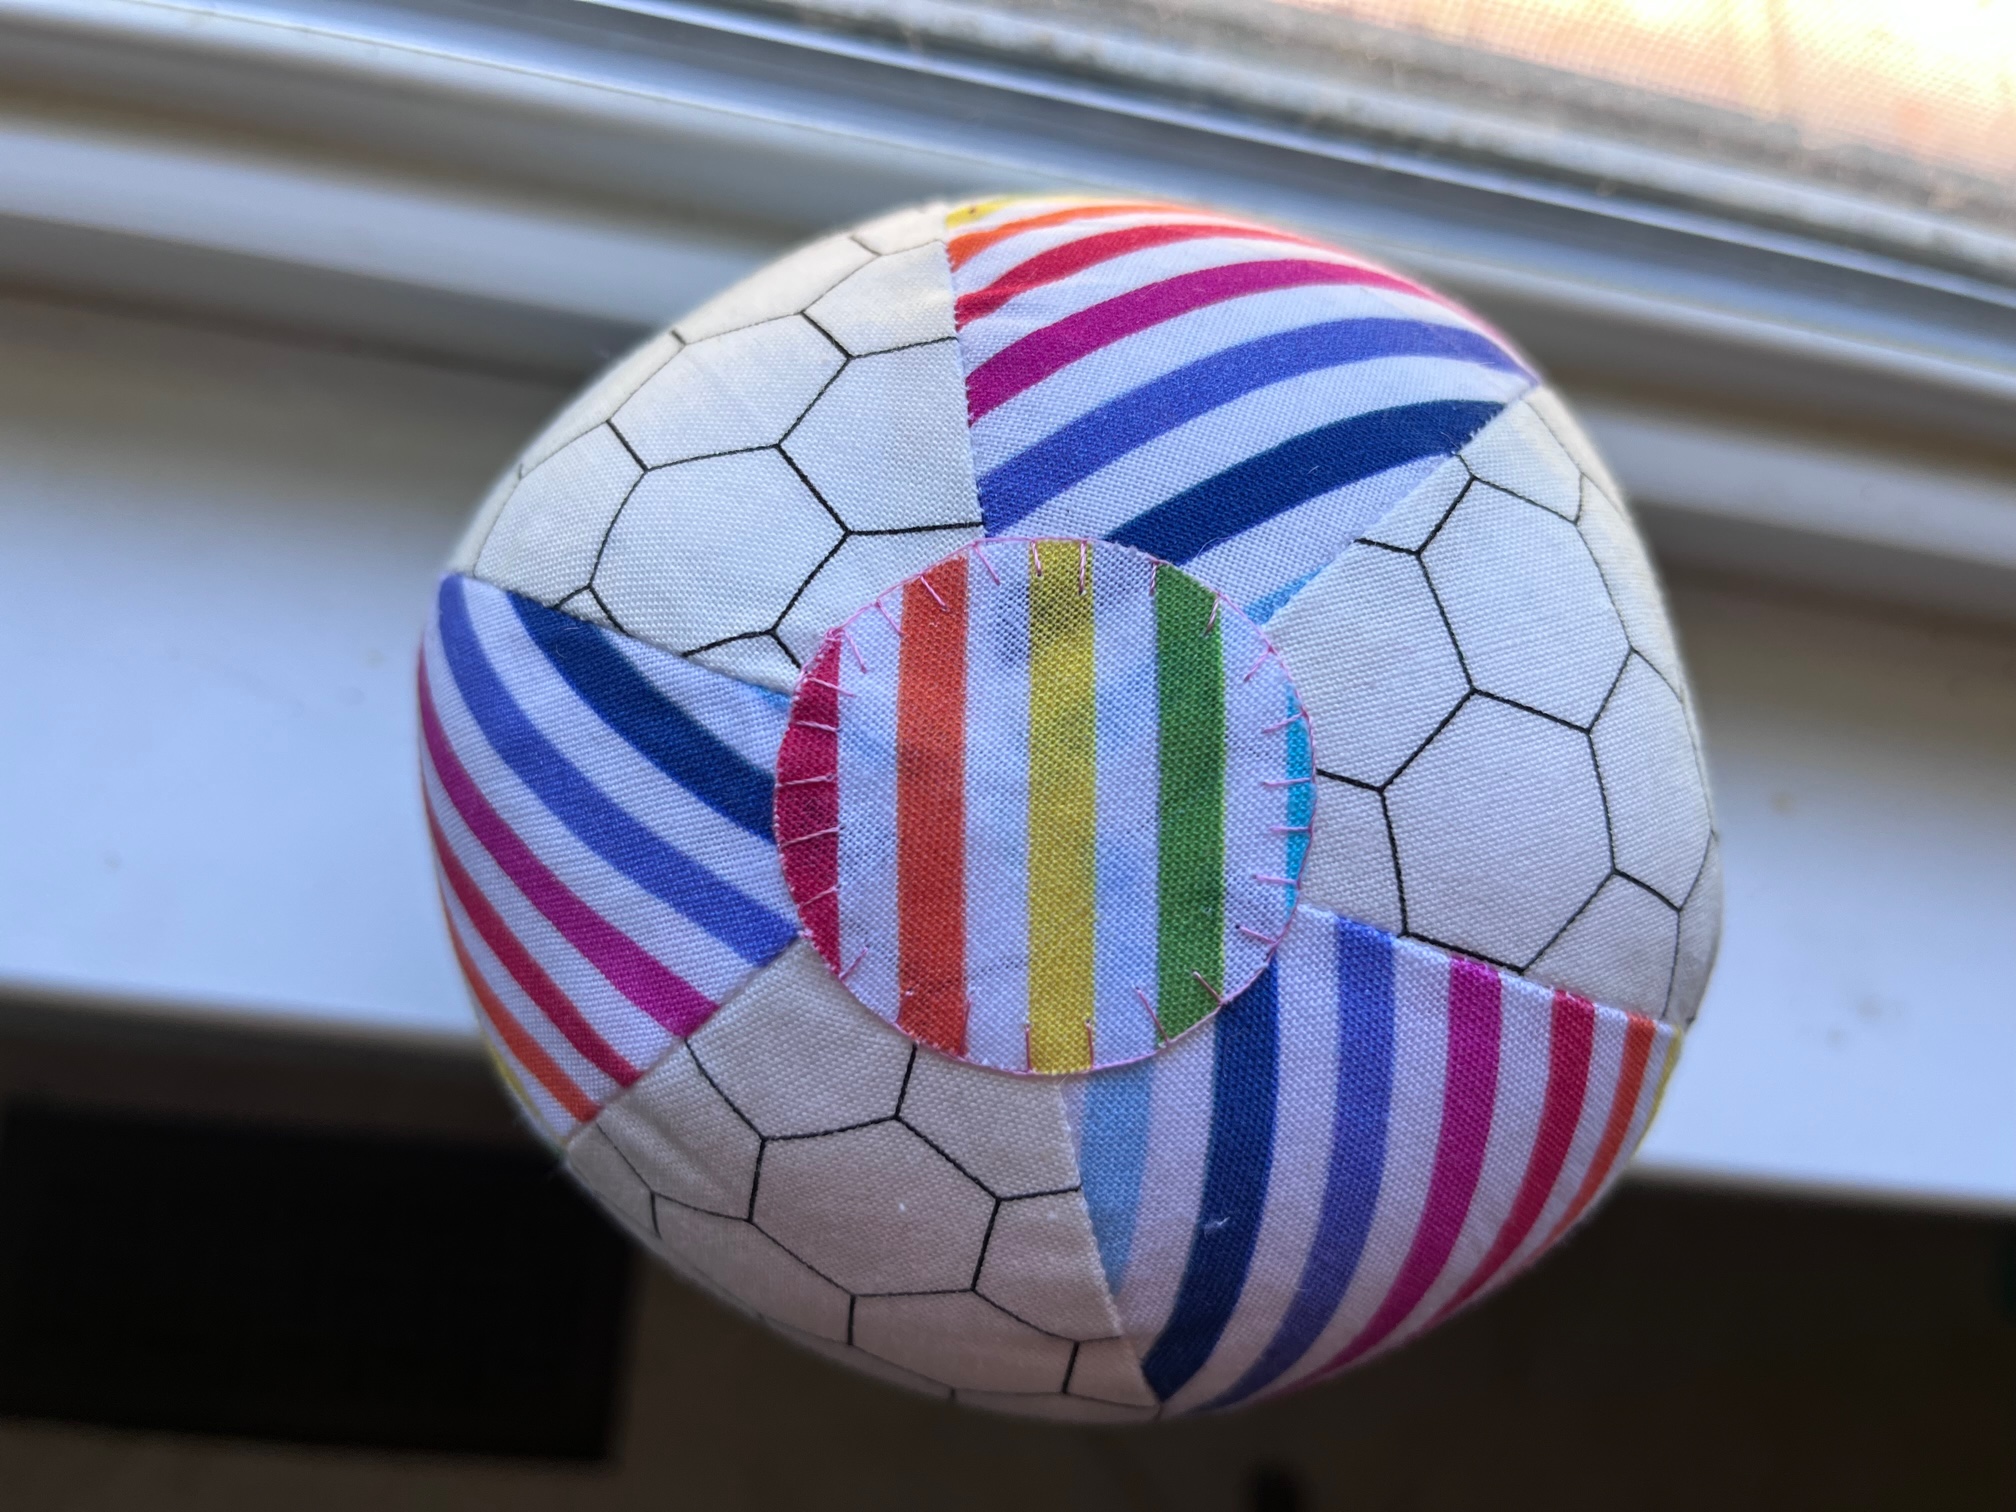
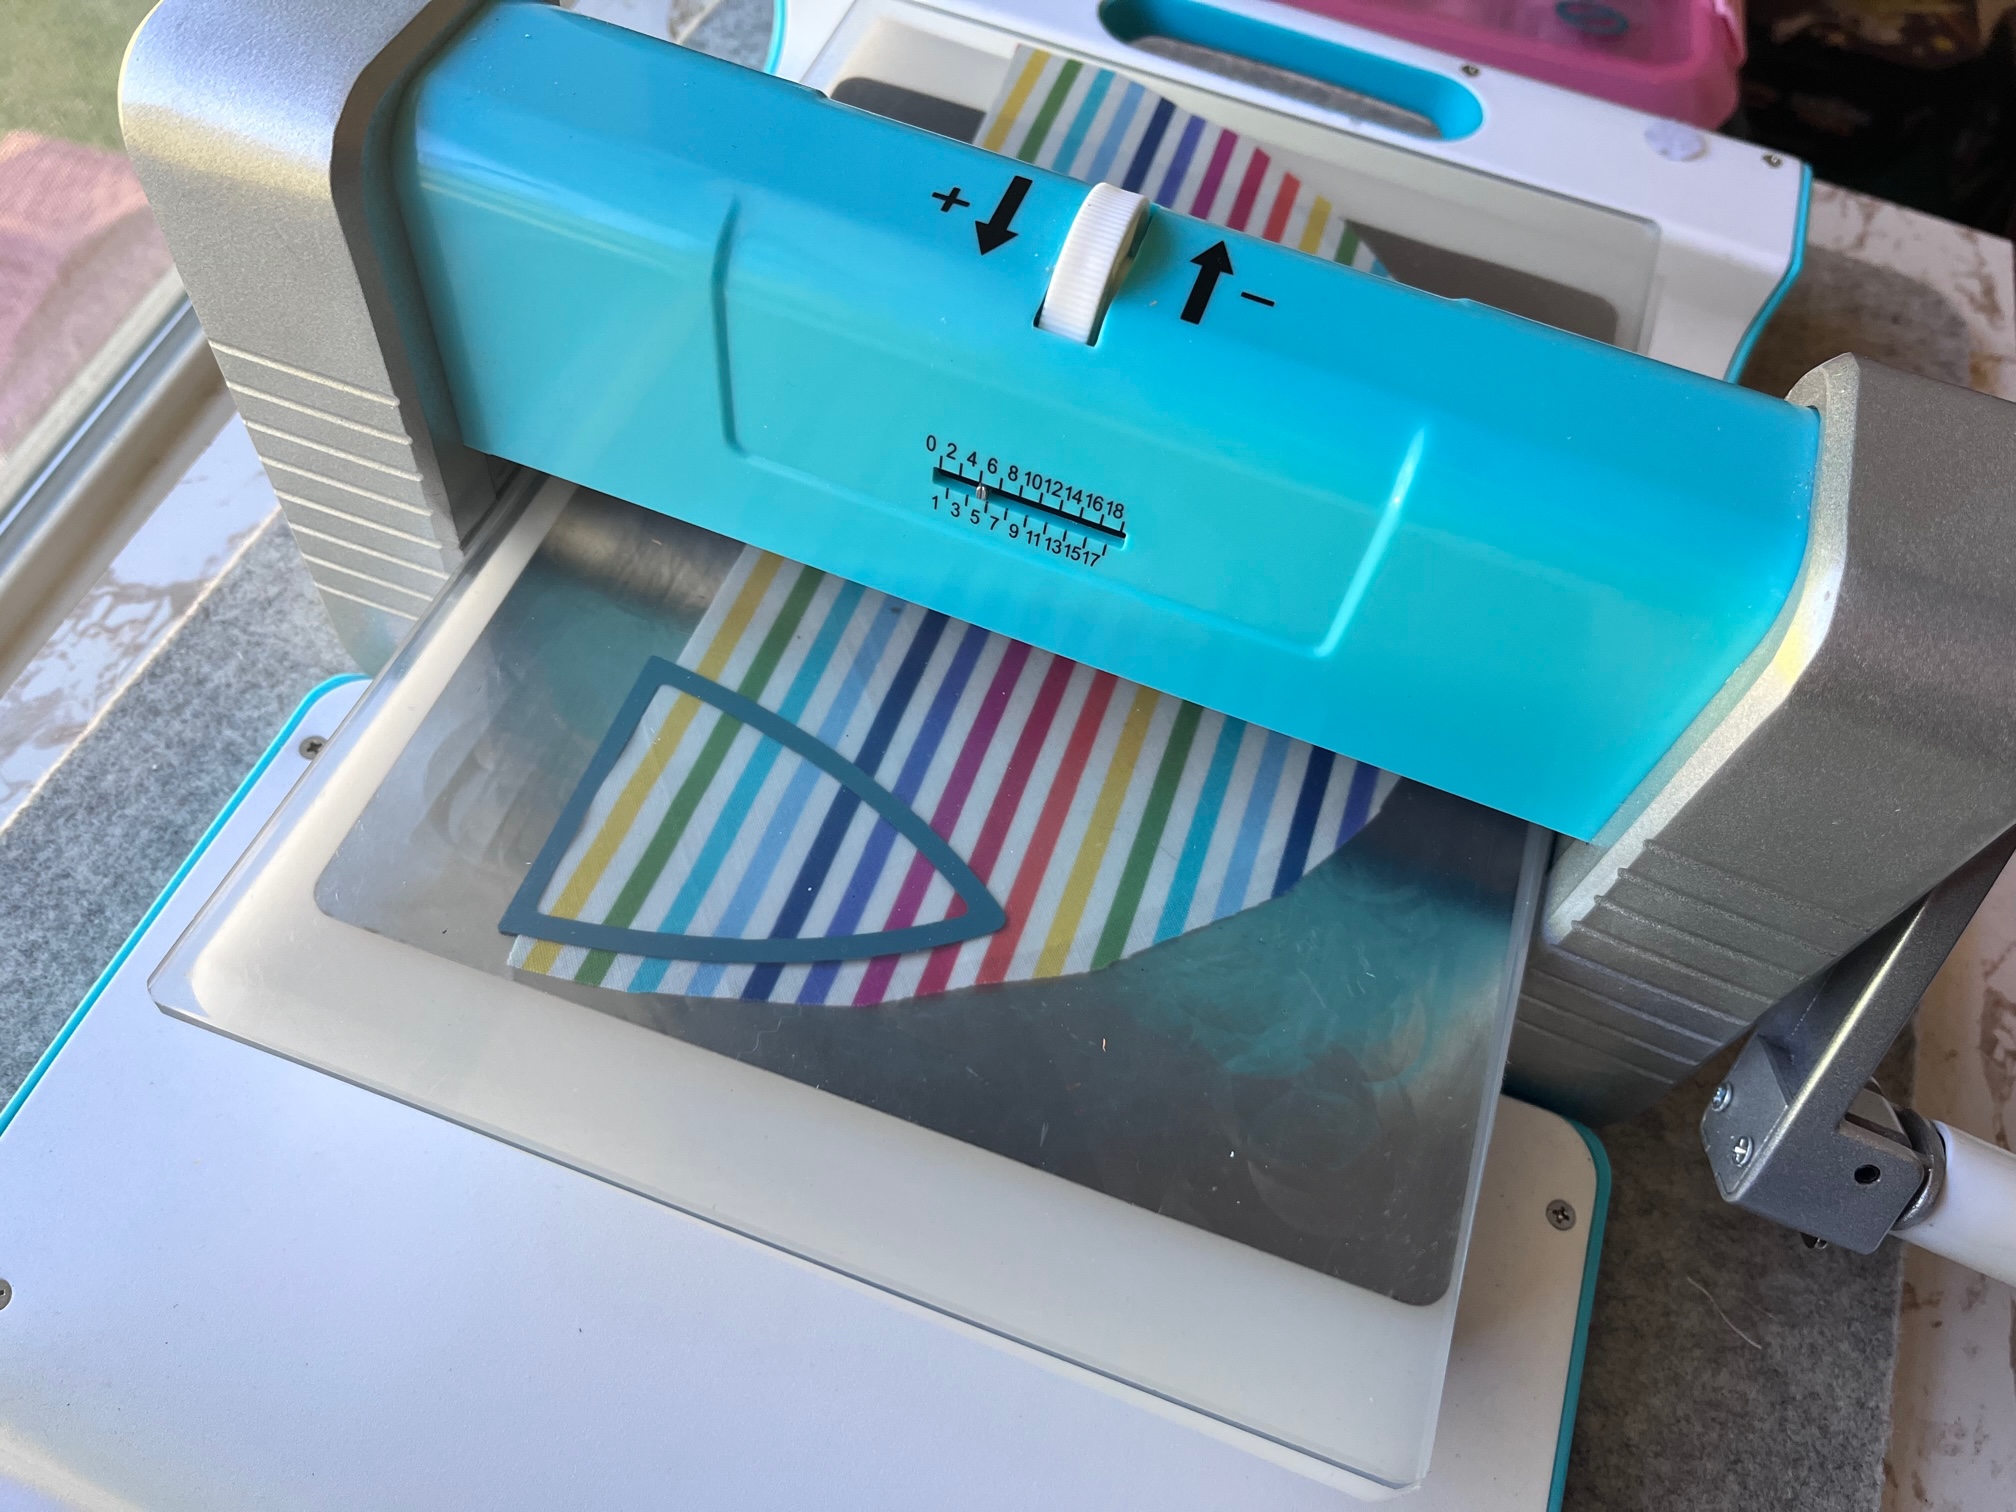
Using the Crossover II machine, cut out 6 fabric beach ball wedges using the large beach ball die. Using the smaller die, cut out 6 fusible fleece wedges. You will also need to cut out (2) 1 1/2″ circles using the circle die set.
Next…
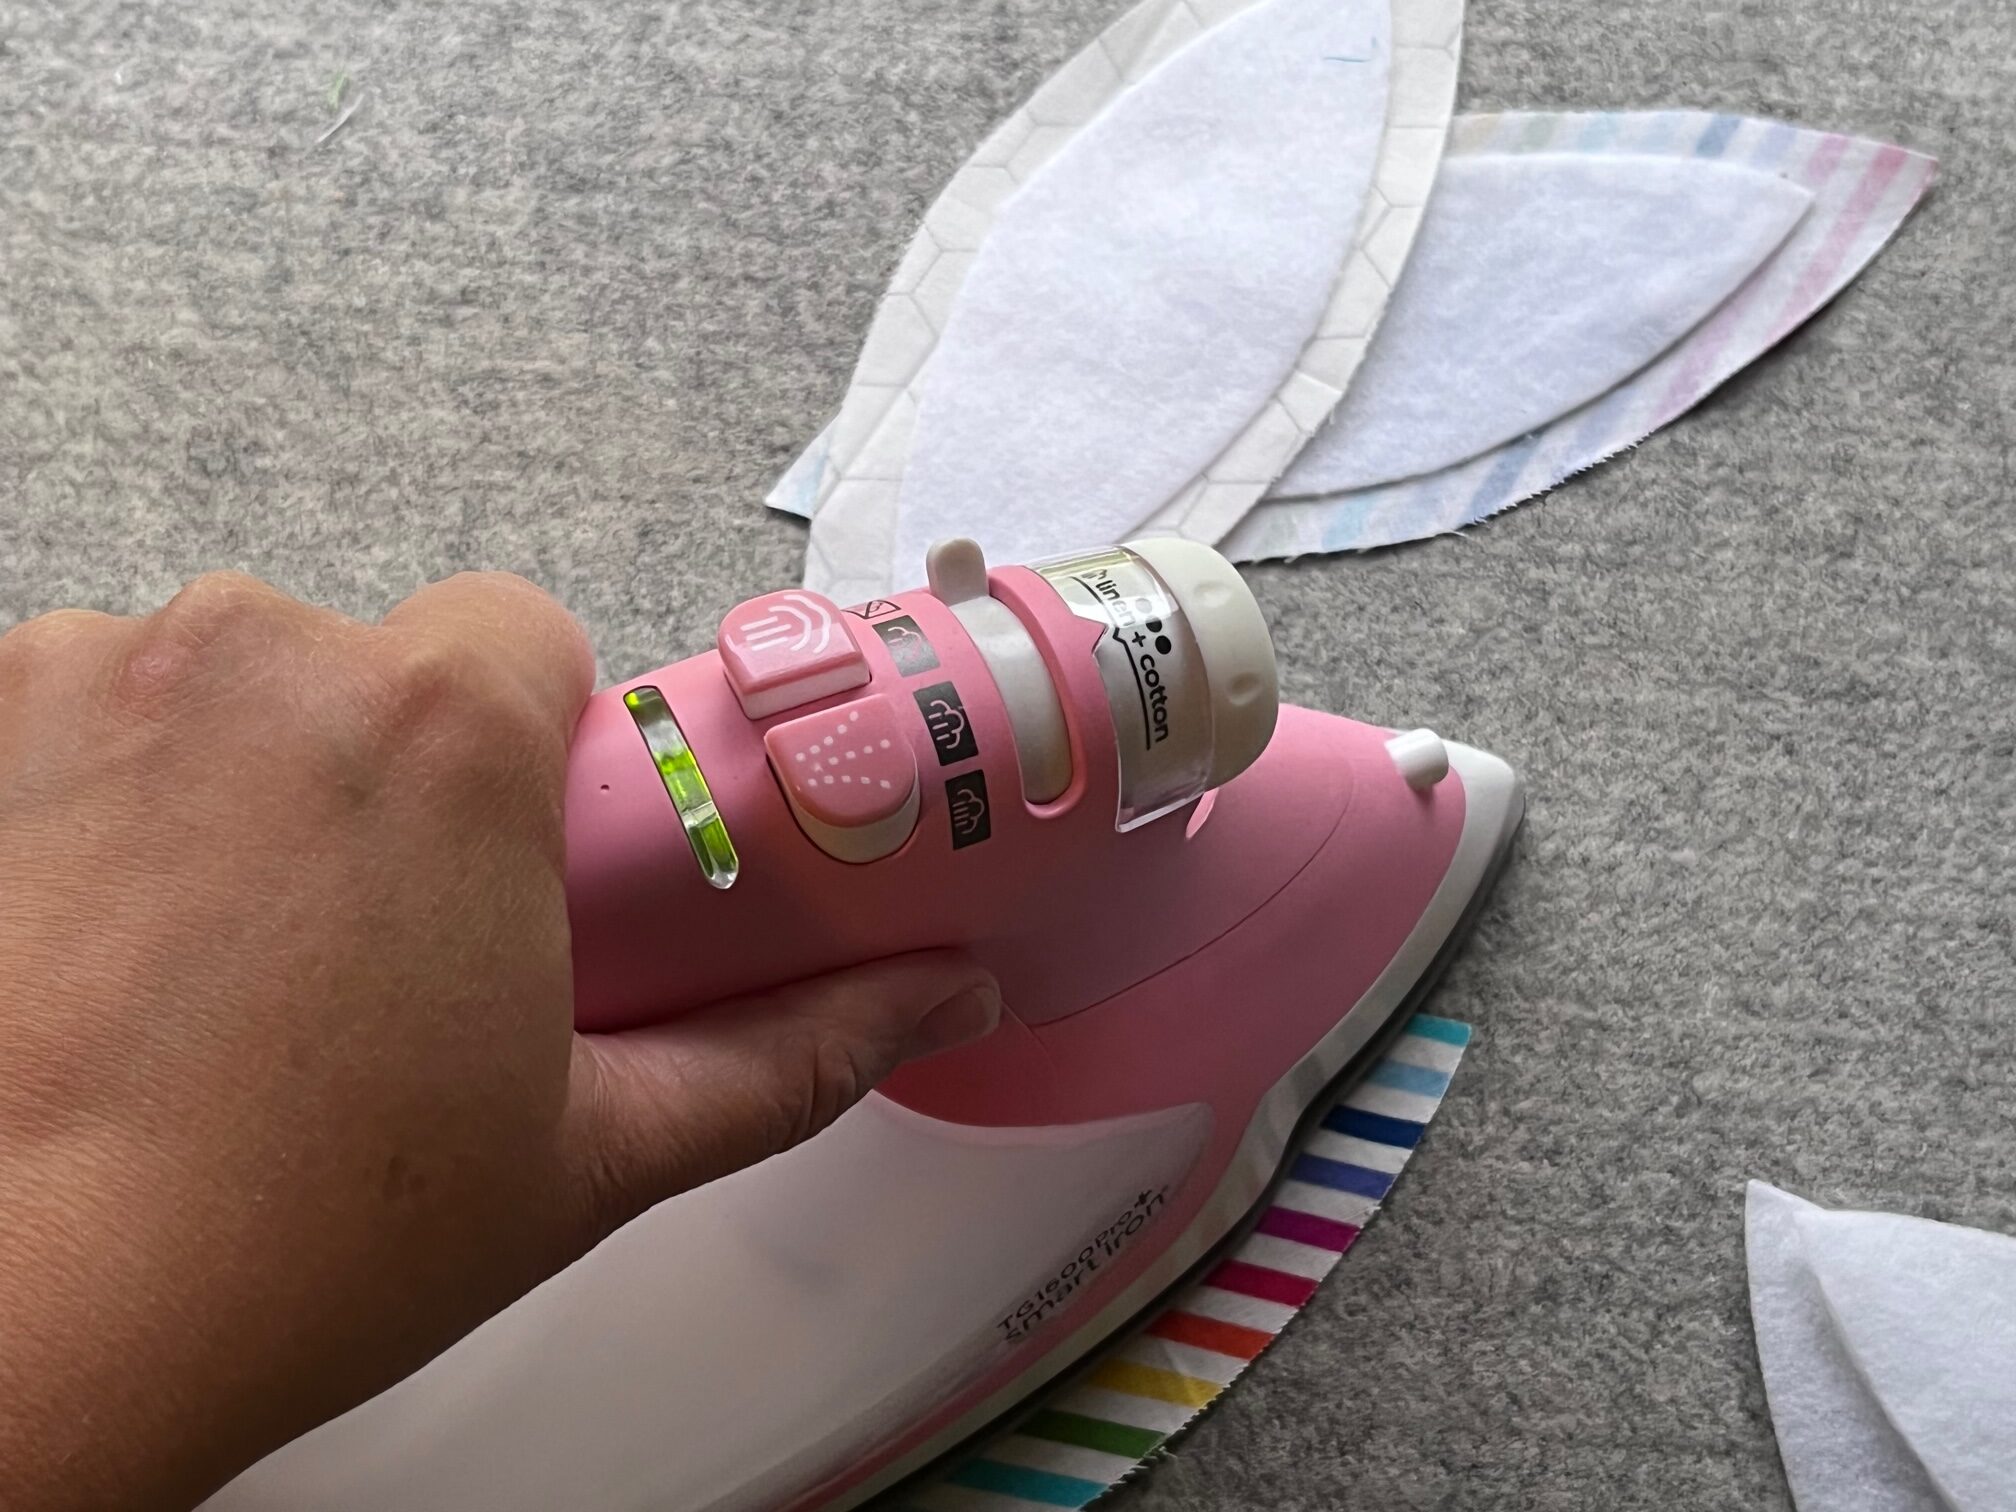
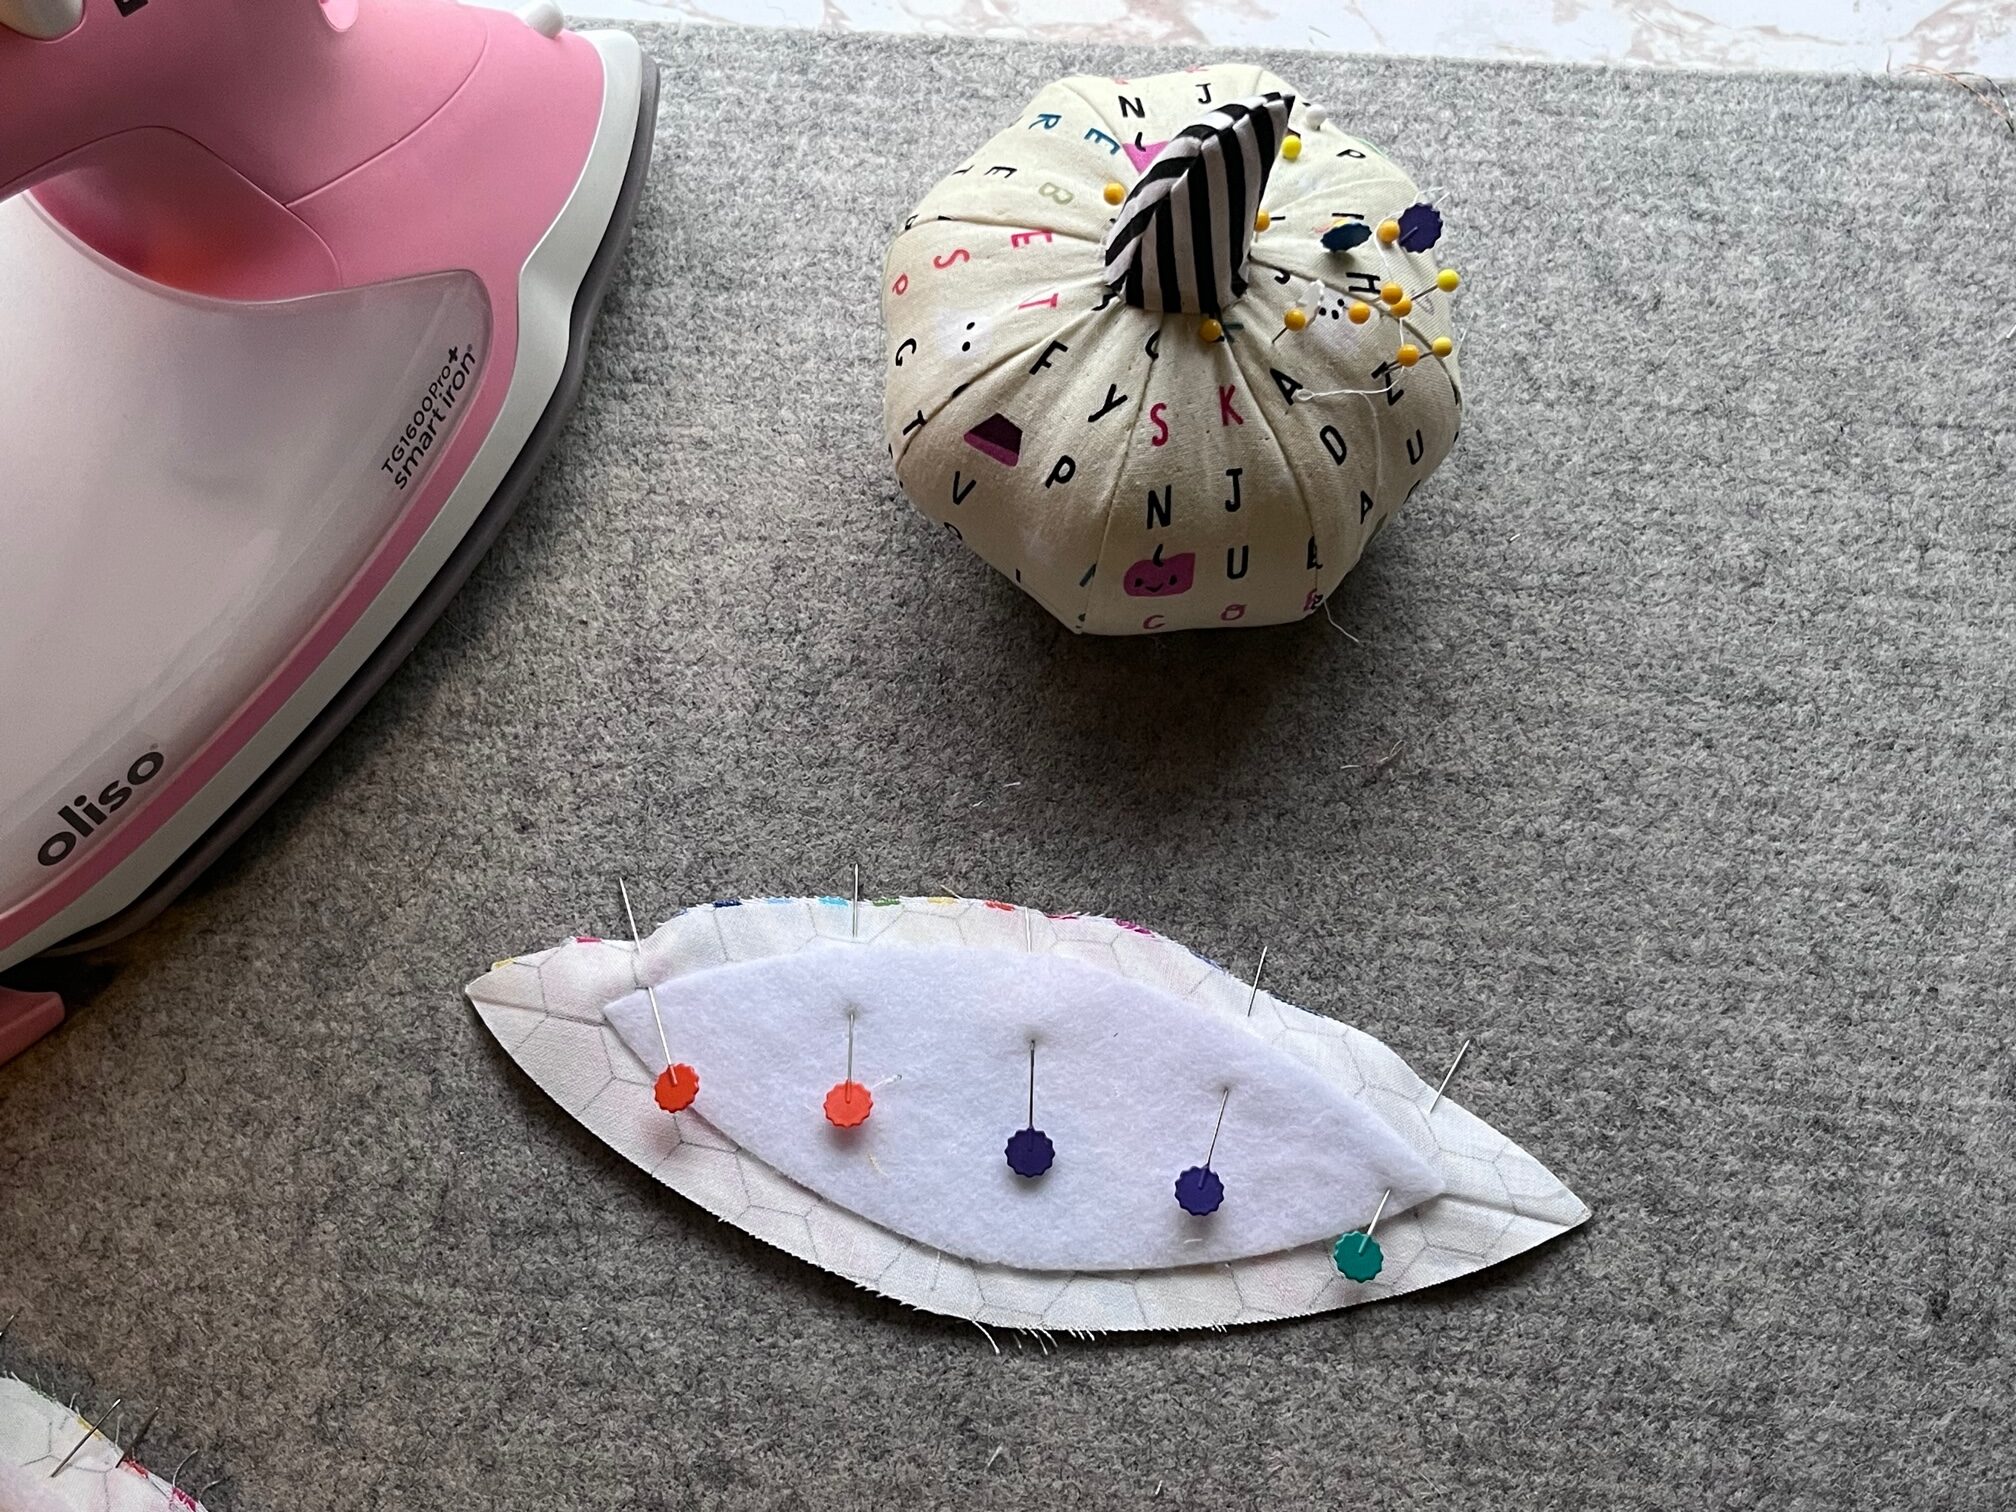
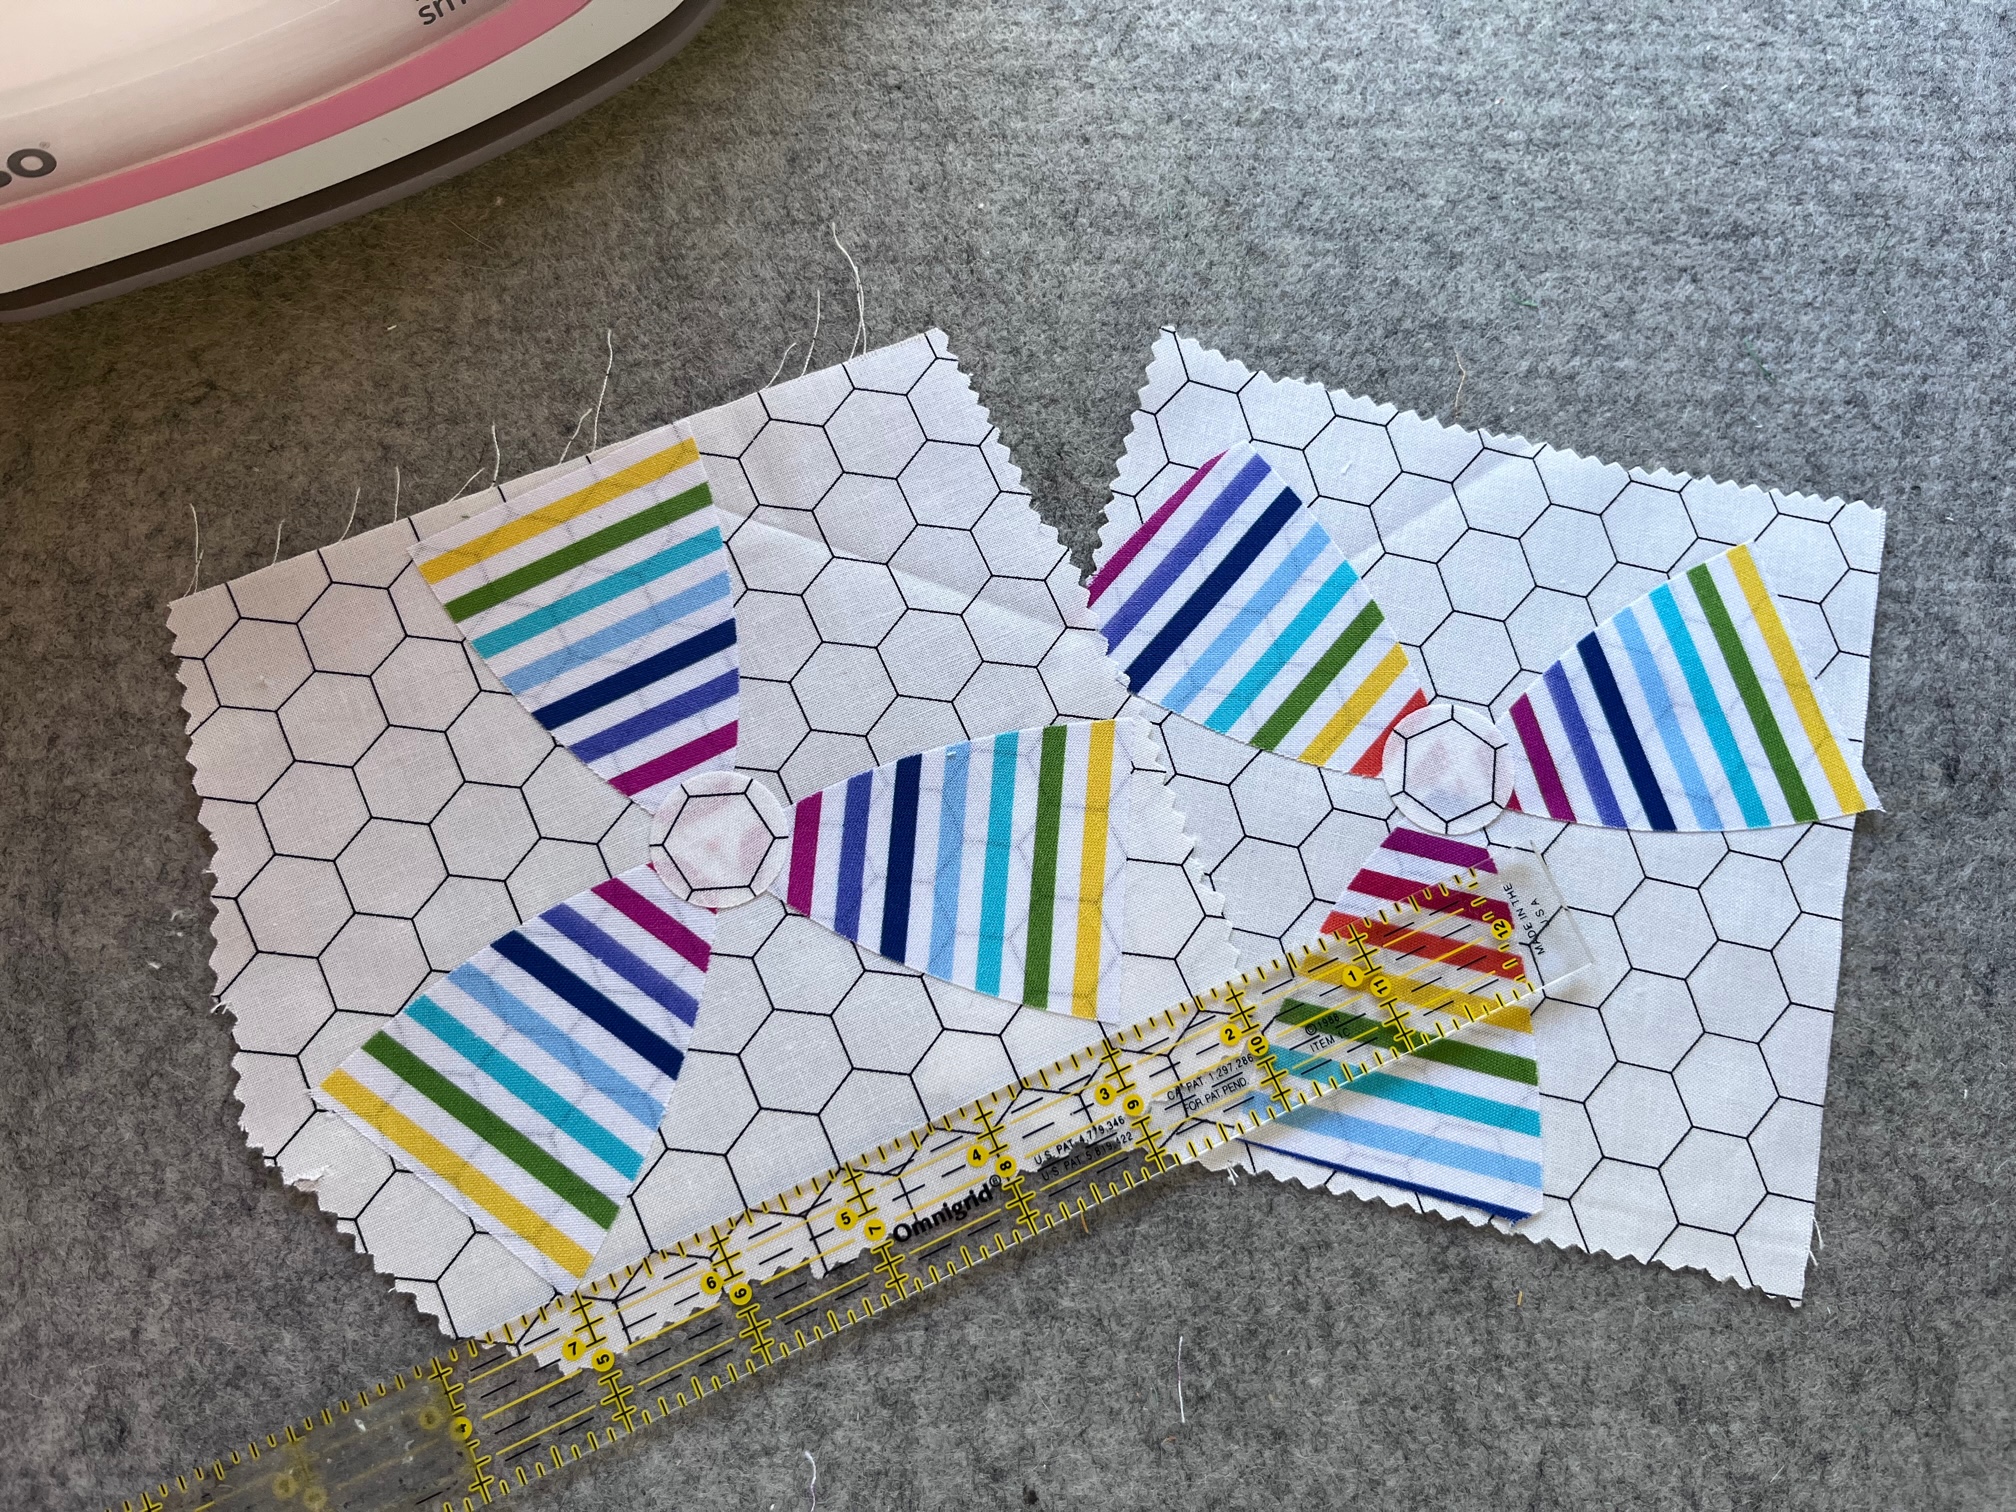
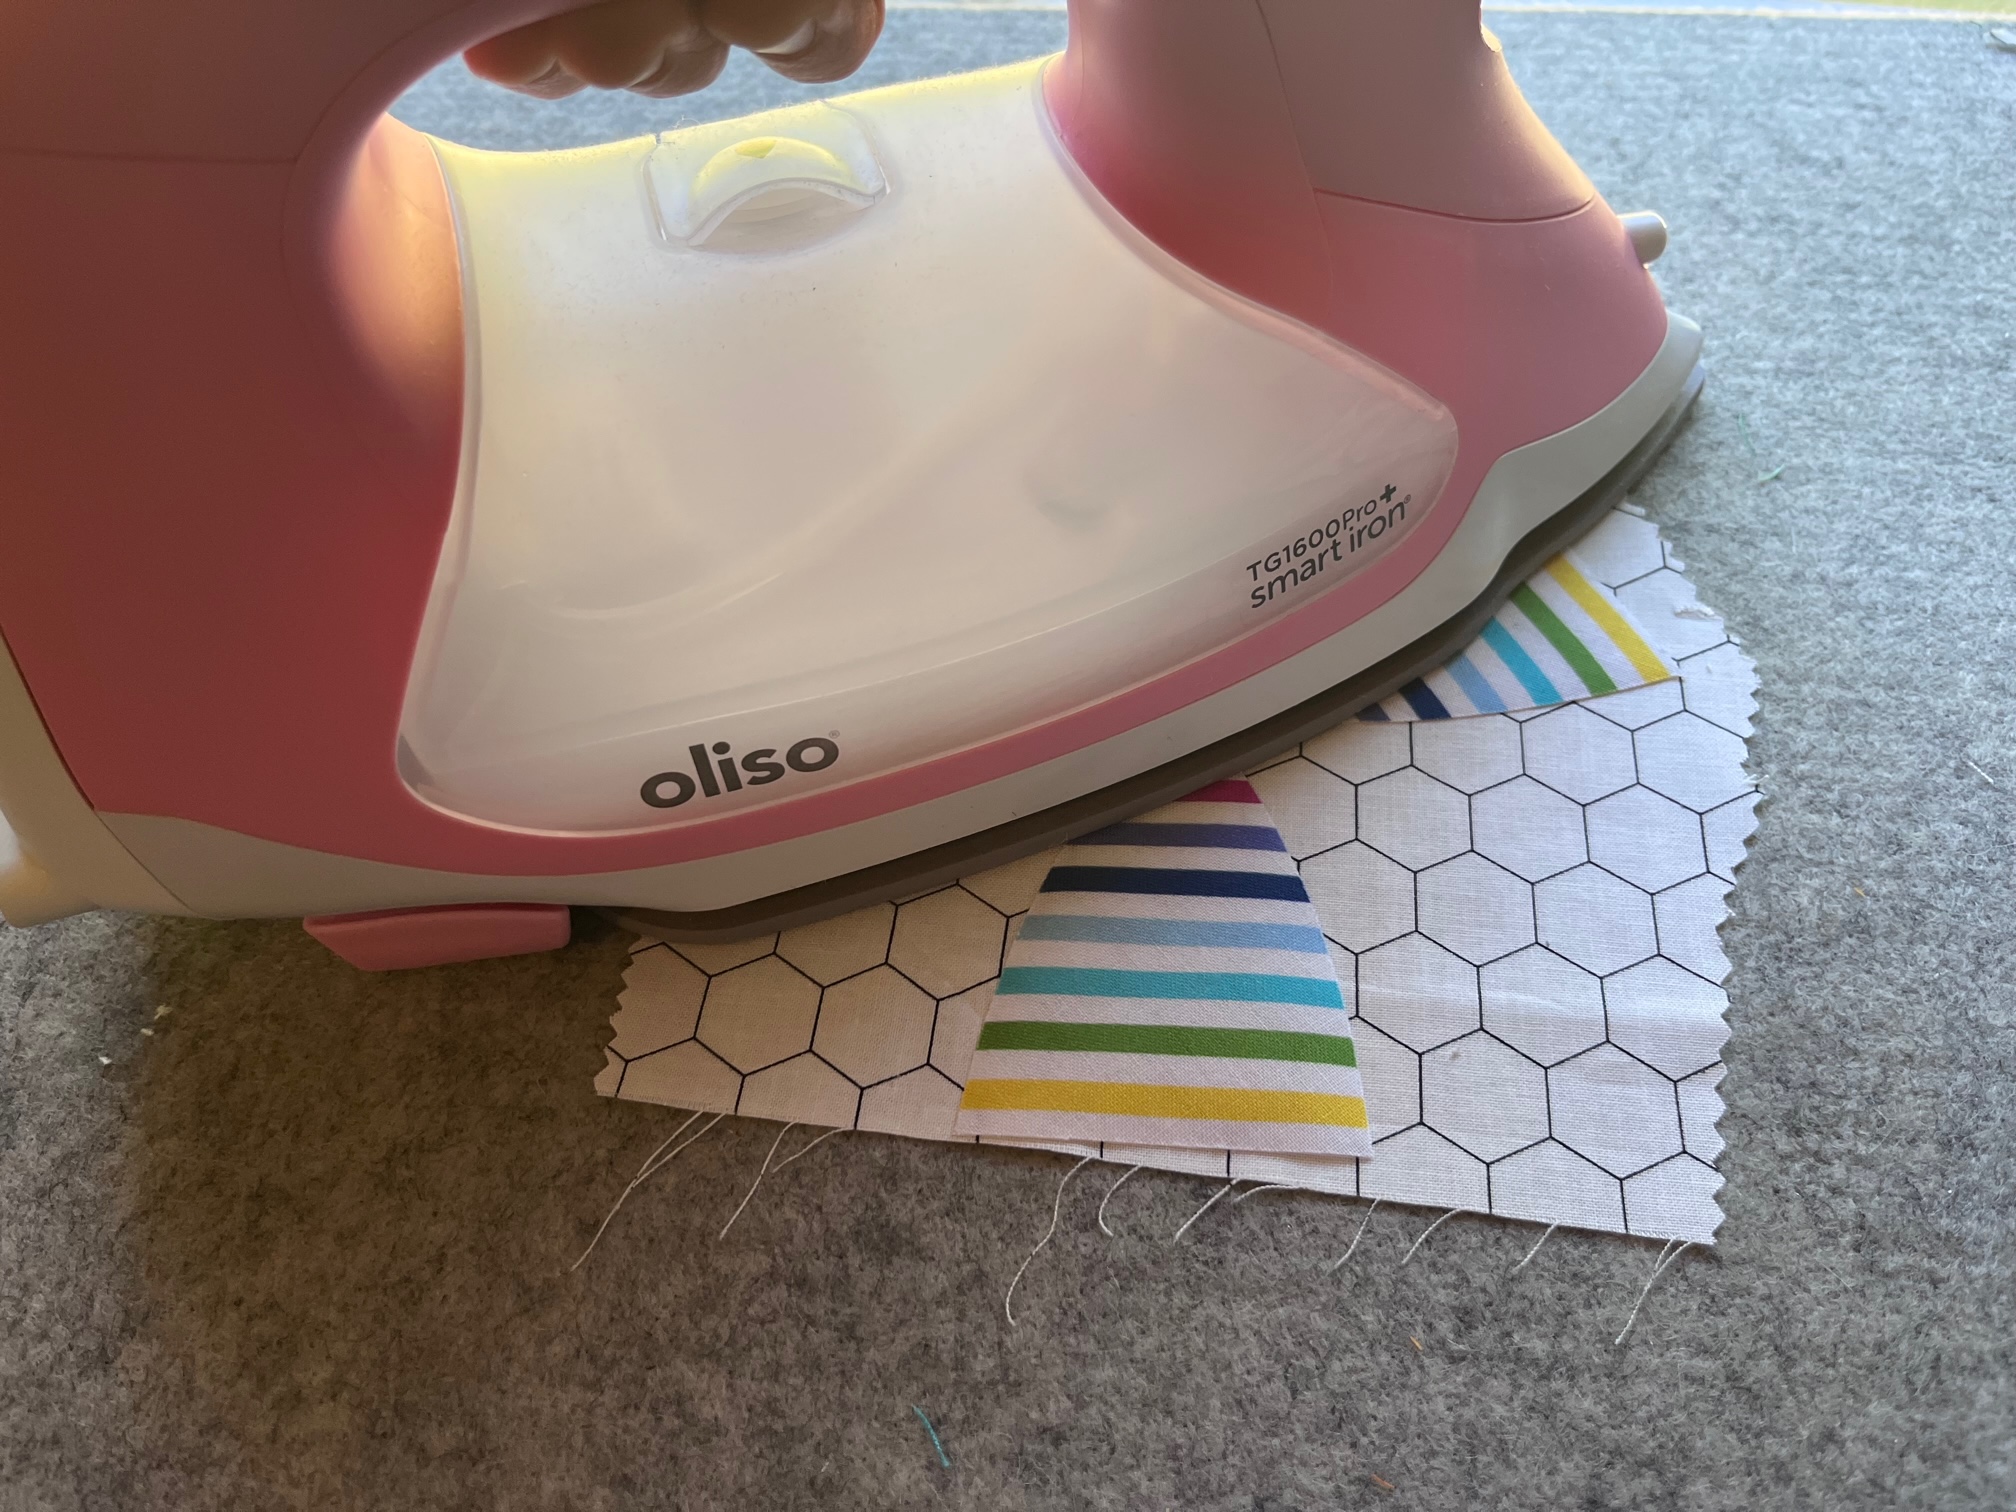
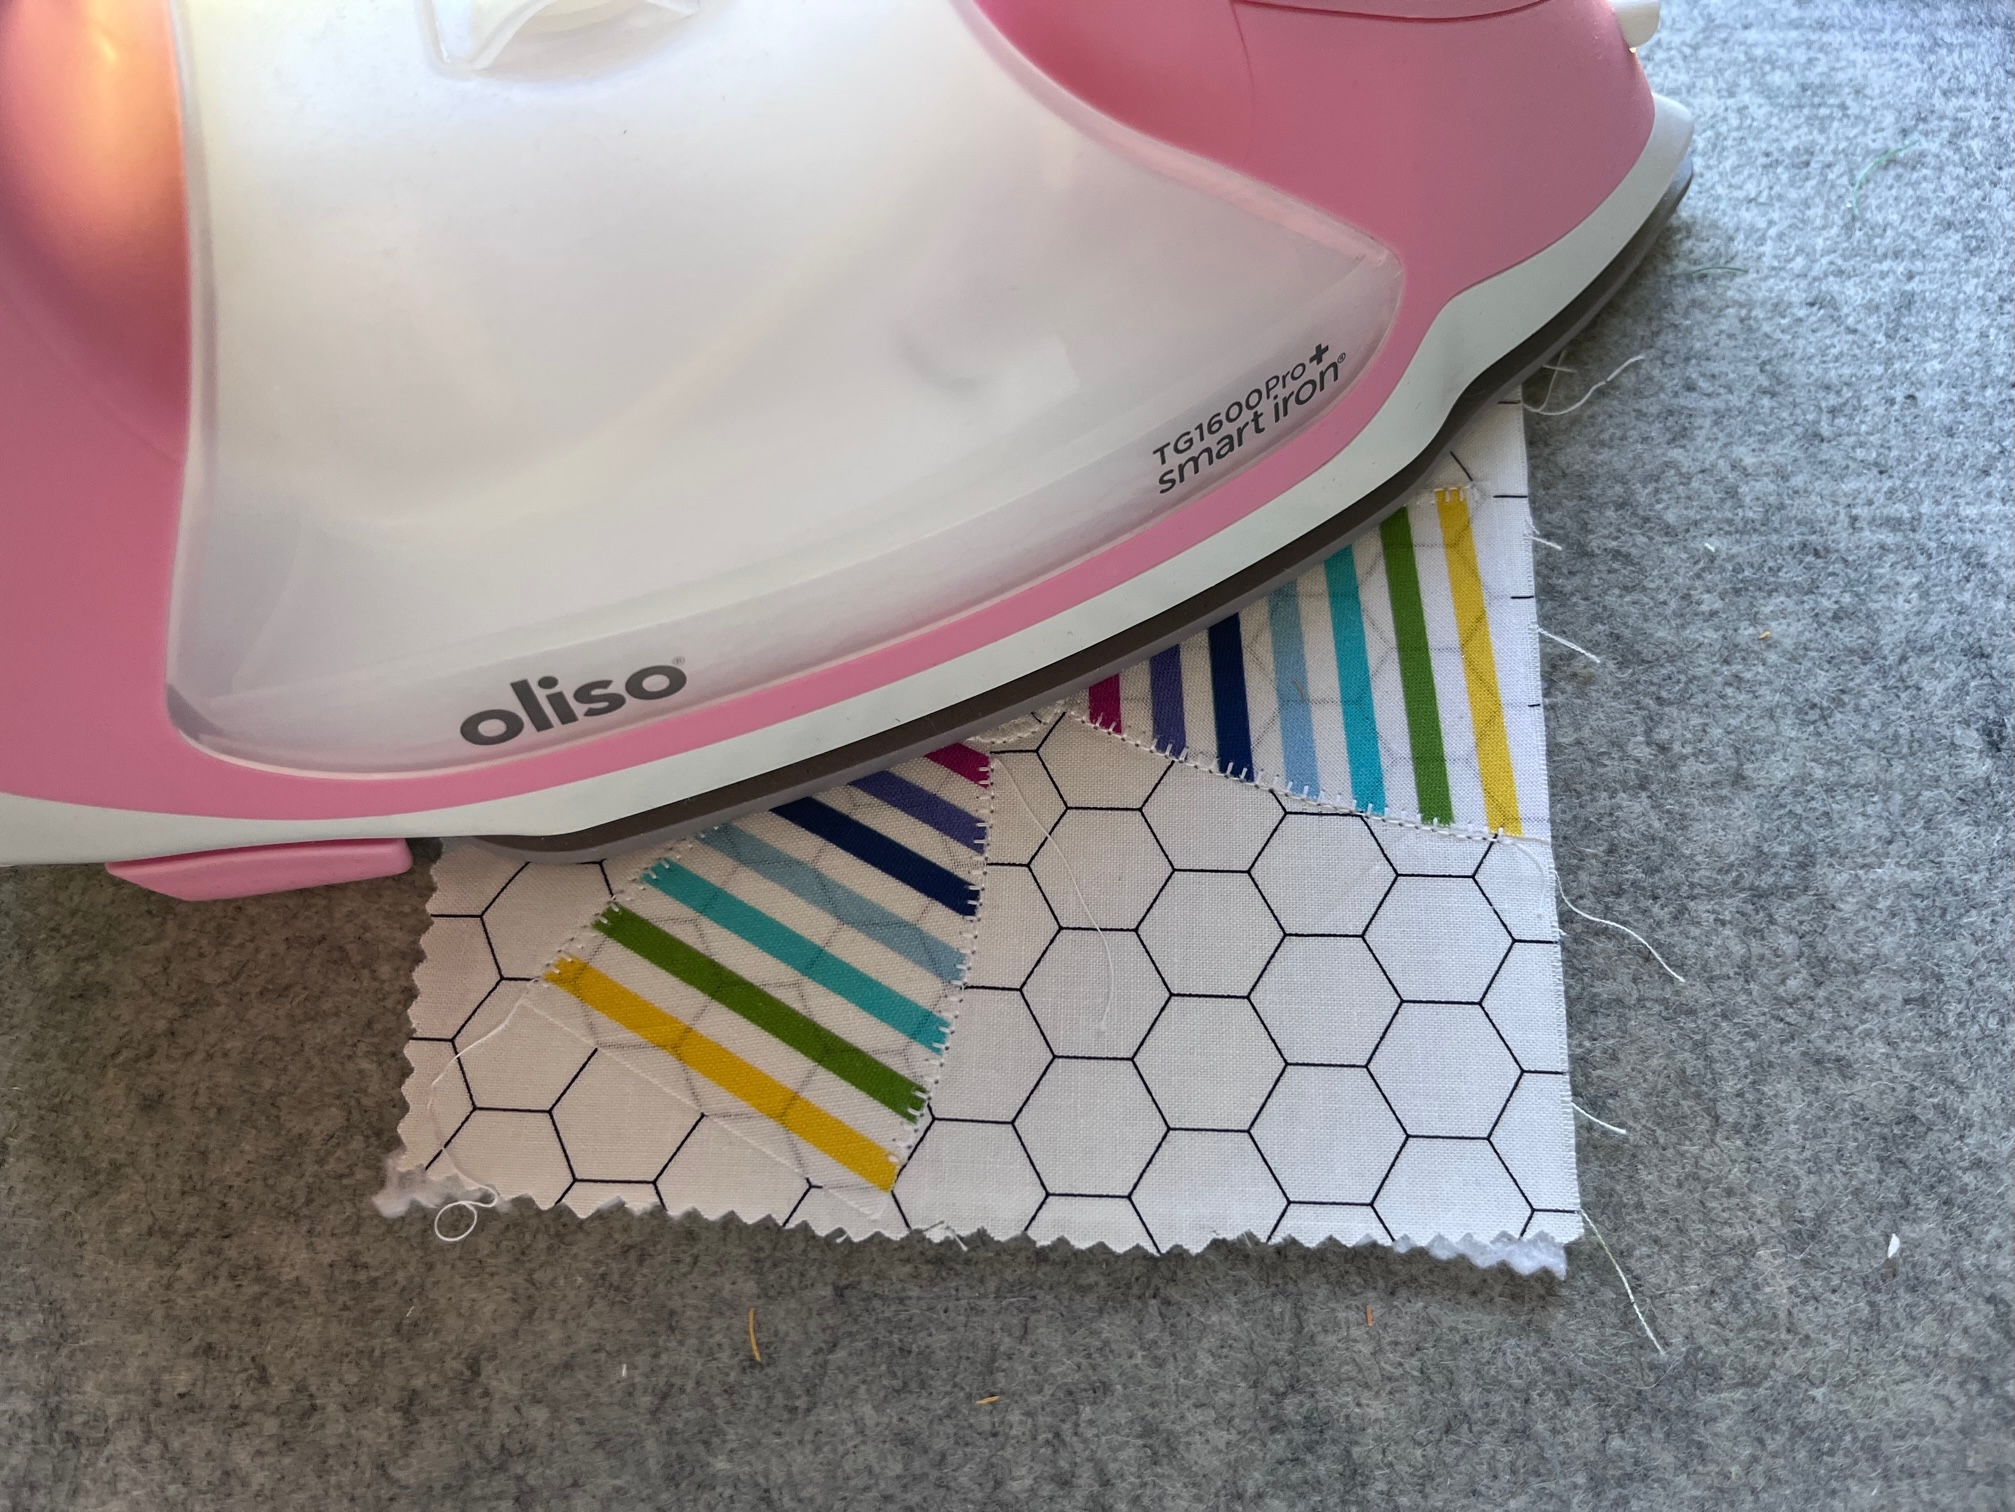
Adhere the fusible fleece to the center of your fabric wedges. The fusible fleece is smaller than the fabric wedges, so we eliminate any trouble with bulky seams.
Next…
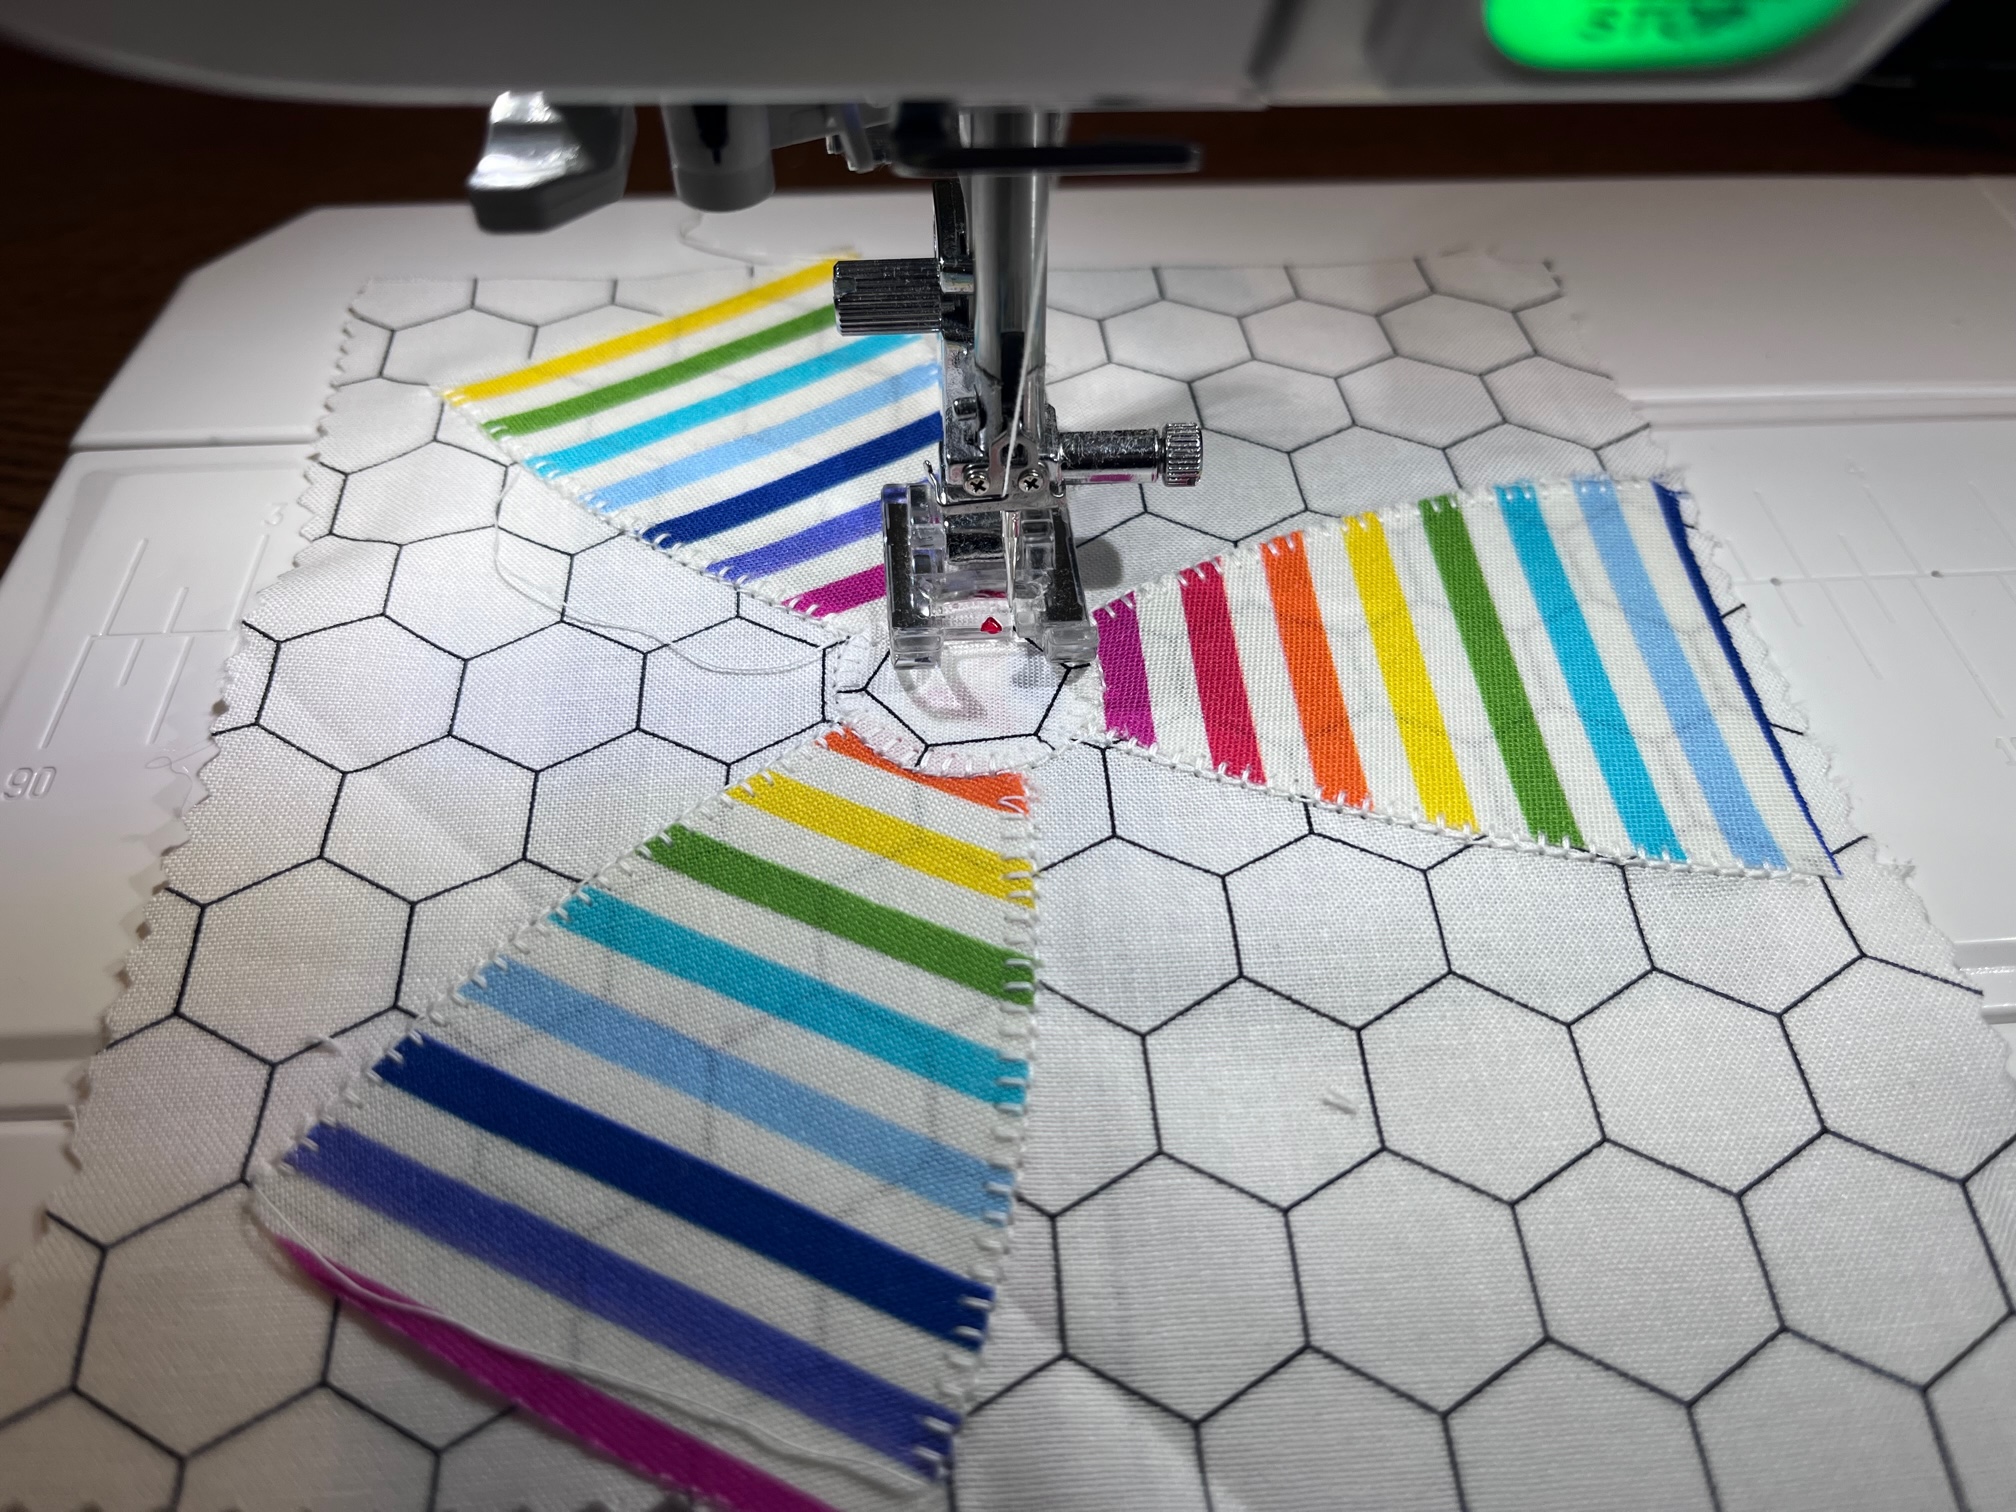
Place your beach ball wedges right sides together. Starting a 1/4″ down, sew a quarter inch seam. Stop 1/4″ before you reach the bottom.
Important tip: You need to leave a 1/4″ unsewn on the top and the bottom so that you are able to successfully sew the other wedges to your beach ball. For a better understanding of this, check out the full YouTube tutorial for visual reference.
Continue by…
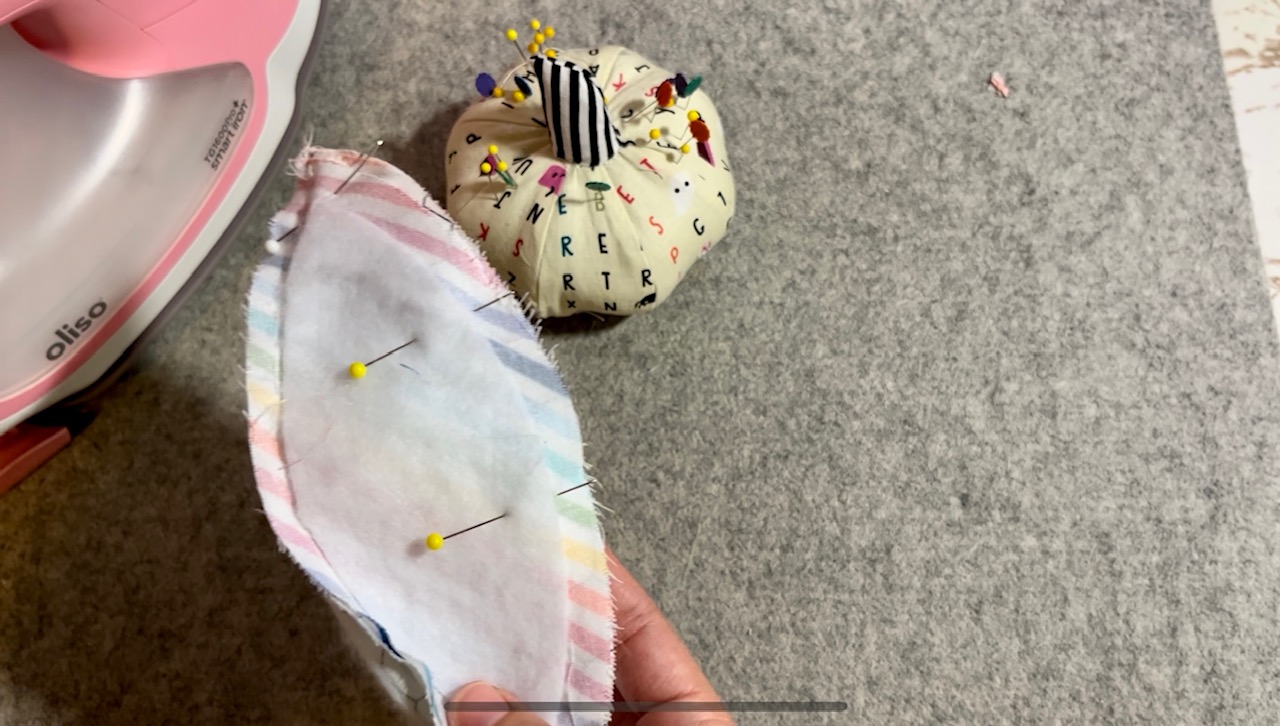
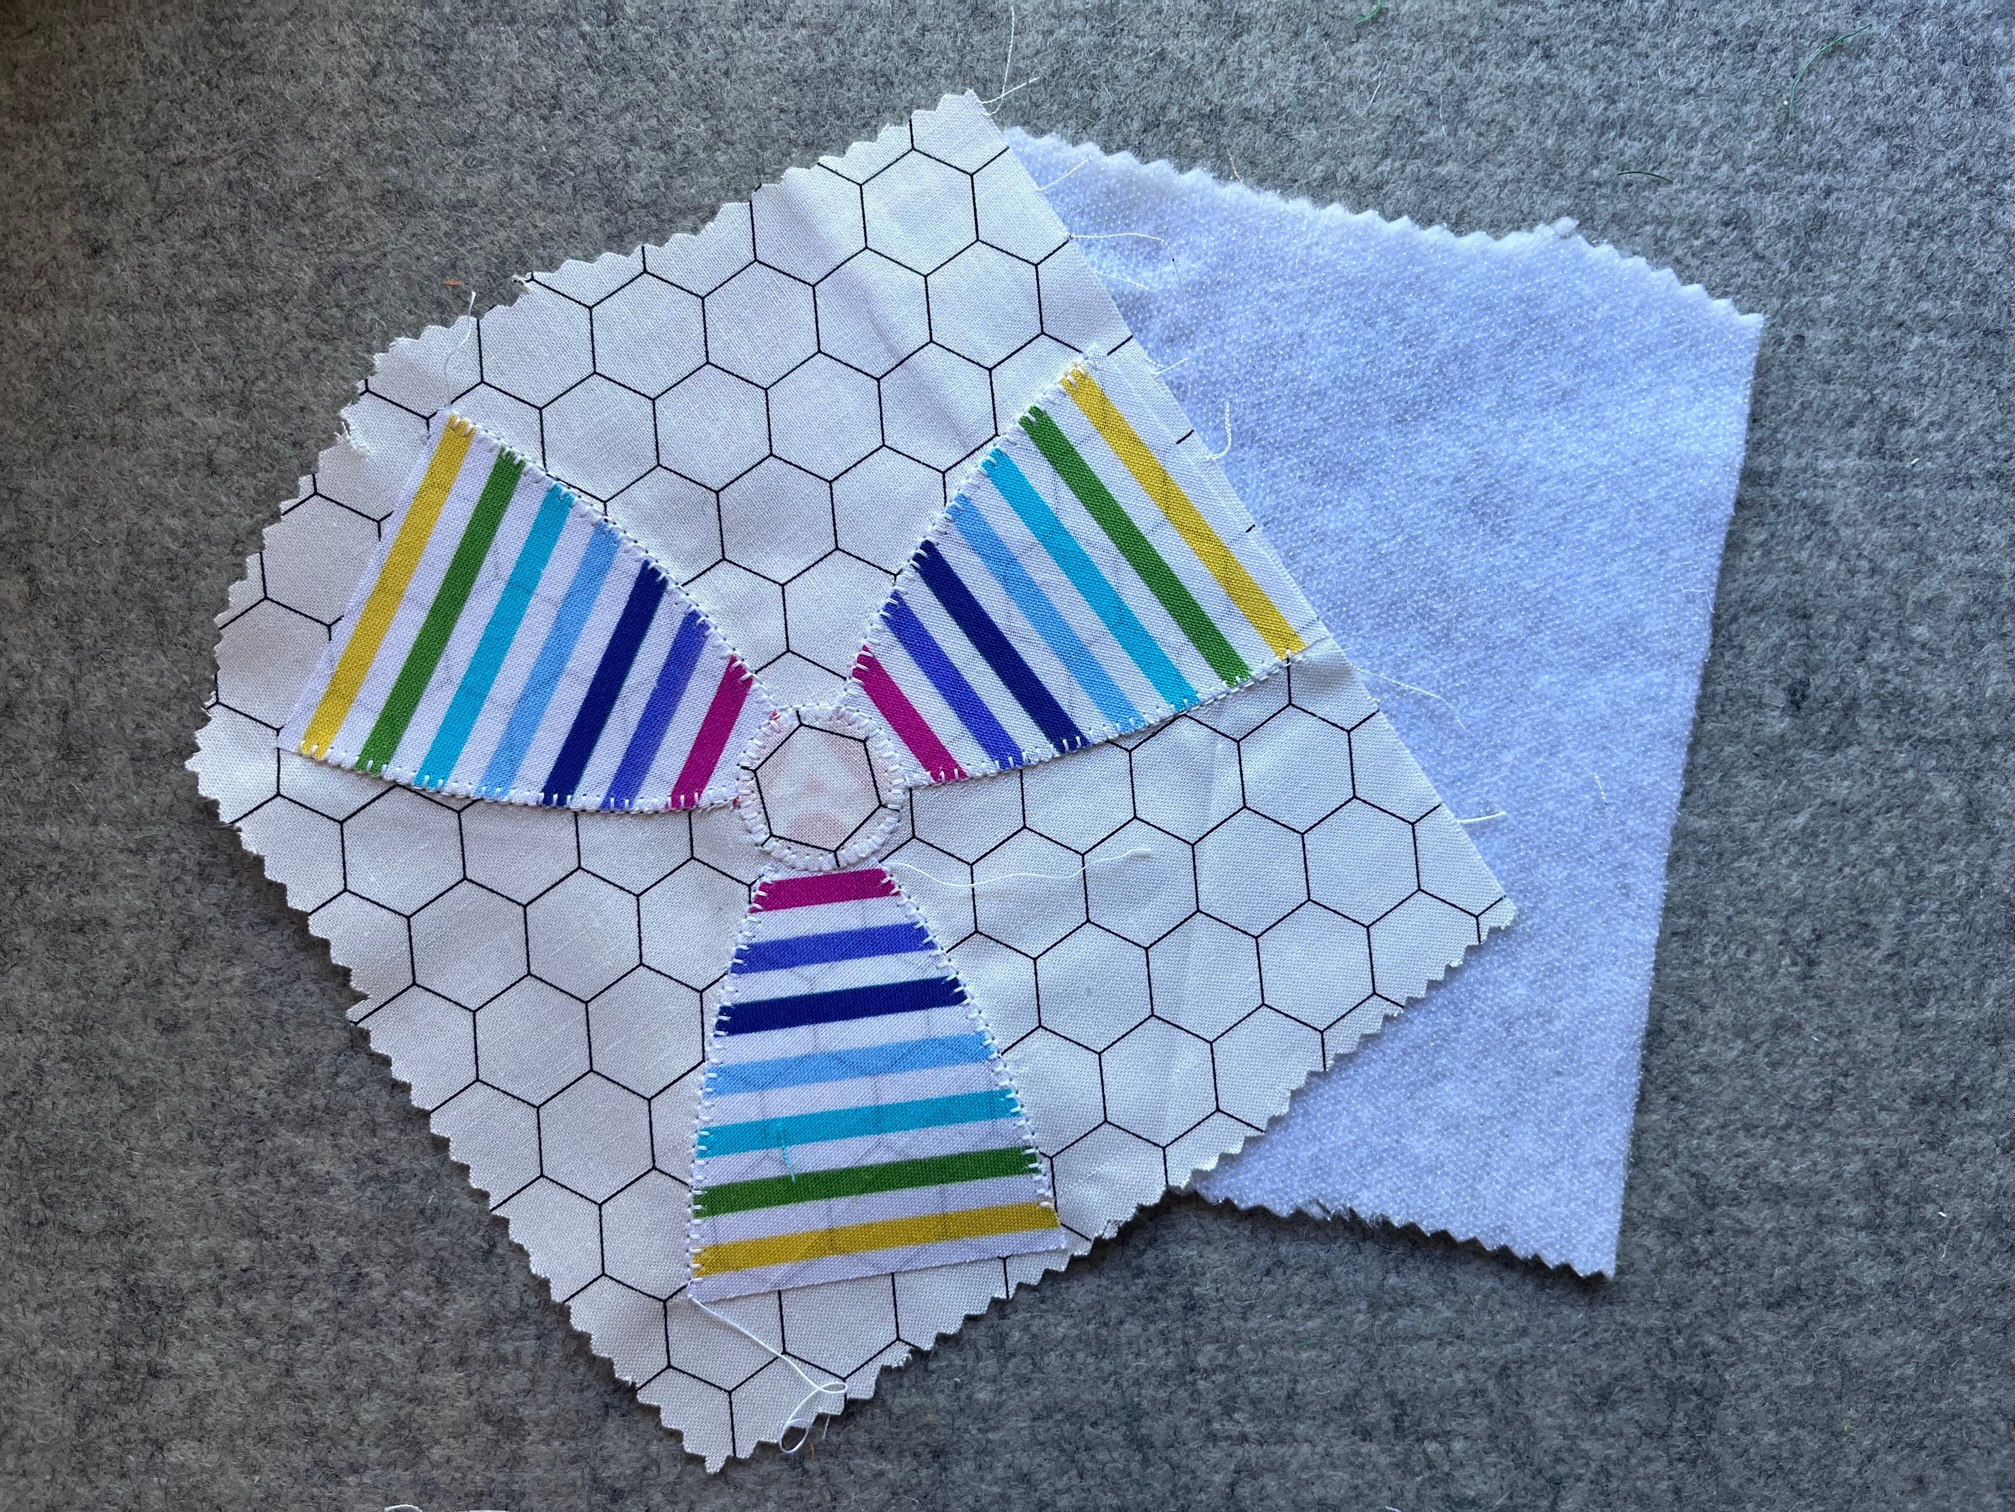
Sewing the beach ball wedges together until you have sewn the entire ball together minus 1 final side seam.
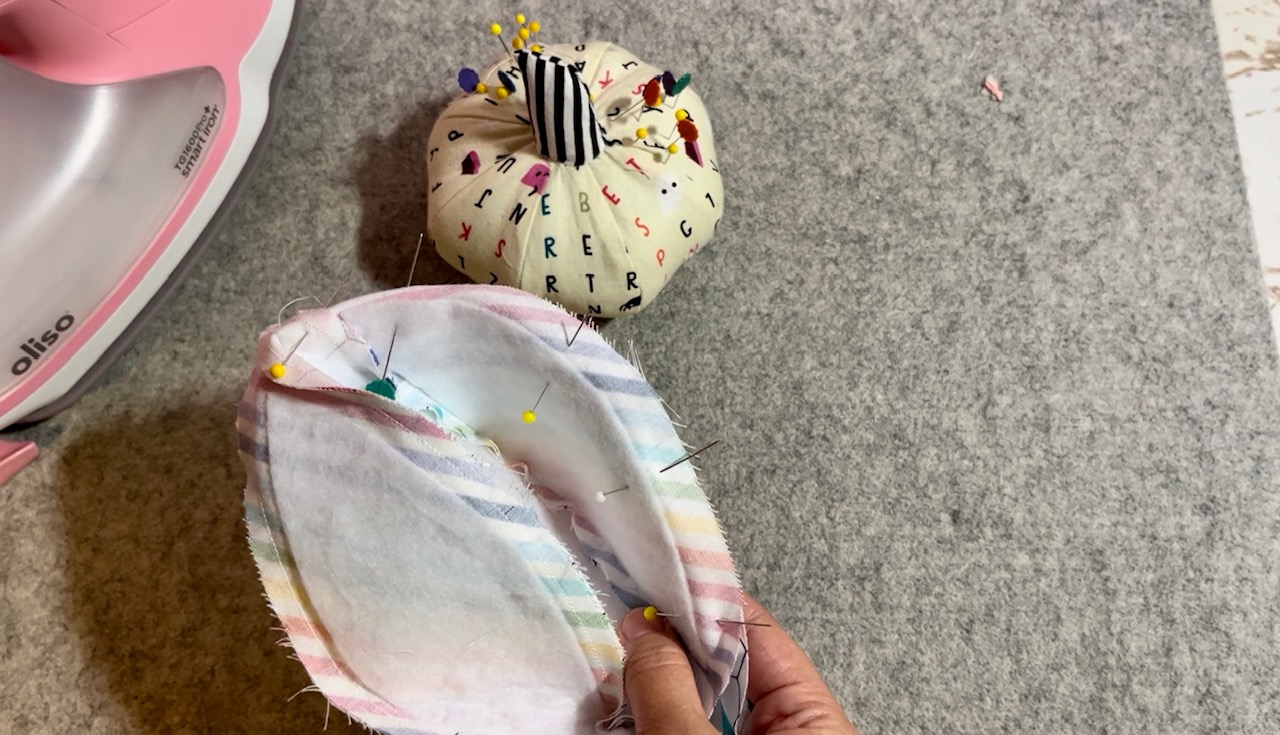
When sewing the final side seam, leave an opening so that you can turn your ball right side out. The two yellow pins in the photo below show where I plan to leave the opening for turning.
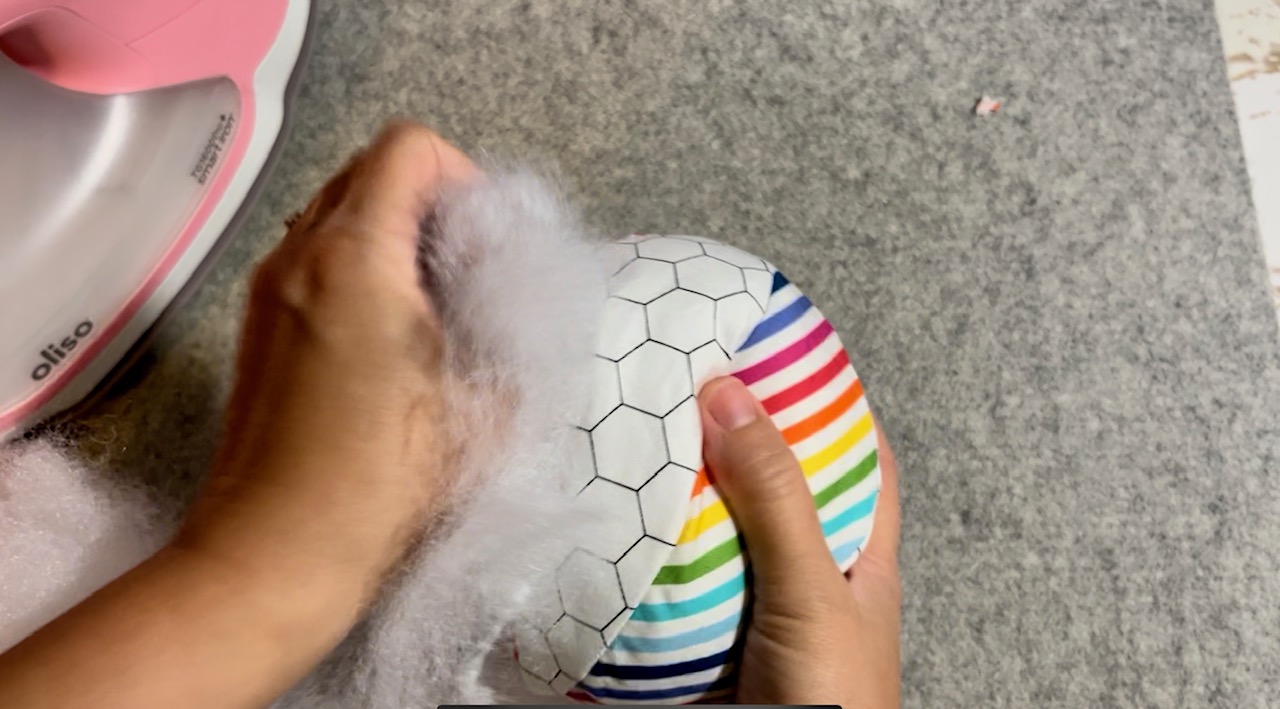
Turn the ball right side out and stuff.
Next…
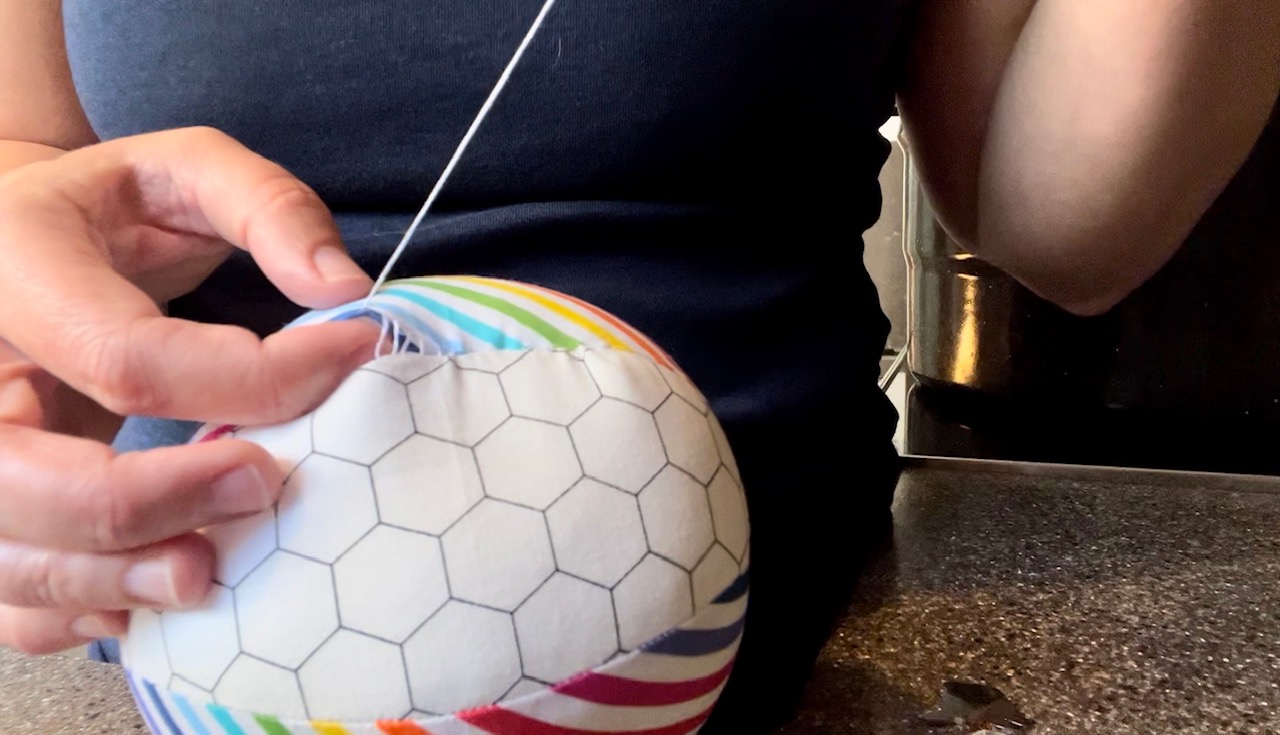
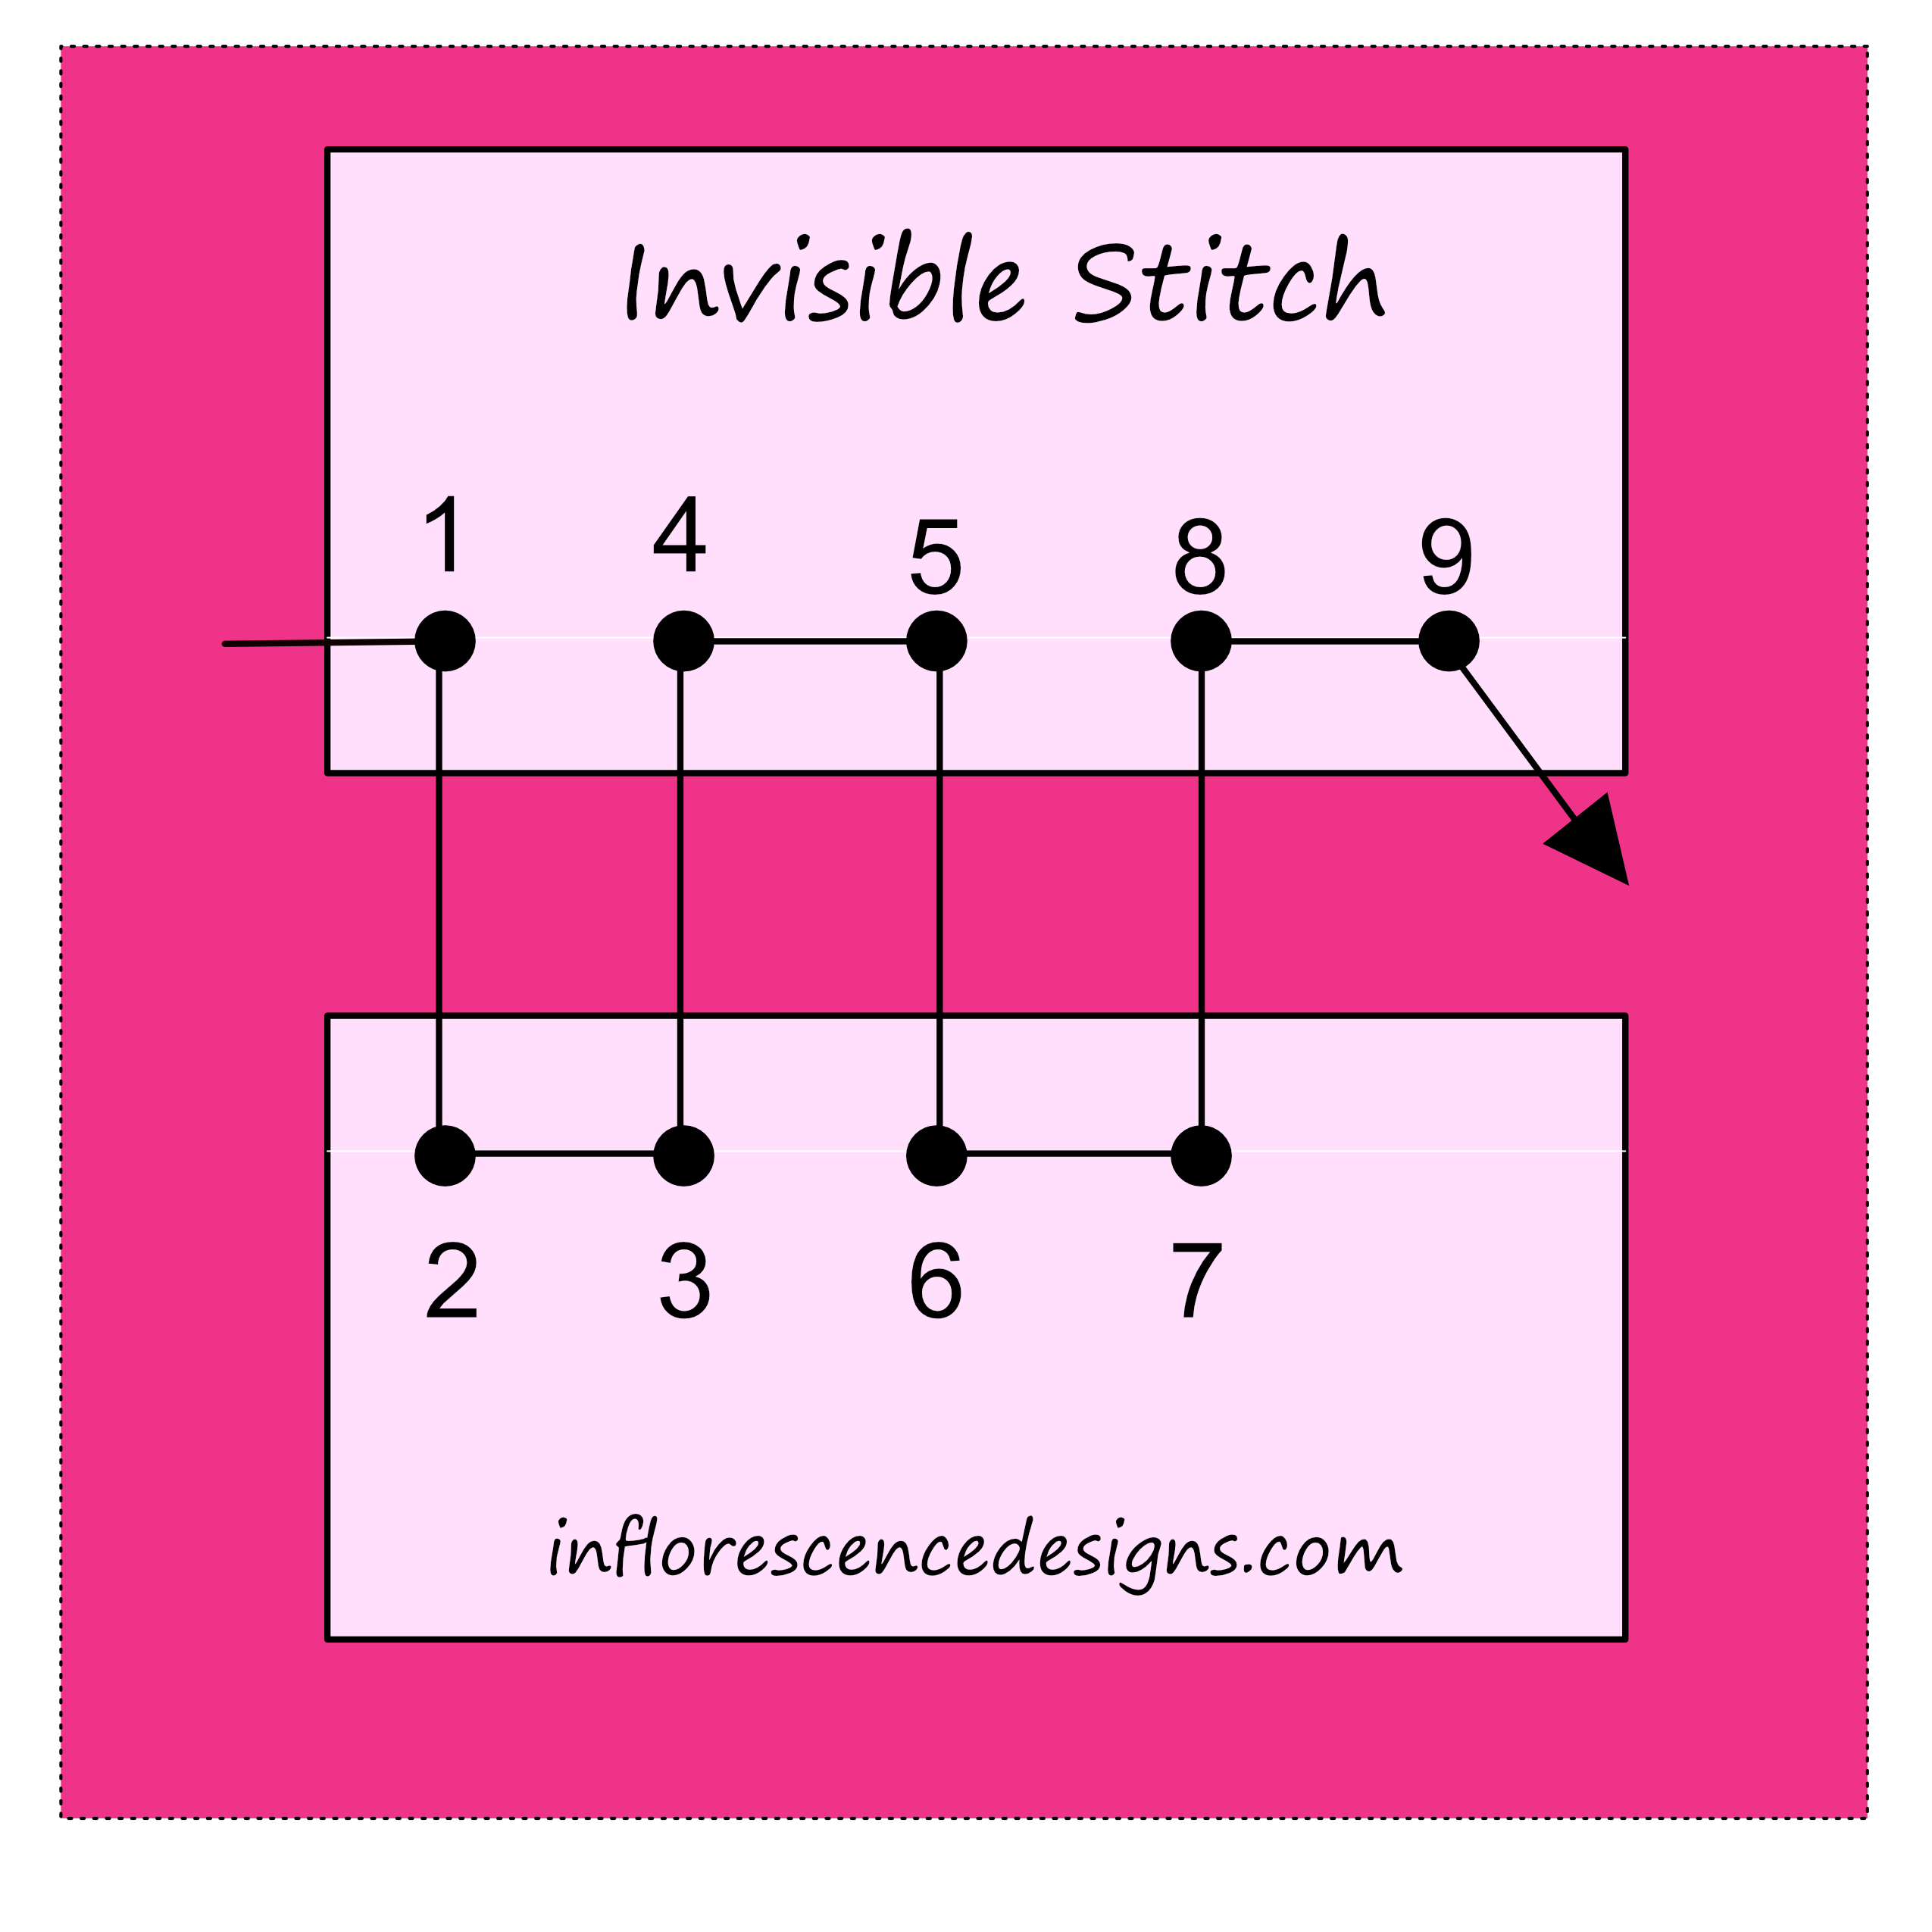
To close the beach ball, you will need to hand sew the seam together. I used the invisible stitch. To get a good grip on the ball for hand sewing, you will need to push some of the stuffing down. Once you have closed the seam work the ball around to obtain a better displacement of the fiber fill and a rounder ball.
Finally…
Finish your beach ball by using Thermoweb’s Fabric Fuse to glue the 1 1/2″ circles to the top and bottom of your beach ball. You can leave it this way, or you can add hand sewn stitches like a blanket stitch.
Finished!
Check out the Video Tutorial
Beach Ball Coasters
What could be better than one beachy tutorial? How about TWO beach theme tutorials! Using the same 2 dies sets from Crafter’s Edge you can also make some matching beach ball coasters.
Beach Ball Coaster Supplies:
These are great scrap busters. I have included the fabric sizes needed if you want a starting point. I used all scraps for this project, including my HeatnBond Lite and fusible fleece so my pieces are not squarely cut.
Supplies below are for ONE coaster
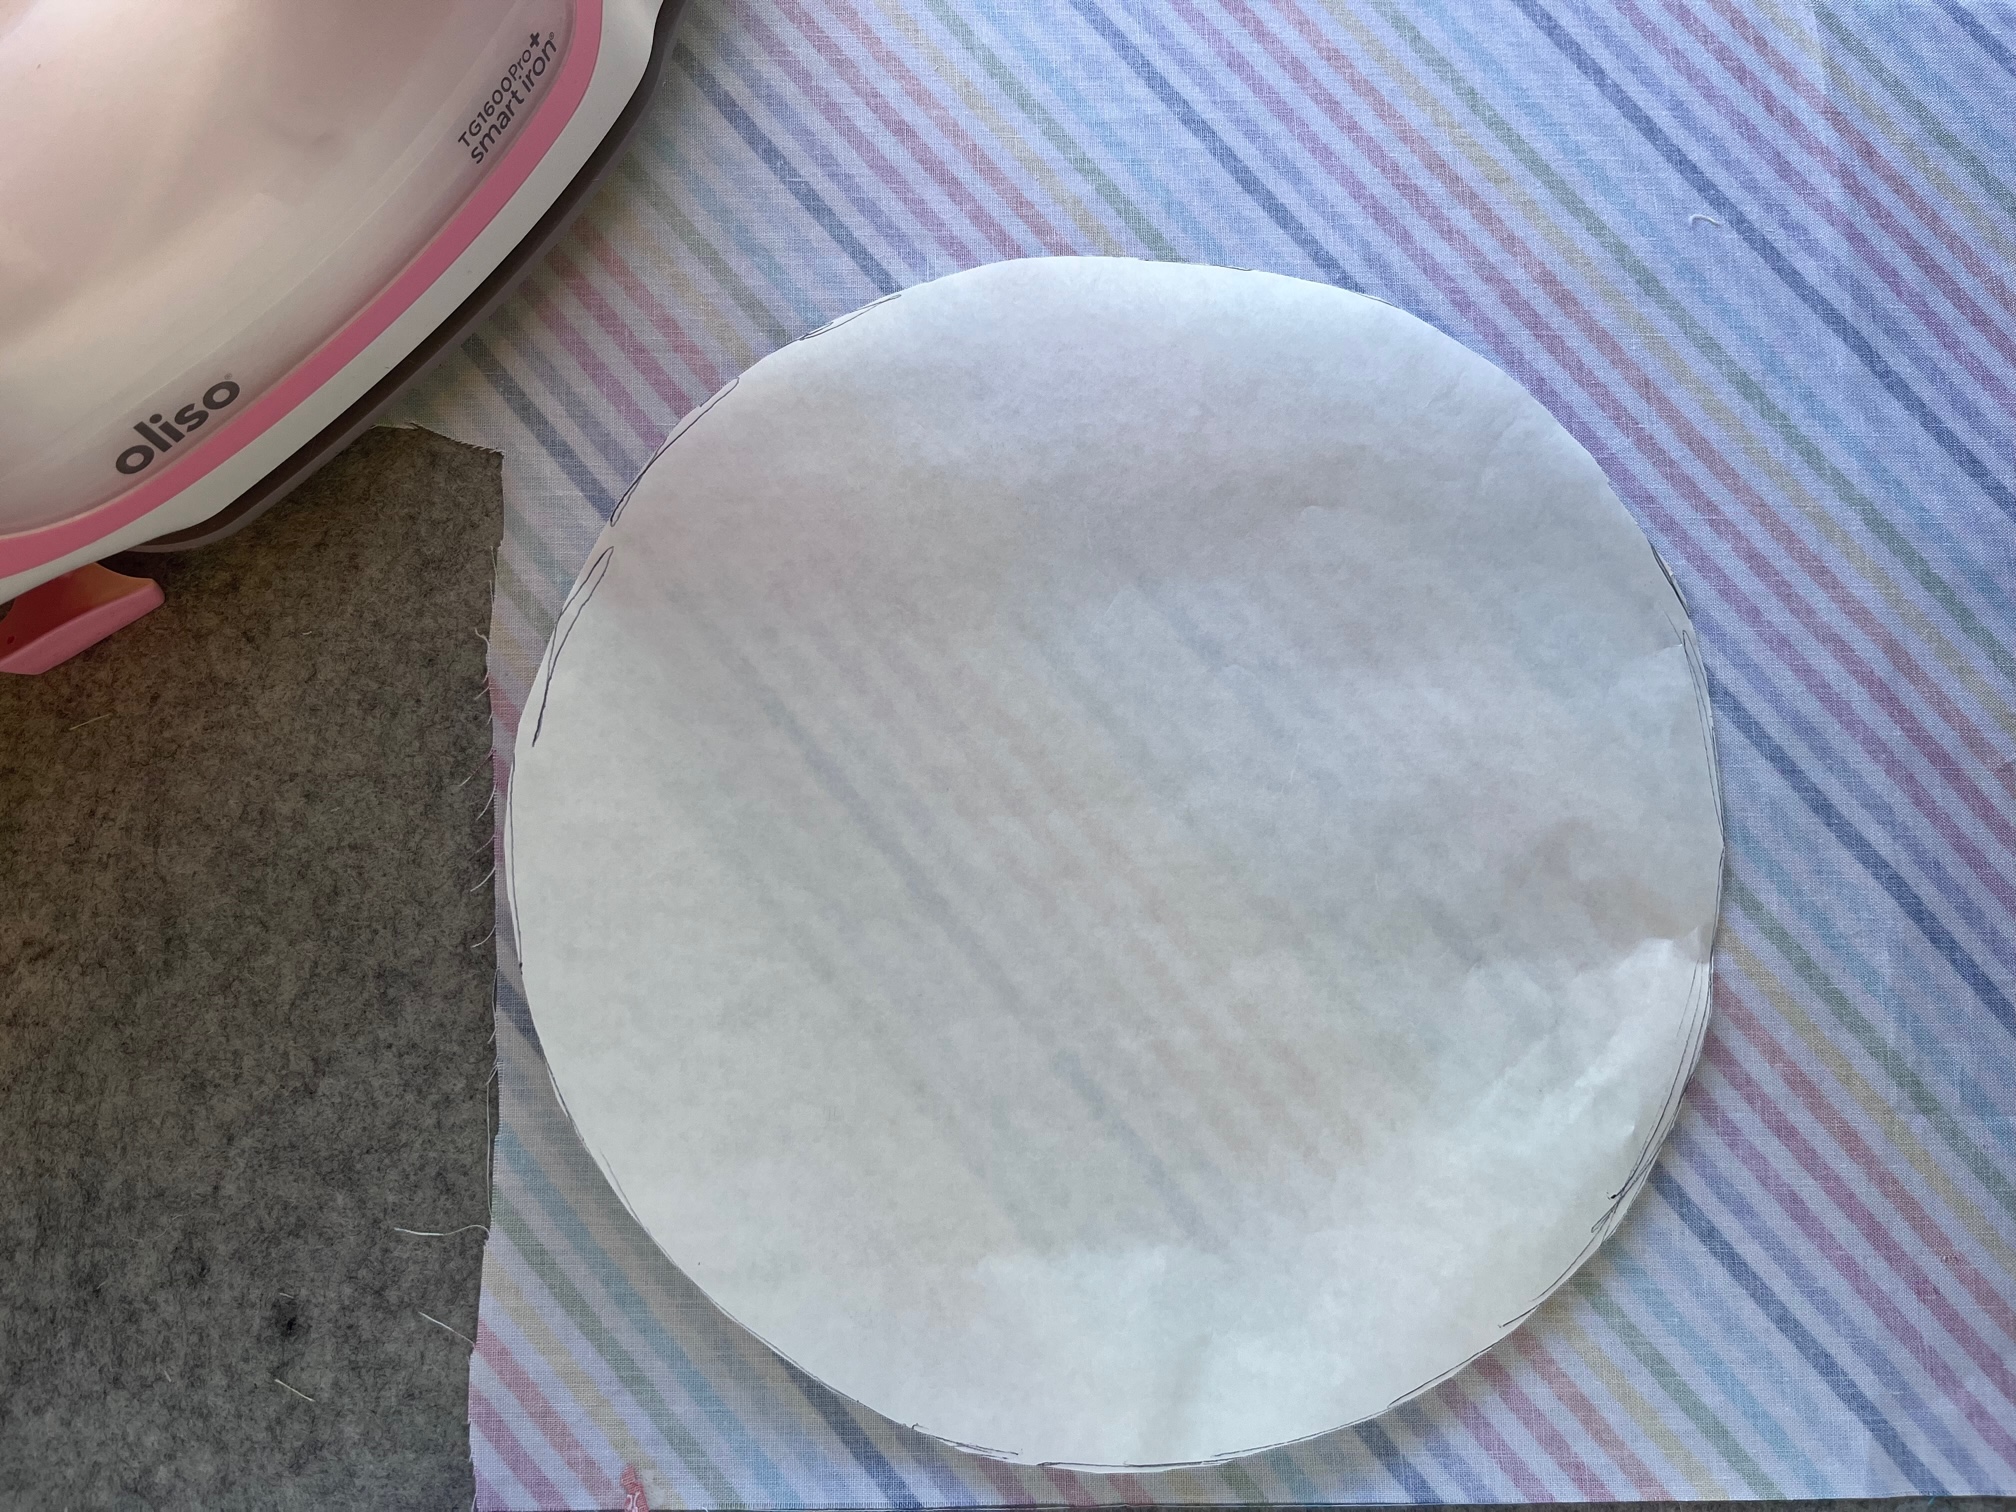
- HeatnBond Fusible Fleece: 6 1/2″ square
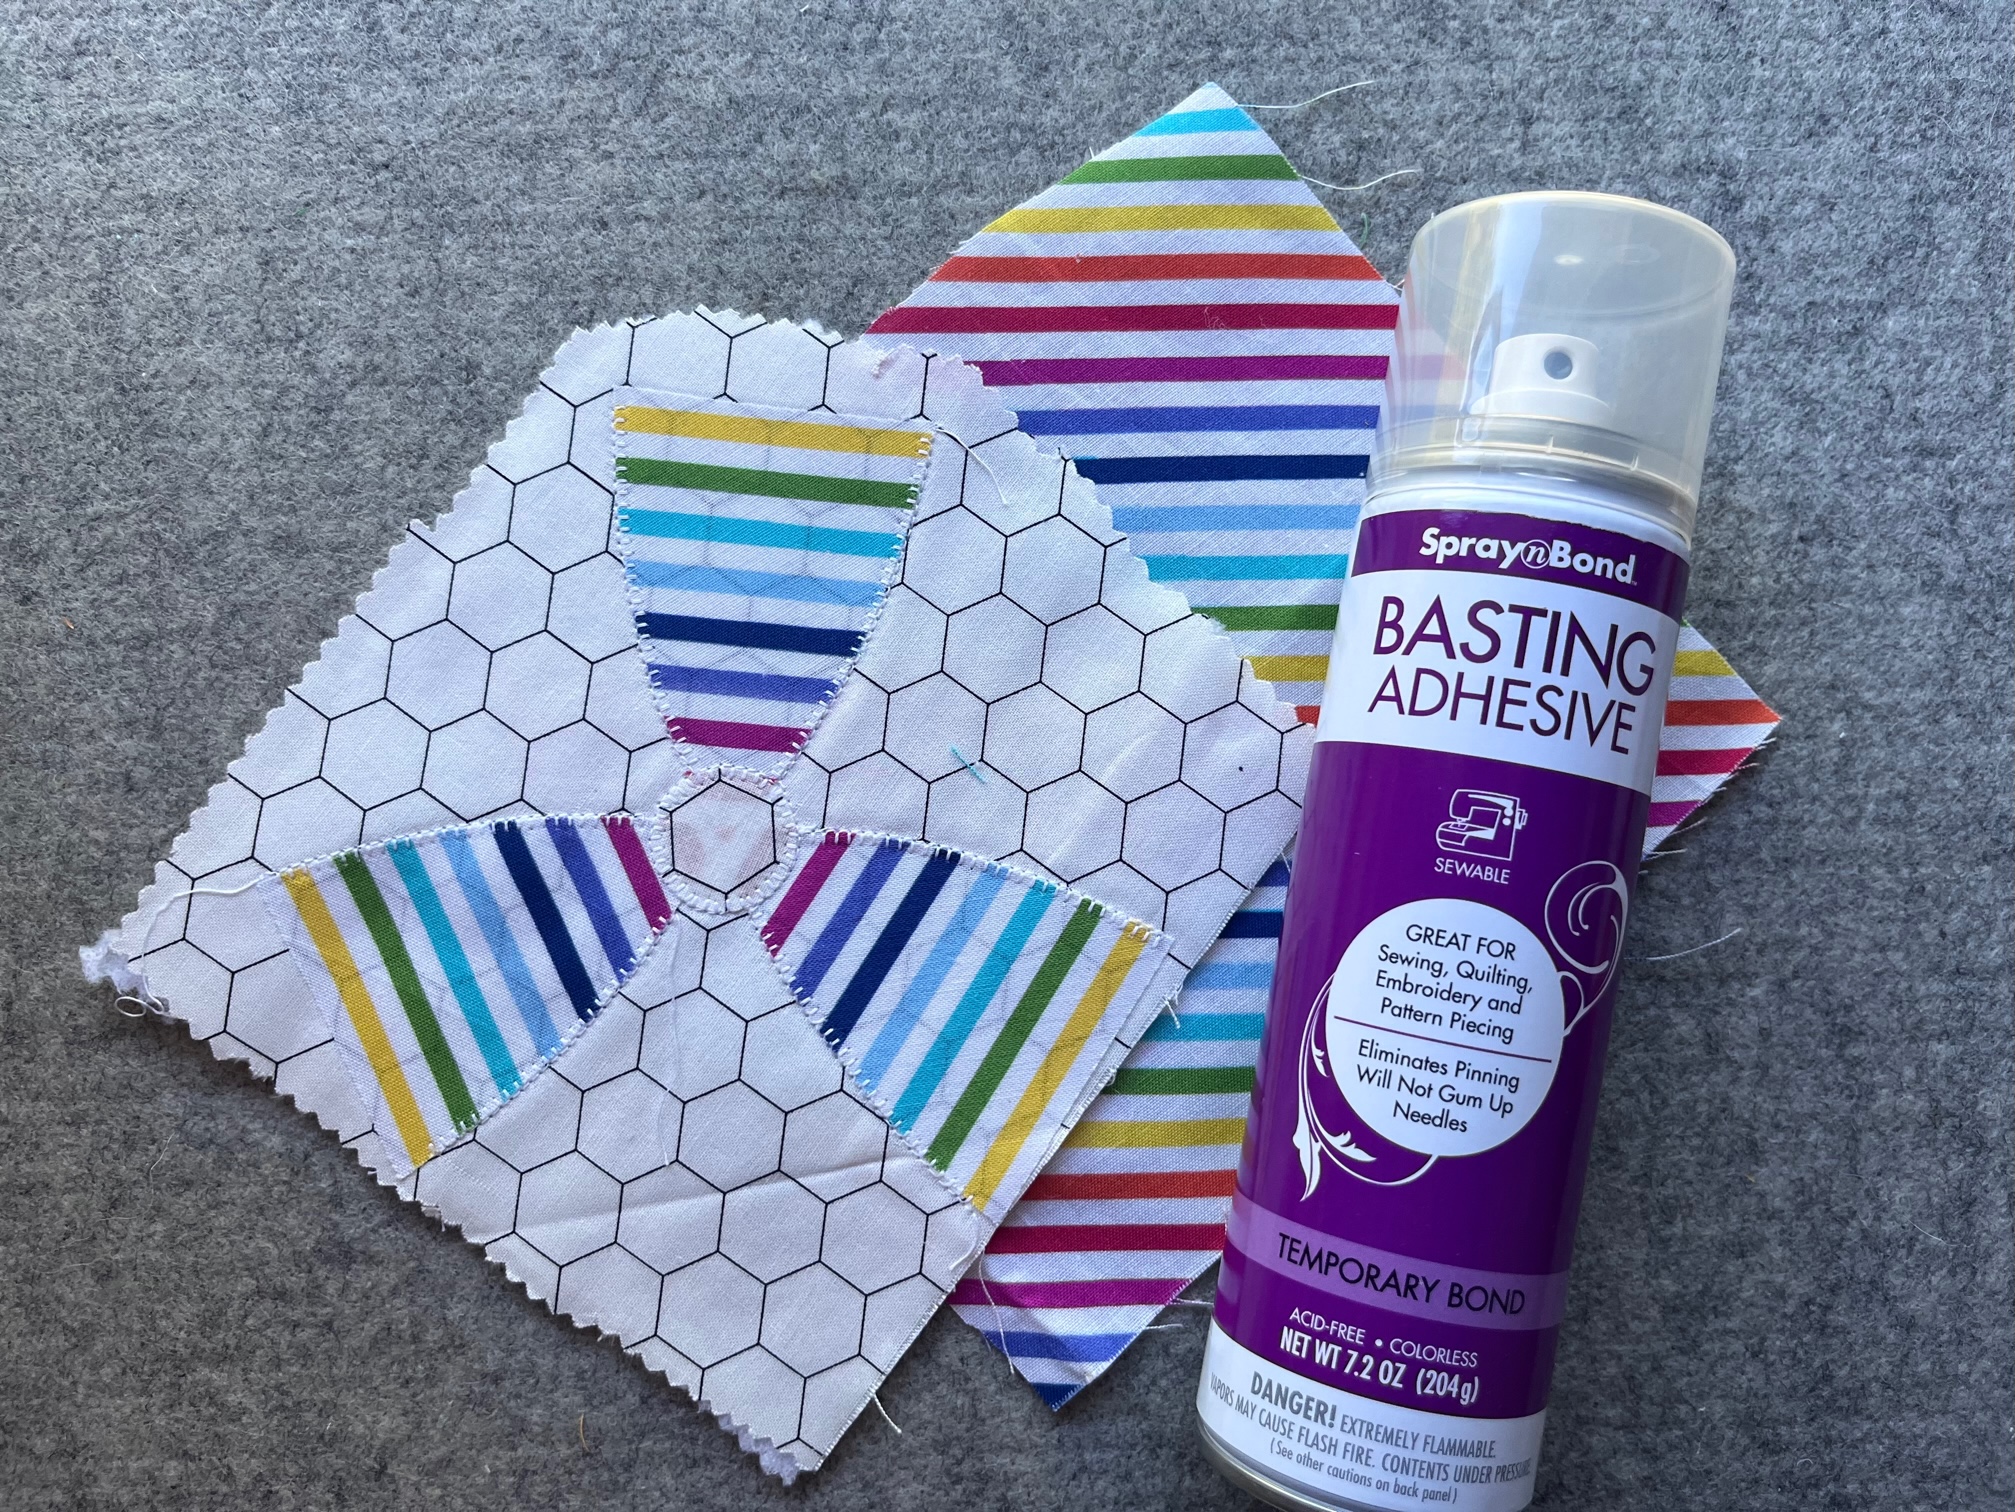
- SpraynBond Basting Spray
- HeatnBond Lite
- Oliso Iron
- Crafter’s Edge Crossover II
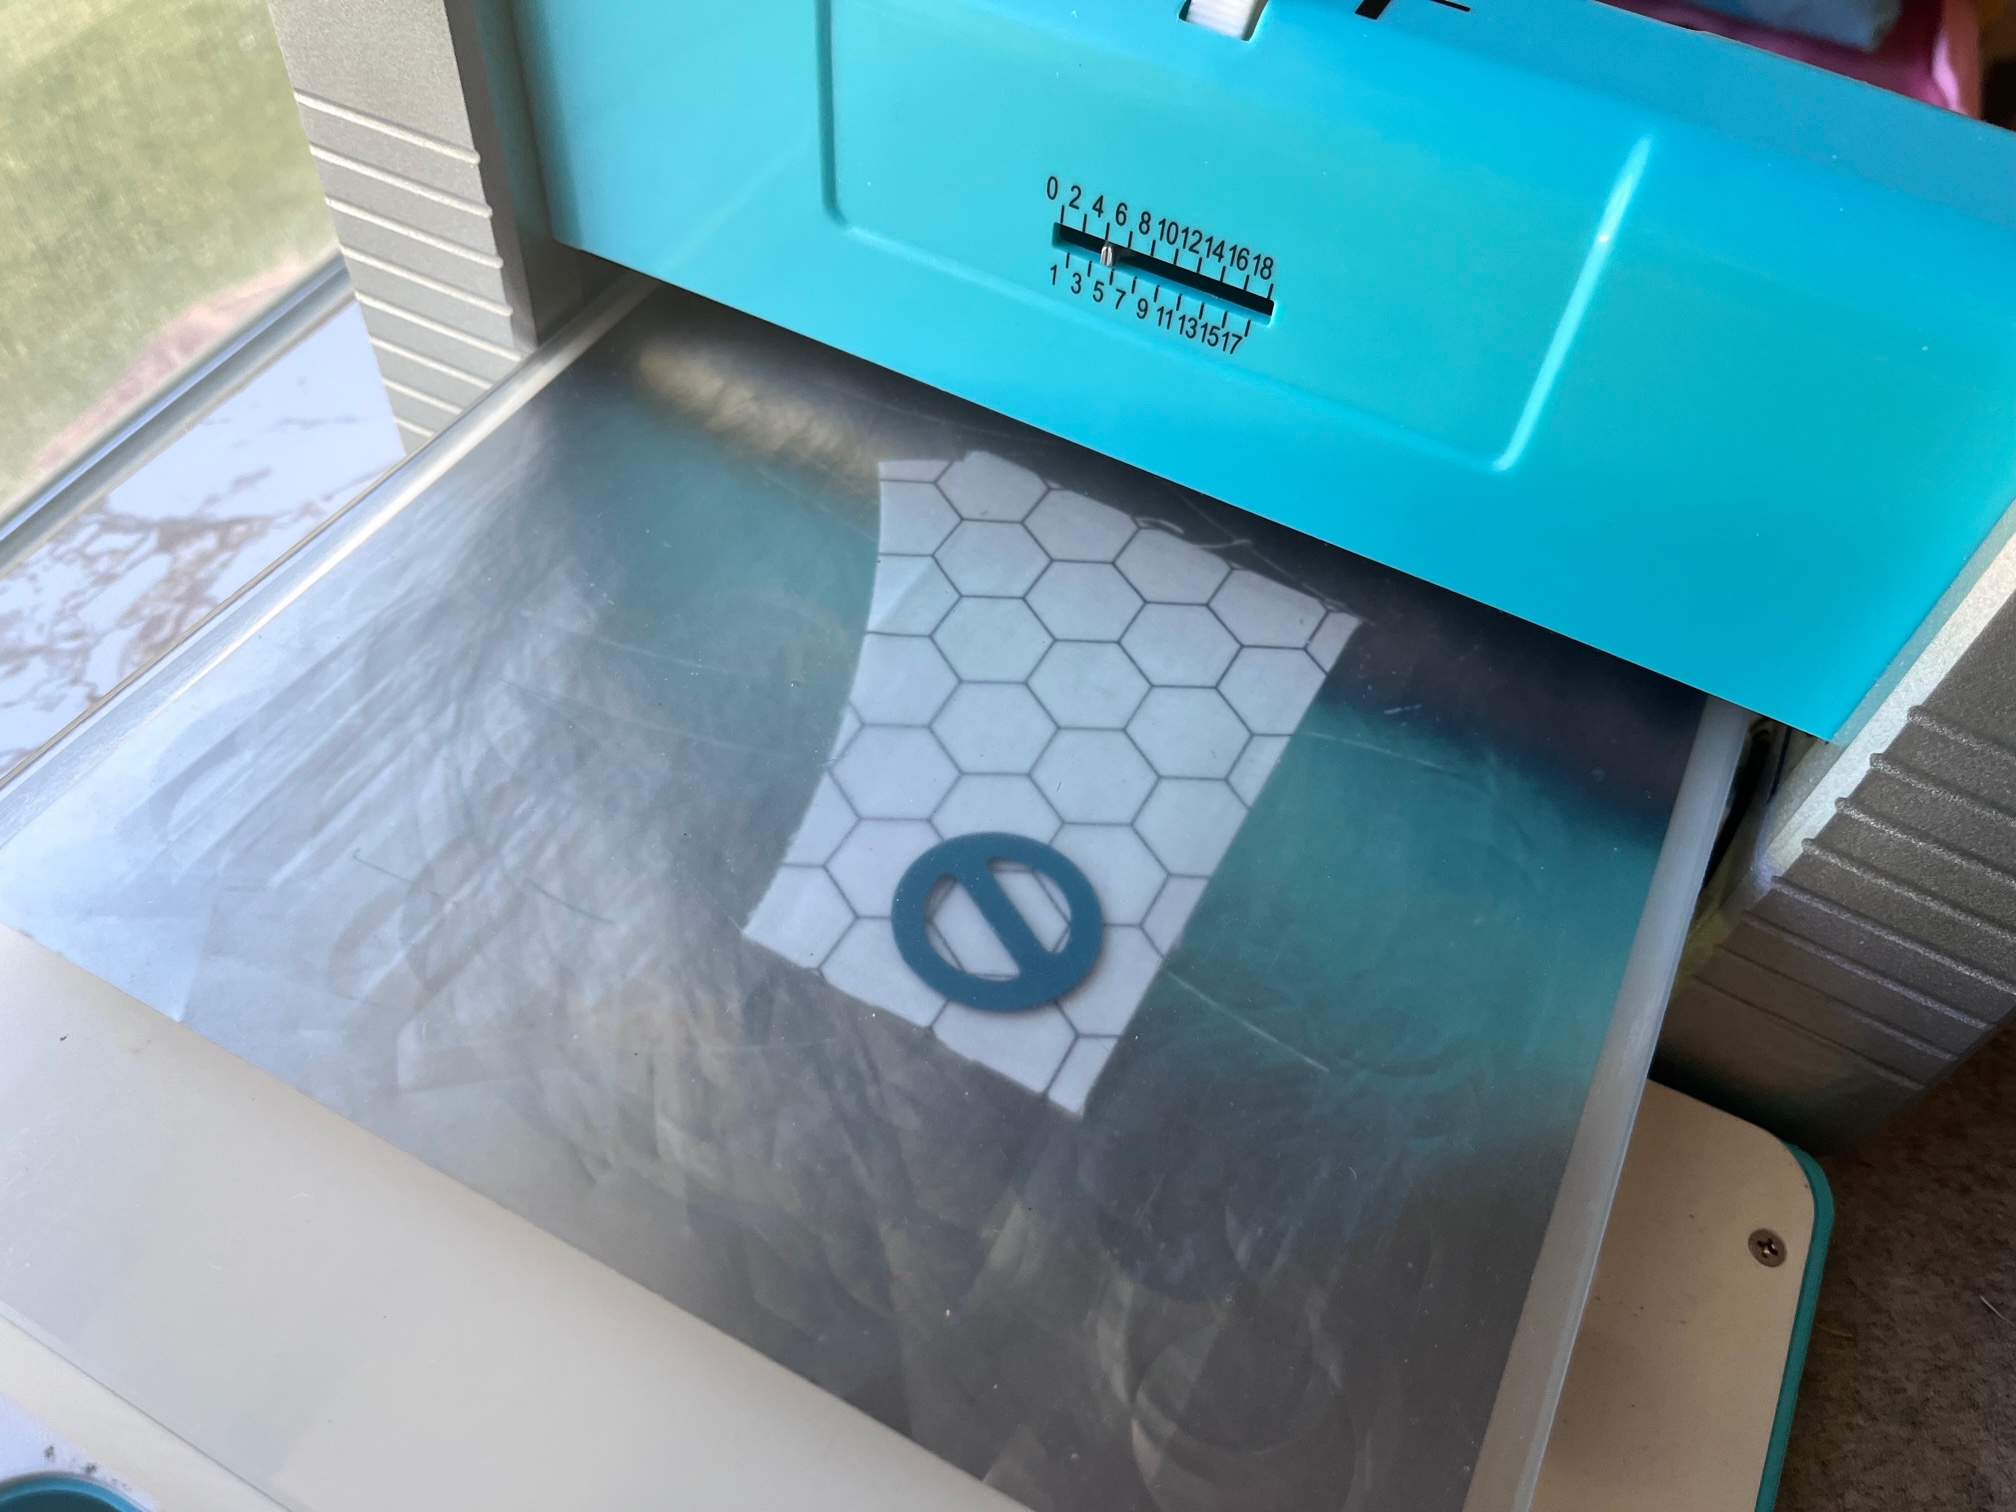
- Crafter’s Edge Circle Die Set: 5 1/2″ circle
- Crafter’s Edge Beach Ball Die: Small wedge and circle
- Fabric for Beach Ball Wedges: You will need 3 wedges. This project can definitely use up some scraps. Each wedge piece needs to be at lease 3 1/2″ x 4 1/2″.
- Front Background Fabric: 6 1/2″ square
- Backing Fabric” 6 1/2″ square
- Fabric Scrap for center circle
- Basic Sewing Notions
Beach Ball Coaster Instructions:
Begin by…
Fusing the HeatnBond Lite to the beach ball wedge fabric and center circle fabric. Next, cut out the 3 wedges and center 1″ circle. You will only need to use the half wedge for this project.
Next…
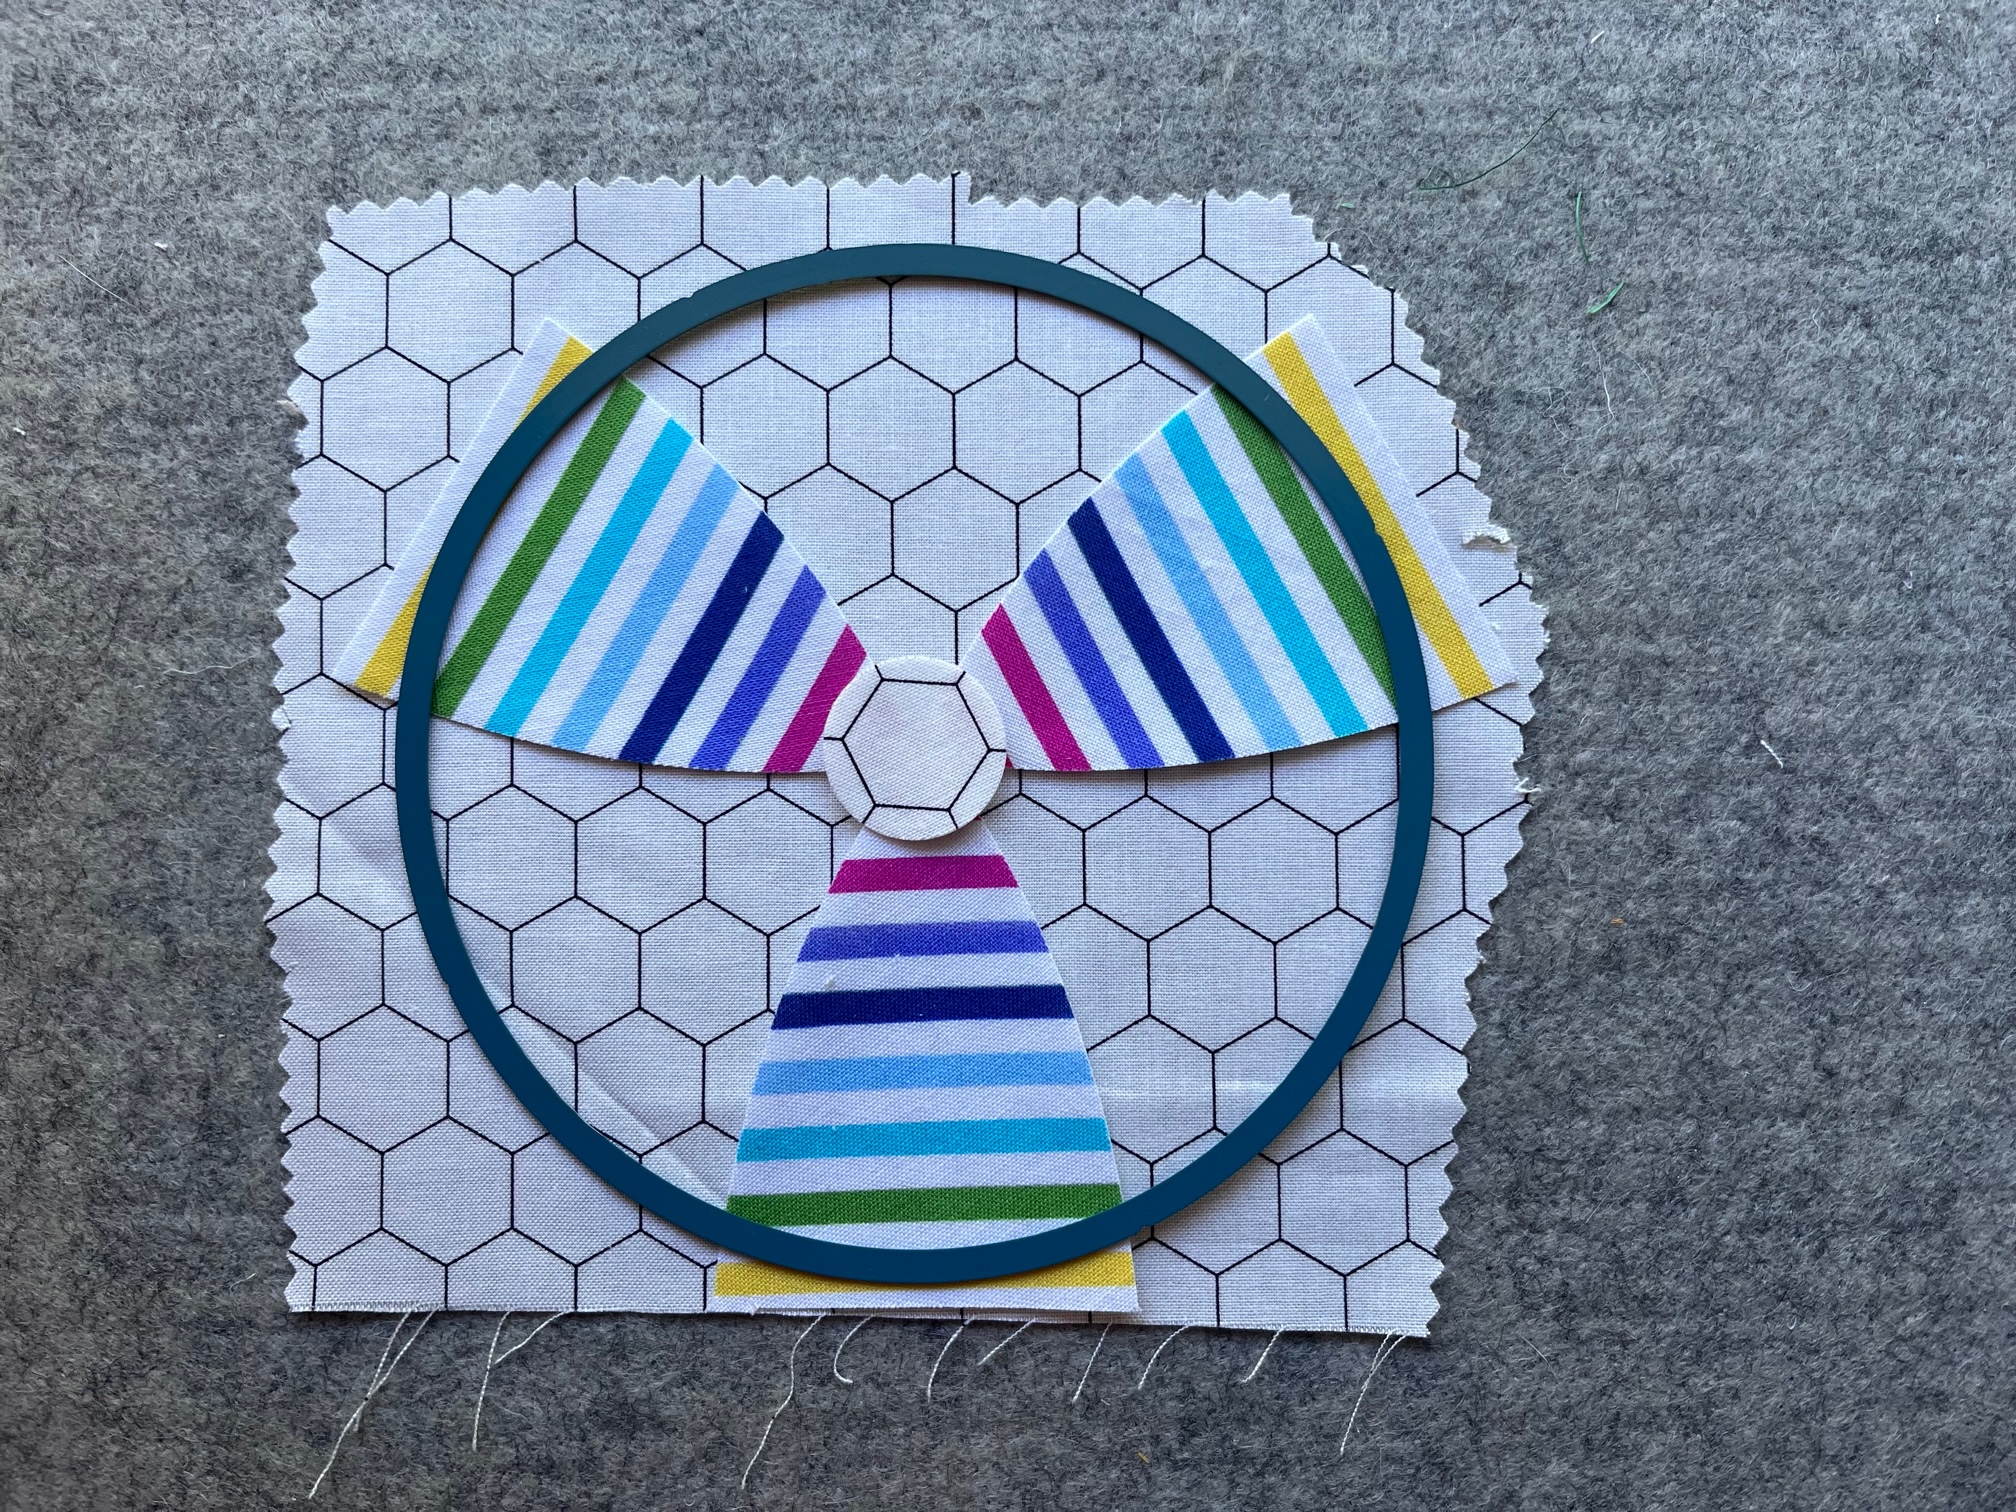
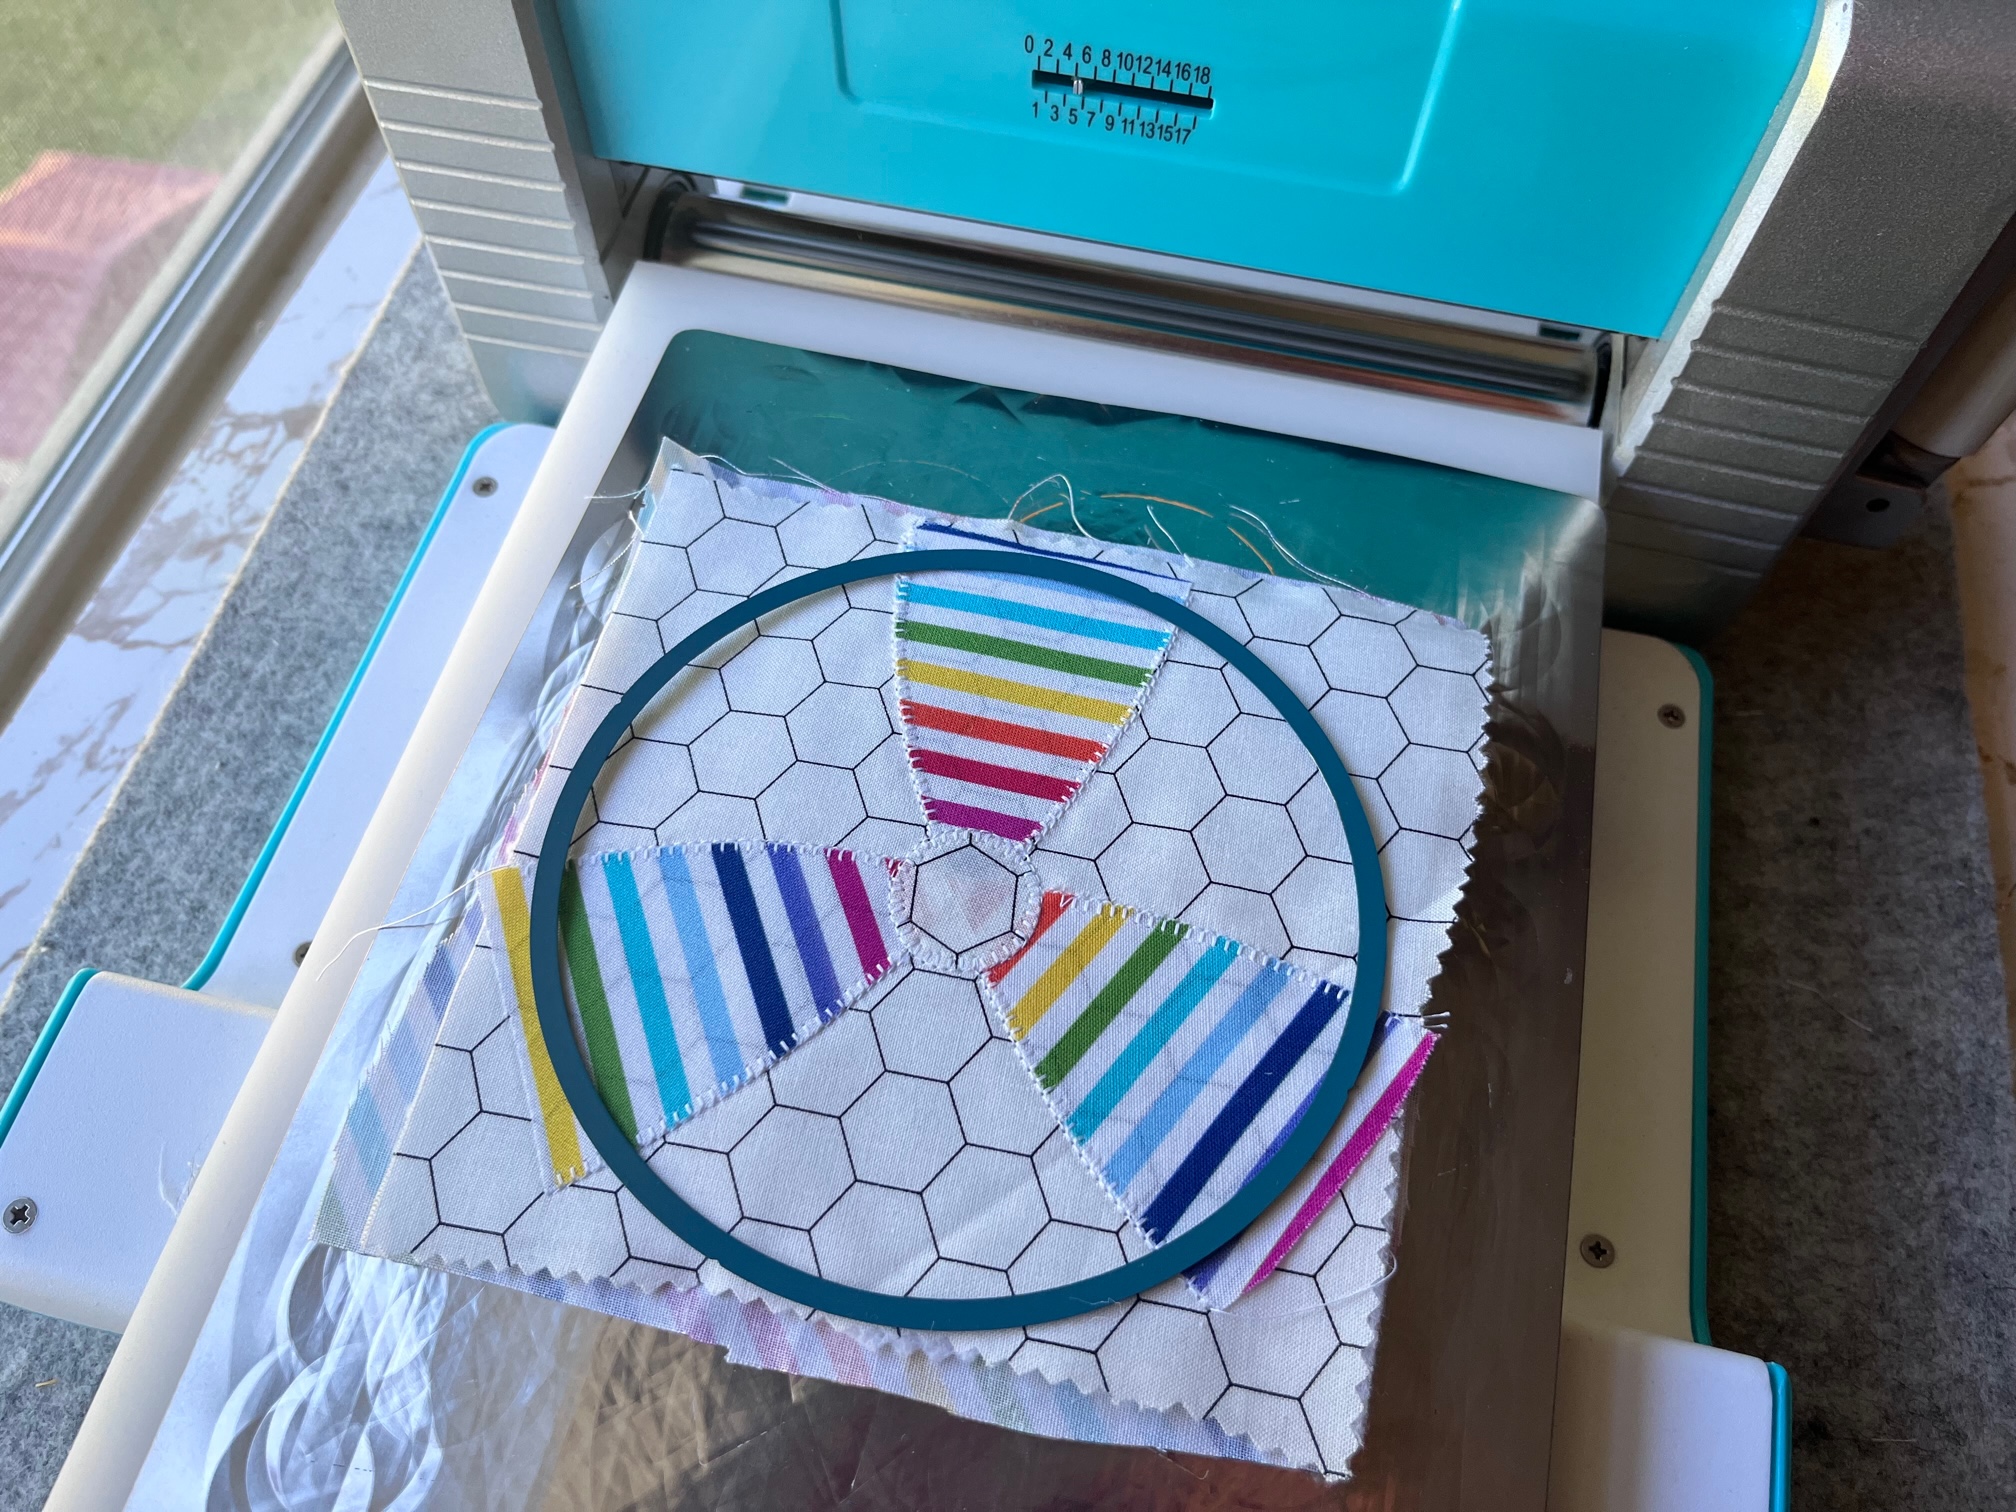
Arrange the cut pieces on the front background fabric. The wedges are about 4″ apart. Make sure the design fits inside the 5 1/2″ circle die. Fuse the pieces.
Next…
If using HeatnBond Lite you will need to sew the pieces to the background. If you use HeatnBond Ultra no sewing is required.
Continue by…
Layering the front piece and fusible fleece together. Press to fuse. Next, use SpraynBond basting spray to baste the backing piece.
Next…
Cut out the coaster using the 5 1/2″ circle die.
Finally…
Add bias binding and press.
Finished!
Thank you for following along with me today! I hope you enjoyed the “Beach Ball Home Decor” & “Beach Ball Coasters”. Come back soon to see what else will be starting to bloom with Inflorescence Designs!
Starting to bloom by choosing JOY ~ Julia