


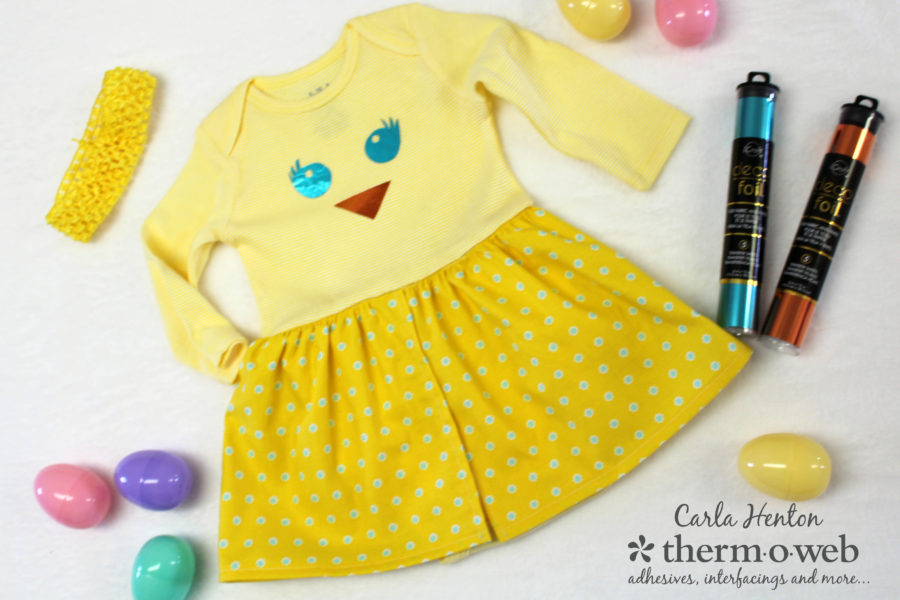
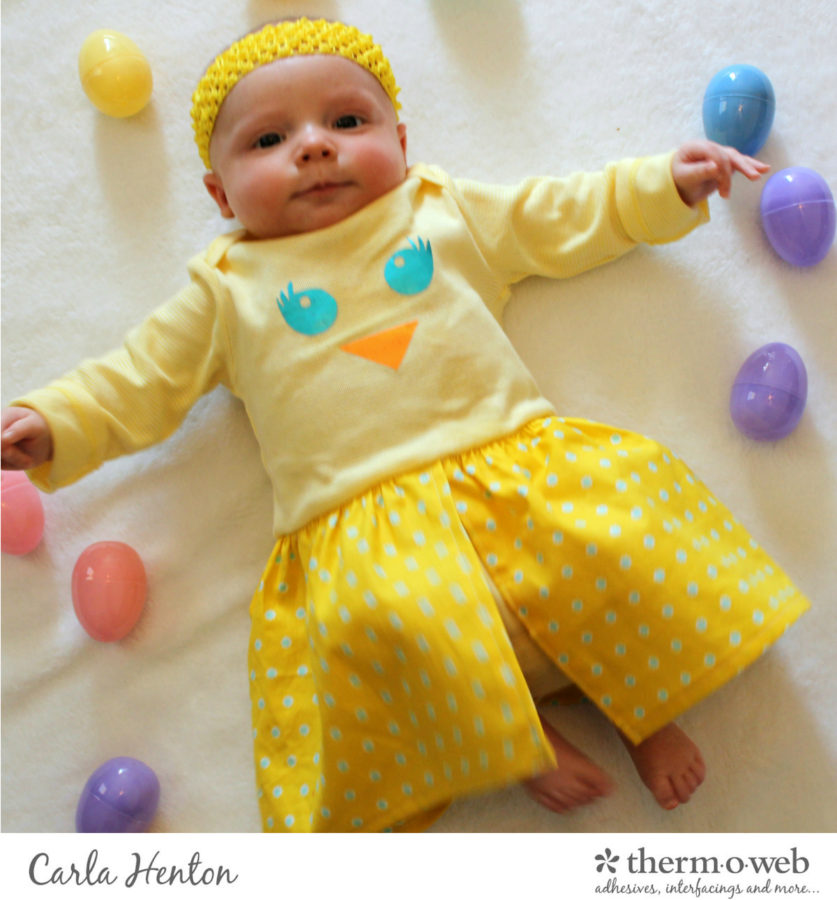
 It’s almost Easter and we are having so much fun with preparations. Carla here from Creatin’ in the Sticks with one of my favorite sewing projects, turning a onesie into a sweet little split skirted dress. This one is extra special with a little chick face created with Deco Foil to add just the right amount of sparkle to a little Easter outfit and the cotton fabric by Windham Fabrics for the skirt is perfect for spring.
You’re One Cute Chick Split Skirt Onesie featuring Deco Foil
By Carla Henton at Creatin’ in the Sticks
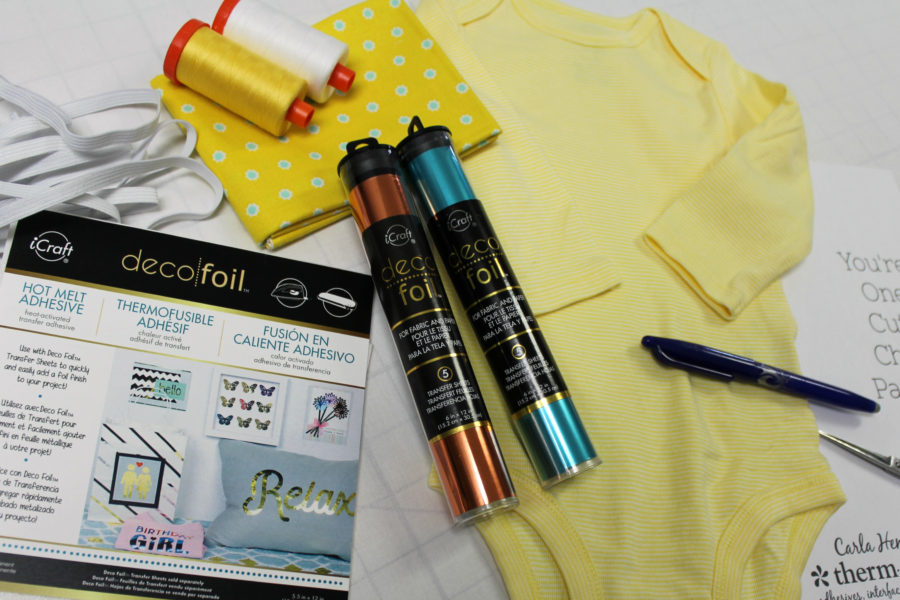
Supplies:
You’re One Cute Chick Pattern – Download by clicking HERE.
1 – Sheet of Hot Melt Adhesive
1 – Deco Foil Transfer Sheet – Color, Pumpkin
1 – Deco Foil Transfer Sheet – Color, Turquoise
1 – Fat Quarter of fabric or 8 ½” x WOF (width of fabric) – Hello Jane by Windham Fabrics 42918-6
1 – purchased onesie in desired size (up to 12 months)
Note: The skirt strip length requires more fabric for larger sized onesies.
1 – pkg. of ¼” knit elastic
Aurifil thread 50 wt (#2021, #1135)
Erasable fabric marking pen
Sharp scissors
Hole Puncher
Iron
Sewing machine with a walking foot and zigzag stitch
Measuring tape, pins, permanent marker, 2 pieces of parchment paper (included in Hot Melt package)
You’re One Cute Chick Instructions:
Please read through all the instructions before beginning this project.
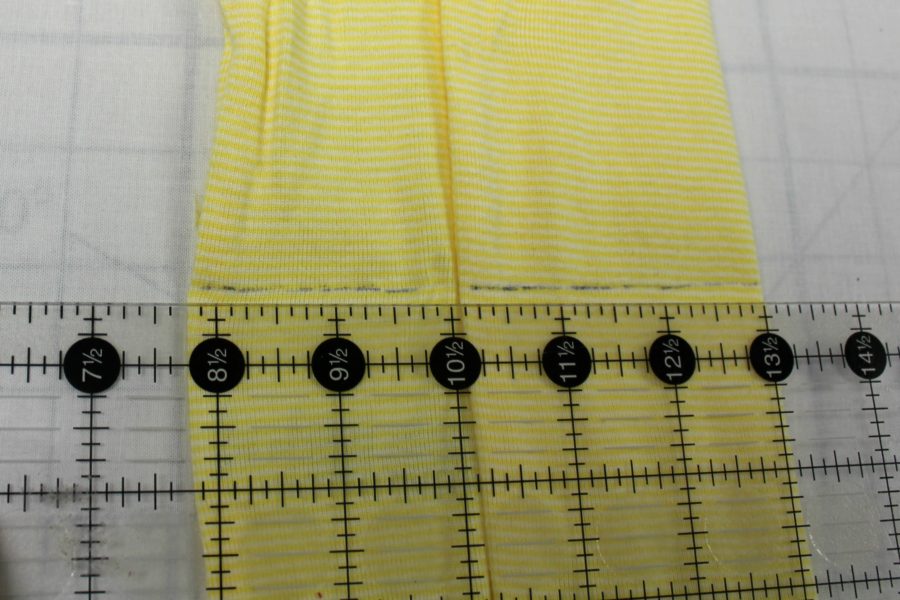
Step #1:
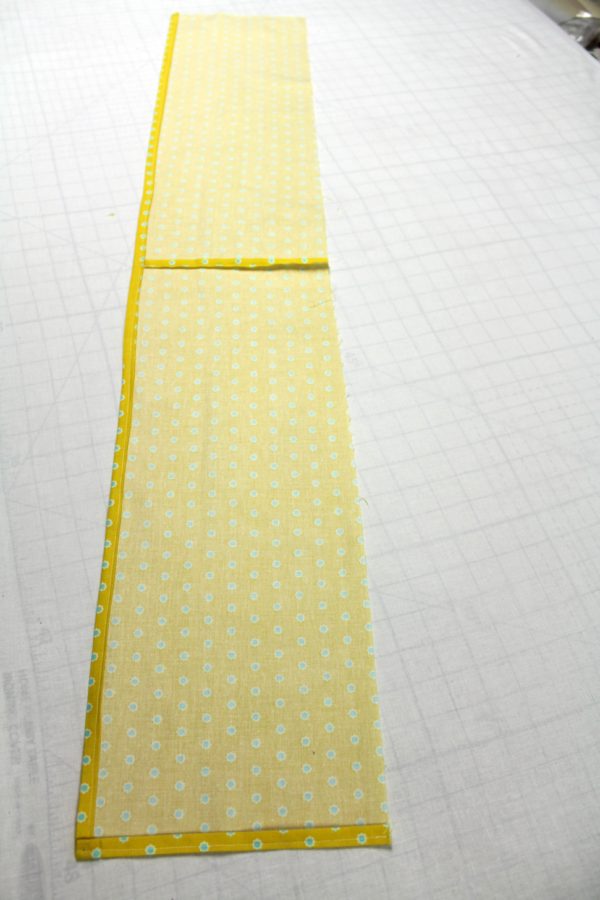
From the fat quarter cut 2 strips 8 ½” x the length of the fat quarter. Next, trim the selvages off the strips and with right sides together, sew the strips together with a ¼” seam across one short ends of the strips to form one long strip of fabric. Finish the edges of the seam allowances with a zigzag stitch. If fabric yardage is used, cut a strip of fabric 8 ½” x the width of the fabric. The next step is to hem one of the long sides of the fabric strip by pressing ¼” to the wrong side and then pressing it up another ¼”. Stitch along the strip to secure the hem. Now, hem one short side in the same way (see the following picture), by pressing ¼” to the wrong side and then folding it again and securing by stitching.
Step #2:
Measure the recipient of the onesie (baby girl) from the bottom of her neck to about her waist. This is the measurement needed for the skirt placement on the onesie. This onesie is a 3-6-month size and the measurement from the model is about 7” from neck to waist. Measure the onesie and make a mark where the skirt will be placed with an erasable fabric marker. Mark the placement completely around the body of the onesie.
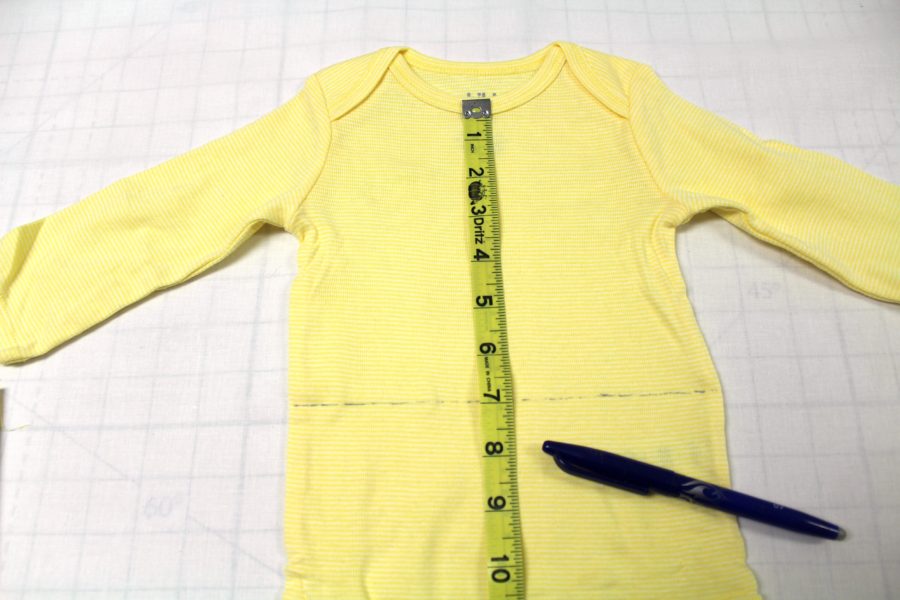
TIP: Use the leg openings and a quilting ruler to find a straight line on the front then fold the onesie so half of the line shows to make a straight line on to the back. Repeat on the other side and then connect the lines on the back.
Now, measure the distance around the body of the onesie on the mark without stretching the fabric. The length of the elastic is determined by this measurement. This one is 16 ½” so add one inch for overlap and cut a piece of elastic. This one is cut 17 ½” long 16 ½” + 1”.
Step #3:
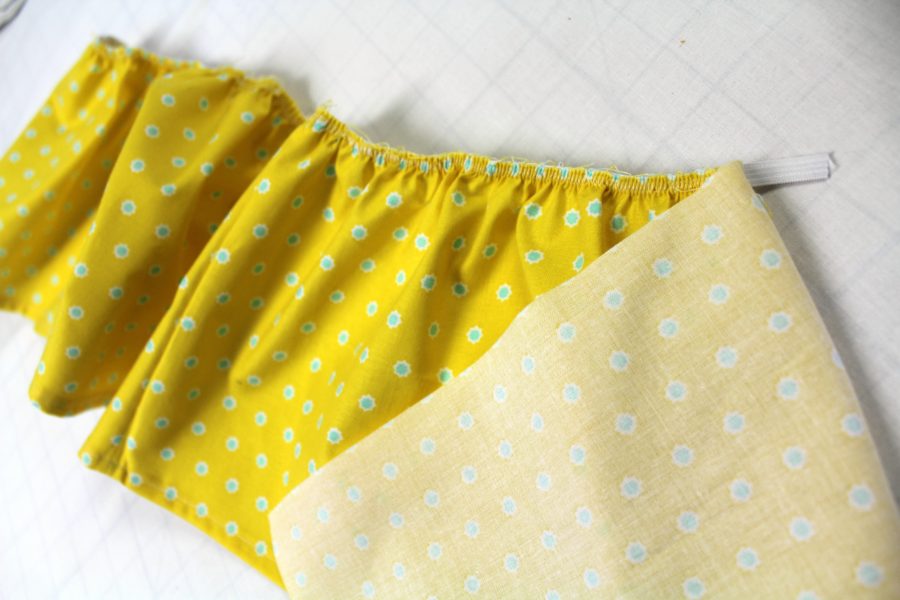
The elastic and fabric strip will be used for this step.
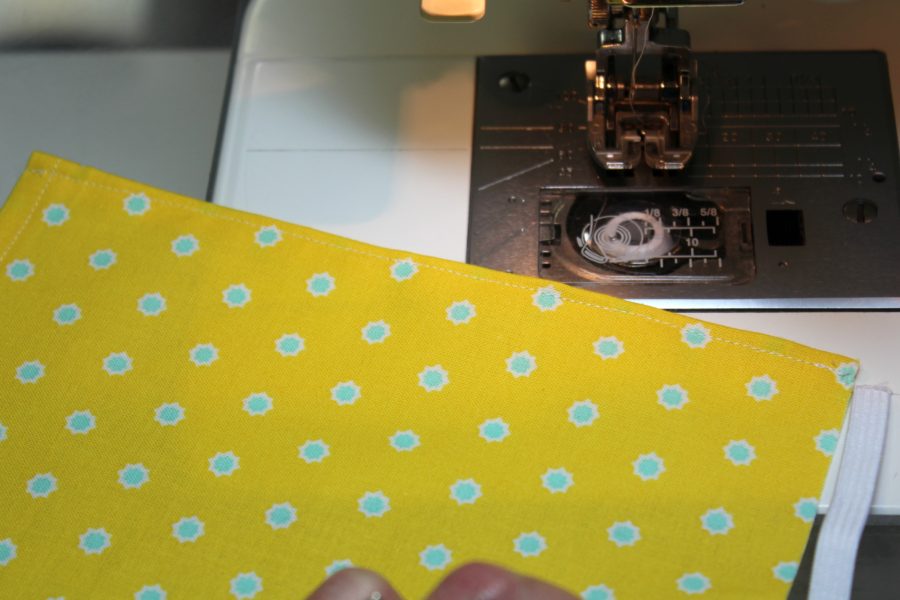
Zigzag stitch the fabric to the elastic. To do this, start the elastic and fabric on the sewing machine with the short side that was hemmed and the long raw edge. Stitch the hemmed edge by backstitching at the start and stitching a zig-zag to the end of the hem.
Now stretch the elastic while keeping the fabric lined up with the edge and continue stitching the zigzag. This will gather the fabric and stitch it to the elastic at the same time. Likewise, it finishes the raw edge of the fabric. You may have to pull on the backside of the fabric behind the machine to guide it through while stretching the elastic. Take small sections at a time.

The process of stretching the elastic and stitching the fabric with a zigzag stitch is continued until there is 1” of the elastic left. Backstitch and remove the strip from the machine.
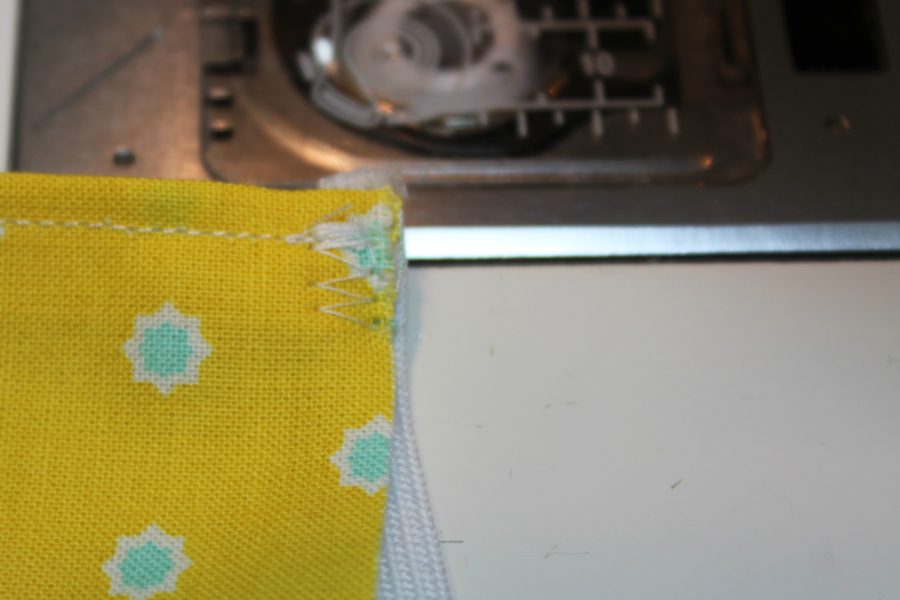
Trim the excess fabric ½” from the elastic to make a hem at the end of the strip and hem similarly as before, encasing the elastic in the hem.
Continue the zigzag stitch through the end of the top of the strip stitching the top of the hem. Then stitch the hem at the end of the strip. The skirt is ready to attach to the onesie.
Step #4:
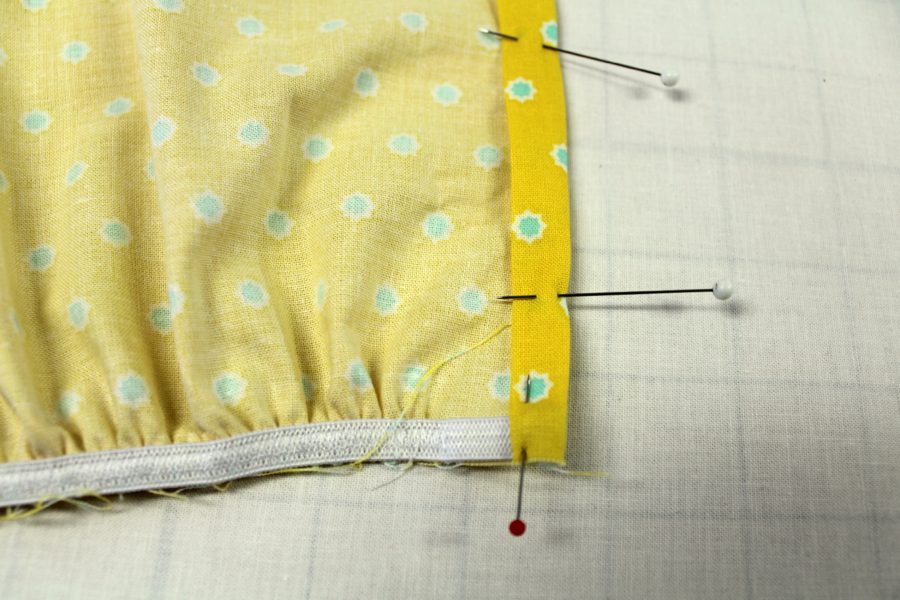
Starting on the center front of the onesie, pin the skirt. Line the zigzag edge with the mark on the onesie, right sides together and the skirt hem is at the top of the onesie. Do not stretch the elastic or the onesie fabric.

Pin all the way around. Make sure to keep the zigzag edge on the mark and the fabric of the onesie smooth. The ends of the elastic should overlap, simply pin the overlap in place.
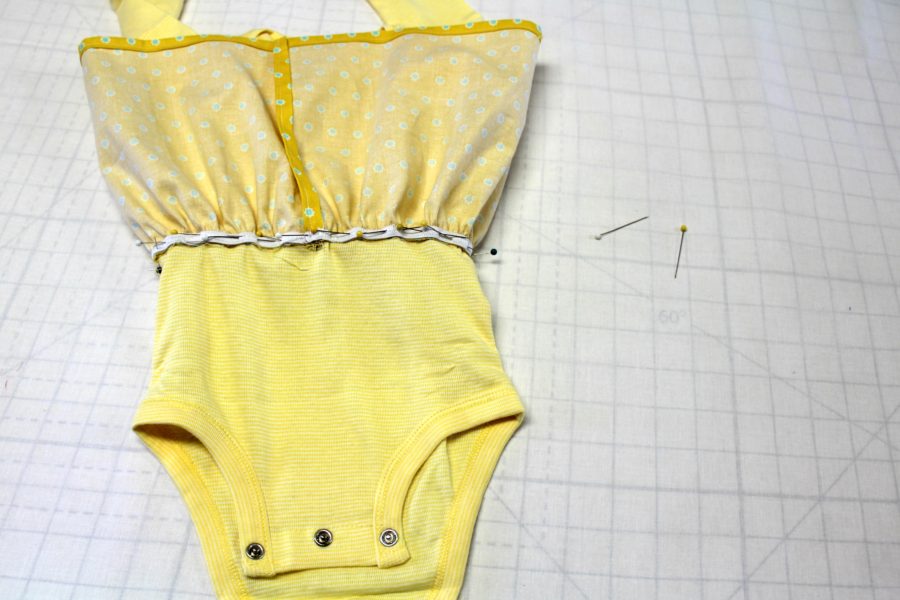
Finally, zigzag stitch the elastic to the onesie, being careful not to stretch the fabric or elastic to finish the split skirt.
Step #5:
To embellish the newly made dress with a chick face, print the pattern in its original size. Trace the pattern on the paper side of the Hot Melt adhesive sheet with a permanent marker. There is no need to reverse the design.

Now, cut the three pieces out on the traced lines with sharp scissors. Use a standard hole punch to cut the pupils out.
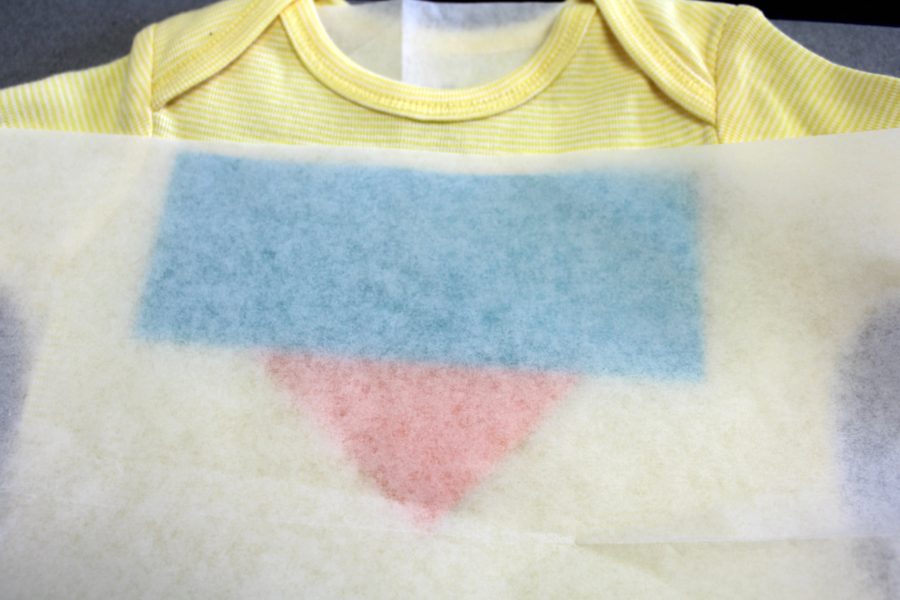
An important detail is to heat an iron to the medium, wool setting with no steam. Place the dress on a solid ironing surface, top up. The next step is to slide 1 piece of parchment paper inside the dress to protect the back of the dress. Iron the dress front smooth with the parchment paper sandwiched in the dress. Now, place the cut pieces of Hot Melt adhesive rough side down and cover them with the second piece of parchment paper that is included in the package.

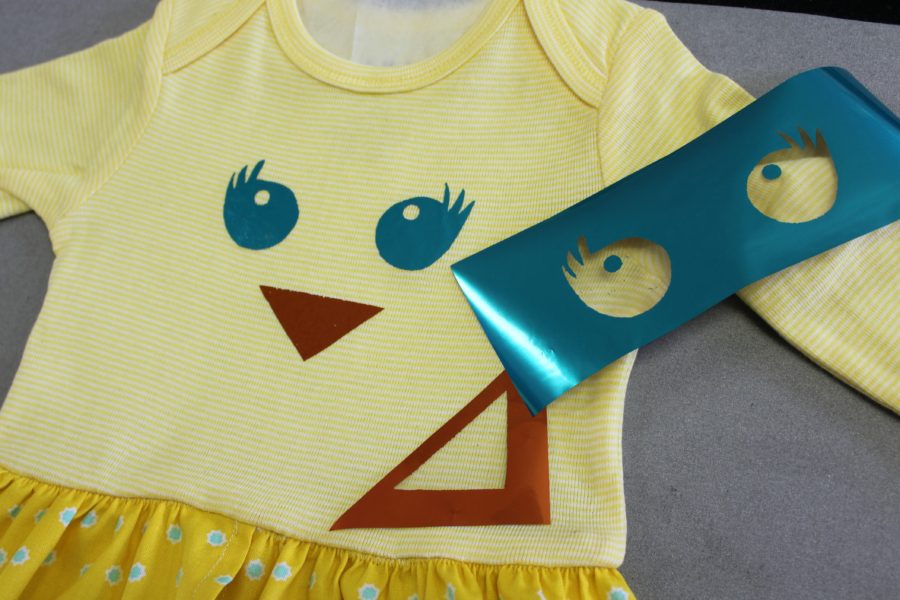
Place and hold the iron on the parchment paper with the adhesive design underneath for 30 seconds. Remove the parchment paper and let the design cool completely. Meanwhile, cut the foil transfer sheets into pieces a little larger than the eyes (turquoise color) and beak (pumpkin color).
Next, peel the outer paper off of the design that is bonded to the onesie and place the foil, color side up, on top of the adhesive design.
Place the parchment paper over the foil and iron slowly with firm pressure for 30-40 seconds. Furthermore, allow the foil and adhesive to cool completely.
Finally, let the magic happen by peeling the foil transfer pieces away to reveal one cute chick.
I’m a first-time grandma to this cutie. I’m learning to make her outfits a little big, therefore she can wear them for more than one time and she has also taught me to make her clothes soft and comfy. Hence, no stiff lace and or frills for this girl. She loves this one. She is one cute chick.
Have a Happy Easter!
Carla
 March is National Craft Month and National Quilting Month and we want to offer you a chance to win some fun supplies!
We have two prizes to give away this week…one is perfect for the fabric crafter and the other the paper crafter!

This prize contains adorable Hello Jane fabrics from our friends at Windham Fabric along with must-haves in any craft room! We’ve included our HeatnBond Lite Fusible Adhesive, Heatnbond Hem Tape, HeatnBond EZ Print Sheets in Lite and Featherlite PLUS our HeatnBond Soft Stretch Hem Tape!
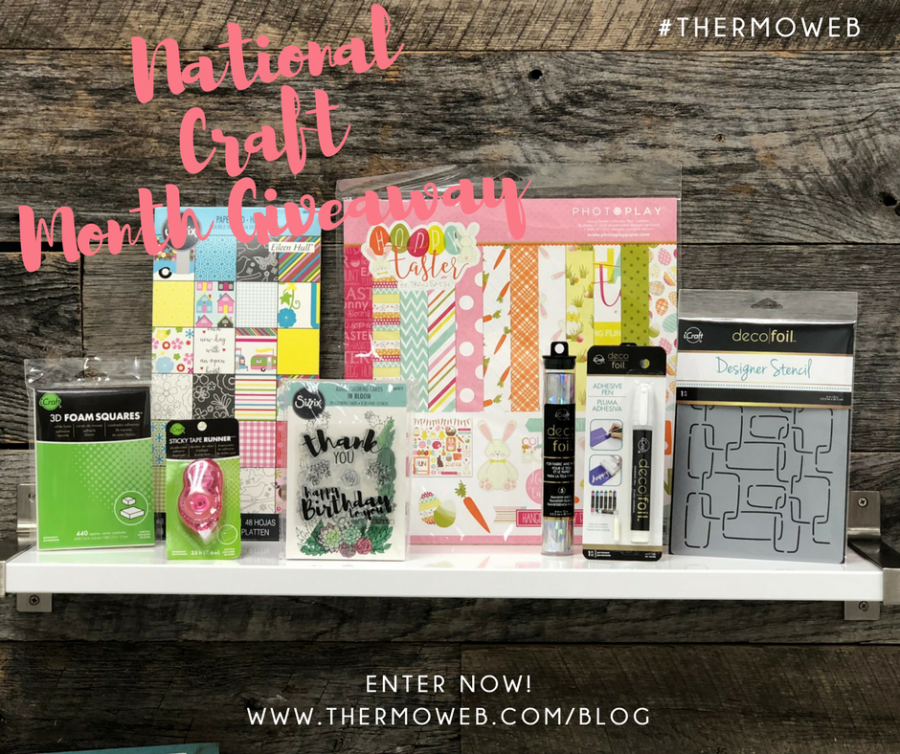
Our paper prize has lots of good things! Sizzix paper pad, coloring pad and stamps, Photo Play Ppaer Hoppy Easter paper kit, Deco Foil Transfer Sheets, Adhesive Pen and our NEW Designer Stencil plus 3D Foam Squares and our favorite Mini Tape Runner!
Follow the Rafflecopter steps to get yourself entered to win! We’ll pick two winners to send these goodies out to!
3 Comments on You’re One Cute Chick Split-Skirt Baby Onesie Featuring Deco Foil
1Pingbacks & Trackbacks on You’re One Cute Chick Split-Skirt Baby Onesie Featuring Deco Foil
-
[…] One Cute Chick Baby Onesie Dress by Carla Hinton for Therm O Web […]
QuiltShopGal
March 23, 2018 at 11:23 am (6 years ago)Great project and tutorial Carla. #CreativeGoodness
Diane
March 24, 2018 at 11:18 am (6 years ago)The direction seems easy to follow! Can’t wait to make one for my baby girl.