


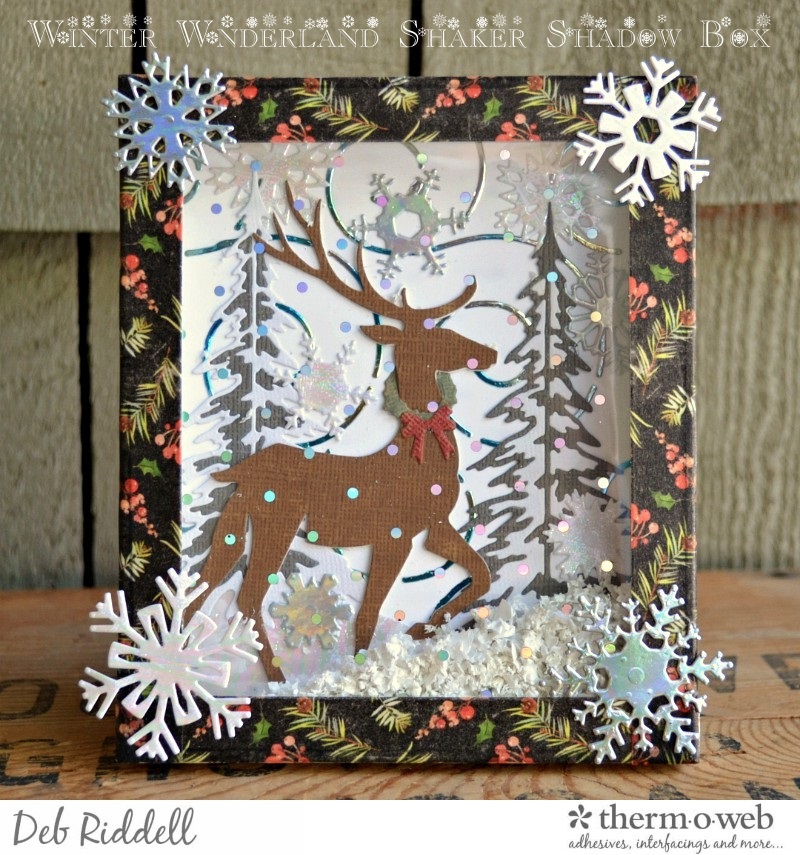
Hello everyone and welcome to Christmas Week on the Therm O Web blog! Deb Riddell here today and I have a Winter Wonderland Shaker Shadow Box to share with you, created with Deco Foil products, as we Mix It Up For Christmas.
Winter Wonderland Shaker Shadow Box Created With Deco Foil

Therm O Web Supplies Used:
Deco Foil™ Swirls Stencil
Deco Foil™ Transfer Gel
Deco Foil™ Clear Toner Sheets • Polka Dots
Deco Foil™ Transfer Sheets • Lapis Watercolor
Deco Foil™ Transfer Sheets • Opal
Deco Foil™ Transfer Sheets • Iridescent
Deco Foil™ Toner Sheets
Gina K. Designs Premium Cardstock • Luxury White
Purple Tape
iCraft Mixed Media Adhesive 2.1 fl oz
Memory Tape Runner XL™
SuperTape™ Roll • 1/4 in
Other supplies used:
Foil Laminator • 12 inch
Woodland;Prancing Deer;Village Christmastime;Mini Paper Snowflakes;Small Easel dies – Sizzix
Symphony Tissue Tape; Christmas Design Tape; Festive Paper Stash; Classic Kraft Stock – Advantus
Miscellaneous – shallow box or heavyweight box making cardstock; die cutting machine; paper trimmer; scissors; ruler; brayer; artificial snow or glitter; silver glitter glue
Winter Wonderland Shaker Shadow Box Instructions:
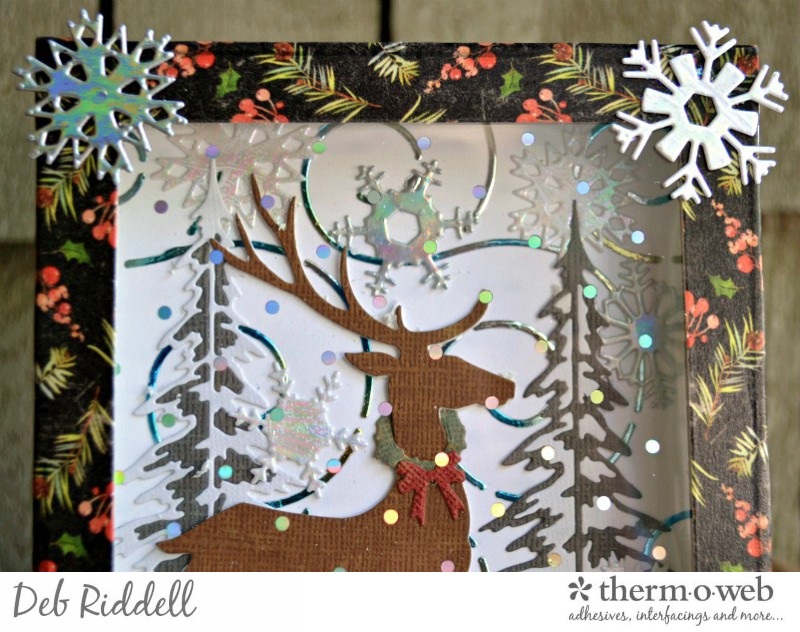
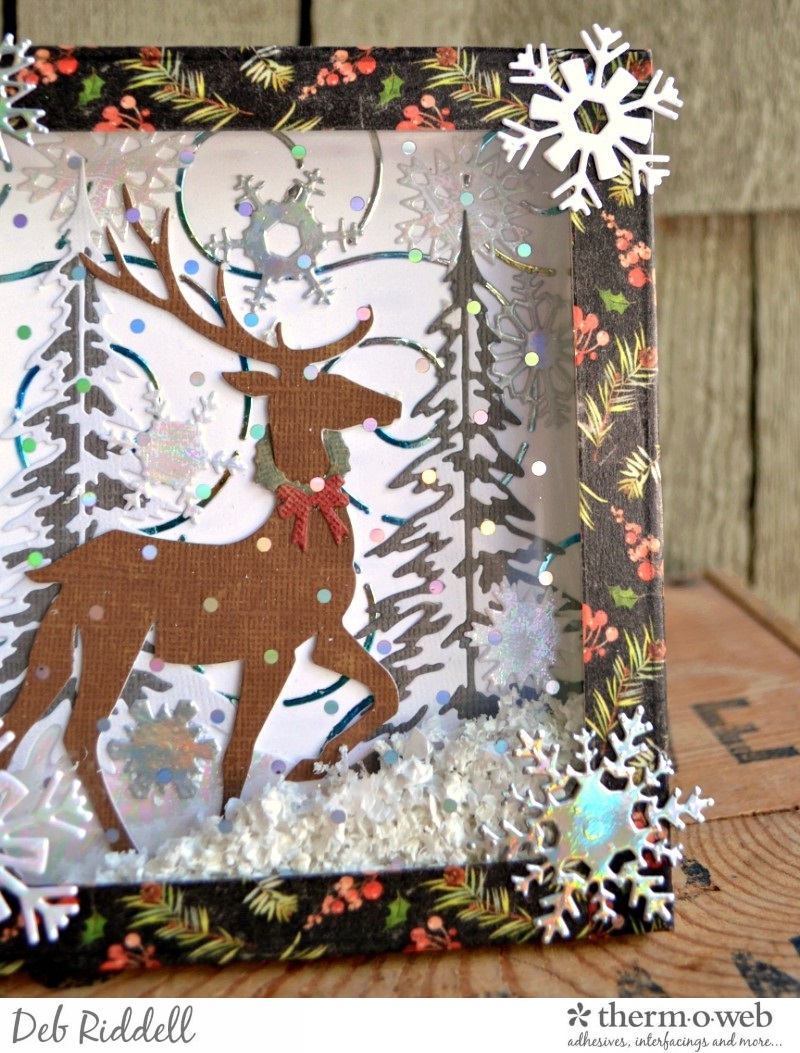
Stencil Deco Foil Transfer Gel through the Swirls Deco Foil Stencil onto Gina K. Designs Luxury White cardstock and let dry till clear (about one hour). Cover the stenciled design with Lapis Watercolor Deco Foil Transfer Sheet and run through your preheated laminator.
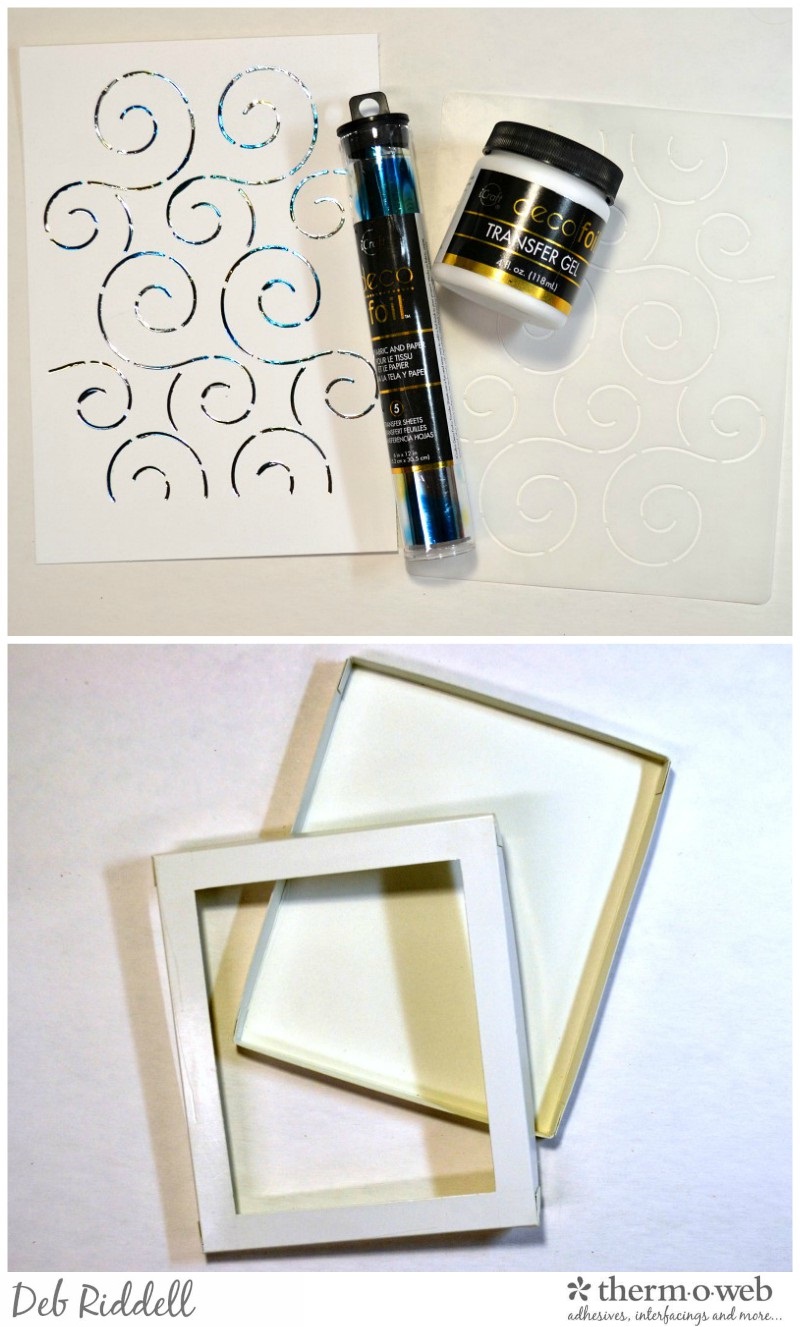
Select a small shallow pre-made box from your stash or make one of your own (the box that I made is approximately 5″ wide x 6″ tall x 1/2″ deep). Cut a window into the box top, leaving a 1/2″ border on all sides.
Cut a piece of Polka Dots Clear Designer Toner Sheet large enough to back the opening in your box top and foil it with Iridescent Deco Foil. Attach the Deco Foil Clear Designer Toner Sheet to the inside of the box top with 1/4″ SuperTape (make sure none of the SuperTape is exposed or else your artificial snow will stick to it!). Trim the Swirls foiled cardstock to size and fit it inside the bottom of the box. Add a line of silver glitter glue around the edges to cover any gaps.
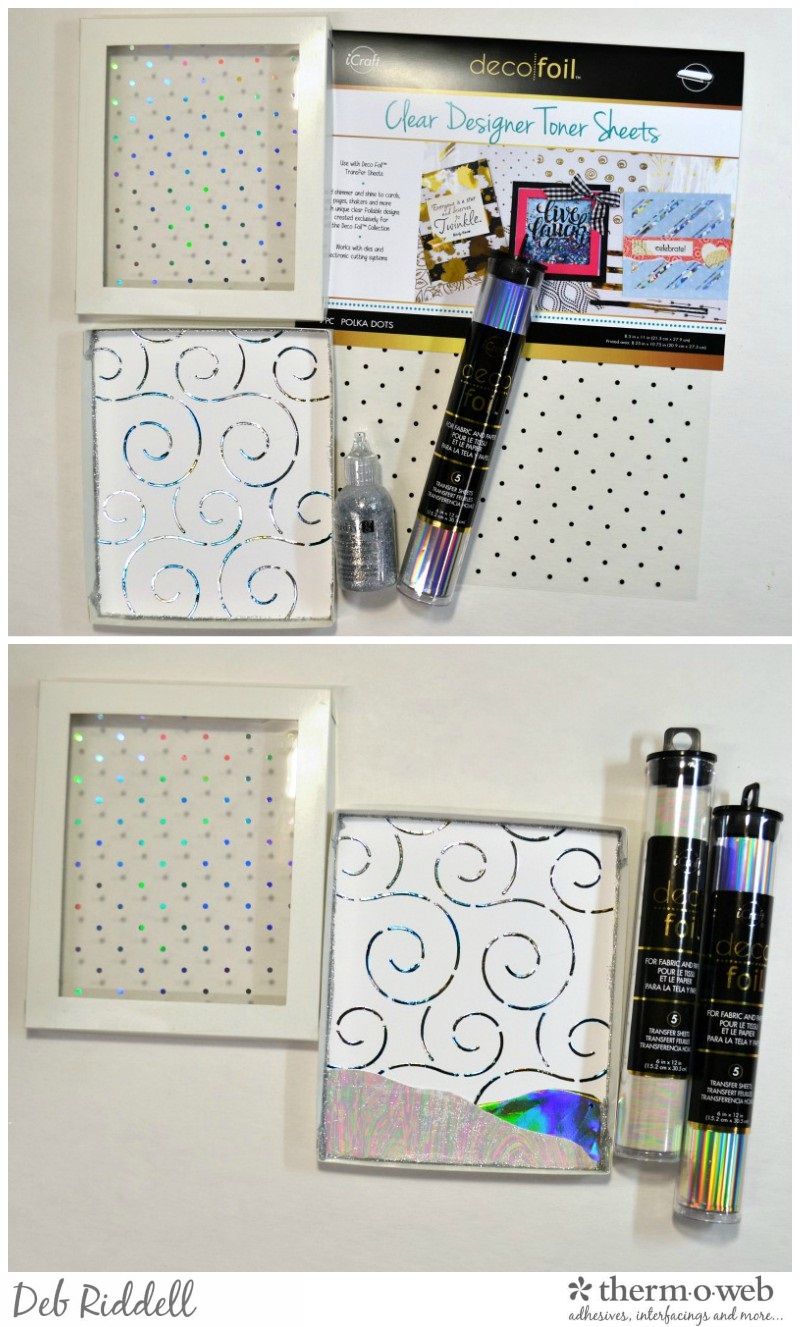
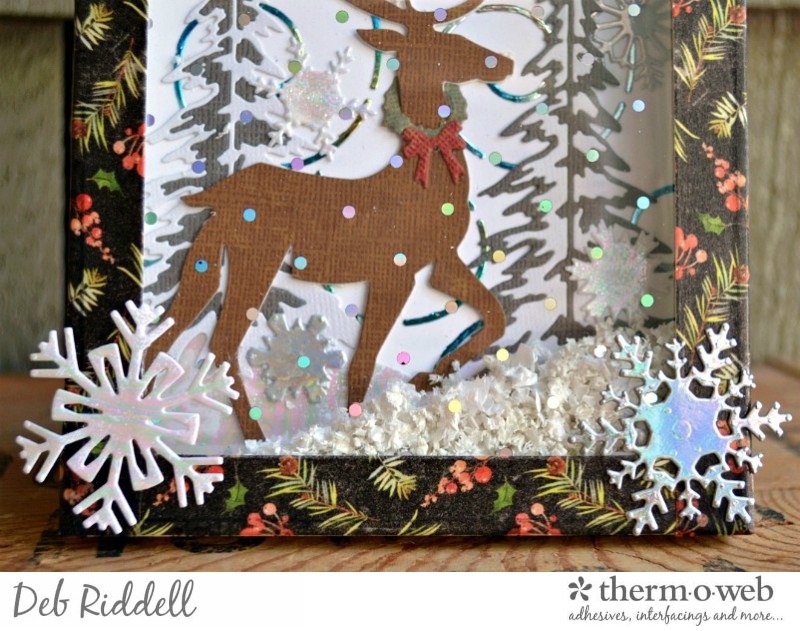
Cover a piece of Deco Foil Toner Sheet with Iridescent Deco Foil. Brayer Deco Foil Transfer Gel onto a piece of white cardstock, allow to dry till clear and foil the cardstock with Opal Deco Foil (the Opal Deco Foil is translucent, so the black colour shows through if you use Deco Foil Toner Sheets. Applying Deco Foil Transfer Gel onto white cardstock and then foiling it ensures that the beautiful opalescent colours of the Opal Deco Foil will be visible). Cut a couple of ‘snow banks’ to size and fit them along the bottom of the box over the foiled Swirls stencil.
Die cut the Prancing Deer die twice, once from brown Classic Kraft Stock and once from white, layering them together with the white die cut behind. Cut two Woodland trees, once from green and once from white Classic Kraft Stock, and piece the two die cuts together to make your snow-covered trees. Die cut Mini Paper Snowflakes from the Iridescent foiled Toner Sheet and the Opal foiled cardstock. If desired, die cut a Christmas wreath to go around the Prancing Deer’s neck with the Village Christmastime die from more Classic Kraft Stock.
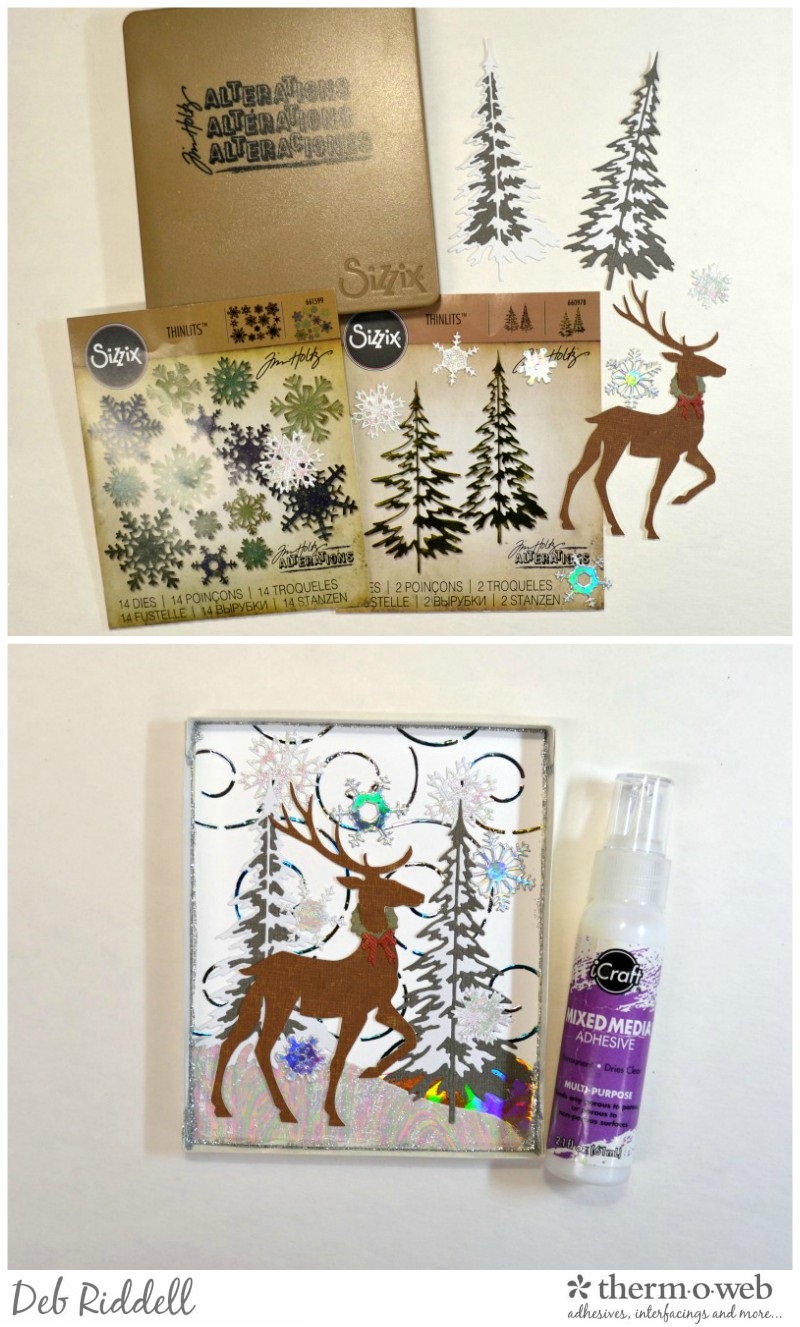
Arrange your die cuts on the box bottom and adhere in place with iCraft Mixed Media Adhesive.
Add some artificial snow or glitter to the bottom of the box, covering up the deer’s feet to your desired depth. Cover with the box top.

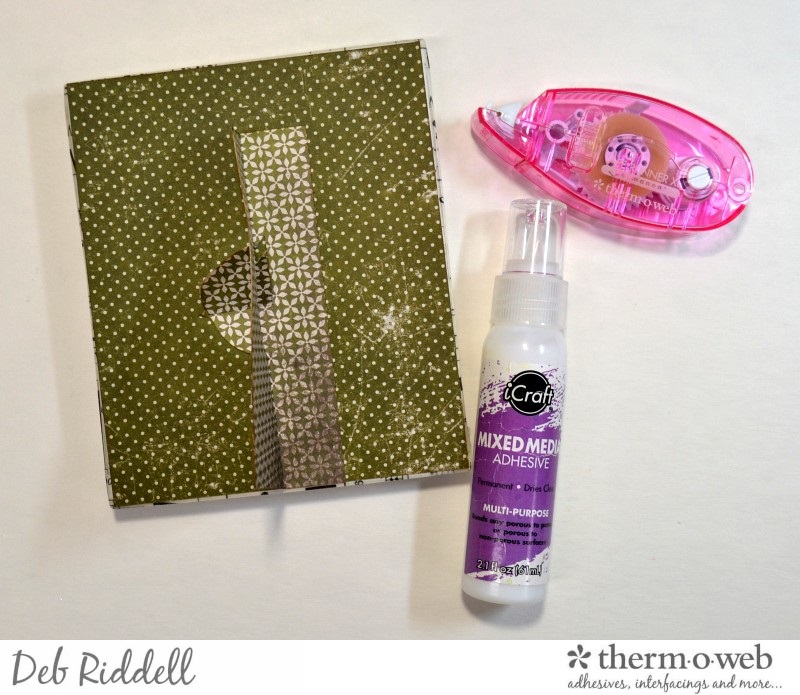
Seal all four sides of the box with a patterned washi tape to ensure no snow can leak out (this is Symphony Tissue Tape). Cover the exposed box front with a Christmas themed washi tape (this is Christmas Design Tape).
Cover the back of the box with a Christmas themed scrapbook paper, adhering it with your Memory Tape Runner XL. Die cut a Small Easel from more Christmas patterned scrapbook paper and adhere it to the back with iCraft Mixed Media Adhesive to ensure that your shaker shadow box will stand up securely.
Add a foiled Mini Paper Snowflake to each corner of your Winter Wonderland shaker shadow box and you are done! Here are a few close-ups of the finished decoration.

I hope that you’ve enjoyed seeing how my Winter Wonderland shaker shadow box came together and that you’ve been inspired to make some of your own mixed media home decor with these wonderful Deco Foil products!
Thanks as always for stopping by today and happy creating!
Deb xo
Sharon Gullikson
August 20, 2018 at 1:06 pm (6 years ago)Love your shadow box. I like to make them, too!!
Deb Riddell
August 20, 2018 at 2:40 pm (6 years ago)Thank you Sharon, this is the first one I’ve made but definitely not the last! Deb xo