


Hello Crafty Friends!!
Larissa here today as we feature the NEW Brutus Monroe Deco Foils this week!! SWOON!! They are PERFECT for all of your Holiday needs as well as MANY other options!! I’ve created Two Cards today with coordinating Envelopes!! Let’s get started!!
Slimline Cards
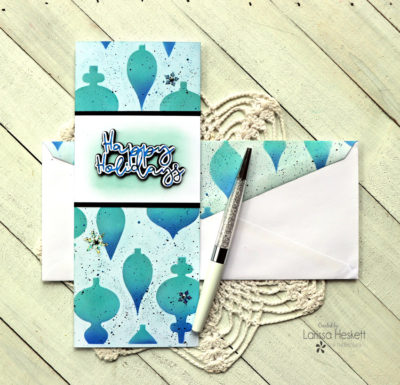
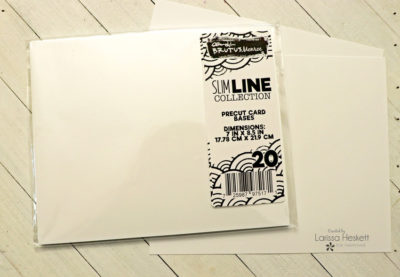
My First Card is a Happy Holidays Card and I’m using the NEW Brutus Monroe Precut Slimline Card Panels and Precut Slimline Cardbases!! To be honest this was a Hard Challenge for me!! I’m NEW to creating Slimline Card Designs!! I also Struggled with a Design Idea!! Why am I telling you this, because I want you to know that it happens to EVERYONE!! I was messaging with an AMAZING Friend (Wink Wink You KNOW who you are) when she INSPIRED me with an Idea!! So don’t be afraid to talk it out with another Crafter, or just play with your Products until you create something that you LOVE!! 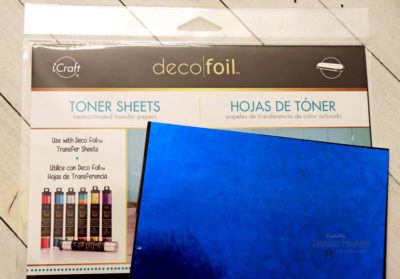
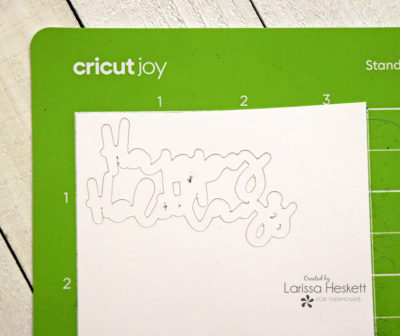
I started by Foiling the NEW Brutus Monroe Blue Waves Deco Foil to a Piece of Deco Foil Toner Sheets with my Laminating Machine!! I knew I wanted to use it along with my NEW Cricut Joy and one of the Brutus Monroe Cut Files!! I’m using the Happy Holidays Cut File that can be found HERE!!
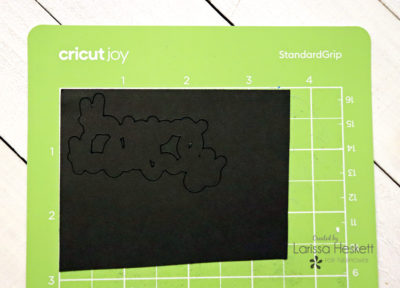
There are 3 Layers to this Cut which makes it FUN to Layer with the Deco Foils!! I’ve used some Brutus Monroe Raven Cardstock for the Base Layer!!
Then I cut the Second Layer from a piece of the NEW Brutus Monroe Precut Slimline Card Panels!!
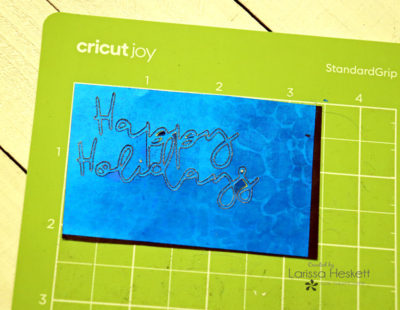
Then I Cut the Third Layer from the NEW Brutus Monroe Blue Waves Deco Foil that was Foiled onto the Deco Foil Toner Sheets!! SQUEAL!! This makes me SO EXCITED knowing that I can Cut the Foiled Deco Foil Toner Sheets as this opens up an entire NEW way to use them!!
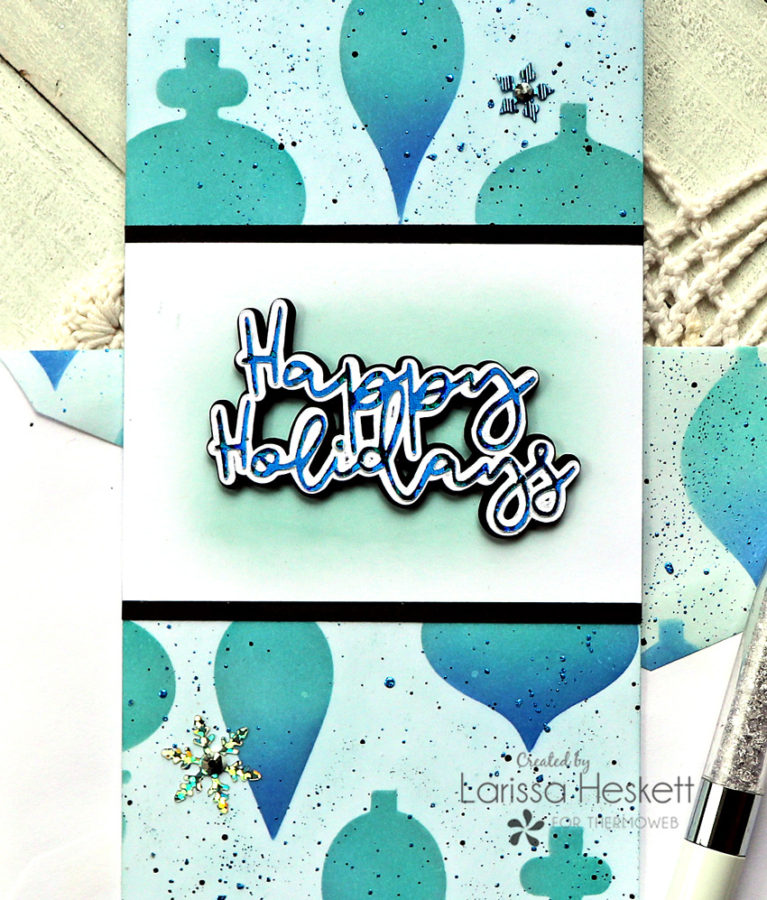
Here’s a Close up of the Layered Happy Holidays!! It’s SO BEAUTIFUL!! That Foiled top Layer really adds to the overall Design!! 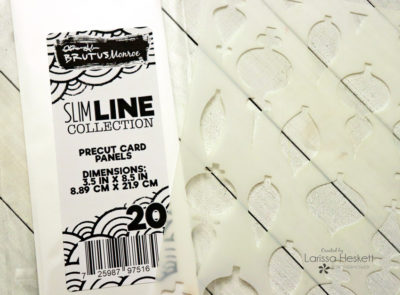
Next, I Sprayed the Back Side of the NEW Brutus Monroe Background Baubles 6×9 Stencil with some Pixie Spray and I adhered it over the NEW Brutus Monroe Slimline Precut Panel!! 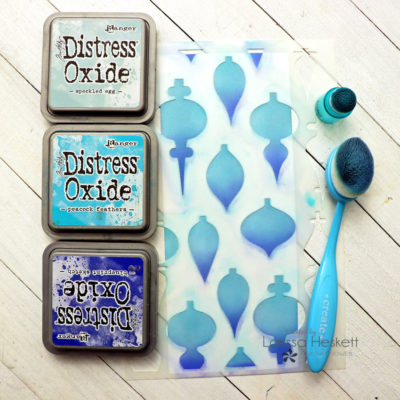
I Inked the Baubles with some Speckled Egg, Peacock Feathers, and Blueprint Sketch Distress Oxide Inks!! Then I added some of the Speckled Egg Distress Oxide Ink to the background of the Slimline Panel!! 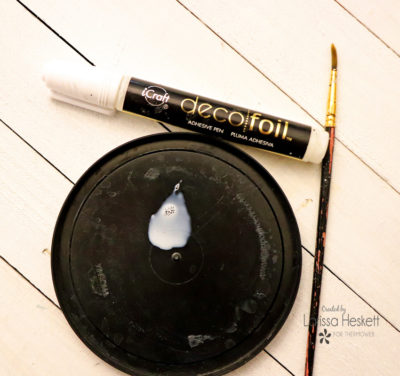
I wanted to add some Foiled Splatters to my Card Panel so I used the Deco Foil Pen and pushed down onto the tip of the Pen releasing a puddle of the Deco Foil Adhesive onto a Plastic Lid!! Then I used a Paint Brush to Splatter it onto my Card Panel!! Then I set it aside to dry completely!! Once it was dry, I placed the Blue Wave Deco Foil Over the Adhesive Splatters and pressed firmly!! The results are just BEAUTIFUL and FUN!!
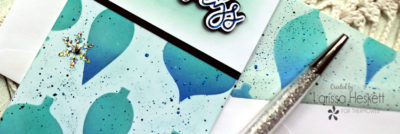
Here’s a Close up look so you can see how FUN this technique is and how much dimension and Sparkle it can add!! Resembles Snow in this Design!!
I added the Panel onto a NEW Brutus Monroe Slimline Recut Cardbase using some Ultra Bond Adhesive!!
I wanted to create a coordinating envelope to go with my Card so I used a Scratch piece of Paper under the flap to protect the back of the Envelope and I applied the Background Baubles Stencil to the Flap Inking it the same way as I inked the Card Panel!! Then I added the same Deco Foil Adhesive Pen Splatters and let them dry completely before I applied the Blue Waves Foil over the Adhesive!! I also added some Black Soot Distress Paint Splatters for even more texture and to help tie in the Black I used for the Sentiment and the Trim!! 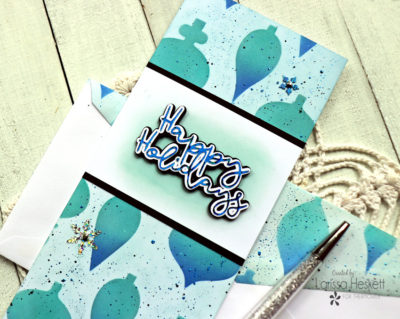
I LOVE the way it turned out and I hope I’ve inspired you to give the Slimline Cards a try!!?? I also hope you’ll give the Deco Foil Pen Splatters a try as it really is FUN and the results are PERFECT for this time of the Year to add some Sparkle and Shine to ANY of you Holiday Projects!!
Products Used:
Therm O Web:
NEW Brutus Monroe Blue Wave Deco Foil
Ultra Bond Adhesive
3D Foam Sticky Strips
Deco Foil Toner Sheets
Pixie Spray
Zots Bling Adhesive Dots
Deco Foil Clear Transfer Adhesive Pen
Other:
Brutus Monroe Slimline Card Fronts
Brutus Monroe Background Baubles 6X9 Stencil
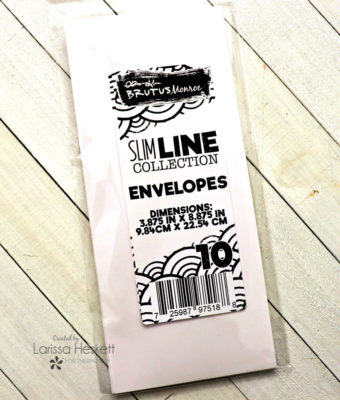
Brutus Monroe Slimline Envelopes
Brutus Monroe Precut Slimline Card bases
Brutus Monroe Happy Holidays Cut File
Speckled Egg, Blueprint Sketch & Peacock Feathers Distress Oxide Ink
Black Soot Distress Paint
Paint Brush
Iridescent Snowflake Sequins
Silver Metallic Jewels
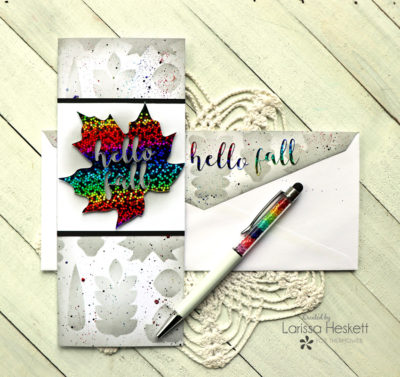
For my Second Card I knew I wanted to create a Hello Fall Card!! 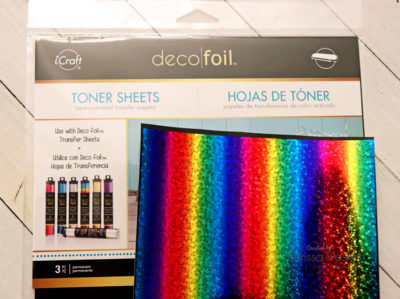
I started by Foiling the NEW Brutus Monroe Rainglow Deco Foil to a Piece of Deco Foil Toner Sheets with my Laminating Machine!! Again I’m using it along with my NEW Cricut Joy and one of the Brutus Monroe Cut Files!! I’m using the FREE Hello Fall Cut File that can be found HERE!!
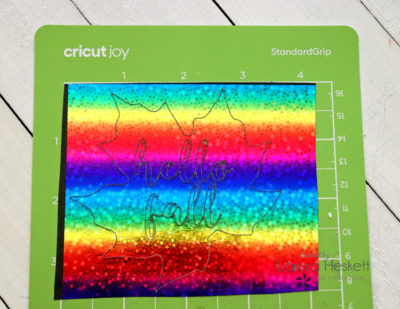
I Cut the Design using my Cricut Joy Machine and I LOVE the way it turned out!! I sized it down so it would fit perfectly onto the Slimline Card Panel!!
TIP: Pay attention to the direction you want the Rainglow Pattern to go when you are Die Cutting or using a Cricut Joy or other Cutting Machine because you don’t want the Rainbow to be crooked!!TooltipText 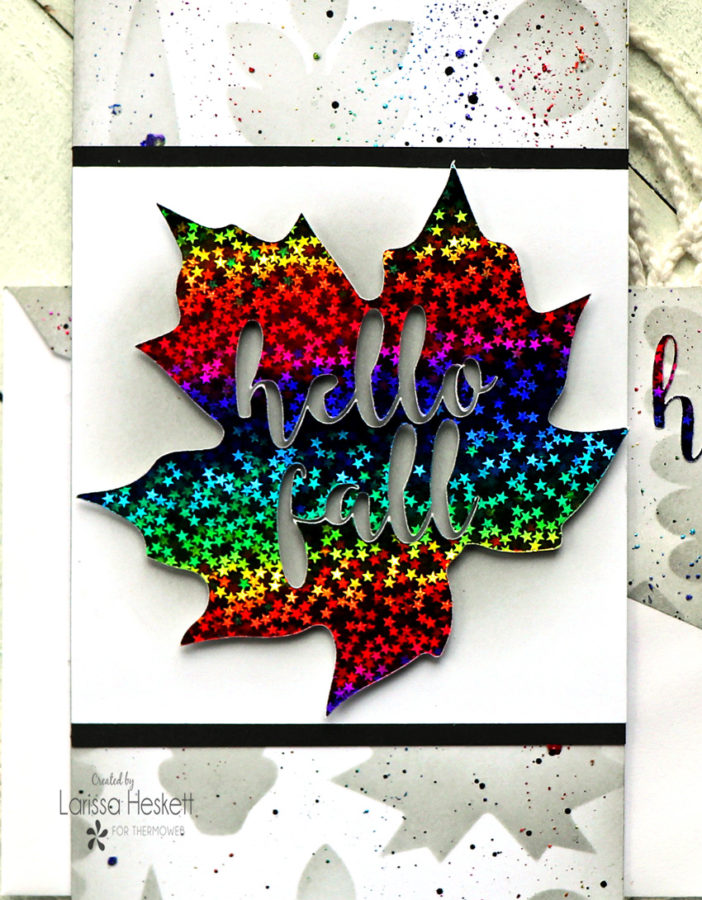
Here’s a close up look of the STUNNING Rainglow Foiled Rainbow Maple Leaf!! SWOON!! I just LOVE it!!

Next, I Sprayed the Back Side of the NEW Brutus Monroe Falling Leaves Pixie Spray and I adhered it over the NEW Brutus Monroe Slimline Precut Panel!!
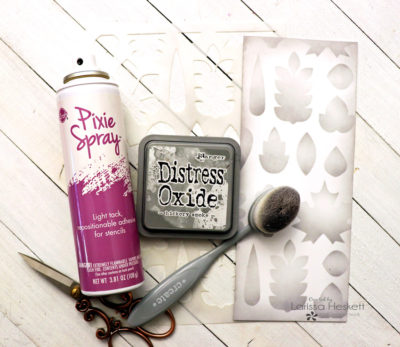
After I placed the Stencil over the Slimline Card Panel I added some Hickory Smoke Distress Oxide Ink!! I LOVE the Ombre` Inking on the Card Panel!! 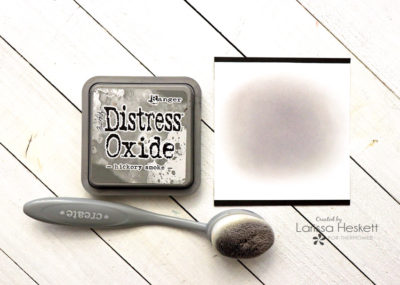
Next, I created the Panel using one of the Precut Card Panels and Inked the Center using some Hickory Smoke Distress Oxide Ink!! Then I added the Raven Cardstock Strips to the backside of the Sentiment Panel and adhered the Maple Leaf using some 3D Foam Sticky Strips to the center of the Panel!!
Again I added some Foiled Splatters to my Card Panel so I used the Deco Foil Pen and pushed down onto the tip of the Pen releasing a puddle of the Deco Foil Adhesive onto a Plastic Lid!! Then I used a Paint Brush to Splatter it onto my Card Panel!! Then I set it aside to dry completely!! Once it was dry, I placed the Rainglow Deco Foil Over the Adhesive Splatters and pressed firmly!! The results are just BEAUTIFUL and FUN!! 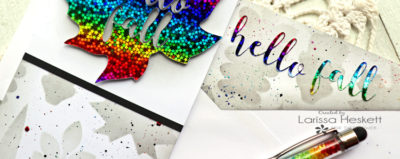
Here’s a Close up look so you can see how FUN this technique is and how much dimension and Sparkle it can add!! Resembles Snow in this Design!! 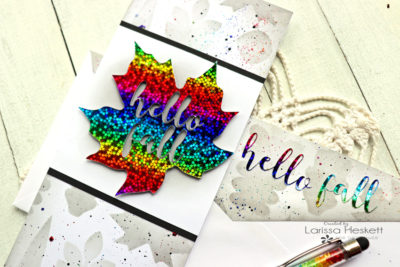
So there you have it, two Slimline Card SURE to make ANYONE SMILE!!
I LOVE the NEW Rainglow Deco Foil and think this Leaf looks STUNNING of that subtle Inked Background!!
Products Used:
Therm O Web:
NEW Brutus Monroe Blue Wave Deco Foil
Ultra Bond Adhesive
3D Foam Sticky Strips
Deco Foil Toner Sheets
Pixie Spray
Zots Bling Adhesive Dots
Deco Foil Clear Transfer Adhesive Pen
Other:
Brutus Monroe Falling Leaves 6X9 Stencil
Brutus Monroe Slimline Card Fronts
Brutus Monroe Slimline Envelopes
Brutus Monroe Precut Slimline Card bases
Brutus Monroe Happy Holidays Cut File
Hickory Smoke Distress Oxide Ink
Black Soot Distress Paint
Paint Brush
THANKS SO MUCH for stopping by today!! I hope I’ve INSPIRED you to give Slimline Cards a try for your Holiday Cards using the NEW Brutus Monroe Products!! It’s always FUN to try something NEW and when the results are this STUNNING, I just know you’re going to LOVE creating them to send some Happy Holiday Mail to someone SPECIAL!!
If you create something please share with us on Social Media using the hashtags #decofoil #thermoweb #brutusmonroe as we LOVE to see what you create!!
THANKS for your SWEET comments too!! They mean a lot!!
I hope you have a Fabulous Week!!
Larissa Heskett
Have you enjoyed the week?
We’d like to give you a chance to enter to win a $50 Gift Card to shop for all of your favorite ThermOWeb and Brutus Monroe products! Just follow the prompts to enter to win!
This post contains affiliate links. For more information, see our disclosure HERE.
Meghan Kennihan
October 22, 2020 at 4:29 pm (3 years ago)I LOVE the sparkle!!!