


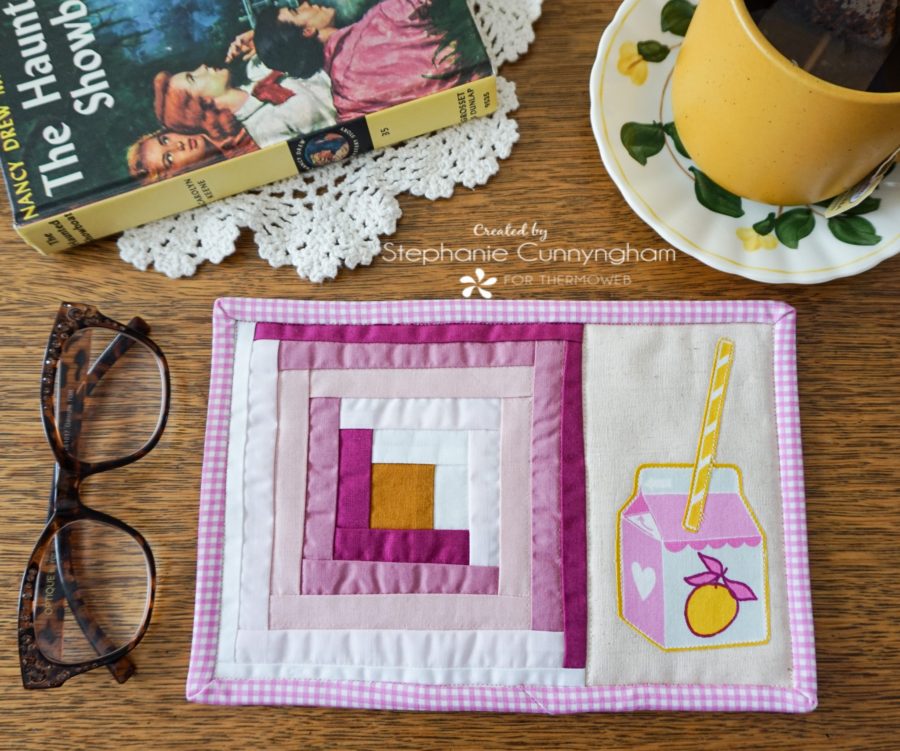
Ombre Rug Mug with Fabric Stiffener
Hello, it’s Stephanie from Sissy Belle Sews, back with another quick but cute project today. I love making smaller things. There is such satisfaction in coming up with an idea, creating it, and finishing it to enjoy all in one easy sewing trip. Smaller projects also make great gifts, for yourself or someone else!
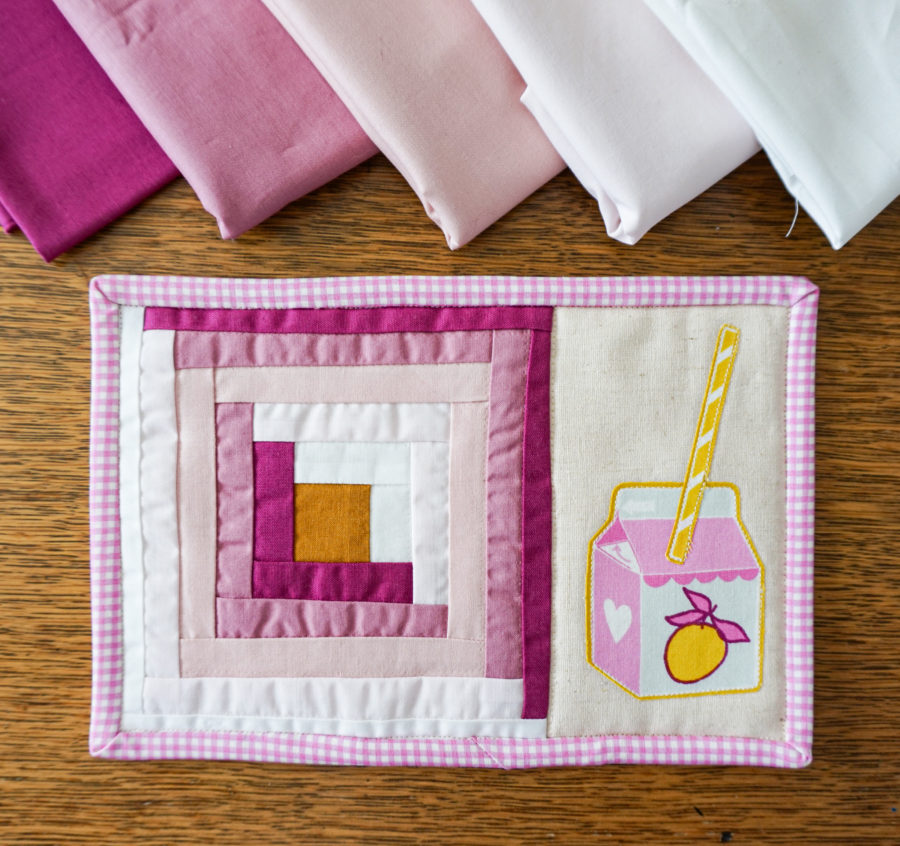
I made this project specifically for myself, to enjoy with my morning routine. When my boys are in school, I start my mornings with a cup of hot tea and a good book. Just 30 minutes or so is enough to help me relax and start my day off on a peaceful note! I’m excited to add a little beauty to my calm space with this new mug-rug I created with an ombre palette and some applique.
Supplies Needed
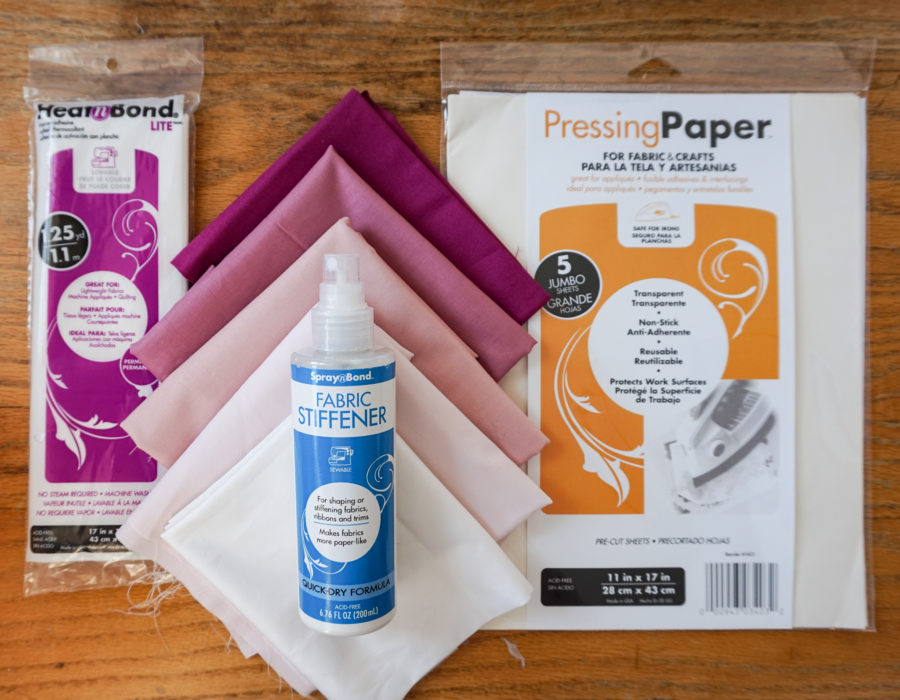
- 1 package of Heat n Bond Lite
- Heat n Bond Pressing Paper (one of my favorite products!!)
- Spray n Bond Fabric Stiffener
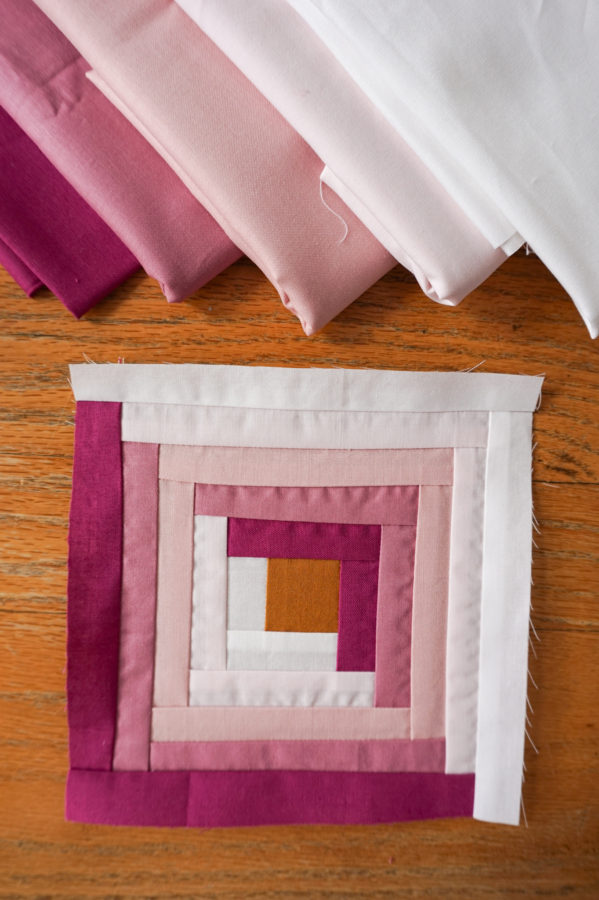
- Fabric scraps (I used 5 different shades of purple to create an ombre effect)
- 3.5″ x 6.5″ piece of linen
- Cut fabric for applique
- 7″ x 9″ piece of batting
- 8″ x 10″ piece of backing fabric
- One 2.25″ x WOF strip for binding fabric
Mug Rug Sewing Instructions
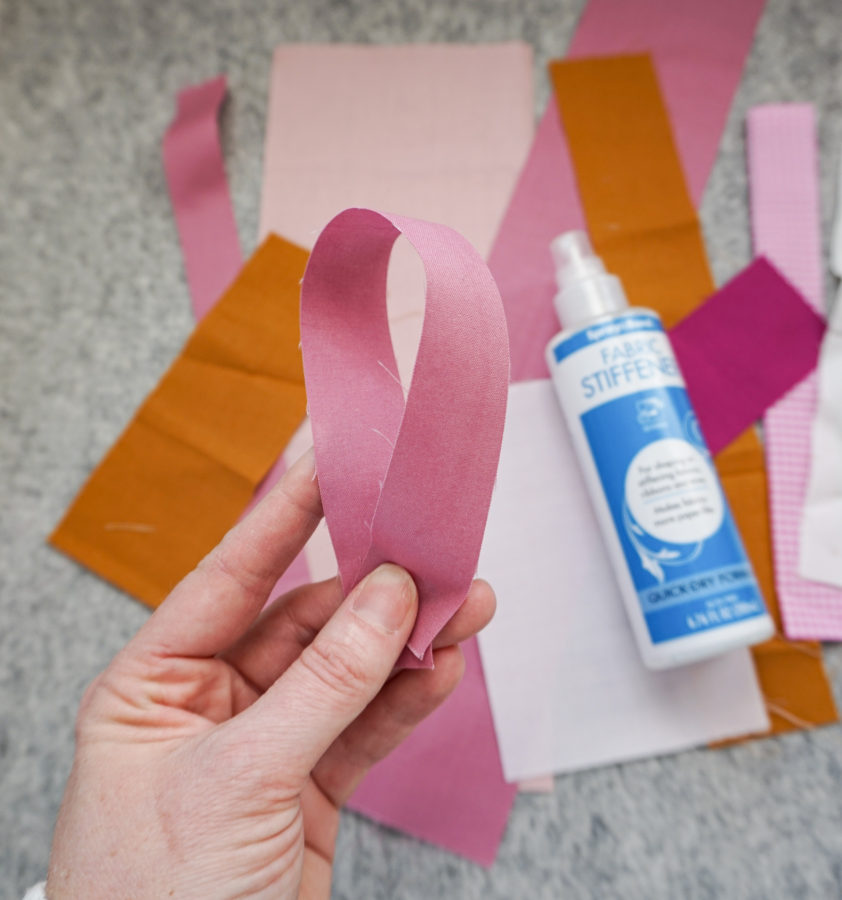
- Generously spray your fabric scraps with Spray n Bond Fabric Stiffener. Press and let dry. This stuff is amazingly good, and it makes working with small pieces very easy. It’s almost like sewing paper. The pieces don’t stretch and warp, which makes accurate sewing very easy. Cut your fabric scraps into 1″ strips.
- Cut a 1.5″ square of fabric for your log cabin center. Yes, we are making a log cabin block!
- Build your log cabin using your 1″ fabric strips. There are lots of great tutorials out there on how to make a log cabin. If you use 5 different fabrics, start with a 1.5″ center square, and build your cabin with your 1″ fabric strips, your block should finish at 6.5″ square.
- Sew your 3.5″ x 6.5″ piece of linen to the right side of your log cabin.
- Roughly cut out the shape you are going to applique, and cut a piece of Heat n Bond Lite about the same size. Fuse your Heat n Bond to the fabric between a sheet of Pressing Paper to protect your iron and your work surface.
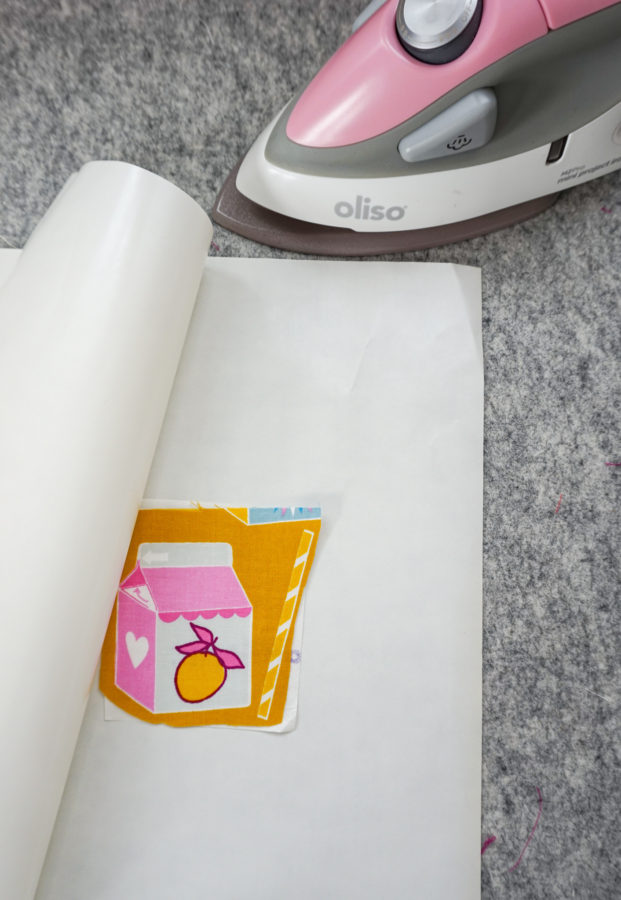
- Cut out your shape and peel the paper off of the back.
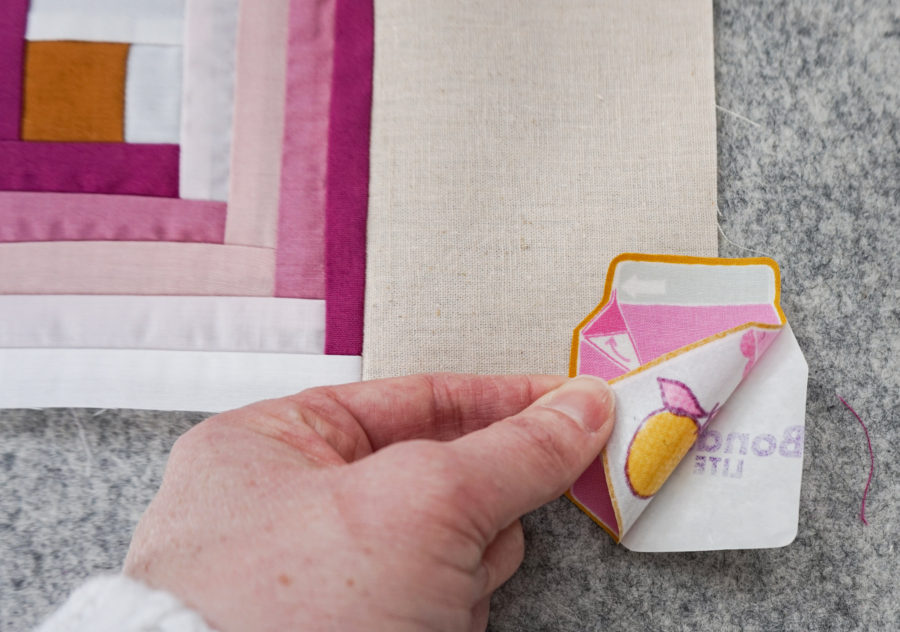
- Place your applique on the linen and fuse in place.
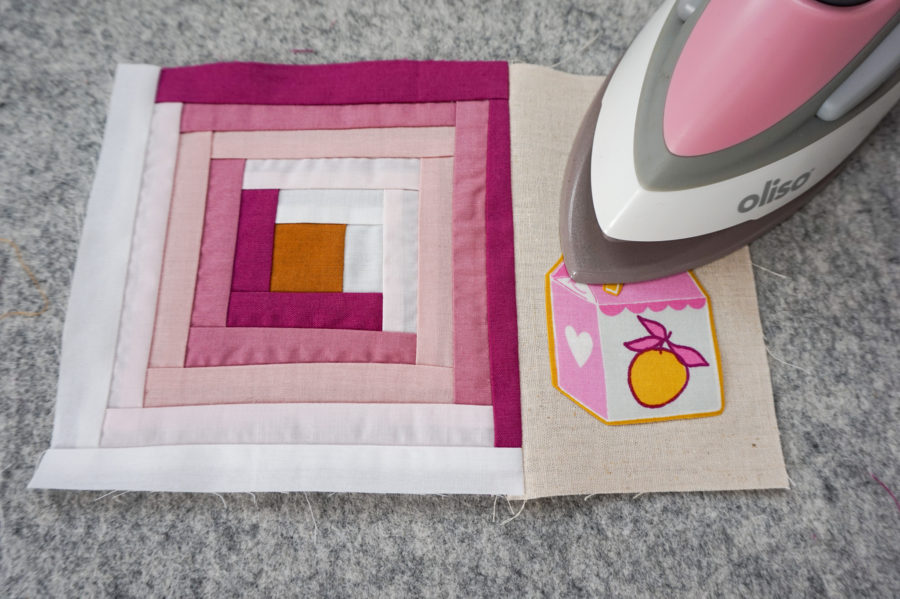
- Stitch around the edge to secure.

- Layer the top of your mug rug, batting, and backing fabric together. Quilt as desired. Trim off excess batting and backing, and attach the binding.
- Enjoy what you created!
Thanks for sewing along with me! I hope you make something beautiful today.
-Stephanie-