


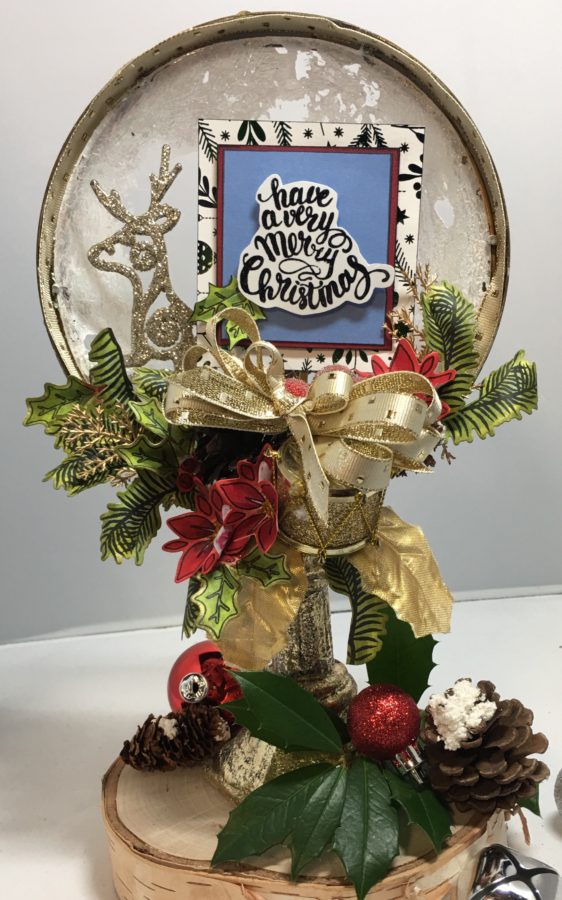
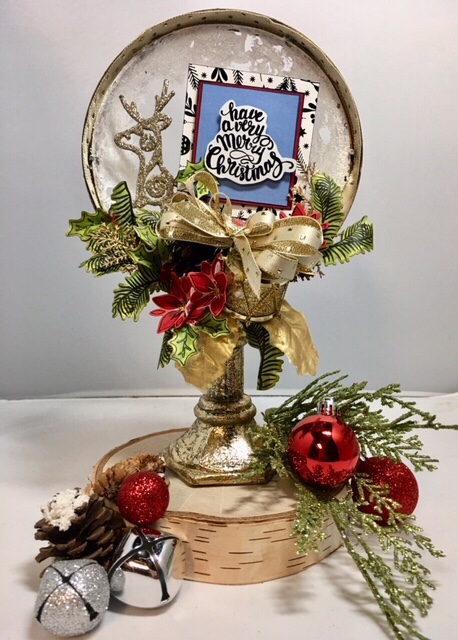
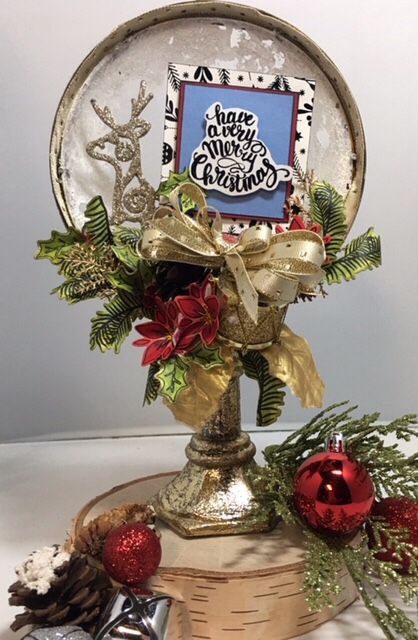
The holidays are upon us and that means time to create some beautiful home decor! Wendy has a knack for creating incredible projects from found items. Wait till you see what she’s created for us with a mix of our Gina K. Designs products and our Rebekah Meier Designs Mixed Media Medium. It’s one stunning Chrismtas Candlestick!
Mixed Media Altered Christmas Candlestick
Supplies:
Gina K. Designs StampnFoil Craft Dies – Holly Jolly
Gina K. Designs StampnFoil Clear Stamps – Holly Jolly
Gina K. Designs Foil Mates Detail Sheets – Holly Jolly
Gina K. Designs Fancy Foils – Sparkling Silver and Glittering Green
iCraft Deco foil Transfer Sheets – Champagne, Black and Opal
Rebekah Meier Designs Mixed Media Medium
Other supplies: Candlestick, clear dish or lid, ribbon, cardstock, black ink, Christmas embellishments, adhesive and bamboo skewer
 Mixed Media Altered Christmas Candlestick
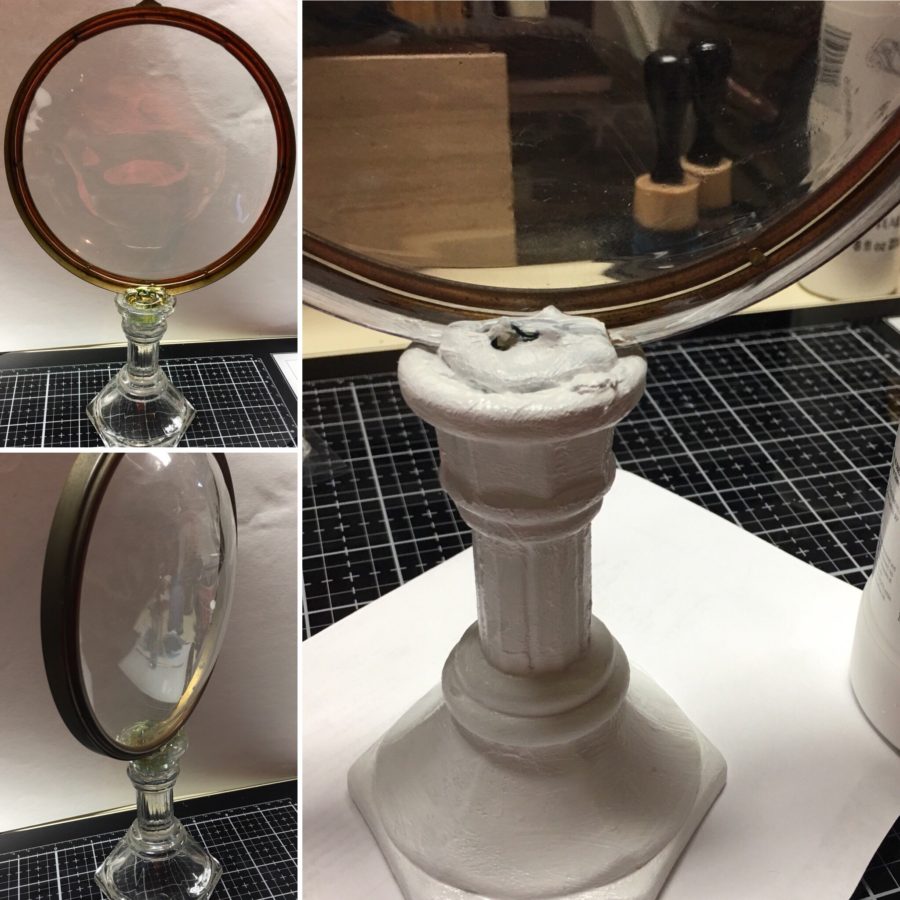
Step One:
Attach clear dish or lid to candlestick using a strong, appropriate adhesive (i.e. E600) also using hot glue to hold it during drying. Allow the adhesive to dry completely before moving to step two.
Hint: The sample uses a clear domed lid but any lid or dish with a lip around the edge will work for this project as long as you can attach it to your candlestick.
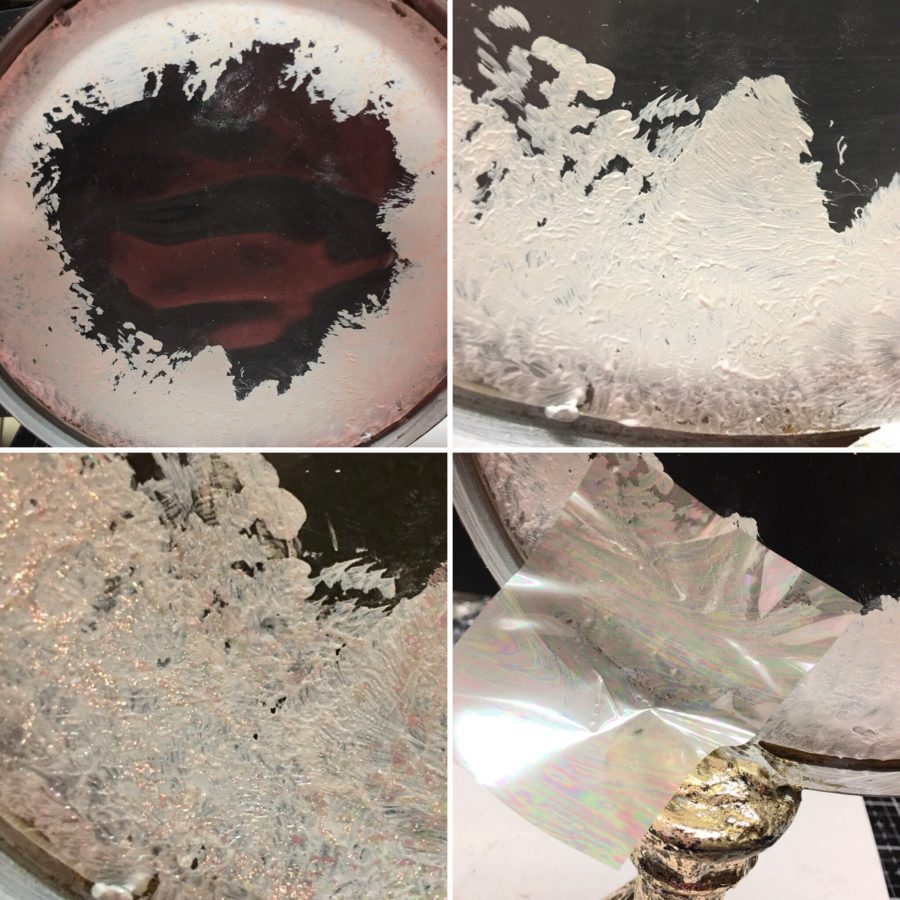
Step Two:
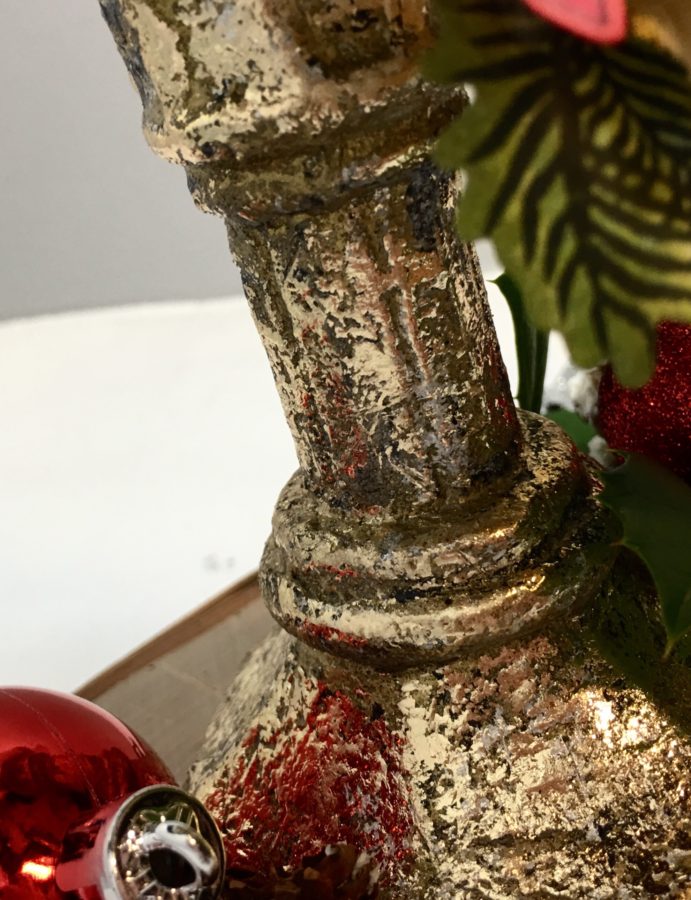
Paint the Candlestick with Gesso and then with Mixed Media Medium. While the Medium is still wet, cover with gold embossing powder and heat emboss the whole thing.
Hint: This step is not absolutely necessary and does not even show in the final project, but the heated embossing powder adds a texture that you otherwise won’t achieve.
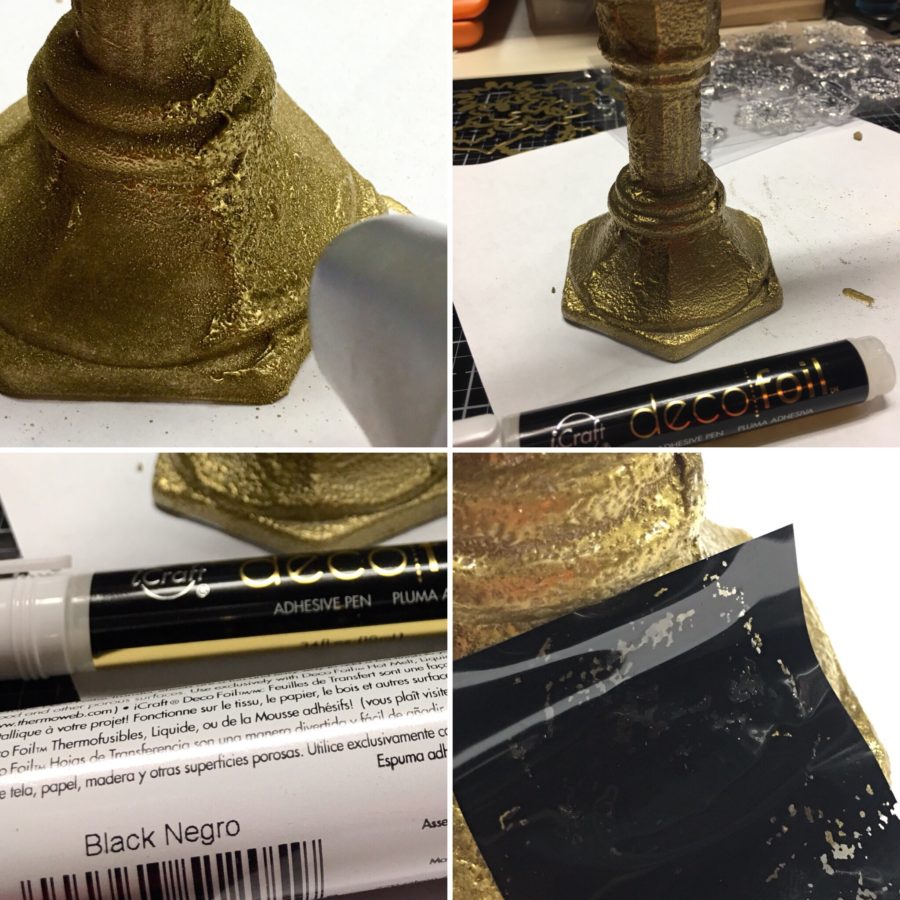
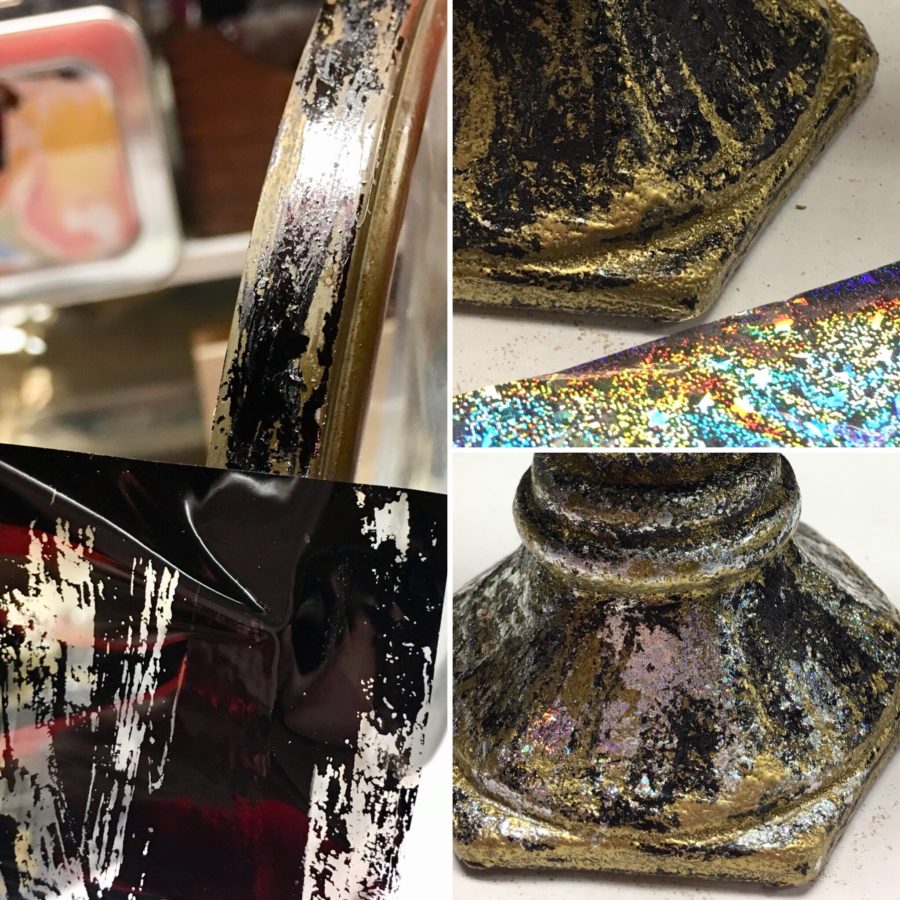
Step Three:
Use the Glue Pen to randomly add adhesive to the candlestick and to the outer edge of the lid/dish and add black Decofoil to those areas. Repeat this process with the Gina K. Designs Fancy Foil Silver Sparkly and Gold Decofoil. You should end up with a candlestick with a nice texture that is gold with bits of black and silver showing through.
Hint: Allow the Glue Pen to dry so that it is not wet to the touch but remains tacky.
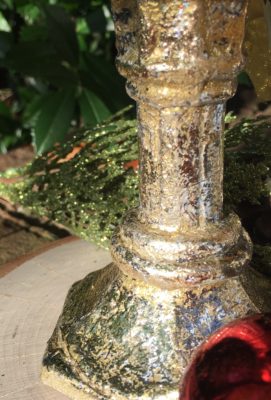
Step Four:
On the outer edge of the inside of the lid/dish, brush on a bit of gesso and then Mixed Media Medium and allow to dry until clear and tacky. After it is clear, press Opal Deco foil onto the Medium and burnish to transfer it to the lid/dish.
Hint: The photo doesn’t do justice to this part of the project; the Opal foil gives a soft and beautiful glow with just a bit of sparkle.
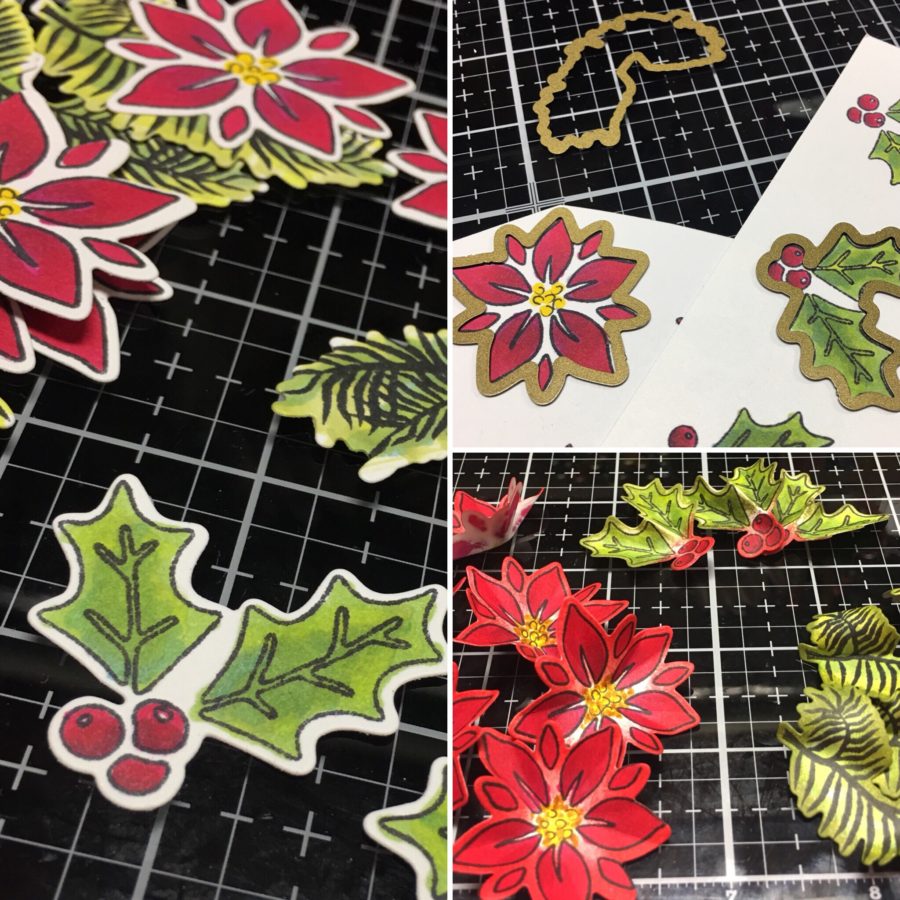
Step Five:
Stamp holly, leaves and poinsettias from the Gina K. Designs StampnFoil Craft Dies and Clear Stamps – Holly Jolly, color and die-cut images. Using the end of a paintbrush or a flower tool, bend and curl the images for added dimension and set aside.
Hint: Ink the edges of the die-cut images to remove the white border.
Step Six:
Arrange and adhere Christmas embellishments and add in the die-cuts to create holiday foliage.
Hint: Random pieces of broken ornaments or tree picks are perfect for this project.

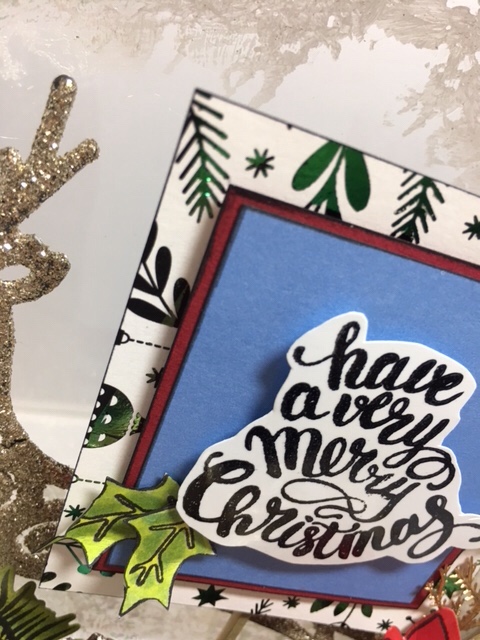
Step Seven:
Stamp your sentiment and mat using the Gina K. Designs Foil Mates – Holly Jolly foiled with Gina K. Designs Fancy Foils. Add a bamboo skewer to the back of the sentiment and stick into the arrangement.
Hint: Add a gold bow to finish your project.

Thanks for Stopping by to take a look at my project!
Wendy