


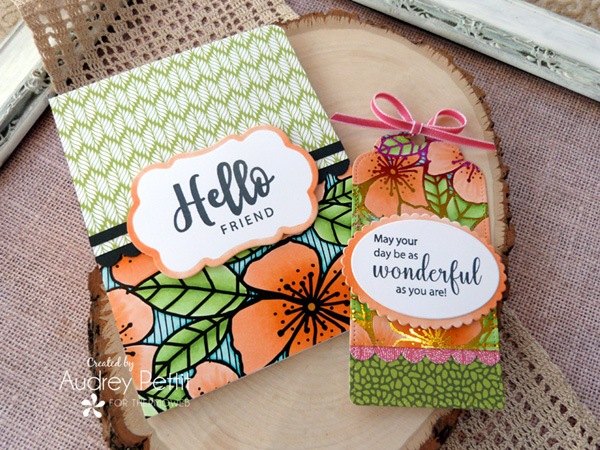
We are so excited here at Therm O Web to announce a new product partnership with our friends at Unity Stamps, toner printed card fronts. These new card fronts are debuting in a handful of whimsical and playful designs, and they can be utilized in many different ways. Today I am sharing a card and tag set featuring two ways to use the beautiful Flowers & Lines Toner Card Fronts.
Deco Foil for Unity Card Fronts
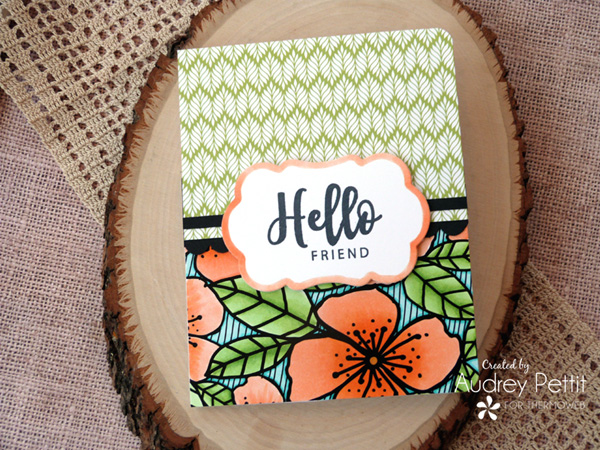
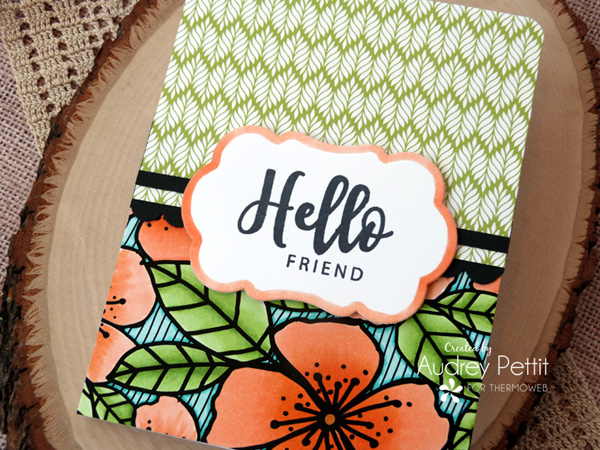
Hello Friend Card
by Designer Audrey Pettit
Supplies:
Deco Foil for Unity Toner Card Fronts: Flowers & Lines
Gina K Designs StampnStencil Stamp Set: Autumn Wishes
Gina K Designs Wafer-Thin Die Set: Decorative Label
Gina K Designs Premium Cardstock: Luxury White, Black Onyx
Gina K Designs Foam Squares
Memory Tape Runner XL
Patterned Paper: Reverse Confetti
Ink: Memento Tuxedo Black
Copic Markers
Corner Rounder: EK Success
Scalloped Border Punch: Fiskars
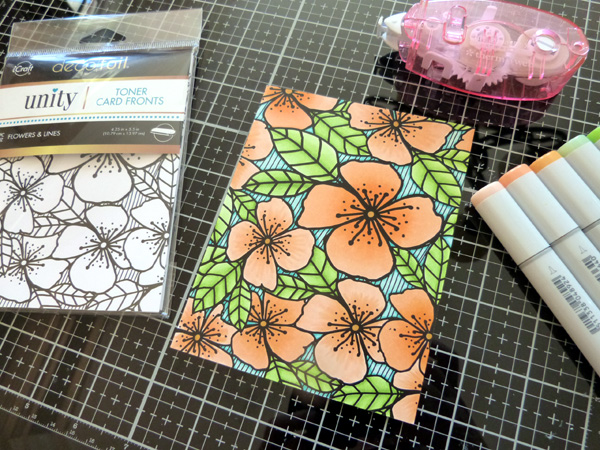
To begin, color a Toner Card Front with Copic markers.
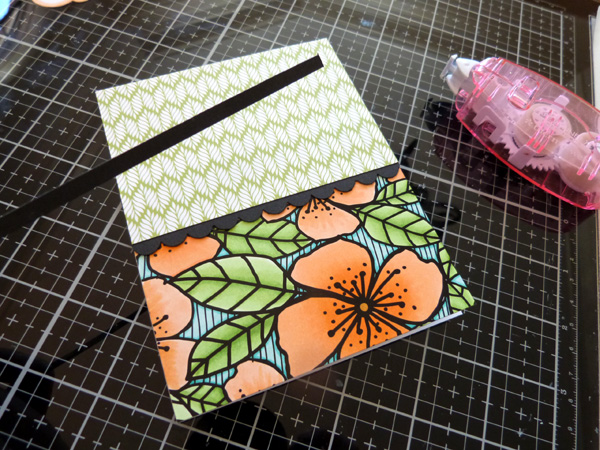
Cut the card front in half, and adhere half to the bottom of a standard A2 card base. Cut a piece of patterned paper to fit the top half of the card. Trim a 1/8″ strip of Black Onyx cardstock, and punch a scalloped border across another strip of black cardstock. Adhere the scalloped border to the bottom of the patterned paper, and then attach the panel to the top of the card base. Add the thin strip of black along the bottom of the patterned paper panel.
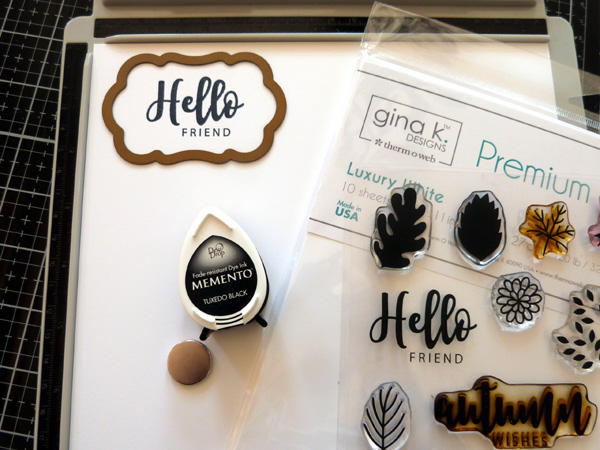
Stamp the Hello sentiment in black ink onto Luxury White cardstock. Die-cut the sentiment with the middle-sized die from the Decorative Label die set.
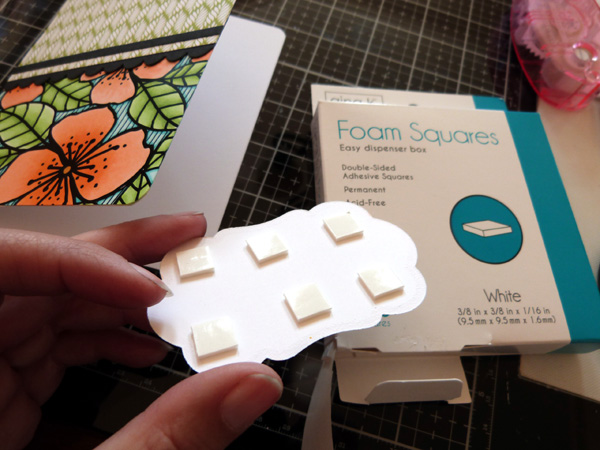
Color around the outside edge of the label with Copic markers. Adhere the label to the center of the card using foam squares for dimension.
Now we’ll create a foiled tag with the remainder of the Card Front, for a second way to use these amazing new sheets.

Friend Gift Tag
by Audrey Pettit
Supplies:
Unity Toner Card Fronts: Flowers & Lines
iCraft Deco Foil Transfer Sheets: Summer Rainbow
Gina K Designs StampnStencil Stamp Set: Crazy Daisy
Gina K Designs Wafer-Thin Die Set: Decorative Tag
Gina K Designs Premium Cardstock: Luxury White
Gina K Designs Foam Squares
Memory Tape Runner XL
Patterned Paper: Reverse Confetti
Oval Dies: Papertrey Ink
Ink: Memento Tuxedo Black
Copic Markers
Scalloped Border Punch: Fiskars
Royal Sovereign Laminator
Trim: Stampin’Up
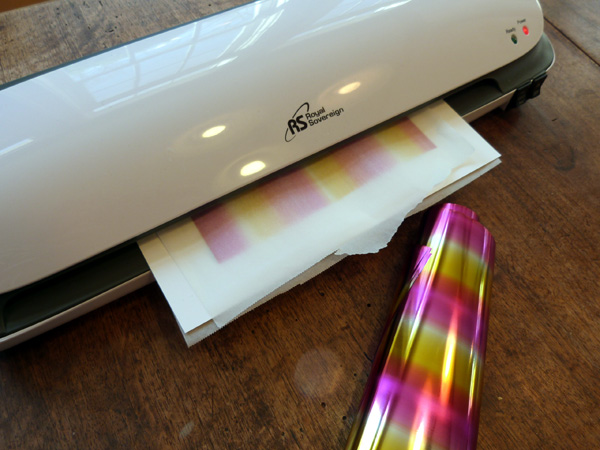
Turn on your laminator and let it heat up. Cut a piece of Deco Foil transfer sheet that is slightly larger then the Toner Card Front. Place the foil onto the card front with the colored side up, and the silver side down. Place the card front between the sheets of a folded piece of parchment paper, and run this sandwich through the machine.
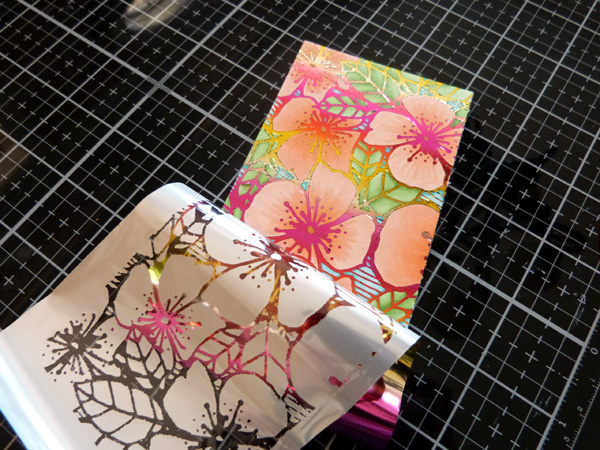
Peel off the transfer sheet to reveal the beautifully foiled design.

Use the partial die cutting technique to die cut the top of the tag shape from the foiled card front. Add papers to the bottom of the tag, secure the tag die back in place and die cut just the bottom portion of the tag.
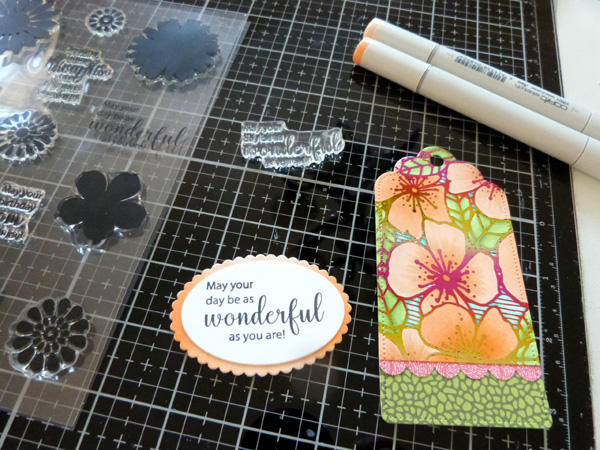
Stamp the sentiment onto an oval shape die cut from Luxury White cardstock. Die cut a scalloped layer from white cardstock, and color the edges with Copic markers to match. Stack and adhere the two oval die cuts, and add them to the center of the tag using foam squares. Add trim to the top of the tag.
Enjoy!