


I am so excited about this new mini quilt I have to share with you today! When considering which word to add to this series of applique mini-quilts, love just seemed like a good one. I love having art around my home that inspires and encourages my family and Love is probably the best thing I could teach them, in my opinion.
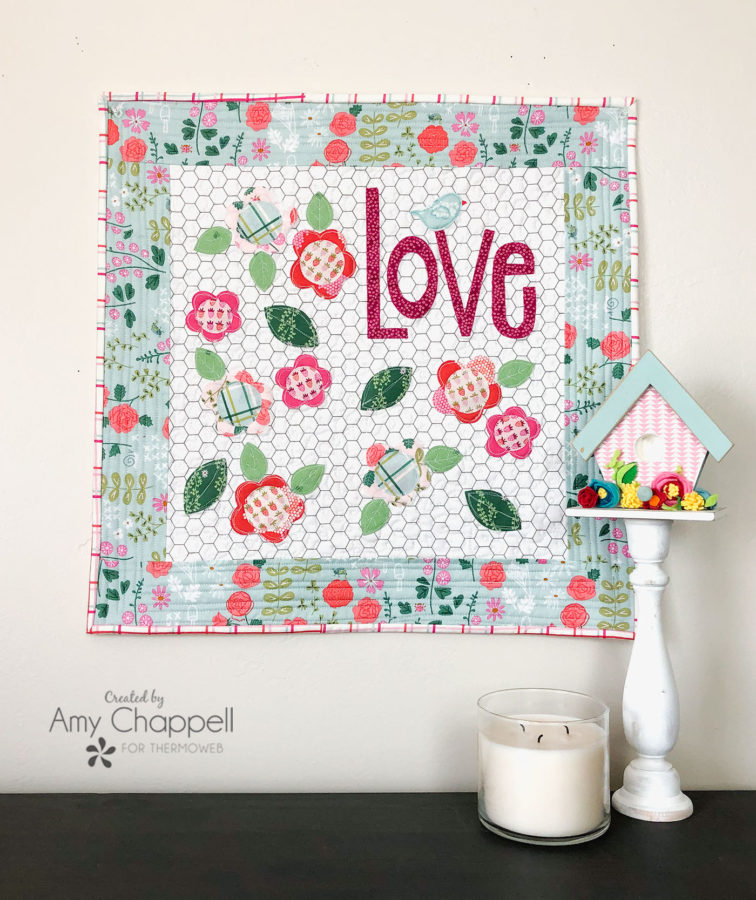
This mini quilt finishes at 20″ square- it is the same size as the hope mini quilt I shared a few weeks ago and I think they would make a great pair if they were turned into pillows, or hung together on a wall.

Love Applique Mini Quilt Tutorial
All seam allowances are 1/4″. Please read through all instructions before beginning.
Supplies/ Cutting:
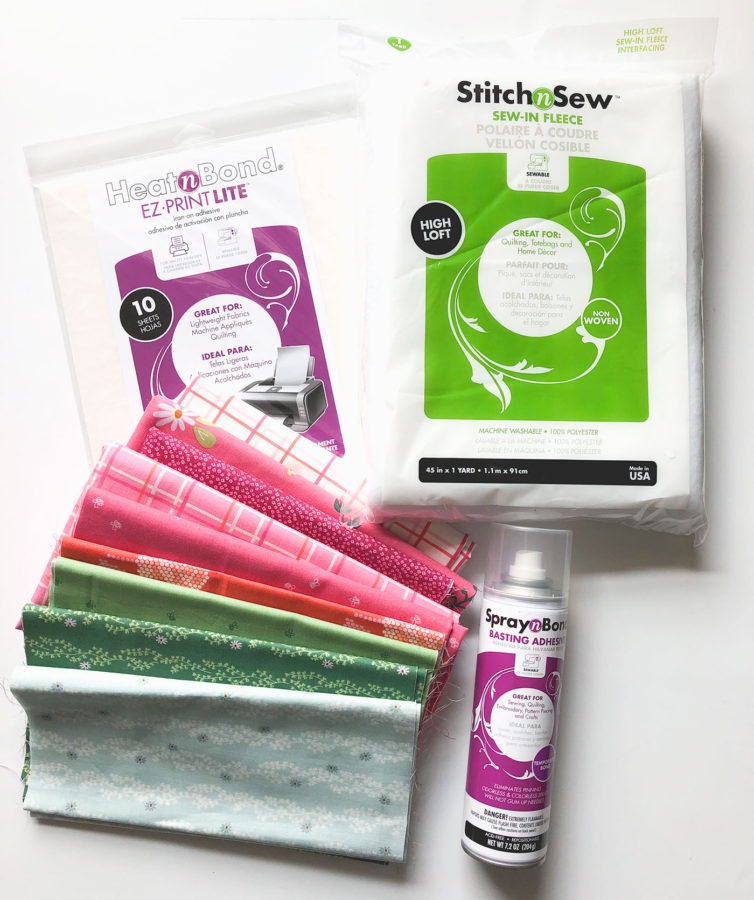
- HeatnBond EZ-Print Lite printable sheets
- StitchnSew Sew-in Fleece- Cut 1- 21″ X 21″ square
- SpraynBond Basting Adhesive
- Love mini quilt pattern
- Fabric – I am using a Bee Basics fabric for the background and some New Dawn fabric by Citrus and Mint Designs for Riley Blake Designs
- From background fabric (I am using honeycomb in white by Lori Holt for this) cut 1- 15″ X 15″ square
- From border fabric (I am using the mint floral in New Dawn) cut 2- 3″ (W) X 15″ (L) strips AND cut 2- 3″ (W) X 20″ (L) strips
- From backing fabric cut 1- 21″ X 21″ square
- From binding fabric cut 2- 2 1/2″ (W) X Width of Fabric strips
- You will also need various prints of fabric for the flowers, flower centers, letters, leaves and bird- small pieces of fabric will work for this- scraps are a great option!
Prepare Applique
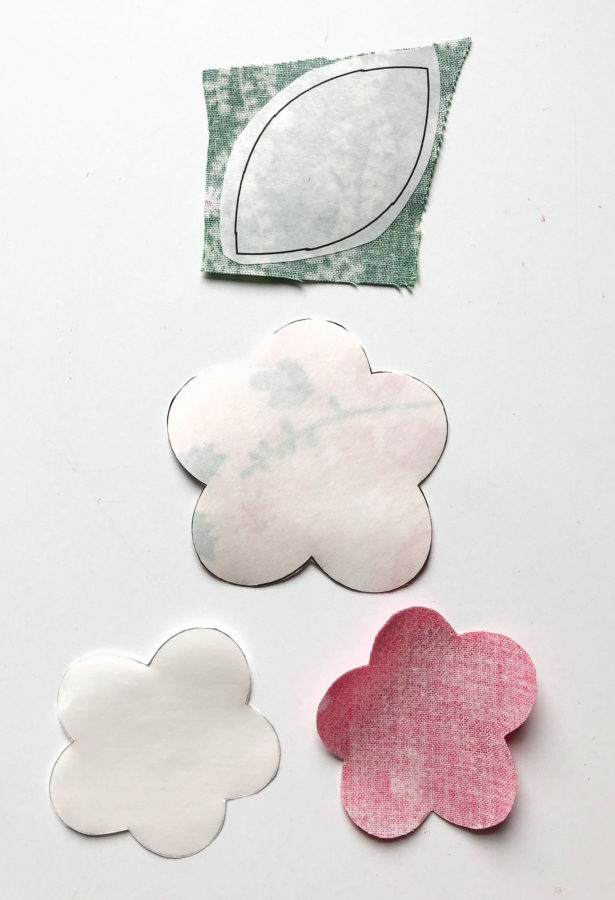
- Begin by printing the two pattern pages onto the paper side of the HeatnBond EZ-print Lite sheets- in my printer, I have to do this one page at a time or they cause a paper jam or misfeed more than one page at once.
- Next- separate the pattern pieces (or group of pieces if they are going to be on the same fabric) leaving a slight margin around each one.
- Follow the package directions to fuse the HeatnBond to the wrong side of the fabric for each pattern piece.
- Cut out each pattern piece on the printed line.
- Separate the paper backing from the applique piece.
Fuse applique:
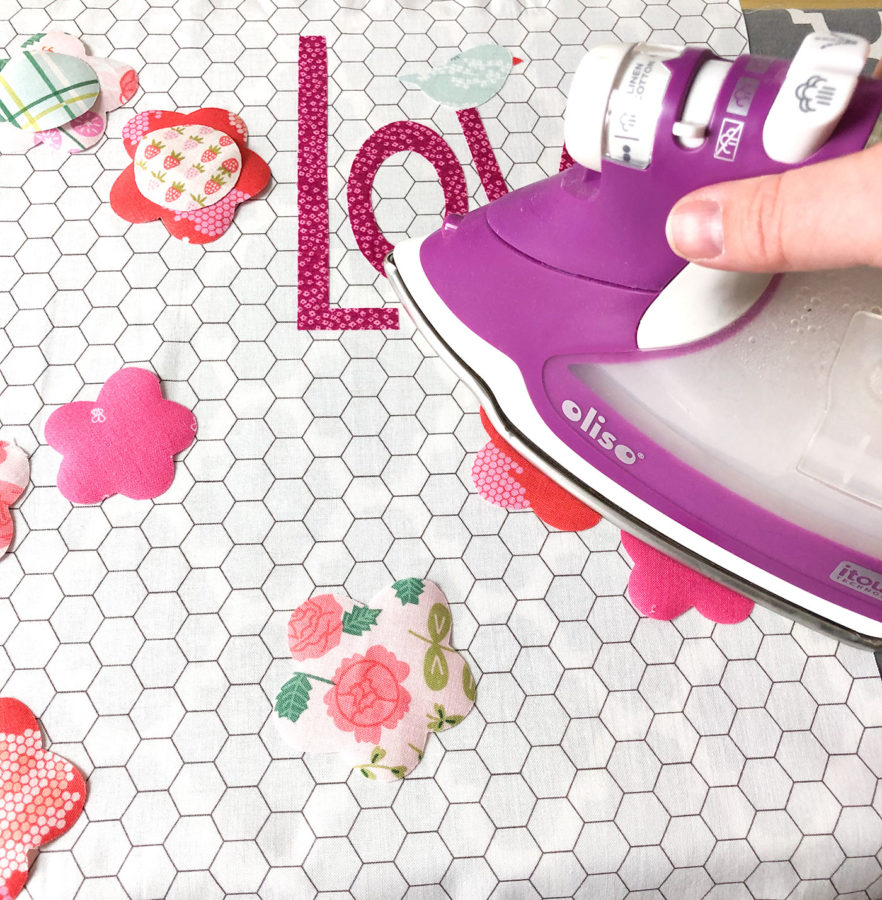
- First, place your background fabric onto your ironing surface. If your ironing surface isn’t large enough to hold the entire background fabric piece, begin by placing the letters first and then build your applique from there.
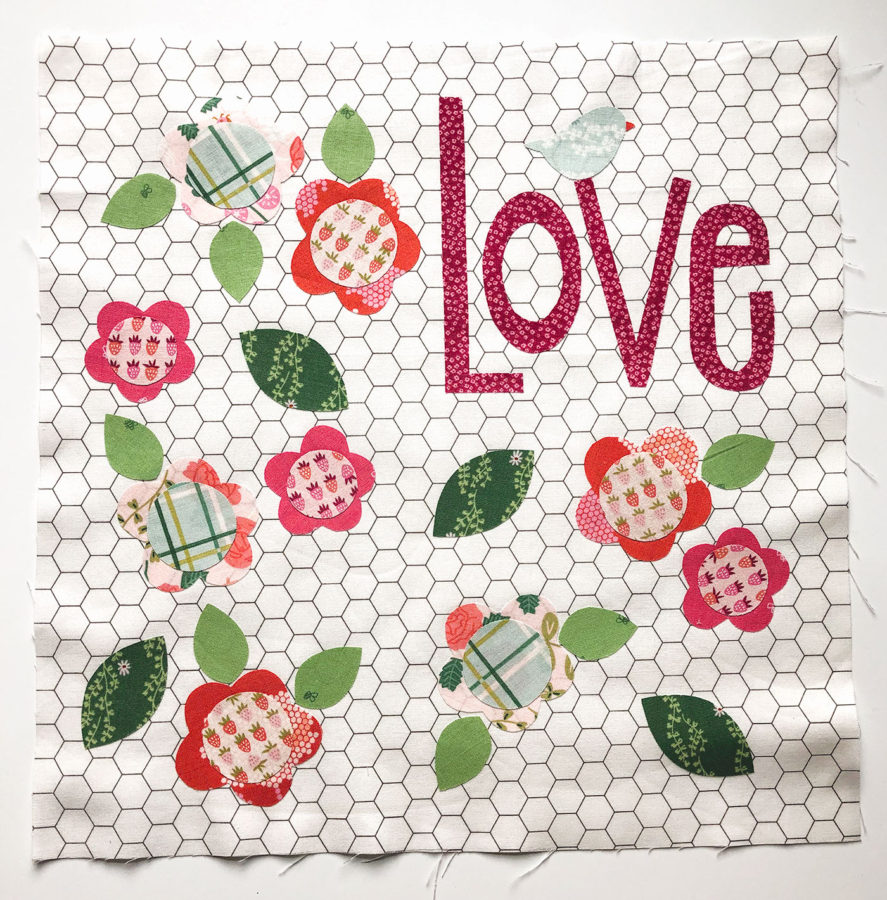
- Next, position your applique pieces a layer at a time. Use the full images of the mini quilt as your guide for placement. I begin with the letters, add the flower bodies, then fill in with leaves and flower centers.
- Follow the package instructions for fusing each layer.
- NOTE: if you decide to arrange the applique in a different way- be aware of seam allowances and do not place applique pieces closer than 1/2″ to the edges of the background fabric.
Finish Applique
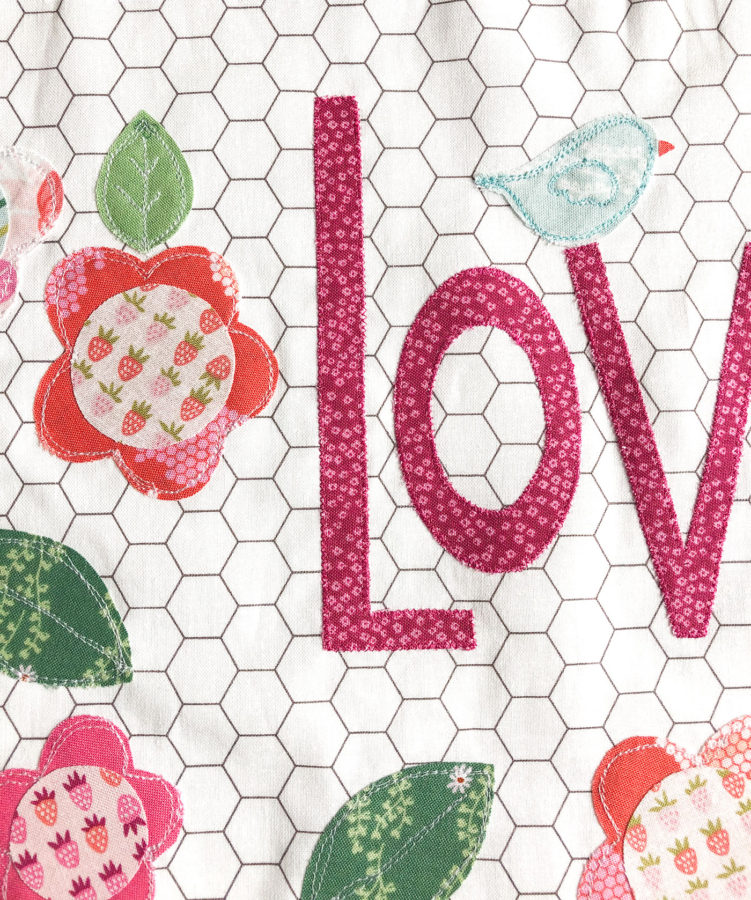
- Sew around each of your applique pieces. I like to use a regular foot and a narrow zigzag stitch to go around my letters. I also use an embroidery foot and a straight stitch to free motion stitch around the flowers and leaves.
- If desired add details to the leaves. *NOTE: I did NOT sew around the centers of the flowers at this stage because I wanted to wait and do that when I quilted the mini quilt to add some dimension and quilting to the flowers.
Add Borders and Finish Mini quilt:
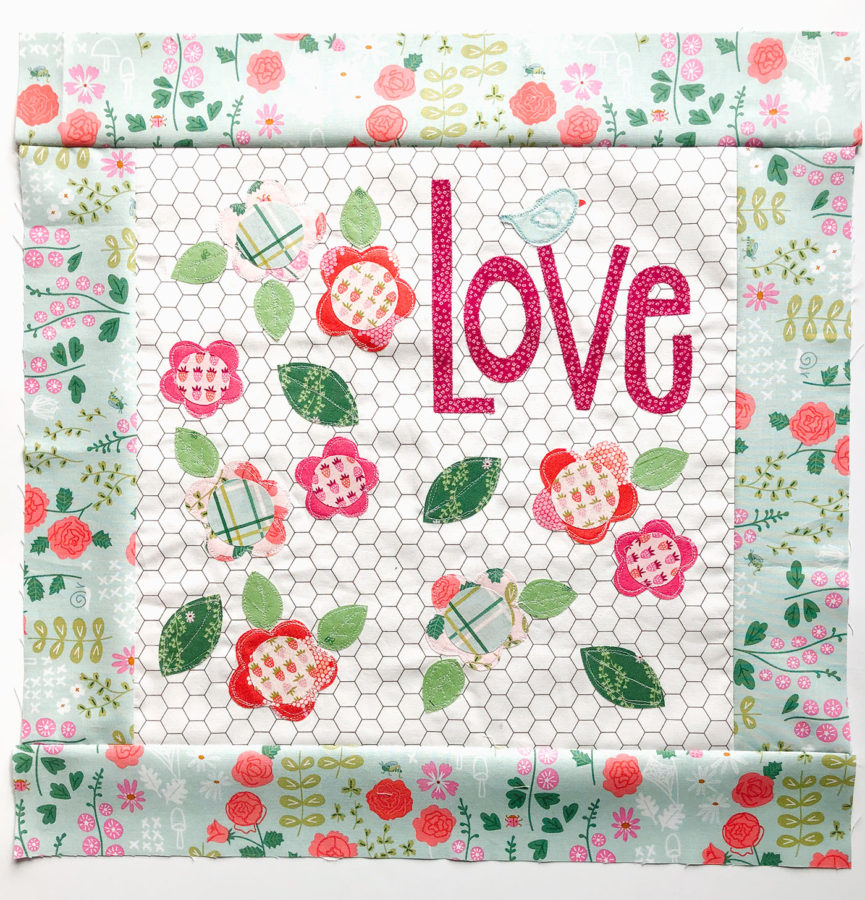
- Add borders to your mini quilt. First, sew on the 3″ X 15″ strips on the two sides of the applique center. Press the border fabric away from the center.
- Next, sew the 3″ X 20″ strips to the top and bottom of the applique center. Again, press the border fabric away from the center fabric.
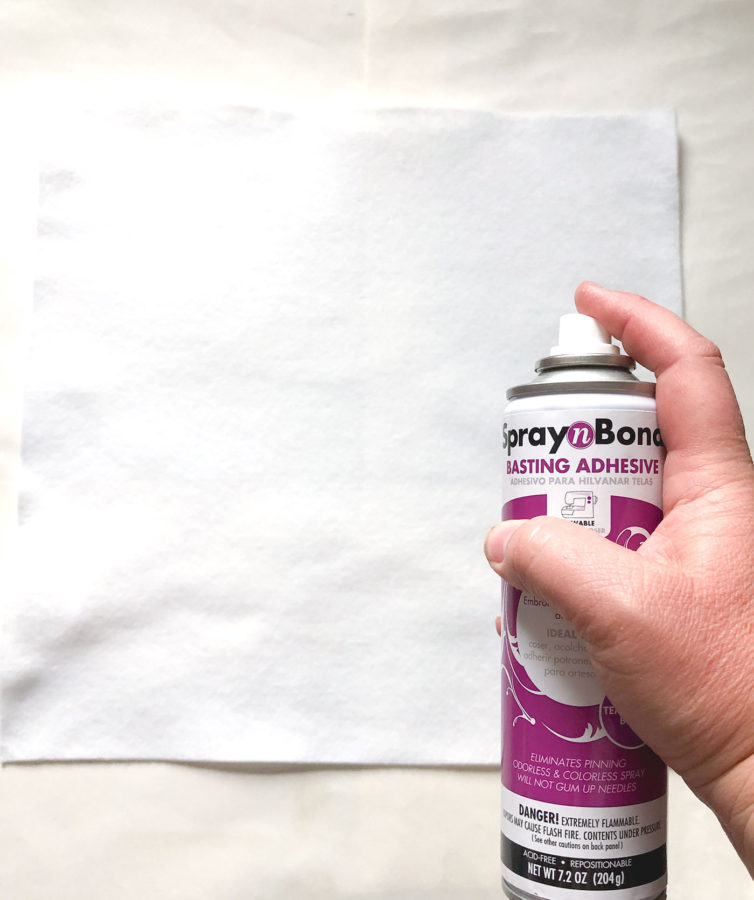
- To create your quilt sandwich, first spread your backing fabric wrong side up on your work surface.
- Protect your area with paper and then lay your fleece down onto the protected surface.
- Spray your fleece with SpraynBond Basting Adhesive.
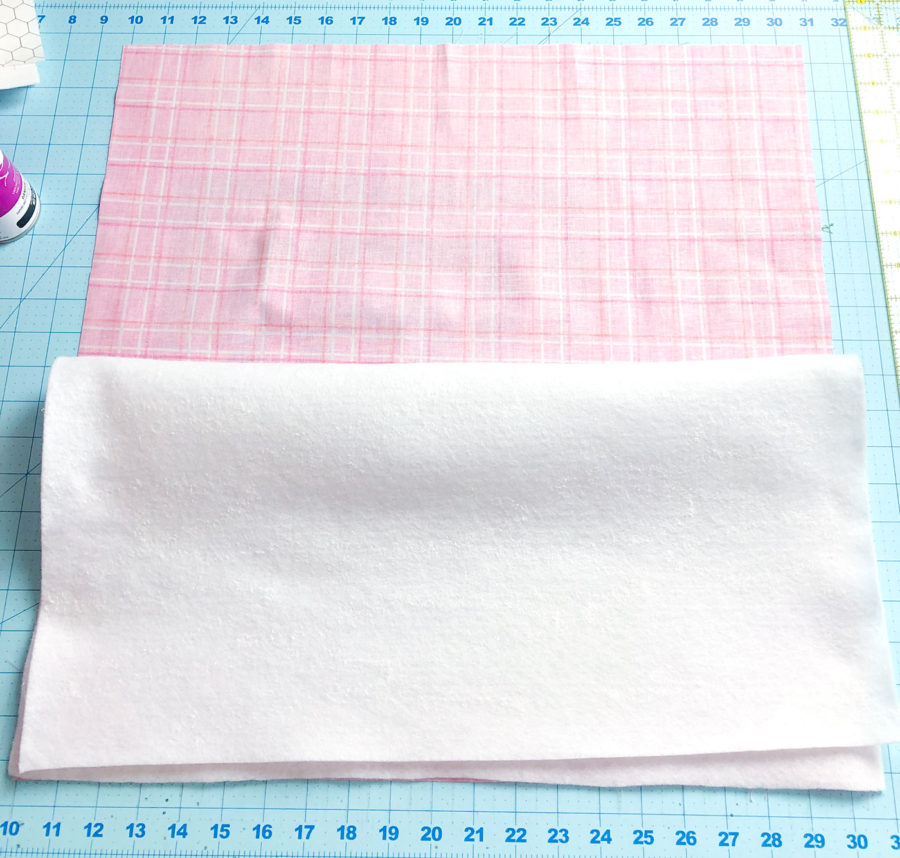
- Carefully fold your fleece in half, with the adhesive on the outside.
- Position the fleece on top of the backing fabric and then roll out, smooth the fabric and fleece as you go.
- Repeat the basting and position steps with the quilt top- *note that the quilt top is smaller than the fleece and backing fabric, this is on purpose to allow for greater ease in positioning the quilt top on the quilt sandwich.
- Quilt your quilt sandwich as desired and then square your mini quilt up to 20″ square.
- Add Binding using your favorite method.
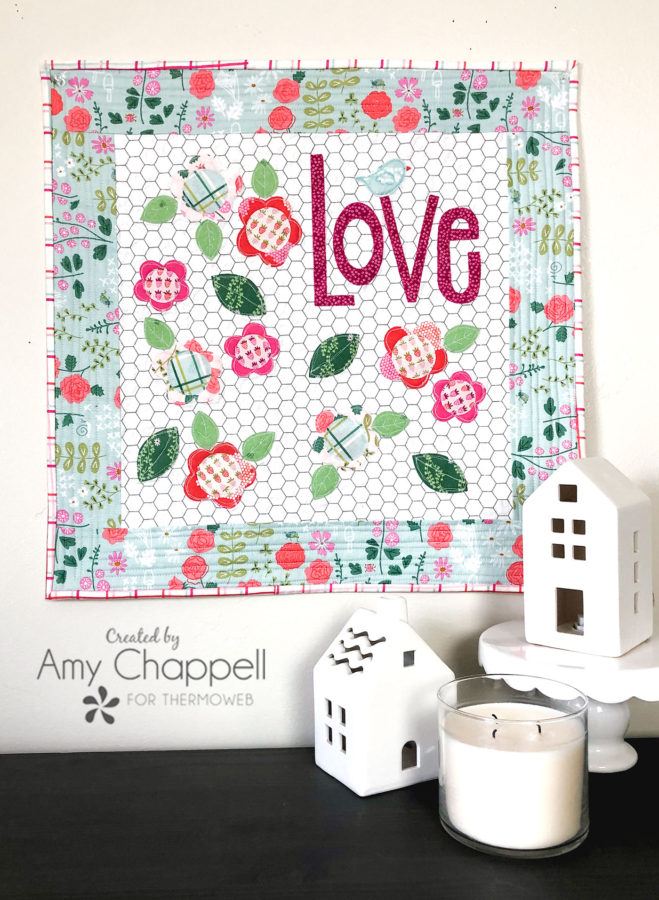
Now you can enjoy your gorgeous new mini quilt!
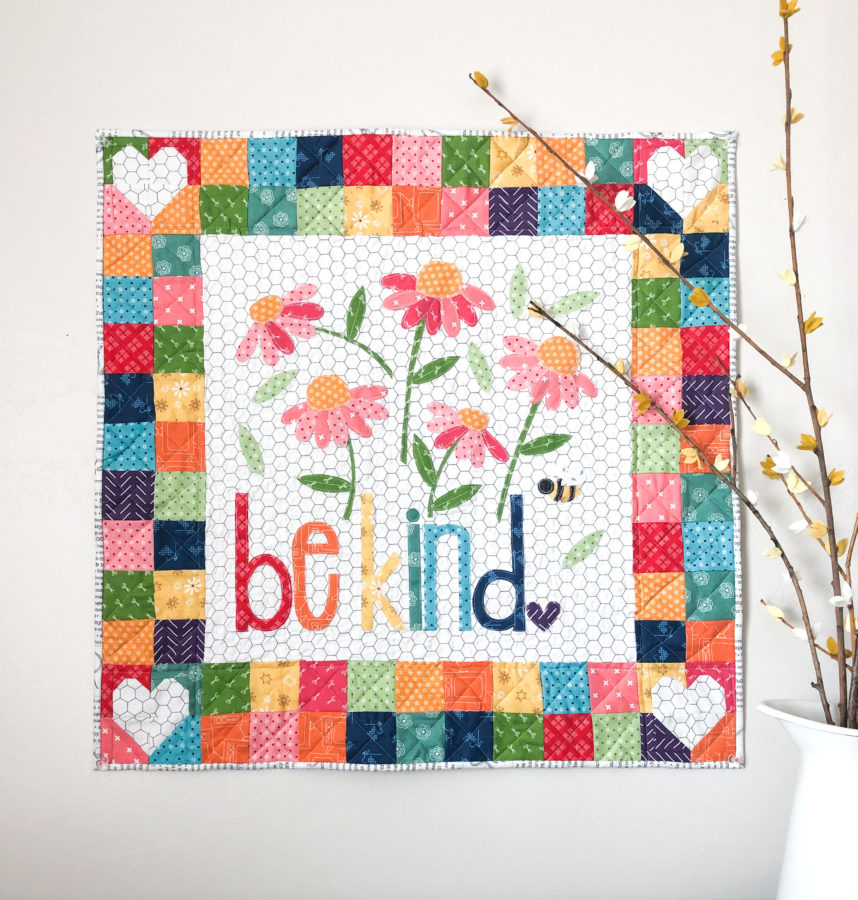
If you are looking for another quilt to add some words/ thoughts to your home- you might love this Be Kind mini quilt also.
And if you are wanting to test out your applique skills, while still making something beautiful and useful, this mini rainbow mug rug is a delightful, quick, and easy make!
What word would you like to put in your home?
Happy sewing friends! xoxo, Amy