


Today let’s be warm and cozy with a sweet pillow cover using the Merry and Bright collection from Art Gallery Fabrics.
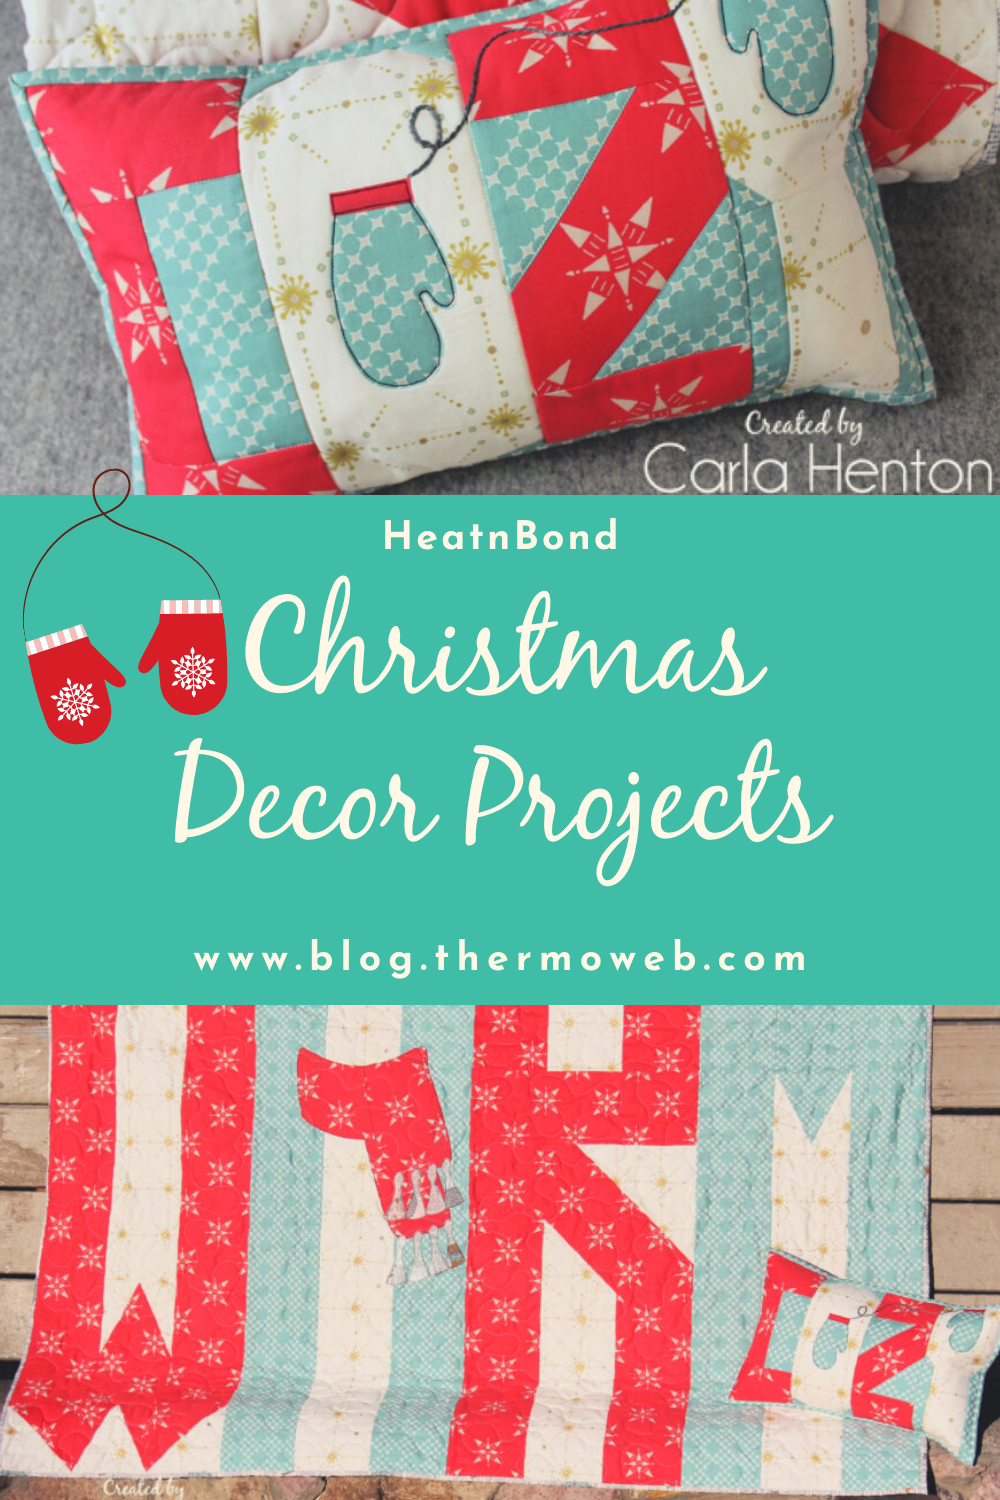

Hi everyone, it’s Carla from Creatin’ in the Sticks and I’m here to share the first of my Warm and Cozy patterns using HeatnBond and Art Gallery Fabrics’ Merry and Bright Collective. This pillow cover is a great compliment to the warm letter quilt I will share soon. Together they would make a great gift exchange gift. HeatnBond makes the letters super fun to make.
![]()
Cozy Letter Pillow Cover with HeatnBond
Finished Size: 10” X 16”
by Carla at Creatin’ in the Sticks
Please read through all instructions before starting.
All seams are stitched at ¼” unless otherwise stated.
Supplies:
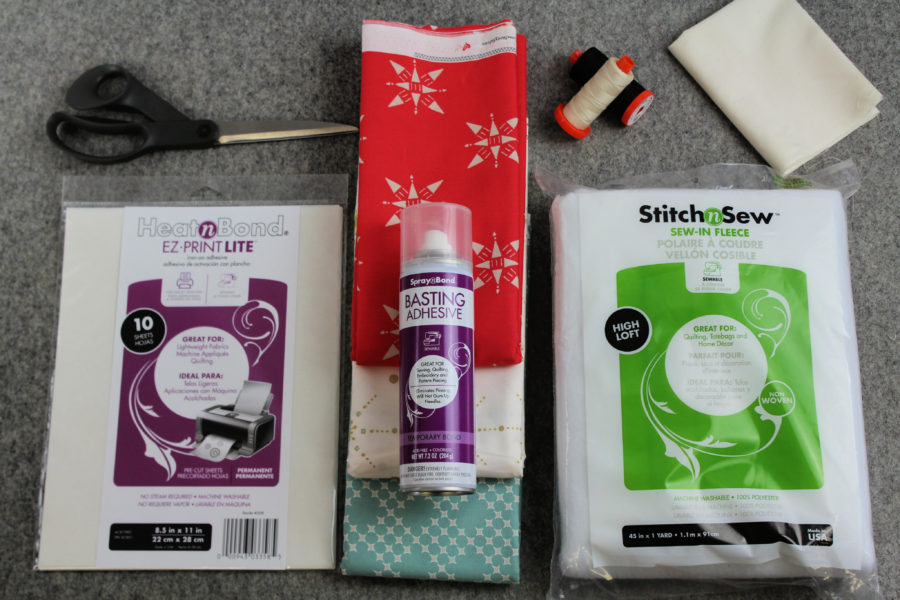
Print the FREE PDF pattern: Cozy Pillow Cover with HeatNBond by Creatin in the Sticks
HeatnBond EZ Print Lite iron-on adhesive – 1 sheet
StitchnSew Sew-In fleece, High Loft – 11” x 17”
Fabric: Art Gallery Fabrics “Merry & Bright” collective by AGF Studio
1/4 yard of white: “From Within Sparkler”
1/4 yard of teal: “Pixie Dust Spark”
1/2 yard of red: “Compassion Ruby”
Other Fabric: muslin or other fabric that will not be seen 11” x 17”
Other Supplies:
Aurifil thread – 50 wt. (#2311 and #2692), inkjet printer, iron surface, iron – I love my Oliso Pro, 1 pillow form sized 10” x 16”, and basic sewing supplies. Optional: Aurifil floss #5004 for the mitten string.
Fabric cutting instructions:
(it is helpful to label pieces)
From the white cotton fabric:
1 rectangle 4 ½” x 10 ½” for the letter O
1 rectangle 4 ½” x 5 ½” for the letter Y
1 rectangle 3” x 5 ½” for the letter Y
Cut from the teal cotton fabric:
2 strips 2 ¼” x width of fabric for the binding (cut first)
1 rectangle 2 ½” x 5 ½” for the letter C
4 squares 1 ½” for the letter O
2 squares 3 1/2” for the letter Z
2 squares 1 ¼” for the letter Y
2 rectangles 1 ¼” x 5 ½” for the letter Y
Mitten appliques (instructions below)
From the red cotton fabric:
2 squares 10 ½” x 10 ½” for the pillow cover back
2 rectangles 3” x 4 ½” for the letter C
1 rectangle 2 ½” x 5 ½” for the letter C
2 rectangles 3” x 4 ½” for the letter Z
1 rectangle 4 ½” x 5 ½” for the letter Z
Mitten cuff appliques (instructions below)
Cozy Pillow Cover Instructions
Step 1 – 4:
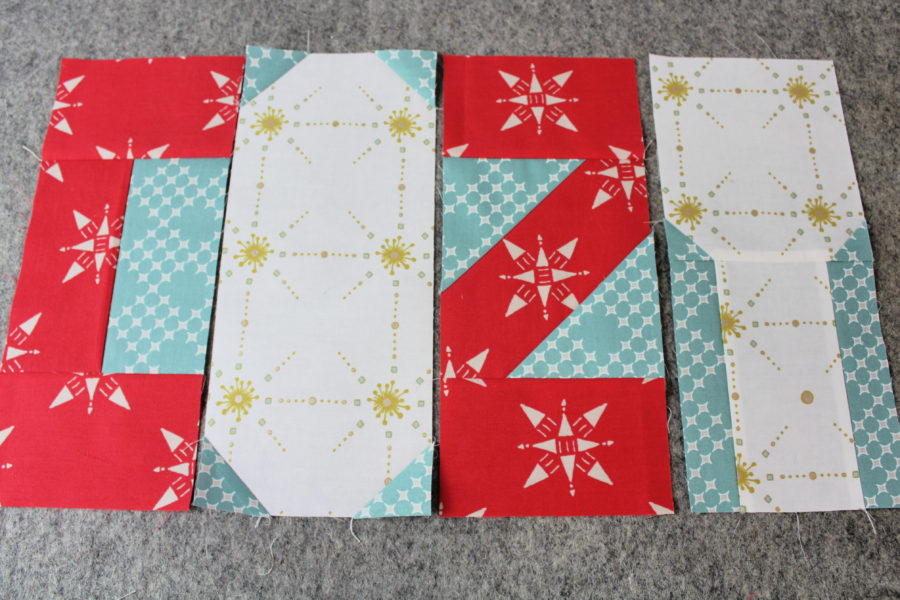
Construct all the pieced letter blocks following the downloaded pattern.
Step 5:
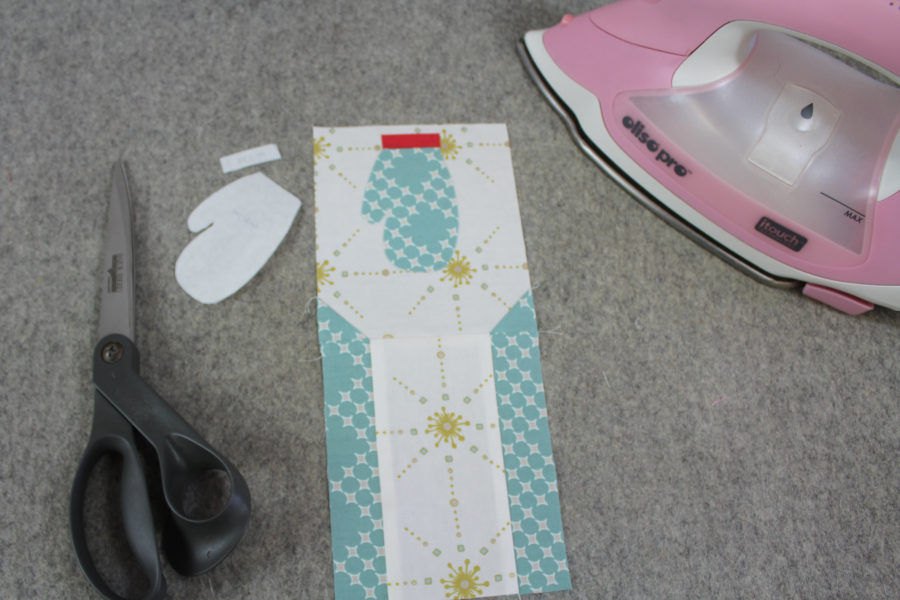
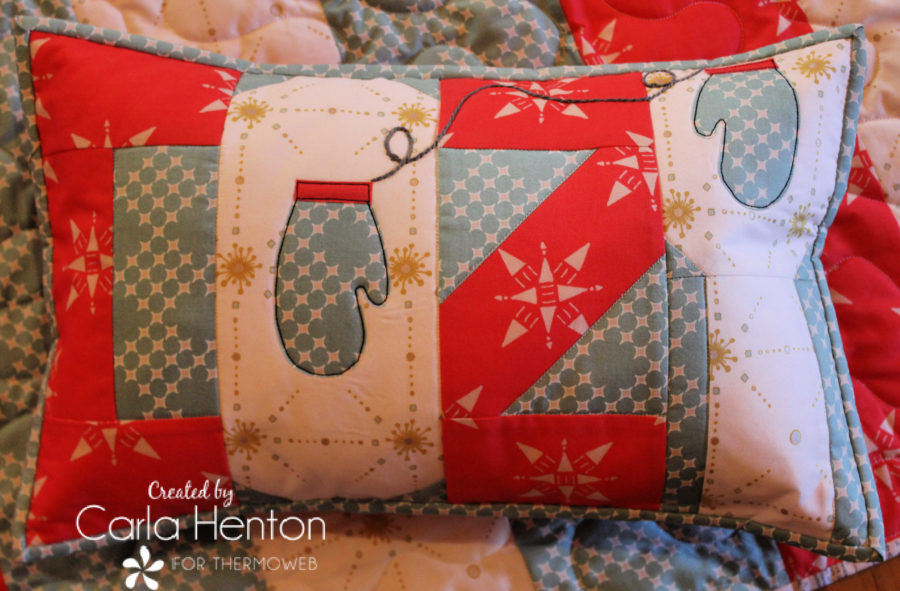
HeatnBond Lite Mittens:
Applique the mittens onto quilt blocks O and Y quilt blocks. First, print the templates (already reversed for you) with a HeatnBond EZ Print Lite sheet following the package instructions. The applique pieces are on the last page of the pattern. Fuse the HeatnBond EZ Print to the wrong side of the teal and red fabrics.

Next, cut out the mitten and cuff pieces on the dark lines, peel off the backing paper, place the pieces on the letter blocks using the key as a guide, and bond the pieces following the package instructions. NOTE: leave space at the top of the Y block for ¼” seam allowance.
Step 6:
Construct and quilt the pillow top
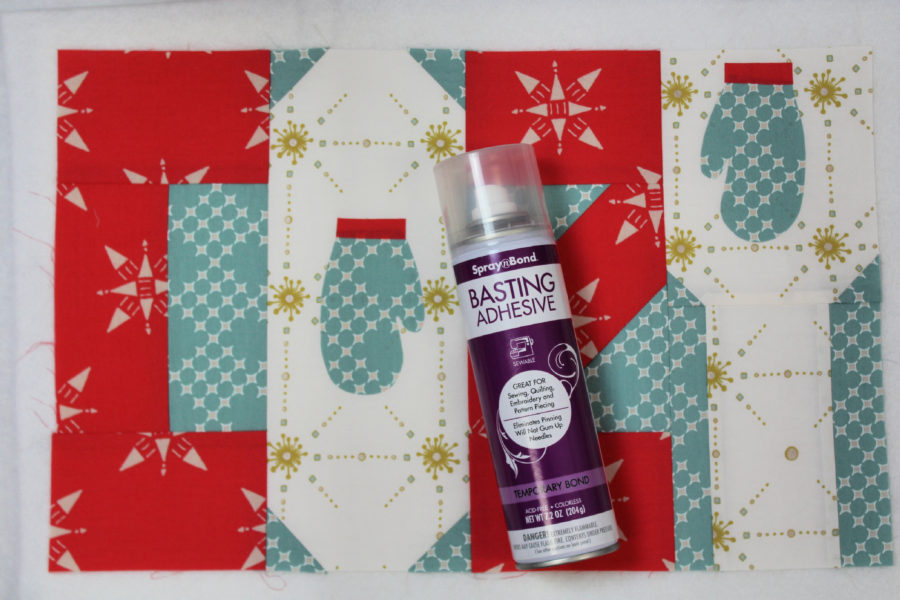
Stitch the letter quilt blocks right sides together to form the word, “cozy”, with ¼” seams. The pillow top should measure 10 ½” x 16 ½”. Using SpraynBond Basting Adhesive, sandwich the StitchnSew fleece between the backing 11” x 17” muslin and the “cozy” pillow top.
The first step is to protect the work surface then lay the muslin right side down. Place the fleece on top of the muslin. Fold half of the fleece over and spray the back with the basting spray.
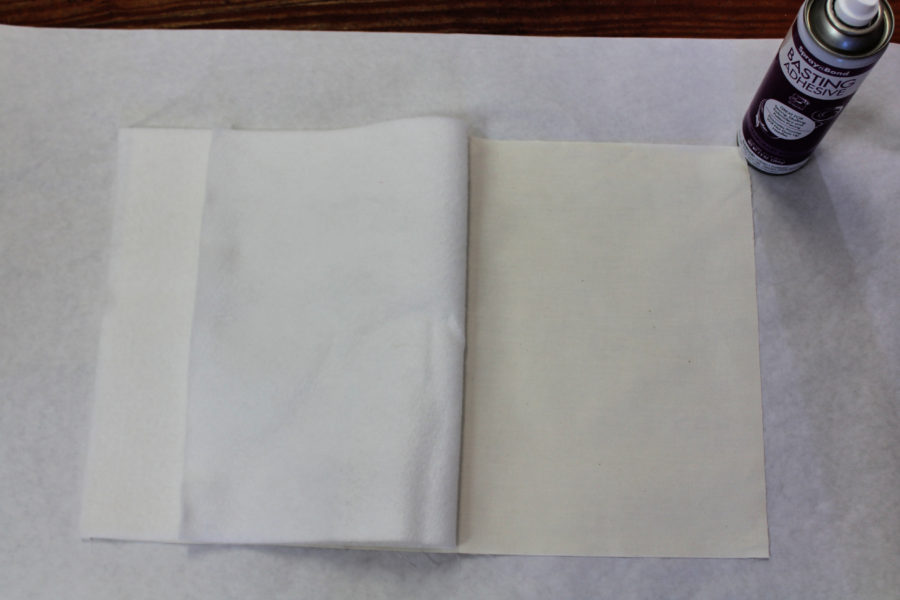
Lay the fleece back on the fabric and smooth the fleece with hands. Next, fold the other side over, spray and smooth back over the fabric. Center the pillow top, right side up, on top of the fleece. Fold one side over and spray the wrong side with SpaynBond Basting Adhesive. Fold back over the fleece and smooth. Repeat the process on the other half of the pillow top. The next step is to quilt the pillow top by stitching around the applique pieces with a straight stitch 2 or 3 times with Aurifil 50 wt. thread.
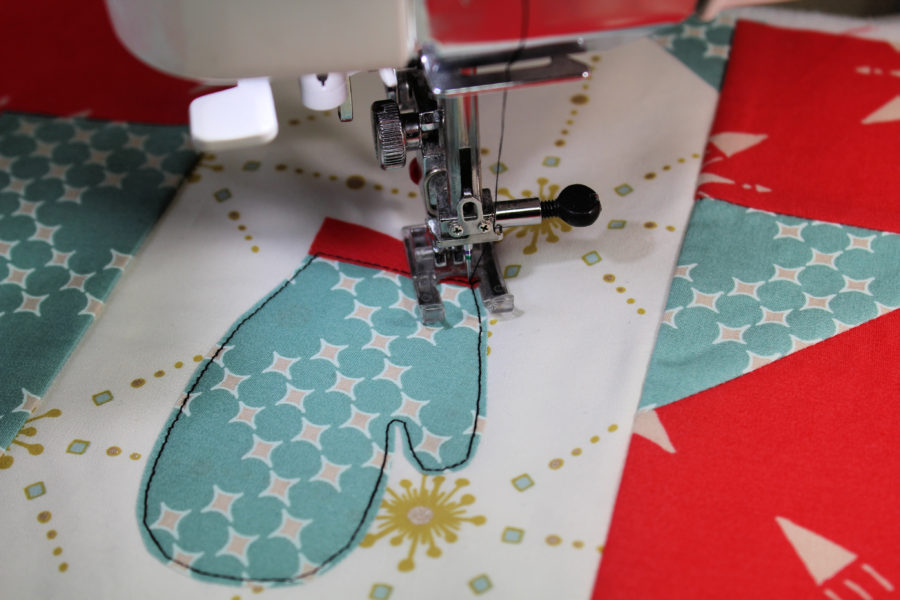
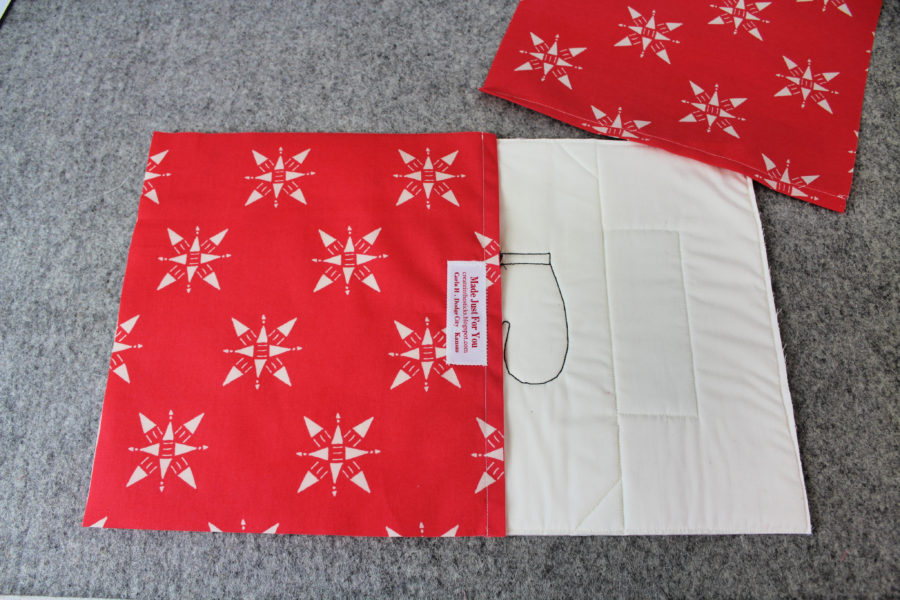
Quilt the rest of the “cozy” top as desired. Machine stitch or embroider the mitten string as desired.
![]()
Use the picture as a guide to draw the mitten string. Finish the pillow top by trimming the excess fleece and backing even with the “cozy” quilt pillow top.
Step 7:
Finish the Cozy Pillow Cover.
Hem one of the ends of both 10 ½” x 10 ½” red pillow backing pieces by turning under ½” and pressing and then turn under again, press, and stitch close to the edge. The next step is to lay one of the hemmed pieces right side up on the back of the pillow top with the hem in the center.
Overlap the other piece over the first and pin. Bast 1/8” from the edge all around the pillow cover. Apply the binding using your favorite method.
Stay cozy and come back next week for the “Warm” quilt pattern and tutorial with these fun fabrics and HeatnBond.
Carla

Don’t miss our Black Friday Sale running all this week through next Monday! It’s the perfect time to stock up and save on all your favorite HEatnBond, SpraynBond, Fabric Fuse, and much more! CLICK the image to shop today!
[…] scarf gives this quilt a whimsy effect. If you missed my “cozy” pillow cover, click HERE to download the free […]