


Hello Crafty Friends!!
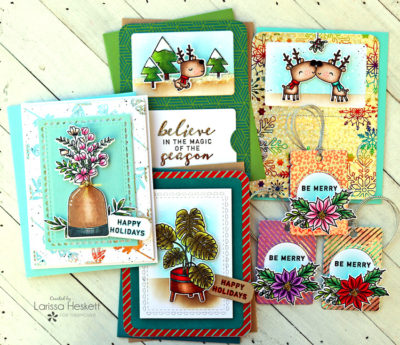
Larissa here today as part of the AMAZING Reverse Confetti Collab with the final post projects!! Today I have SEVERAL Projects showing you some different ways to incorporate the Sparkling Shine of Deco Foil and the Stunning Texture of Deco Foil Flock into your Holiday Projects!! Let’s get started!!
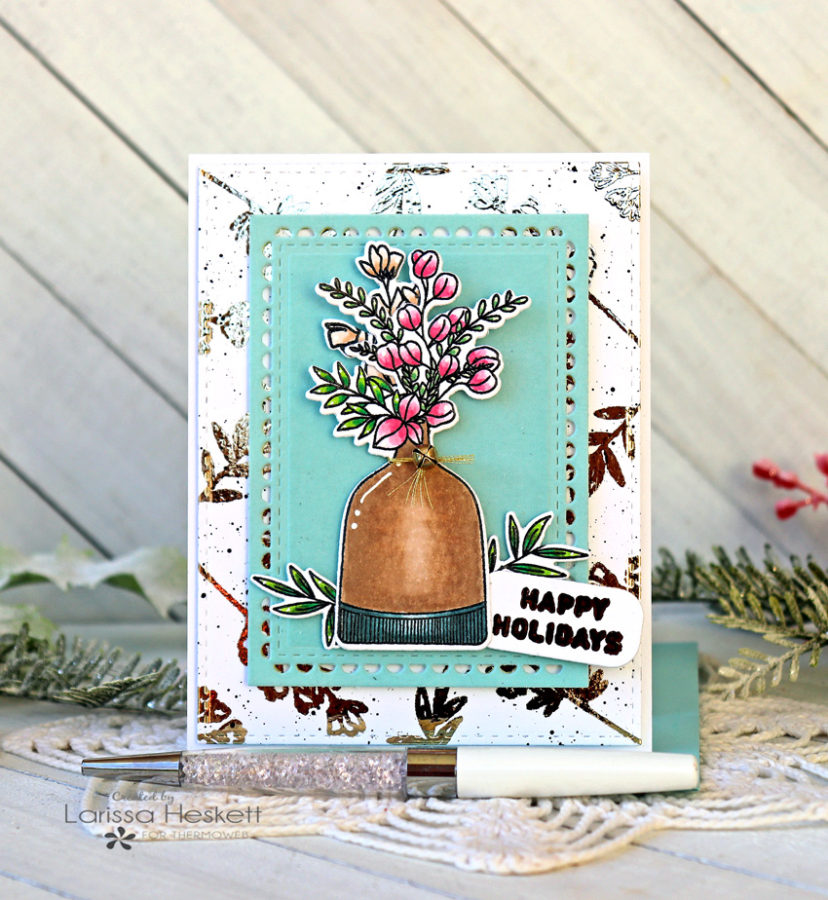
My First Project is a Holiday Card!! I LOVE the Sweet Images from the NEW Reverse Confetti Botanical Stamp Set and I wanted to create a Hobo Chic Holiday Card using the Set!! Here’s how I created it!!
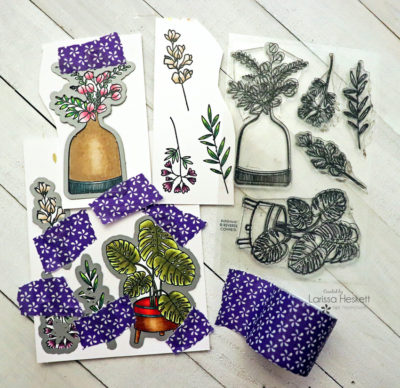
I Started by Stamping and Embossing the Images and then I colored them with Copic Markers!! I then took to coordinating Dies and Die Cut them out using some Therm O Web Purple Tape to keep them in place as ran them through my Machine!!
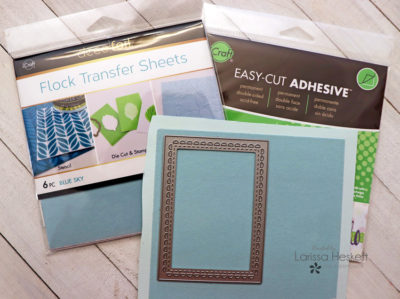
I wanted to Die Cut the Frame from some of the Blue Sky Deco Foil Flock Sheets!! I adhered the Blue Sky Deco Foil Flock Sheets to some Light Blue Cardstock using some Easy Cut Adhesive and ran it through my Machine to burnish it into the Cardstock!! Then I Die Cut the Frame!!
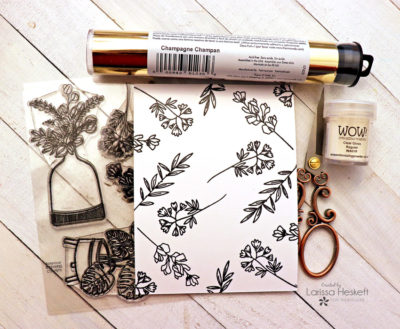
Next, I Stamped and Embossed the Images onto an A2 Card Panel using Versa Fine Black Onyx Ink and Embossed with WoW Clear Gloss Embossing Powder!! Then I cut a Piece of Champagne Deco Foil large enough to cover the Card Panel and ran it through my Laminating Machine!!
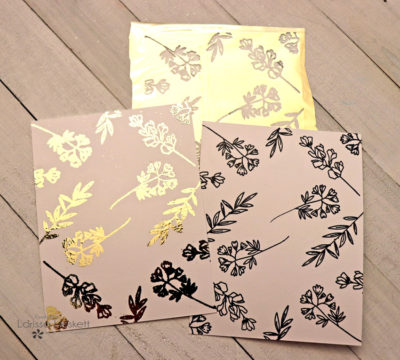
SWOON!! I LOVE the results!! Here’s the side by side of the Foiled and Stamped and Embossed Card Panels!!
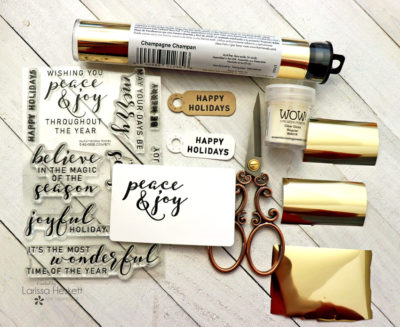
I Stamped and Embossed the Sentiments onto the RC Three Tags Die and the Gift Card Holder Cover Panel using Versa Fine Black Onyx Ink and WoW Clear Gloss Embossing Powder!! Then I Cut a Piece of Champagne Deco Foil Large Enough to cover the Foiled Sentiments and ran them through my Laminating Machine!!
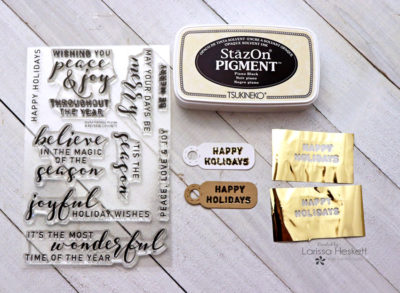
I wanted the Foiled Sentiment to be an Outline so I Stamped the Sentiment again over the Foiled Sentiment using some Staz On Pigment Ink and I LOVE the results!!
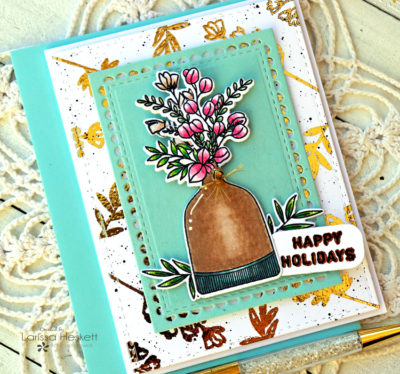
I Adhered the Images to the Deco Foiled Frame using some Gina K Designs Foam Squares!! Then I adhered the Frame to the Stamped and Foiled Card Panel using some more Foam Squares!! Then I adhered it to the Cardbase!!
I LOVE the way it turned out and that it’s not a Traditional Holiday Card Design or Color Palette!! What do you think!!?? Is this a Card you’d ENJOY receiving for the Holidays!!??
Products Used:
Therm O Web Products:
Deco Foil in Champagne
Deco Foil Flock Sheets in Blue Sky
Deco Foil Toner Sheets
Easy-Cut Adhesive Sheets
Ultra Bond Adhesive
Gina K. Designs Foam Squares
Zotz Bing Adhesive Dots
Other Products:
Reverse Confetti Botanical Stamp Set
Reverse Confetti Joyful Holiday Wishes Stamp Set
Reverse Confetti Gift Card Holder Panel Die
Reverse Confetti Three Tags Dies
Reverse Confetti Lacy Scallop Frame Dies
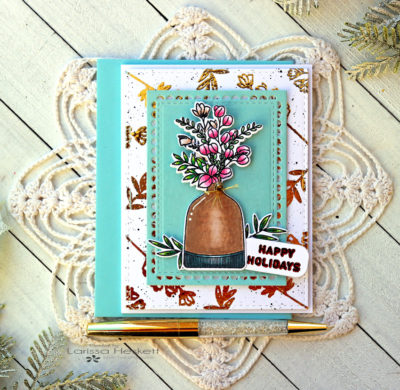
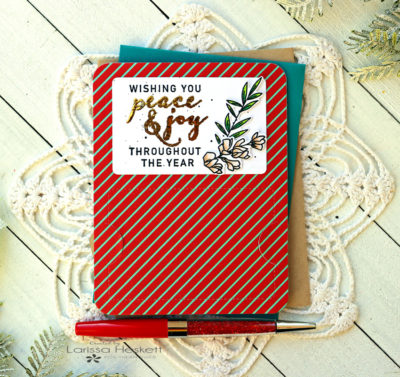
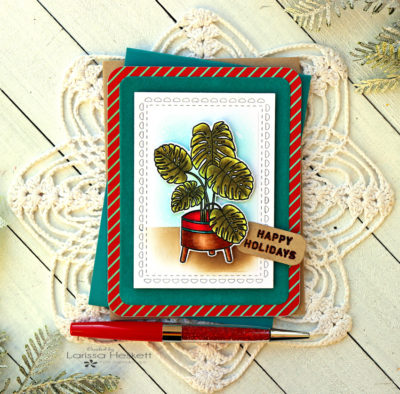
For my Second Project, I’ve created a Gift Card Holder Card using the NEW RC Gift Card Holder Cover Panel Die along with some Images from the NEW Botanical Stamp Set!!
I Started by Stamping and Embossing the Images and then I colored them with Copic Markers!! I then took to coordinating Dies and Die Cut them out using some Therm O Web Purple Tape to keep them in place as ran them through my Machine!!
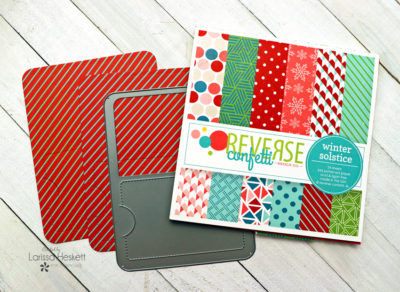
Then I Cut 2 of the Gift Card Holder Die Cuts from some RC Winter Solstice Patterned Paper and glued them together back to back to create a double-sided Gift Card Holder Panel using some Ultra Bond Adhesive!!
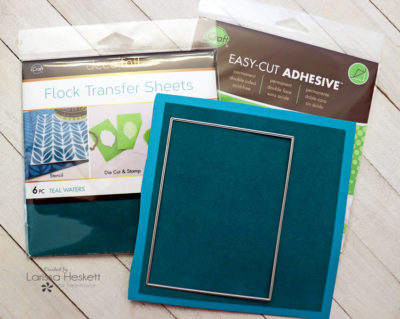
I wanted to Die Cut the Frame from some of the Teal Waters Deco Foil Flock Sheets!! I adhered the Teal Waters Deco Foil Flock Sheets to some Teal Cardstock using some Easy Cut Adhesive and ran it through my Machine to burnish it into the Cardstock!! Then I Die Cut the Frame!!
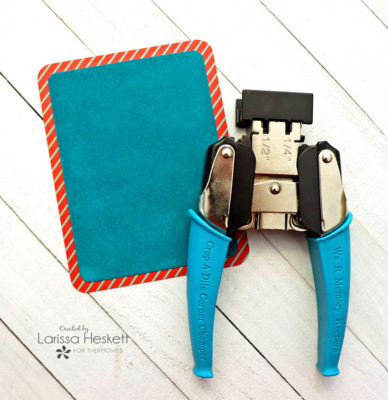
I wanted to round the edges of the Flocked Frame to match the Gift Card Holder so I used my Crop A Dile Corner Chomper to Cut the Edges of the Frame!!
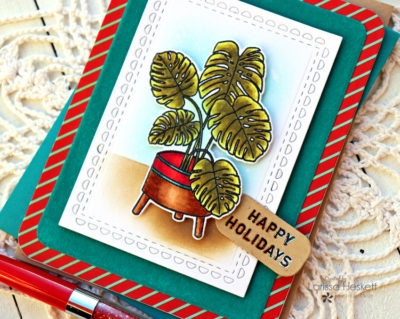
I adhered the Flocked Panel onto the Gift Card Holder and then adhered the Image with some Foam Squares and adhered the Foiled and Stamped Tag!!
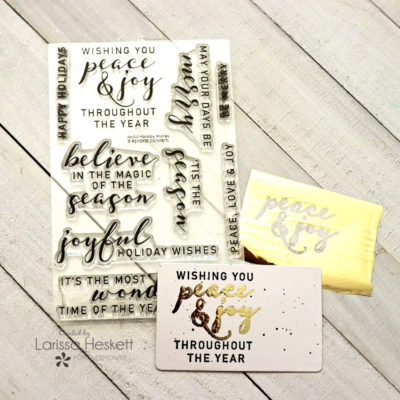
I Stamped and Embossed the rest of the sentiment after I Foiled the Peace & Joy and then I added some Black Soot Distress Paint Splatters!!
I adhered some of the other Images from the Set beside the Stamped and Foiled Sentiment and then adhered it all to the Gift Card Holder!!
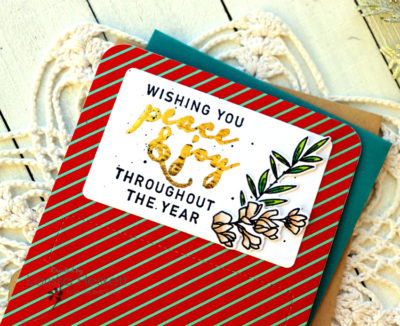
Here’s a close up look at the Design!! I LOVE the way it turned out and look forward to adding a Gift Card to this for the Holidays!! Such a FUN way to present a Gift Card don’t you think!!??
Here’s another look at the front of the Gift Card Holder!!
Products Used:
Therm O Web Products:
Deco Foil in Champagne
Deco Foil Flock Sheets in Teal Waters
Deco Foil Toner Sheets
Easy-Cut Adhesive Sheets
Ultra Bond Adhesive
Gina K. Designs Foam Squares
Zotz Bing Adhesive Dots
Other Products:
Reverse Confetti Botanical Stamp Set
Reverse Confetti Joyful Holiday Wishes Stamp Set
Reverse Confetti Gift Card Holder Panel Die
Reverse Confetti Three Tags Dies
Reverse Confetti Lacy Scallop Frame Dies
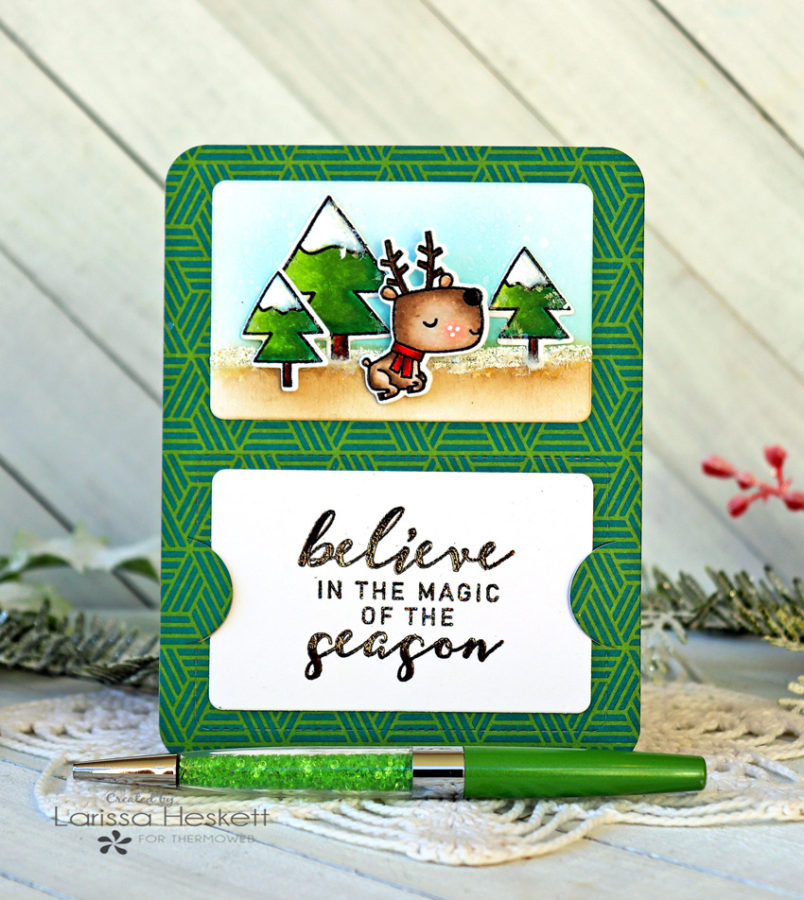
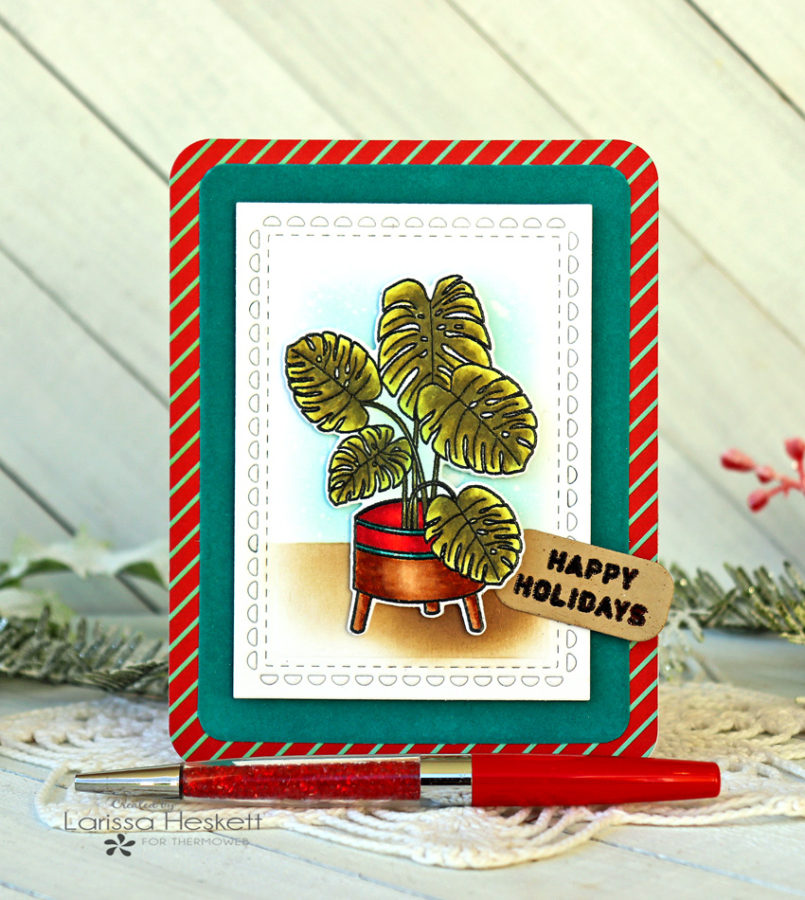
For my Third Project, I’ve created another Gift Card Holder!! This time using the SWEET Images from the NEW RC Deerly Stamp Set!!
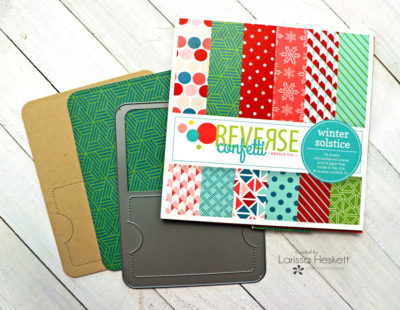
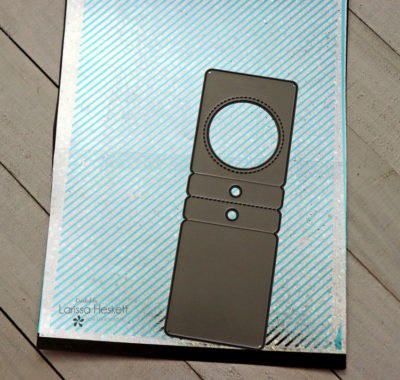
I LOVE the versatility of this Die!! For this one, I’m just decorating the front of the Gift Card Holder!! I Die Cut one of the Gift Card Holders from some Patterned Paper from the RC Winter Solstice Paper Pad and another from some Kraft Cardstock!! Then I glued them together using some Ultra Bond Adhesive!!
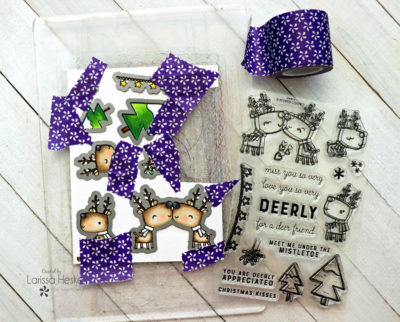
I Stamped and Embossed the Images from the NEW RC Deerly Stamp Set and then Die Cut them out using the coordinating Dies along with some Purple Tape to keep them in place as I Die Cut them out!!
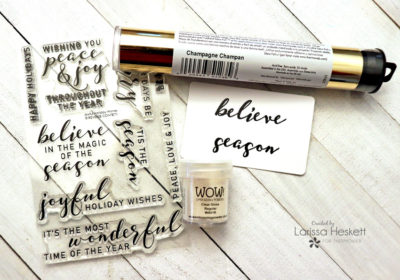
I knew I wanted to Foil the Words Believe and Season!! So I Stamped and Embossed the Sentiment masking off part of the sentiment with some Purple Tape and Stamping with Versa Fine Black Onyx Ink and Embossing with WoW Clear Gloss Embossing Powder!! Then I foiled it with some Champagne Deco Foil by running it through my Laminating Machine!!
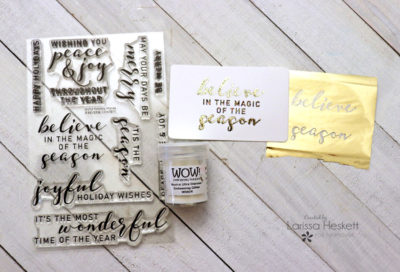
SWOON!! Then I Stamped and Embossed the rest of the sentiment using Versa Fine Black Onyx Ink and WoW Neutral Ultra Shimmer Embossing Powder!!
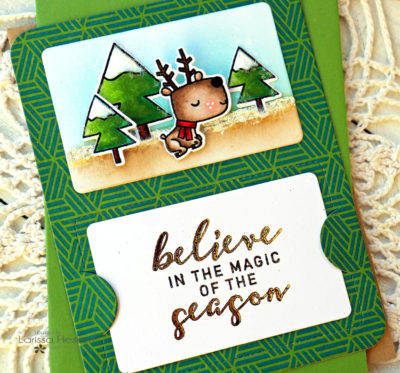
I adhered everything together to create my Scene Panel and then I placed the Sentiment Into the Gift Holder and I’ll place my Gift Card underneath so that the recipient will see it first!! Such a FUN Gift Card Holder to give this Holiday Season!!

Here’s another look at the FUN Design!! I LOVE how it turned out!!
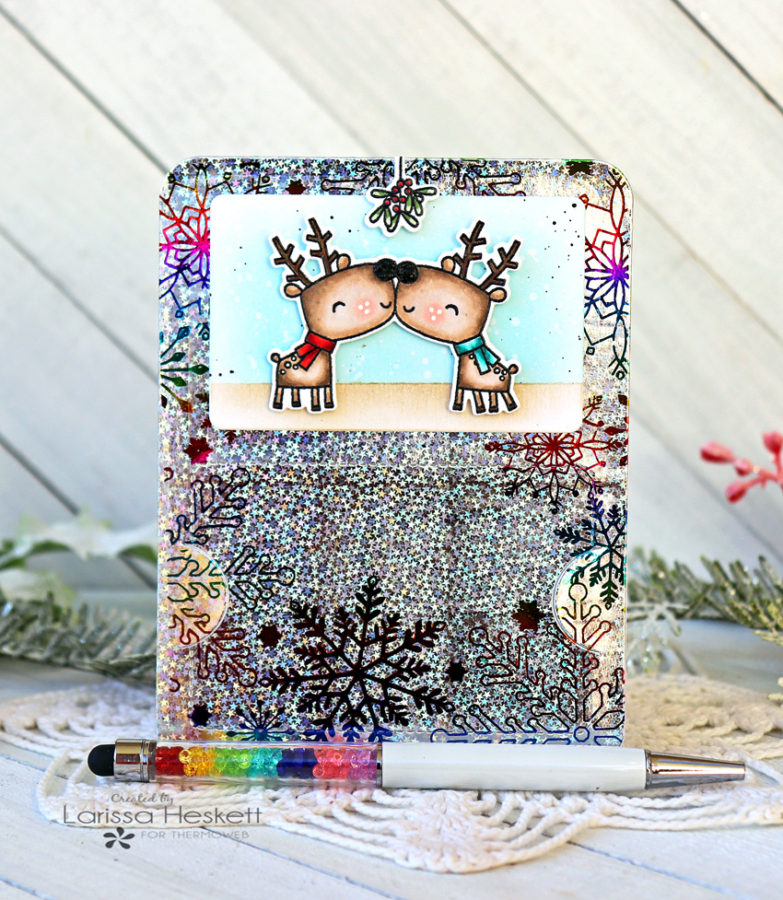
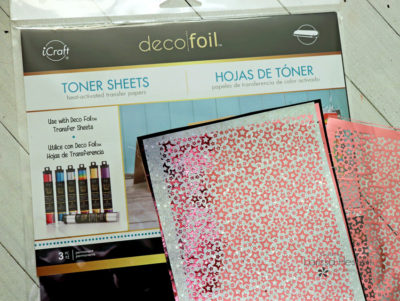
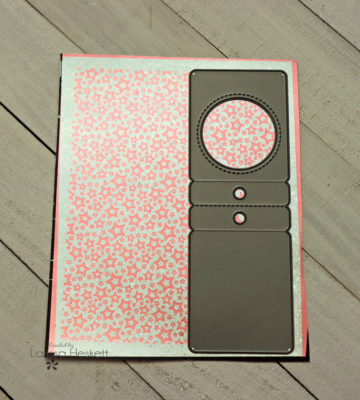
My Next Project is another Gift Card Holder only this time I wanted to show how you can create a Scene using a Negative Foil Piece!! This is a Negative from the NEW Unity Toner Card Fronts in Snow Many Flakes!! My new FAVORITE!!
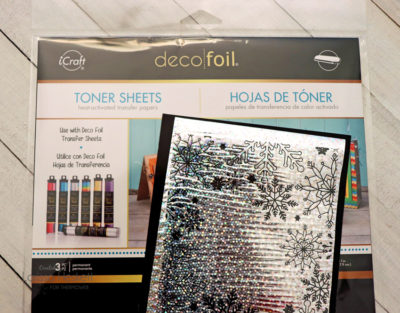
I placed the Negative Foil Piece onto a Piece of Deco Foil Toner Sheets and ran it through my Laminating Machine!!
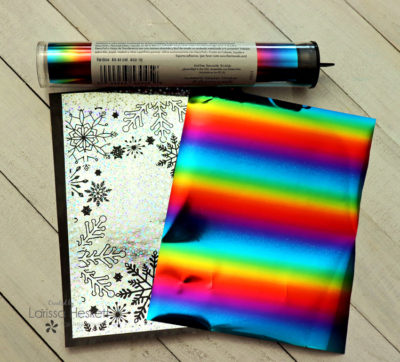
Then I Cut a Piece of Rainbow Deco Foil large enough to cover the Panel and placed it over the top of the Foiled Toner Sheet and ran it through the Laminating Machine again!!
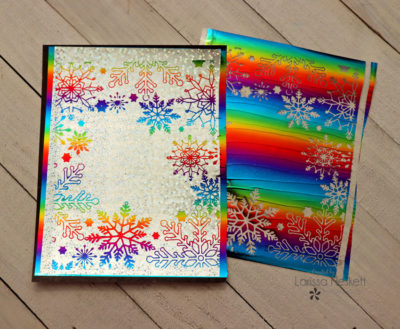
SWOON!! Rainbow Snowflakes anyone!!?? (TIP: SAVE that Negative Foil and I’ll show you how to use it for another Card)
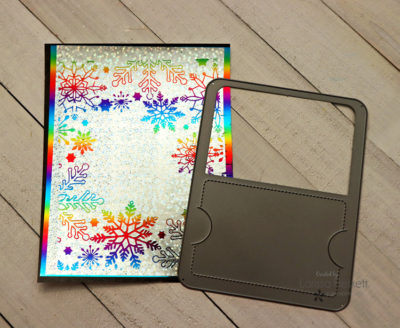
Then I used the NEW RC Gift Card Holder Die to De Cut the Gift Card Holder from the Rainbow Foiled Sheet!! I also Die Cut a White Cardstock Gift Card Holder and then adhered them together using some Ultra Bond Adhesive!!
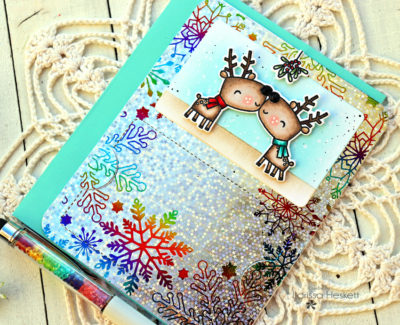
I adhered the Panel and created my Scene by adhering the Images with some Foam Tape!! I just LOVE how FUN this is and how it makes me SMILE!!
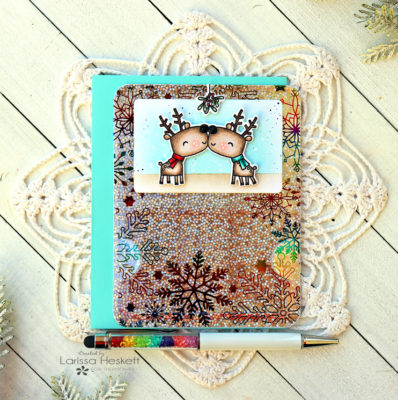
Here it is finished!! I can’t wait to see the recipients SMILE when they receive this for the Holidays!! Isn’t it CUTE!!
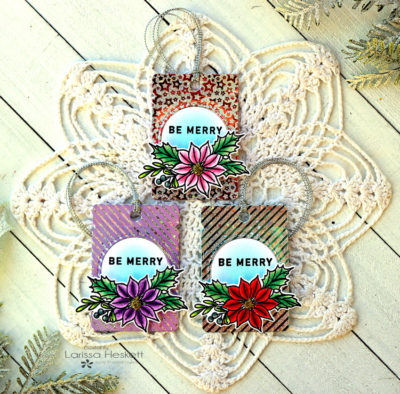
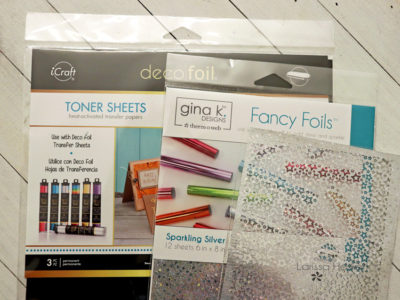
My Last Projects are these adorable little Gift Tags!! I LOVE that these can be Die Cut from so many different Products!! My FAVORITE is these Multi Foiled Sheets!! The possibilities are ENDLESS!!
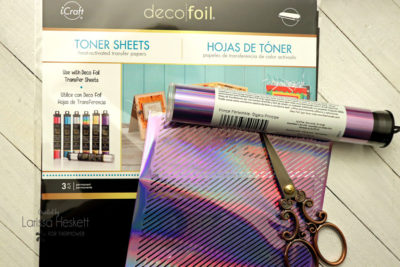
I Started by placing this NEW Prince Periwinkle Deco Foil negative onto a piece of Deco Foil Toner Sheet and then ran it through my Laminating Machine!!

Once Foiled, I removed the Film and then placed a piece of Gina K Designs Sparkling Silver Fancy Foil over the Sheet and ran it through the Laminating Machine again!!
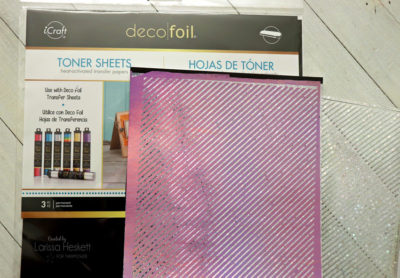
SWOON!! Just look at these STUNNING results!! You’ll be able to Die Cut several images from this one Sheet!!
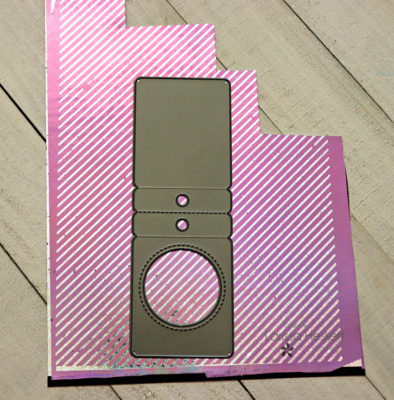
Then I Die Cut the Fold Over Window Tag Die from the Multi Foiled Toner Sheet!!
Next, I again used another Negative Foil piece from my Stash!! This Negative was Created by Foiling the Gina K Designs Foil-Mates Background in Stars and Stripes using the Fancy Foils in Sparkling Silver!!
I placed the Negative onto a Sheet of Deco Foil Toner Sheets and ran it through my Laminating Machine!! Then I Foiled again this time using a Piece of Bubblegum Fancy Foil and running it through the Laminating Machine again!!
SWOON!! How FUN is this Design and I LOVE these Colors for the Holidays!! Then I Die Cut the Fold Over Window Tag Die from the Multi Foiled Toner Sheet!!
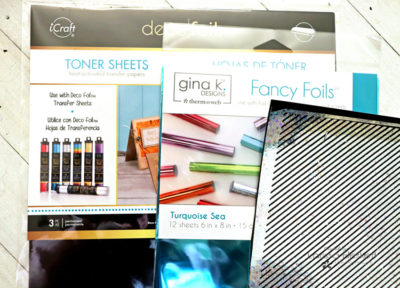
Again I’m using a Negative Piece of Foil from my Stash and adhering it to a Piece of Deco Foil Toner Sheets!! Then ran it through my Laminating Machine!! I then cut a piece of Gina K. Designs Turquoise Sea Fancy Foil large enough to cover the Panel and then placed it over the Toner Sheet and ran it through the Laminating Machine again!!
Then I Die Cut the Fold Over Window Tag Die from the Multi Foiled Toner Sheet!!
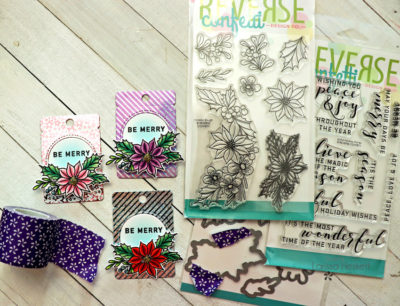
Next, I Stamped and Embossed the Poinsettia Images from the NEW RC Holiday Bough Stamp Set and colored them in with Copic Markers to coordinate with the Deco Foiled Tags!! I Stamped and Embossed the Be Merry Sentiment from the NEW RC Joyful Holiday Wishes Stamp Set!! Then I Die Cut the Images using the coordinating Dies and some Purple Tape to hold them in place as I Die Cut them out!!
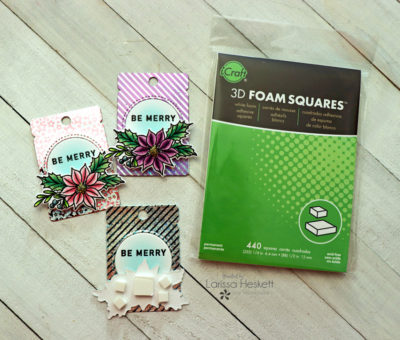
I adhered the Poinsettia Images to the Folded Gift Tags using some 3D Foam Squares!!

I added some Silver Metallic Twine and these are READY to add to some SWEET Packages this Holiday Season!!
Products Used:
Therm O Web Products:
Deco Foil in Prince Periwinkle, Rainbow and Champagne
Gina K. Designs Fancy Foil in Bubblegum & & Turquoise Sea & Sparkling Sliver
Deco Foil Flock Sheets in Blue Sky
Deco Foil Toner Sheets
Easy-Cut Adhesive Sheets
Ultra Bond Adhesive
Gina K. Designs Foam Squares
Zotz Bing Adhesive Dots
Other Products:
Reverse Confetti Holiday Bough Stamp Set
Reverse Confetti Joyful Holiday Wishes Stamp Set
Reverse Confetti Deerly Stamp Set
Reverse Confetti Fold Over Window Tag Die
Reverse Confetti Gift Card Holder Panel Die
Silver Twine
THANKS SO MUCH for stopping by today!! I hope I’ve INSPIRED you with some Ideas on ways to add some Sparkle and Texture to your Holiday Projects!! If you’ve missed out in the AMAZING Reverse Confetti Week I hope you’ll go back and revisit the posts to see ALL of the Inspiration!!
If you create something please share with us on Social Media using the hashtags #decofoil #thermoweb #ginakdesigns as we LOVE to see what you create!!
THANKS for your SWEET comments too!! They mean a lot!!
I hope you have a Fabulous Week!!
Larissa Heskett

What better way to celebrate the upcoming holidays than with a Gift Card to Shop with US and our friends at Reverse Confetti! Follow the steps to enter yourself to win a $50 Gift Card to Shop with ThermOWeb and Reverse Confetti! Now that’s a good thing! And be sure to join us all week for more ideas and visit the Reverse Confetti Blog as well!
4 Comments on Holiday Gift Giving with Reverse Confetti and Deco Foil
1Pingbacks & Trackbacks on Holiday Gift Giving with Reverse Confetti and Deco Foil
-
[…] 1st Card I wanted to use a Negative from a Card I made Previously!! You can find out more HERE!! I LOVE being able to use the Negative Foil leftover after foiling the Unity Toner Card Fronts!! […]
Andre M.
November 16, 2020 at 6:24 pm (3 years ago)Lovely marriage of products from these two brands to create these fun projects. Thank you for sharing this lovely inspiration!
tsurutadesigns1
November 16, 2020 at 7:36 pm (3 years ago)Larissa, these are amazing!!!!
Denise Bryant
November 16, 2020 at 8:27 pm (3 years ago)Awesome creations! I’m in love with those cute deer ad the pretty poinsettias! The foils are available in such beautiful colors too! Love the effect they add!