


Happy Anniversary Card by Designer Audrey Pettit
Supplies:
Therm O Web Memory Tape Runner XL
Therm O Web 3D Adhesive Foam Squares
Therm O Web iCraft Deco Foil™ Transfer Sheets- Gold
Therm O Web iCraft Deco Foil™ Transfer Adhesive
Cardstock: Ranger, Stampin’Up
Patterned Paper: BasicGrey
Designer Vellum: Crate Paper
Dies: My Creative Time
Stamps: Stamper’s Anonymous, Prickley Pear Rubber Stamps
Ink: Ranger, Tsukineko
Trim: Stampin’Up
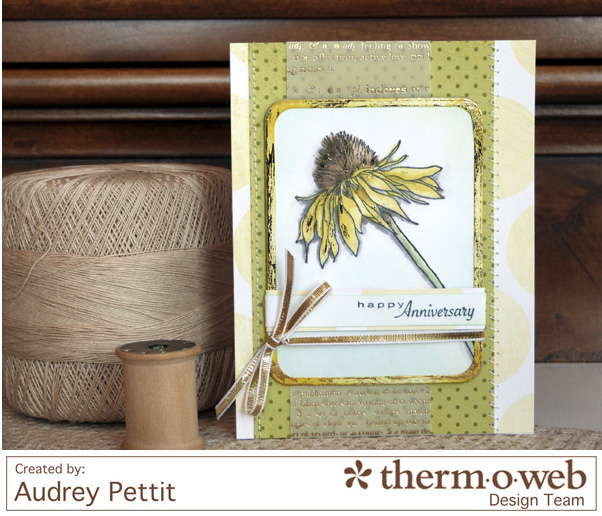
 The bold, metallic look of gold is a very popular fashion trend right now, and it’s very easy to add that gilded finish to your paper-crafting projects using Therm O Web’s new line of Deco Foil transfer sheets. Today I’ve created a pretty anniversary card to share with you, with touches of gold accents added to both the die cut frame and the stamped and water-colored flower image. As you can see, the foil applies beautifully to stamped and inked areas. And with 17 amazing colors of iCraft Deco Foil to choose from, you can create foiled projects for every occasion.
Let’s take a closer look.
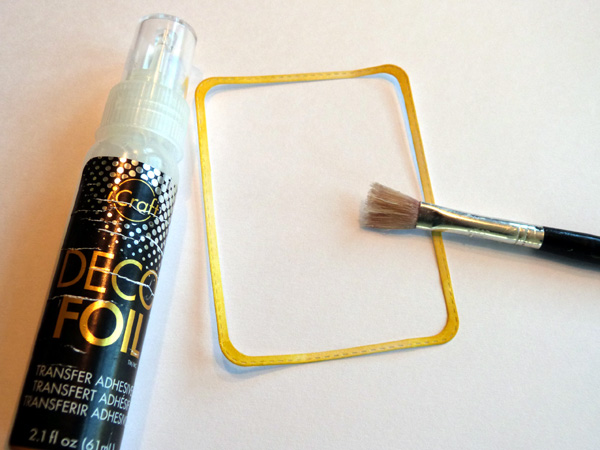
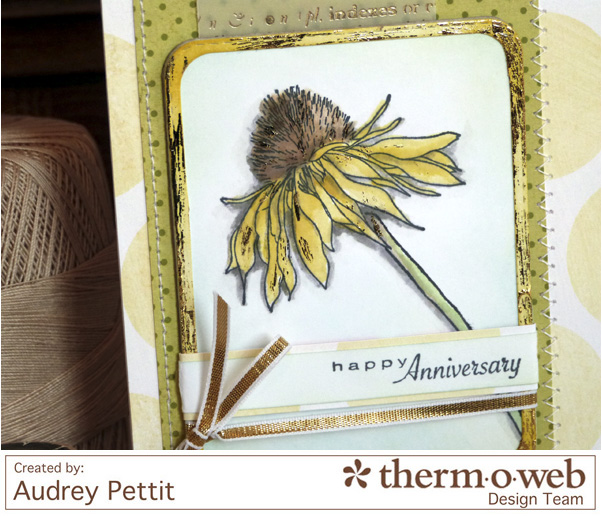
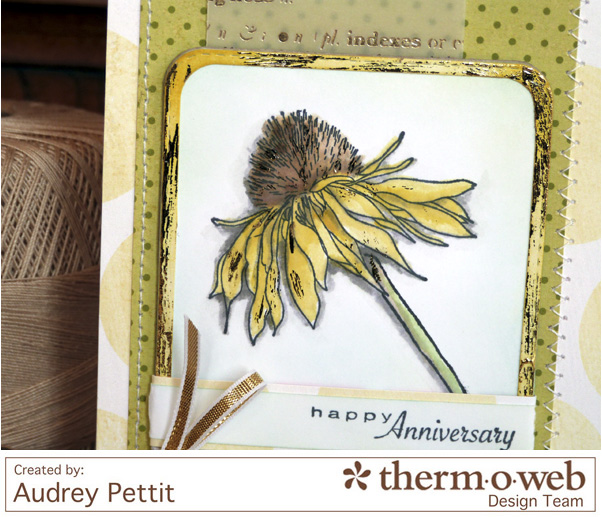
to create the framework for my card, I began by die cutting a frame from heavy weight white cardstock. Using a foam inking tool, I applied yellow Distress Ink over the entire frame, concentrating the darkest color in the corners, and fading the color towards the center of each side. I then added light random swipes of iCraft® Deco Foil™ Transfer Adhesive liquid glue onto the frame using a 1/2″ wide flat paintbrush. To apply the Deco Foil liquid glue, I like to dip my paintbrush directly into the glue bottle, and then sweep my brush back and forth across the paper. I wanted some of the ink to show through, so I kept my glue application light and thin.
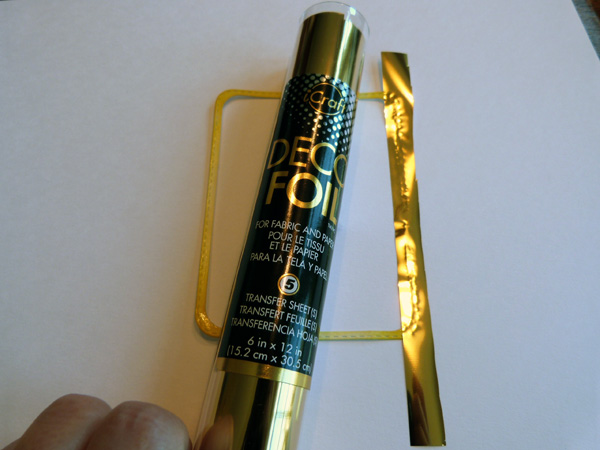
Allow the Deco Foil Transfer Adhesive to dry completely, until the glue is clear and tacky. With my thin coat, that took only about 5 minutes, but the heavier the application of glue, the longer the drying time will be. Cut a thin strip of gold Deco Foil Transfer Sheet, then lay the foil down onto the glued frame, color side up. Rub along the top of the Deco Foil with your finger, then pull up the transfer sheet.
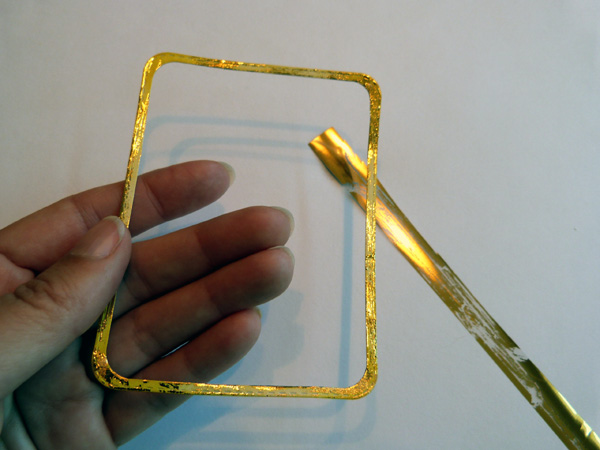
Move the foil sheet to another area, and repeat the process until you’ve covered the entire frame.
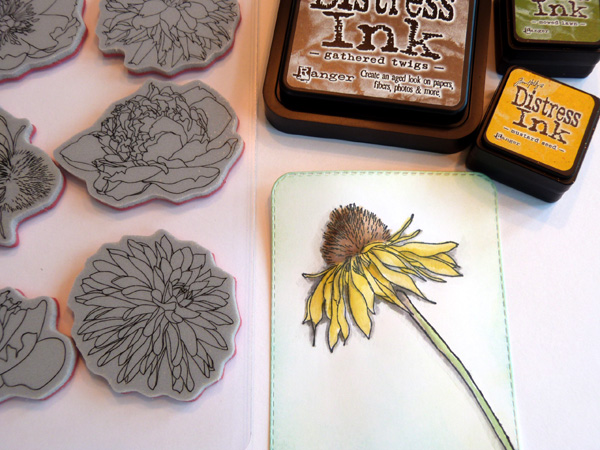
For the focal point of the card, stamp an outline flower image onto watercolor paper or stamper’s select white cardstock. I die cut my flower panel to fit inside my frame, then water-colored the image using my Distress ink pads. Using an ink blending tool, I applies a bit of blue Distress ink around the image to create sky. Once you are done coloring your image, allow the paper to dry completely.
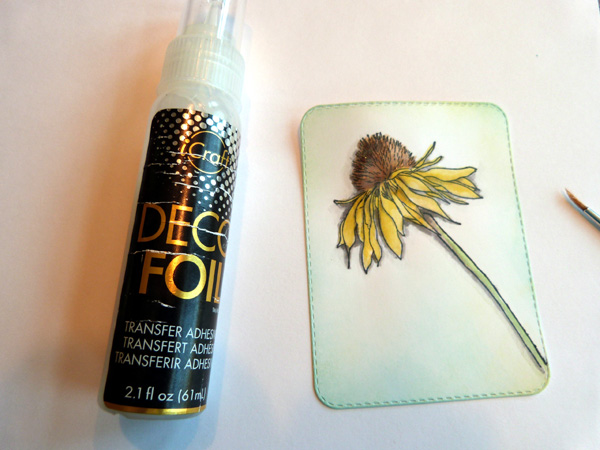
Then dip a fine-tipped paintbrush into Deco Foil Transfer Adhesive, and apply very small amounts of the liquid adhesive onto areas of the image. It’s hard to tell from this photo, but you may be able to see very small shiny spots on the flower image where the adhesive has been applied.
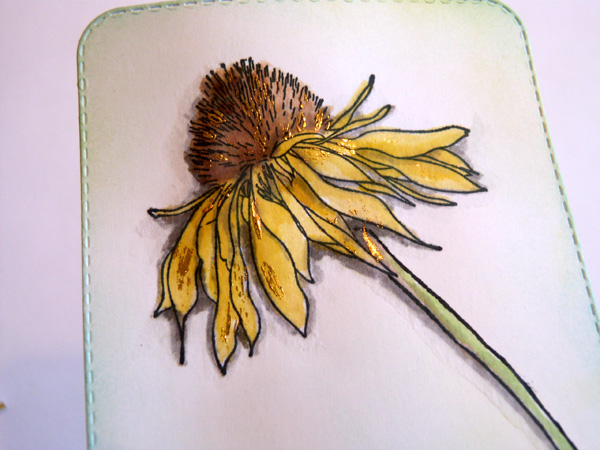
Once the iCraft Deco Adhesive has dried completely clear and tacky, go ahead and add the iCraft Deco Foil (color side up) onto the glue and rub over it with your finger to transfer. Continue until all areas have been covered, and then you are ready to assemble your card.
So fun and easy! Enjoy!

Don’t miss a chance to enter and win with our friends at Scrapbook & Cards Today! They’re celebrating their 9th Anniversary and that means chances for you to win! Click here to visit their blog!