


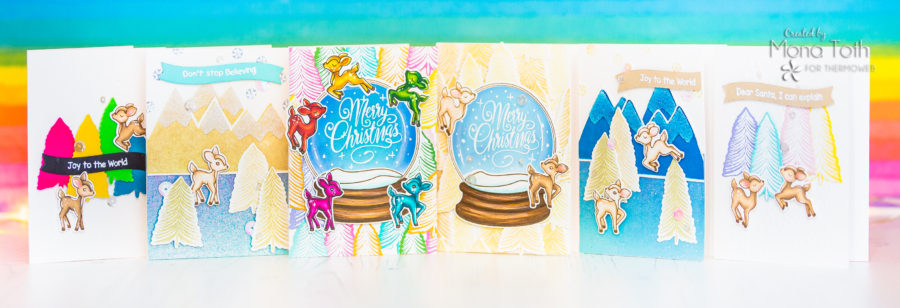
 Hello everyone, it’s Mona here, in my newest tutorial I am going to create six different cards with one LDRS stamp and die set and turn them magical with different Therm O Web products. The used supplies are listed below the post.
Colorful Holiday Cards with Flock
These cards are a bit smaller cards so, for this project, I prepared 80lb Neenah Solar White Cardstock and I cut them in 4.5 by 3.25 inches.
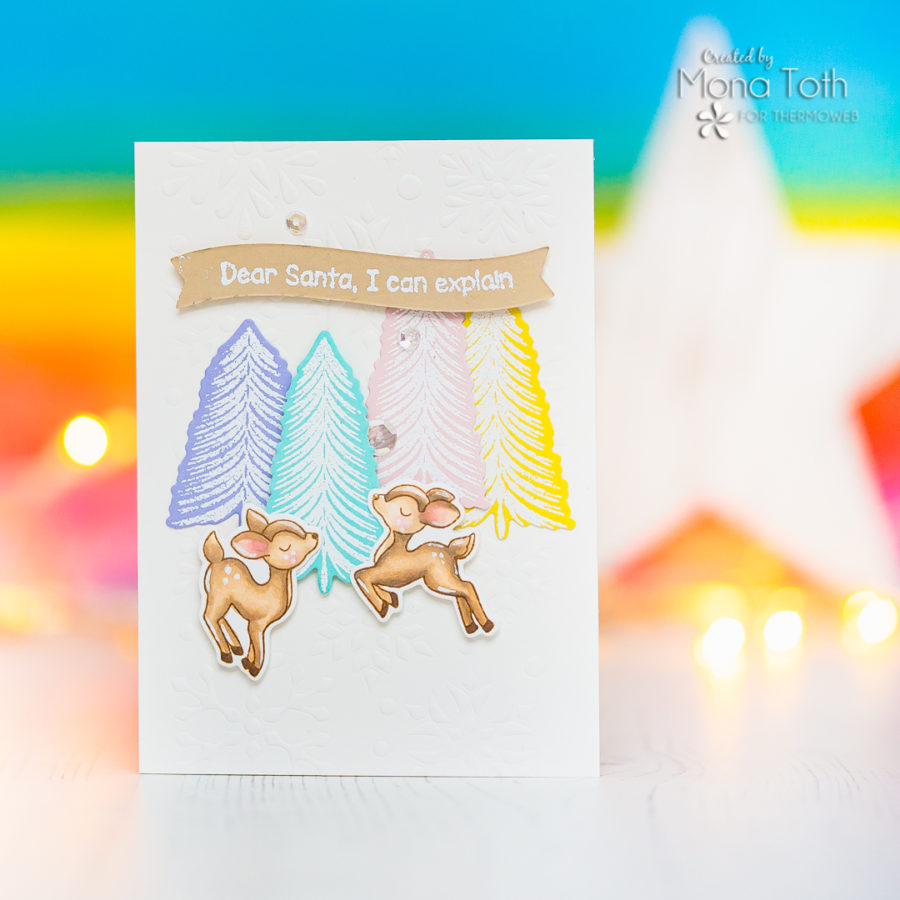
I stamped the images from the Snow Deer to Me Stamp Set with my MISTI. For some of the images I wanted to achieve a softer look, so instead of a black inkpad, I have used Leather brown inkpad, which is Copic and Spectrum Noir marker friendly.
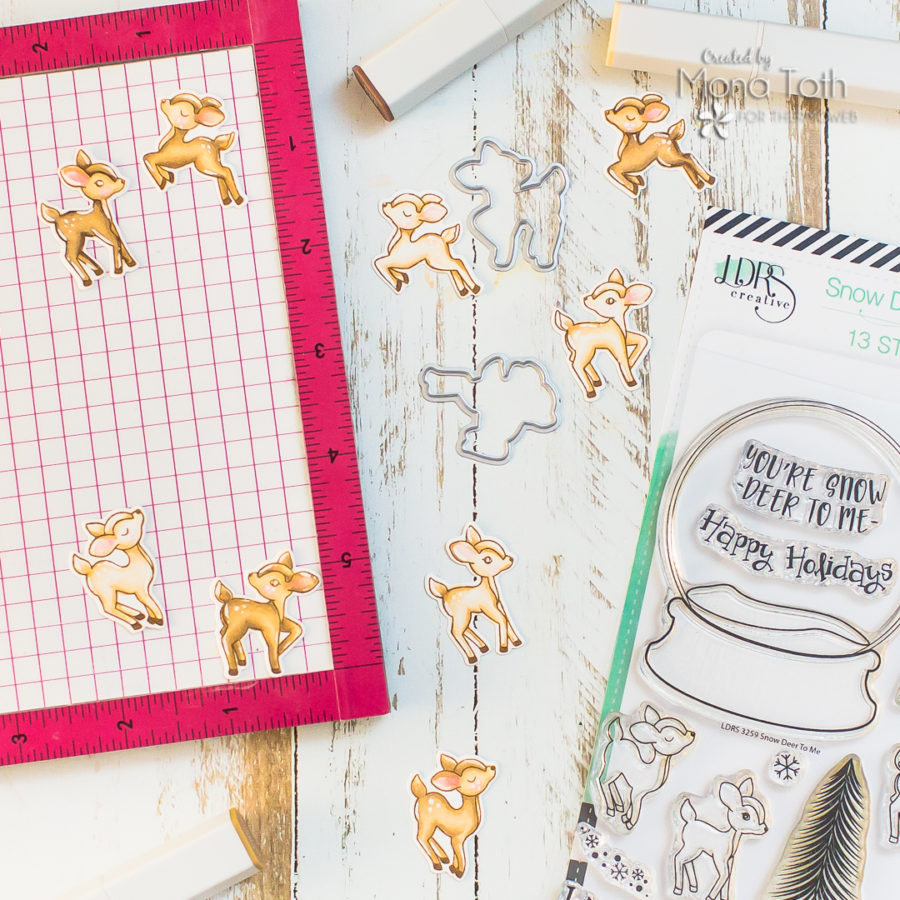
For the soft brown deer coloring, I have used the following Illustrator shades: FS9, MB1, MB2, MB3, MB4, EB4, FS1, FS2, Blender. I also colored some images in high saturated rainbow colors, for this rainbow coloring I was inspired by Alberto Gava.
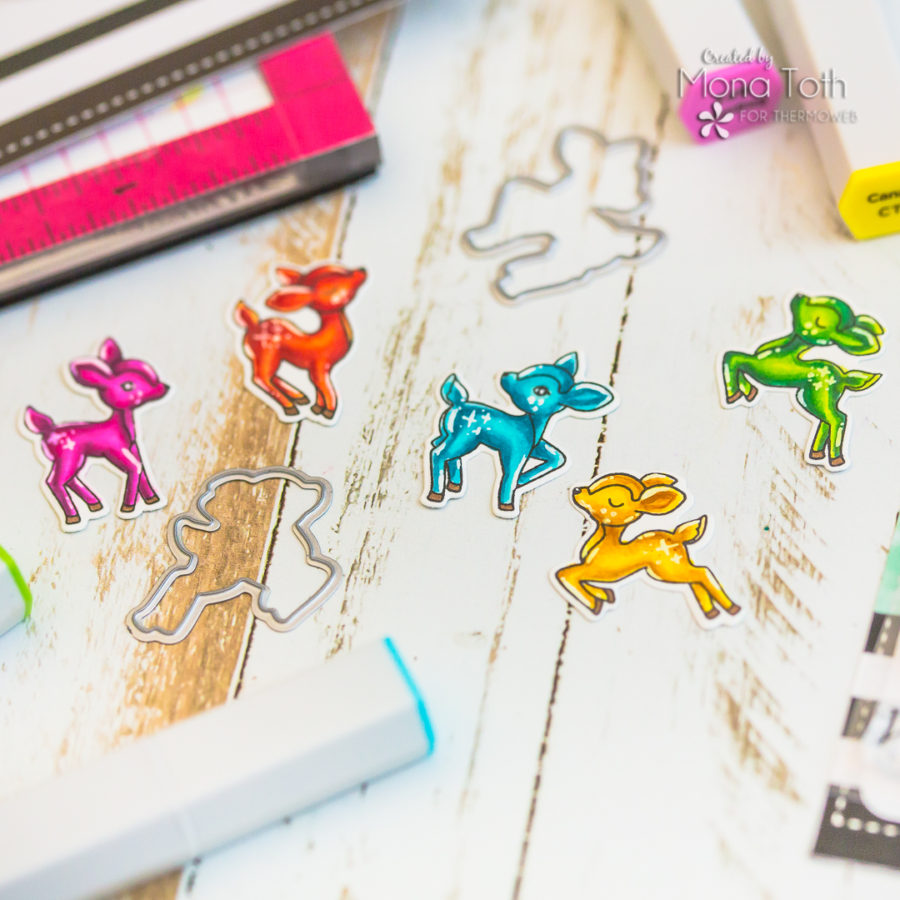
Here I have used these rich and saturated Illustrator colors: CT1, CT3, CT4, GY3, BO1, GY4, GY5, CG1, AG1, AG2, AG3, AG4, AG5, BT1, BT2, BT4, BT6, BT7, BT8, BT9, BP2, BP4, BP5, BP6, BP7, OR2, CR8, CR9, CR10, CR11.
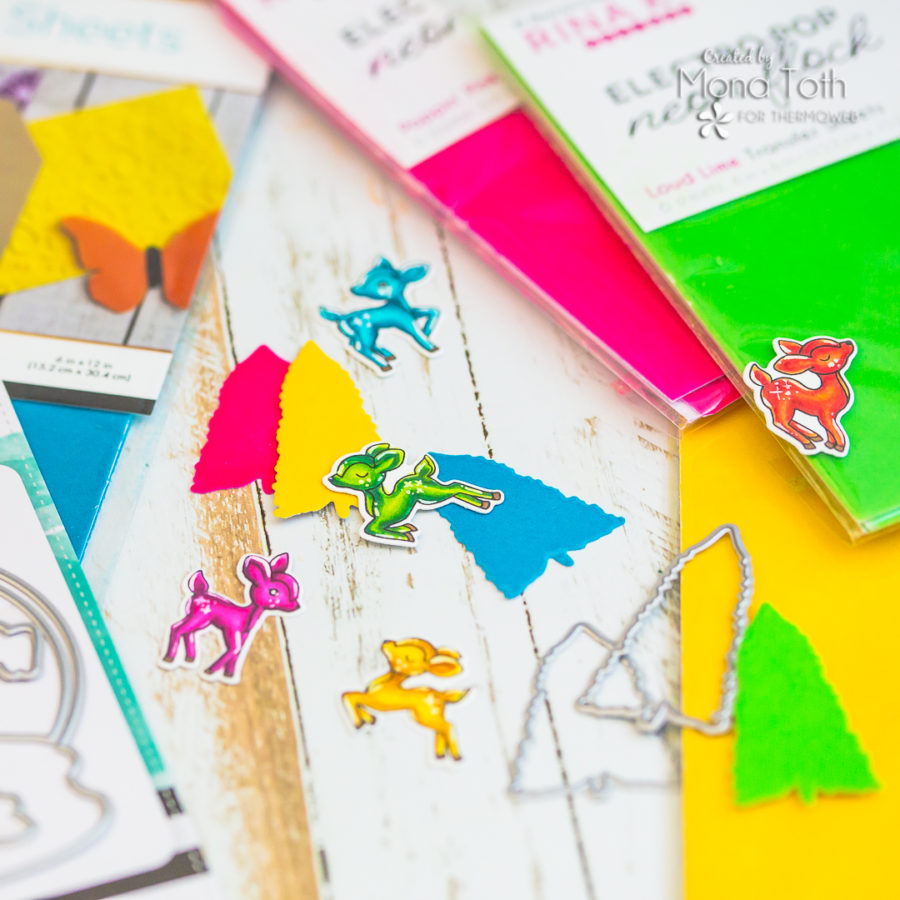
Diecut Deco Foil Flock
For this card, I created die-cuts from Deco Foil Flock Transfer Sheets with no stamping for a clean and simple result. I adhered them
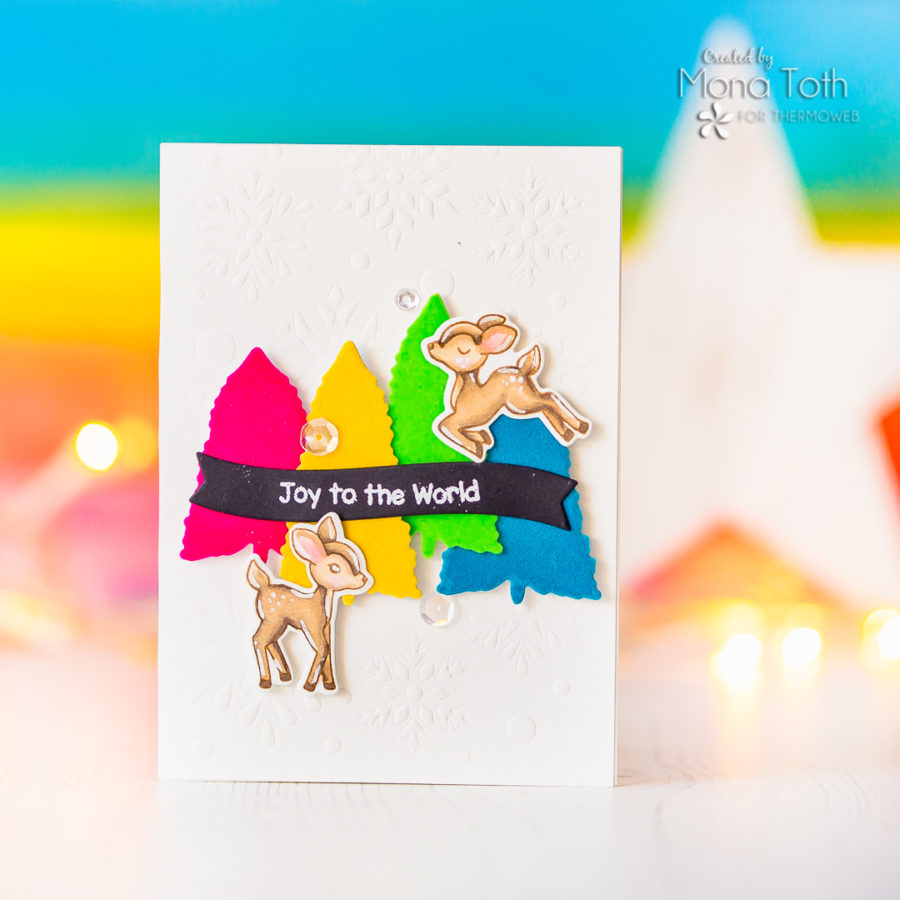
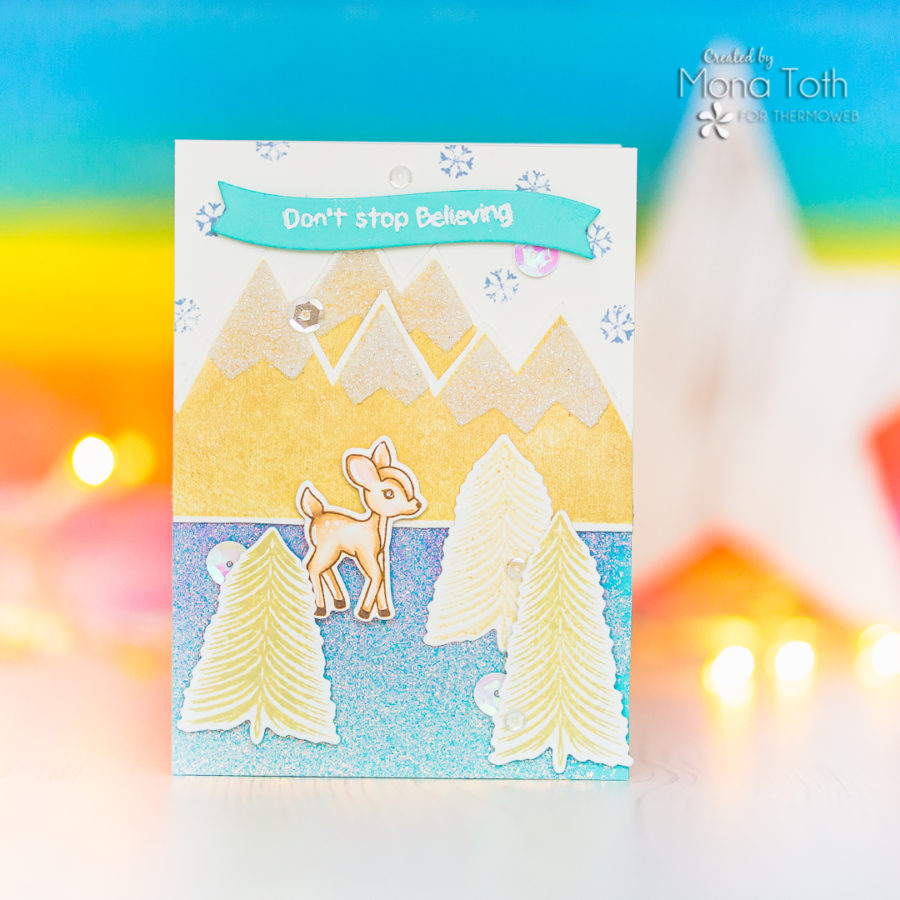
I also stamped brush trees with various beige inkpads to a white cardstock or oppositely.
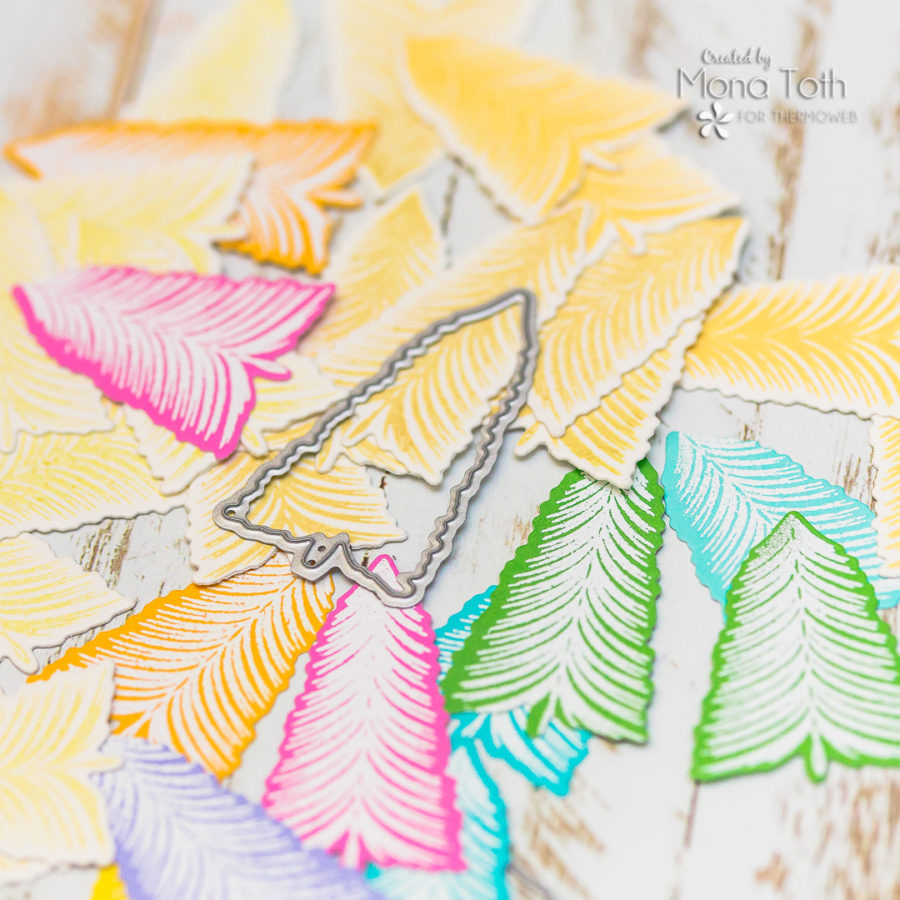
I picked various colorful cardstocks then stamped on them with watermark ink, then heat embossed them with white embossing powder.
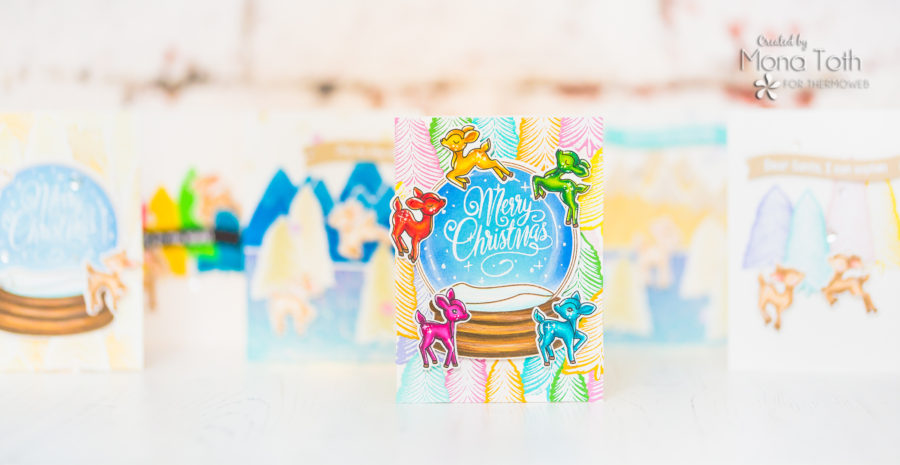
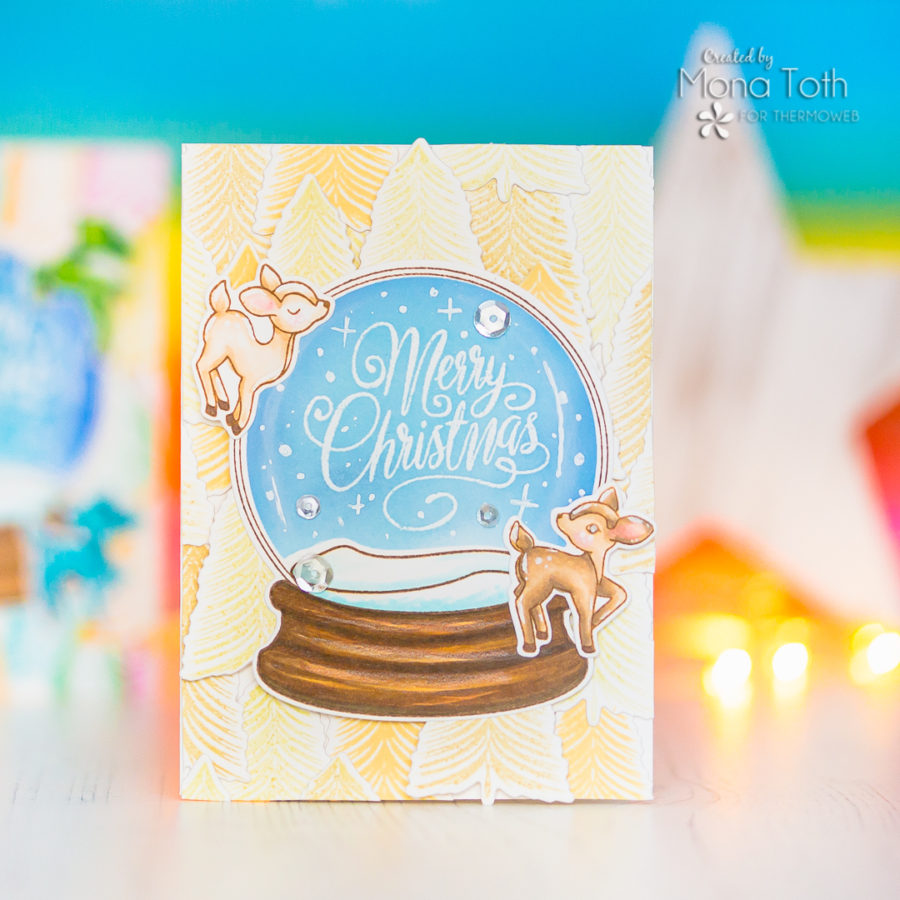
Here I have stamped big snow globes. These are created for shakers, but I thought, that instead of a shaker card I am going to show you a real snow globe masking and blending effect. First I made on it a heat embossed sentiment with the Merry Christmas sentiment from the Glimmery Greetings Stamp Set.

The recipe is super easy. I run the snow globe center die through my die-cut machine with masking magic. I placed the negative part of the masking magic to the top of my die-cut, and I made an ink blending on it.
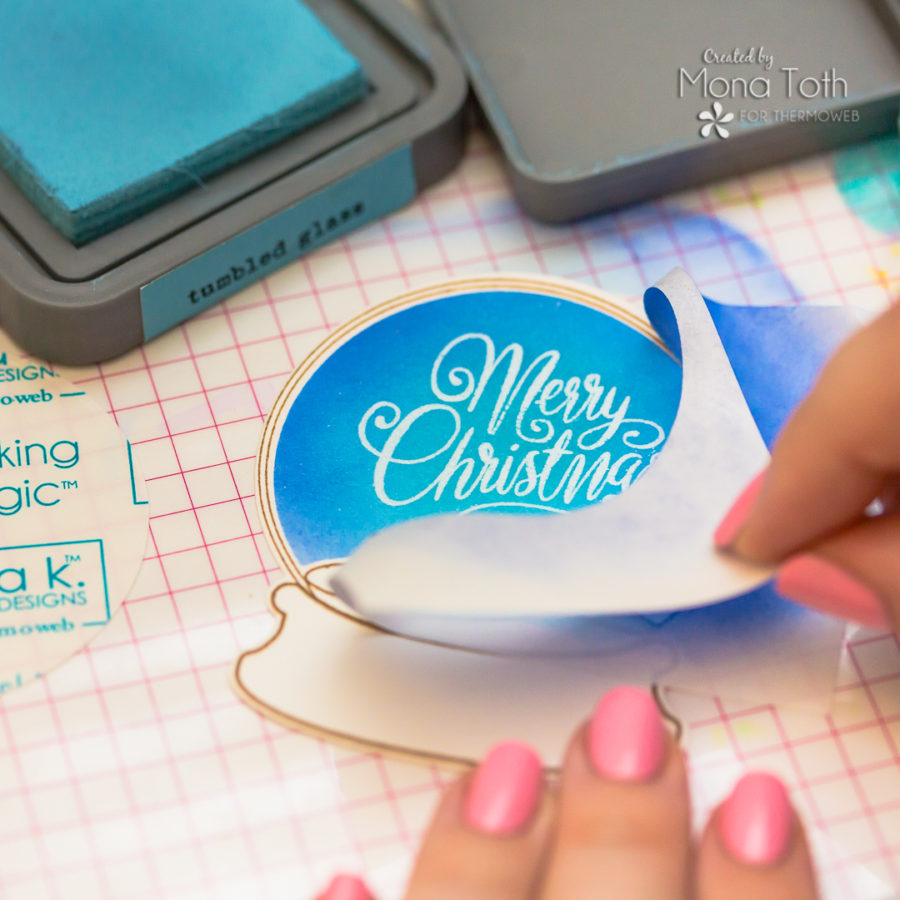
First, I have used a bit darker blue around, then much lighter, and it was done. After the ink blending, I removed the mask and added highlights with a white pen and pencil. This is how it looks like with the tree die-cuts in the background and with a cute dee. They look so fun, right?

Which do you like more? The light or colorful one?
Purple Tape to Keep Things Together
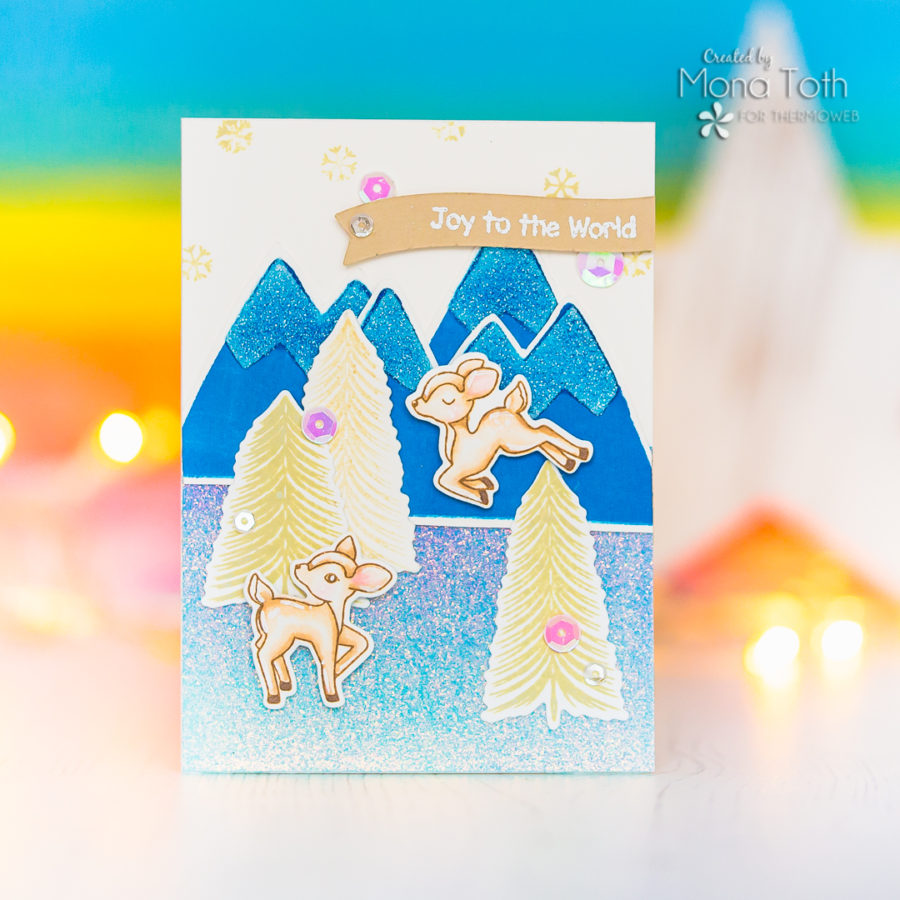
Here I have created a dry embossed background. I picked the Wishing You Joy Stencil, fixed it to the cardstock with Purple Tape, and dry embossed the cardstock with my die-cut machine. You can read more about this technique in my previous post here.
I also stamped solid hills from the Gnome for the Holidays Set and applied on them white glitz glitter gel. When they were dry, I just cut the hills and created layers from them.
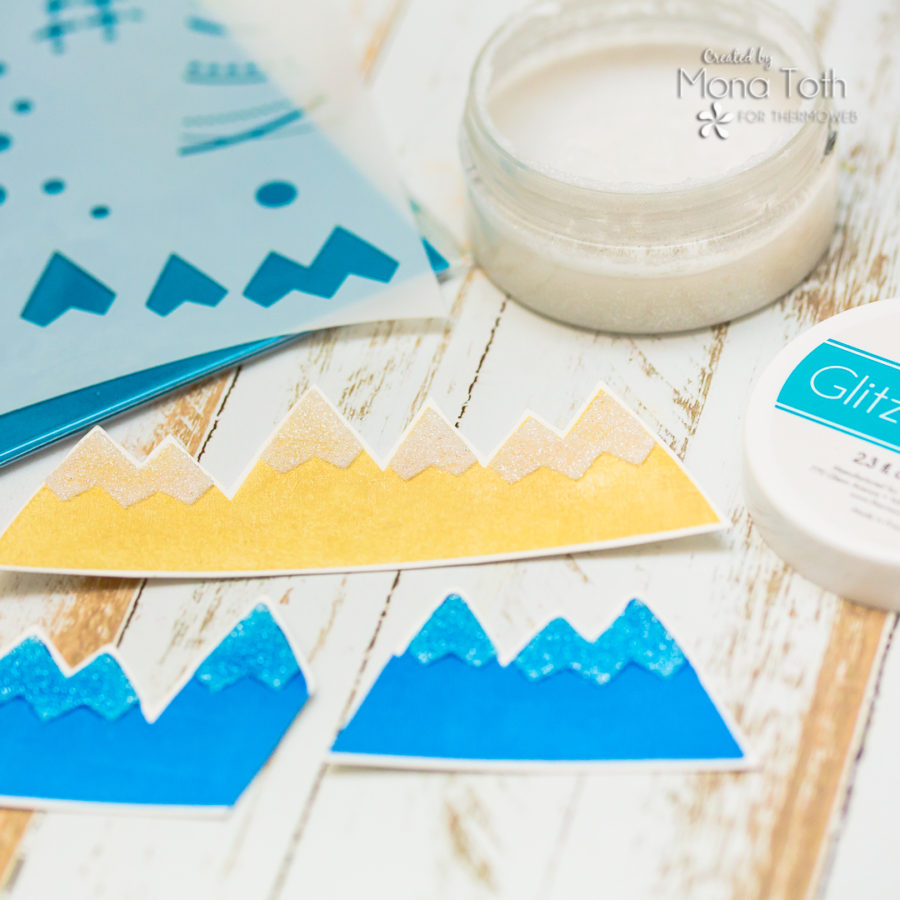
I also created a blue pound for these cards, I made a quick ink blending on a teal cardstock to save a little time.

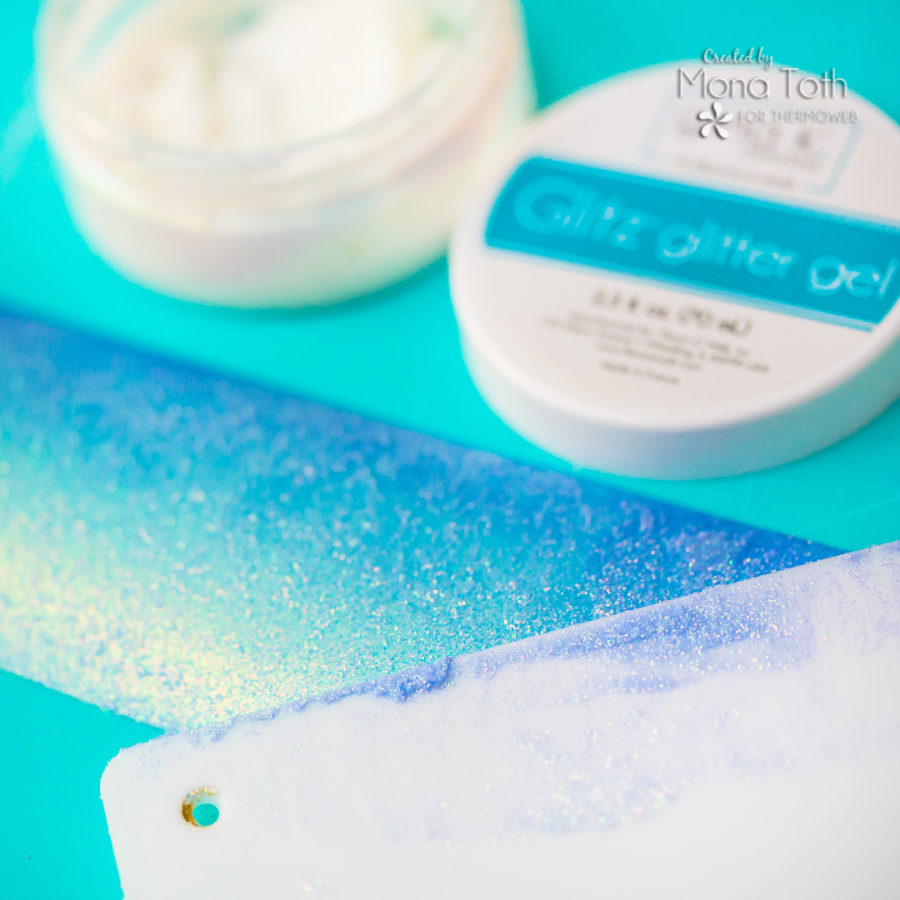
Apply Glitz Glitter Gel
Then I applied on them sparkly Glitz Glitter Gels by Gina K. Designs as well.
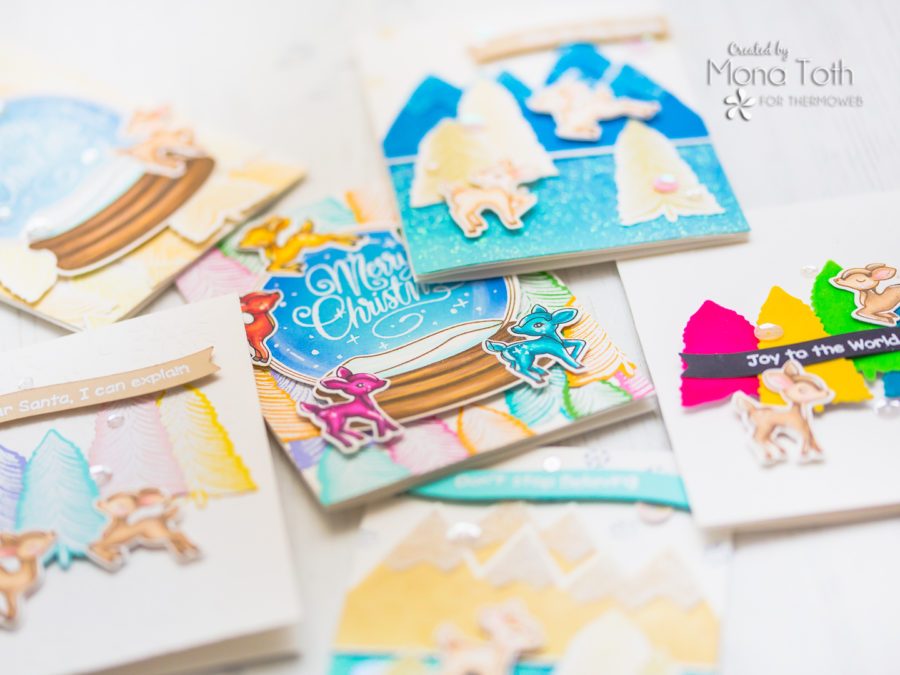
How crazy is that after you change one color on your card it looks absolutely different? Are you team soft or bright colors? I think I love both of them.
I made lots of techniques on these cards, to showcase you the opportunities, if you want, feel free to try these techniques separately or mix them together.
And these are my finished card designs.
For my cards, I have used White Foam Squares, Ultra Bond Liquid Adhesive and Tape Runner XL adhesives.
Tell in your comment which one is your favorite. Thank you so much for stopping by, have an amazing day, Mona.
USED SUPPLIES
https://linkdeli.com/widget.js?id=f5e8378456858c916708
This post contains affiliate links. For more information, see our disclosure HERE.
We know if you’re like us when you see these ideas, you want to make them too! And let’s face it…it’s an expensive time of the year! So do take a moment to get entered to win and then go visit our friends at LDRS Creative to see what they’re up to and enter their giveaway! And don’t miss our Instagram hop we kicked off this Wednesday for more chances to win!
Sharon Gullikson
December 11, 2020 at 2:09 pm (3 years ago)I just love these cute colors!
Denise Bryant
December 11, 2020 at 4:17 pm (3 years ago)Awesome cards! The one with the ‘Dear Santa, I can explain!’ sentiment is my fave! Love the colors of the trees, and the deer are just adorable!
Meghan Kennihan
December 11, 2020 at 4:53 pm (3 years ago)Oooooo I LOVE all the colorful trees!
Sue D
December 11, 2020 at 9:22 pm (3 years ago)So fun and colorful but my favorite is the snow globe in the natural colors.