


Hi, this is Mona Tóth, and today I have another video tutorial for you! Let’s make these cute Halloween tags together with the new deco foil transfer sheets. They are super cute and really easy to make.
Halloween Tags with Deco Foil

I am starting the process with die-cutting. I am creating the die-cut frames with Deco Foil Foam Adhesive and How you been addon Die set. I am adhering the foam adhesive sheet to the luxury white premium cardstock by Gina K. designs. This will make the thin foam adhesive die-cut more stable. Next, I put the frame die to the top of the foam adhesive. The adhered cardstock should be down and the sticky side with parchment paper faced up. then I fixed it with purple tape and run it through the die-cut machine. This will add a nice dimension to the tag.
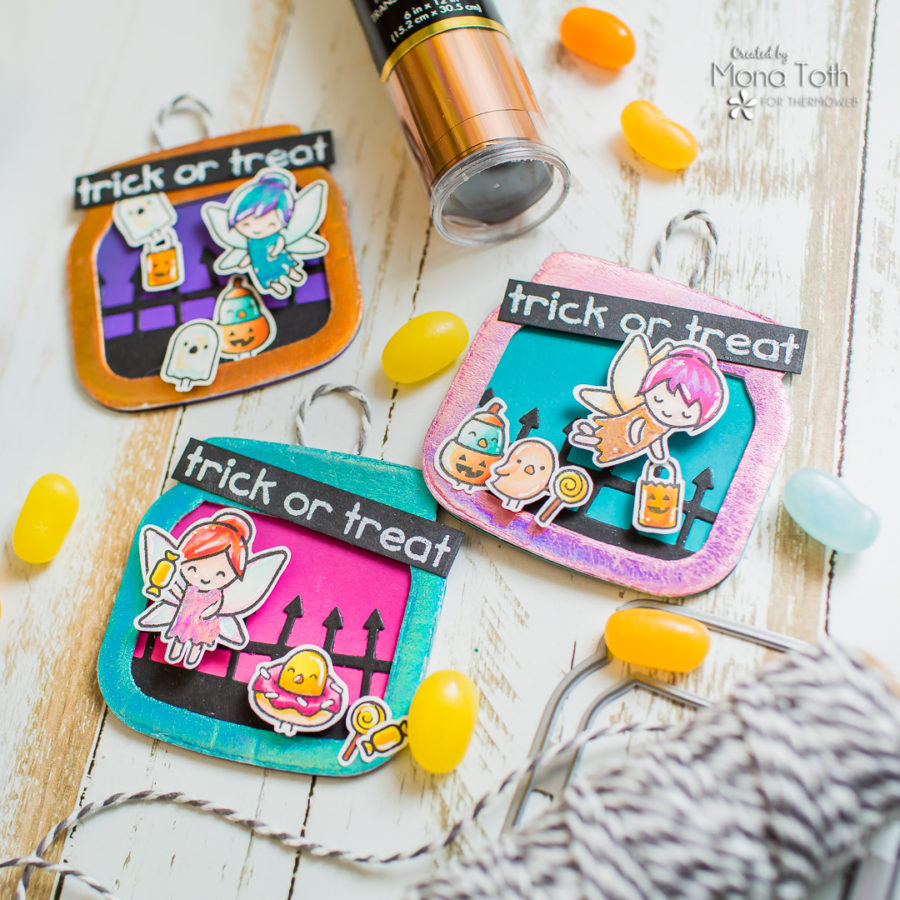
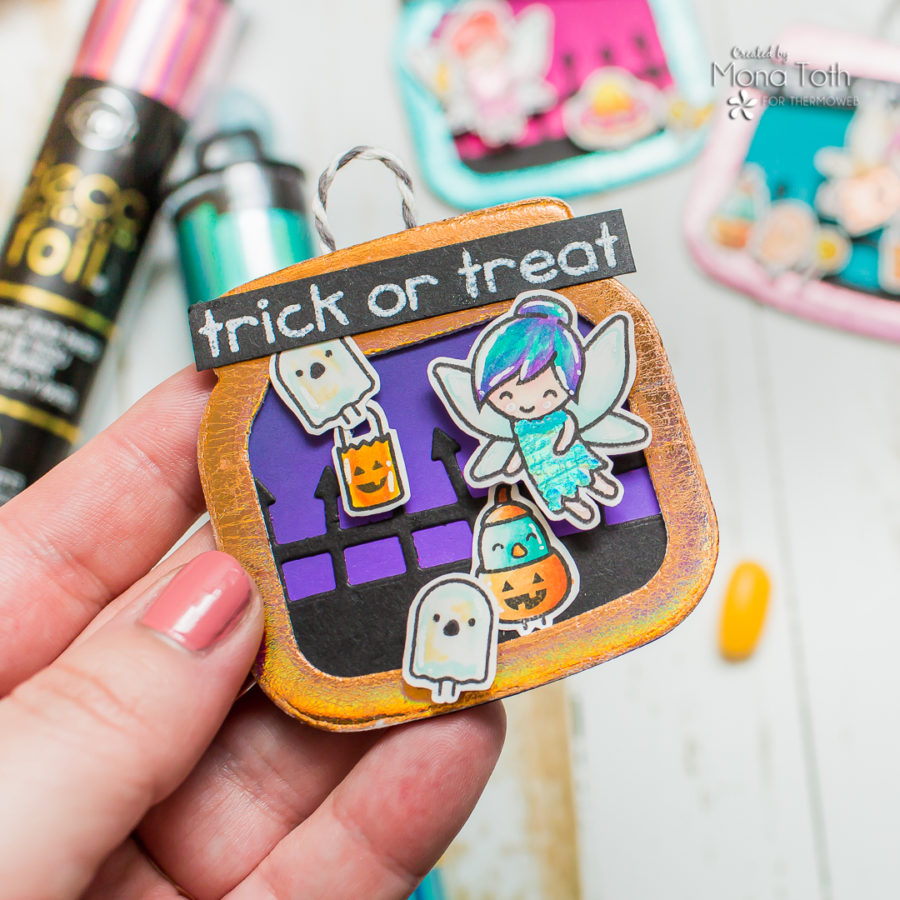
Instead of stamping I will use pretty shiny foils on the frames, so I picked the Peach Princess, Glass Slipper and the Enchanted Rose deco foil transfer sheets which are beautiful and as you can see they have fabulous reflections. This time the foiling will be easy-peasy without hot foil machine. I just placed the picked foil to my workplace with color faced down, then removed the parchment paper from the frame die-cut, and placed it on the top of the foil. Now I am pushing it well with bone folder and remove the clear foil. If it’s needed you can put back the foil and do the same thing until you are happy with the result.
When the frames were done, I continued with die-cutting. This time I run the second die from the How you bean add-on set through my die-cut machine with the same white cardstock. Then I created a black fence with Black Onyx cardstock and Spooky Fence Border die by Lawn Fawn, and because I don’t want to measure and fussy cut, I run this die-cut with the larger piece of díe from the How You Bean Die set as well.
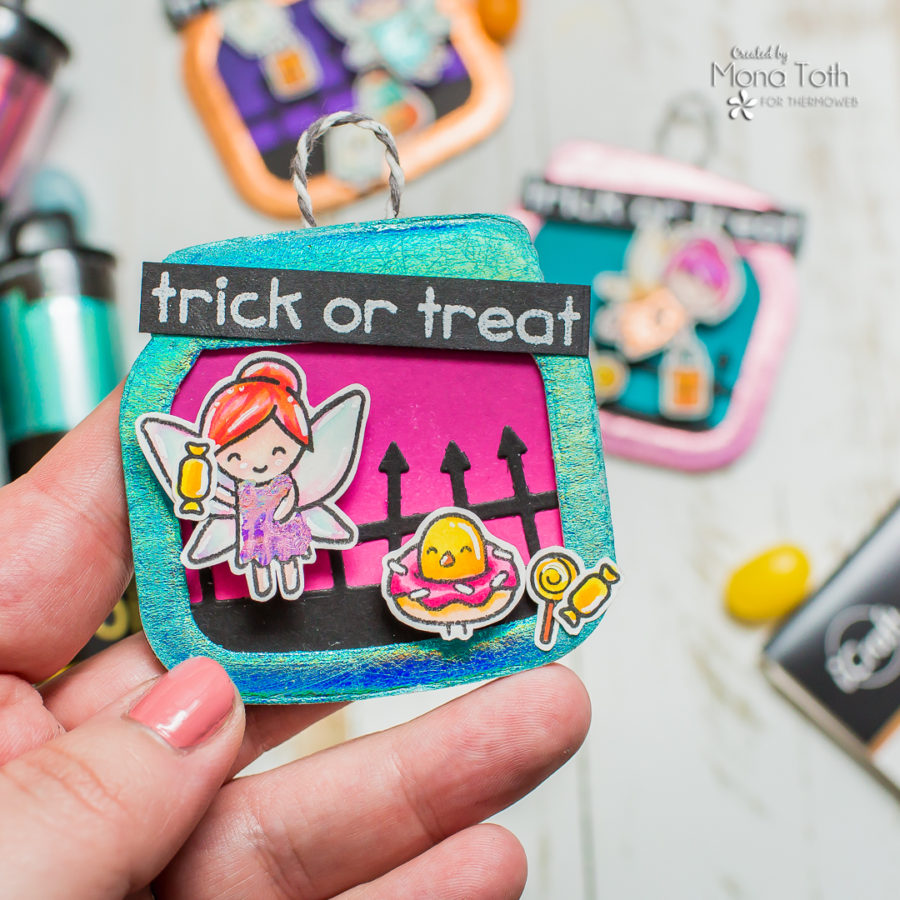
Next, I continue with ink blending on the white jar die-cut. I am using the Wilted Violet, Picked Raspberry, and Peacock Feathers Distress Oxide inks as well as the regular mini inks in the same color to add a bit more contrast to the edges. And in the end, I added slight touches with black soot distress mini ink for all the backgrounds.

I stamped some images with my MISTI using black ink with the Fairy Friends and the Fox Costumes Before ‘n Afters Stamp Sets by Lawn Fawn. Be sure to check the coloring process in the video tutorial. When the coloring was done, I added white highlights to the images to have more contrast. It helps really a lot to pop out the image. The dresses I have colored with foiling.
I am going to make this with the help of the Deco Foil Adhesive Pen. All you need to do, just pick a scrap piece of paper or a clean corner on your cardstock, press down your pen, and hold the adhesive tip until it starts to flow and you are ready to go. I am putting a piece of foil on the top of the test spot, and if it’s okay then I am putting it over the fairies clothes, and rub it well with my fingers. The best part is the reveal, it looks super pretty! LOVE it!
I made a quick fussy cutting off camera. I adhered some die-cuts with Ultra Bound adhesive, then I adhered the images with 3d foam squares to their right places. When it was done, I stamped the sentiment three times with watermark ink to black cardstock, applied white embossing powder, then heat embossed it. When it was done, I adhered to the sentiments to their right place.
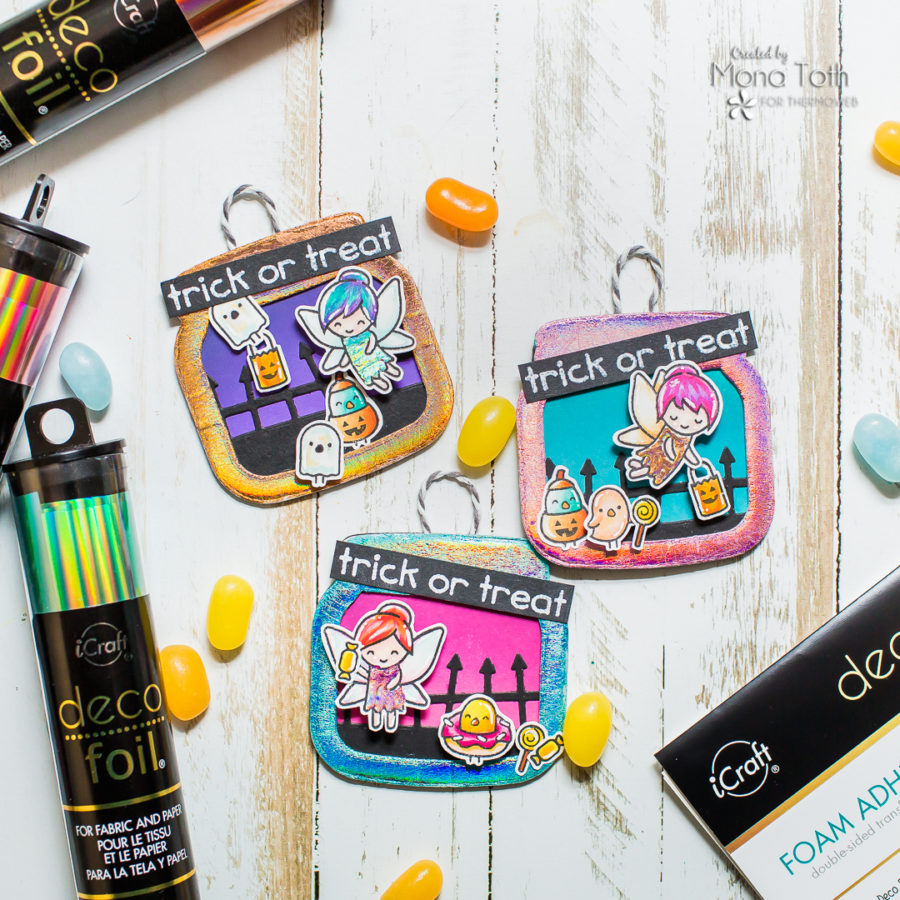
In the end, I have created 3 more jar die-cuts, this time from Onyx black cardstock. I have put adhesive on it with the Tape Runner XL adhesive and before I am adhering the sandwich together, I am putting between them a gray cord. And the super shiny Halloween tags are done. I really hope you have enjoyed my project for today, be sure to check the video tutorial. Thank you so much for stopping by, see you next time, Mona.
Video Tutorial
[youtube https://www.youtube.com/watch?v=0AlDRnaqxAo%5D
Used Supplies
https://linkdeli.com/widget.js?id=f5e8378456858c916708