


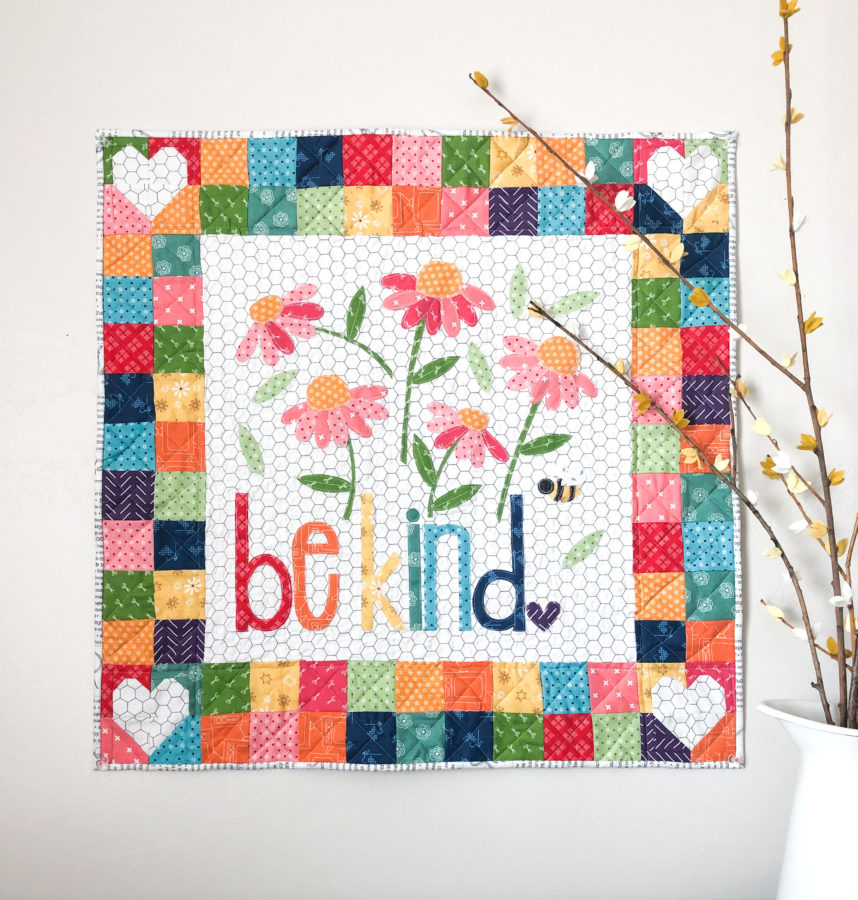
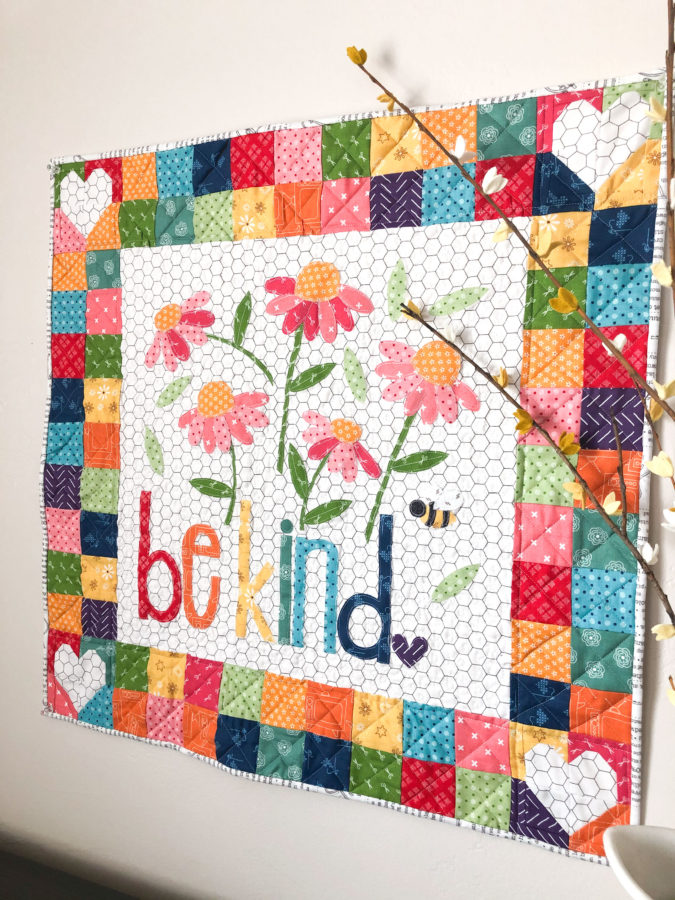
There is definitely something about kindness. It makes you feel good whether you give it or receive it! And I really feel like we could all use a bit more kindness in our lives, so to create a reminder, I designed this mini quilt to hang up as a reminder to spread a little bit more kindness. Today, I am going to share some tips for adding applique to your projects and how I like to finish my mini quilts using this Be Kind mini quilt, but the same principles apply to any raw edge applique you might do.
Supplies:
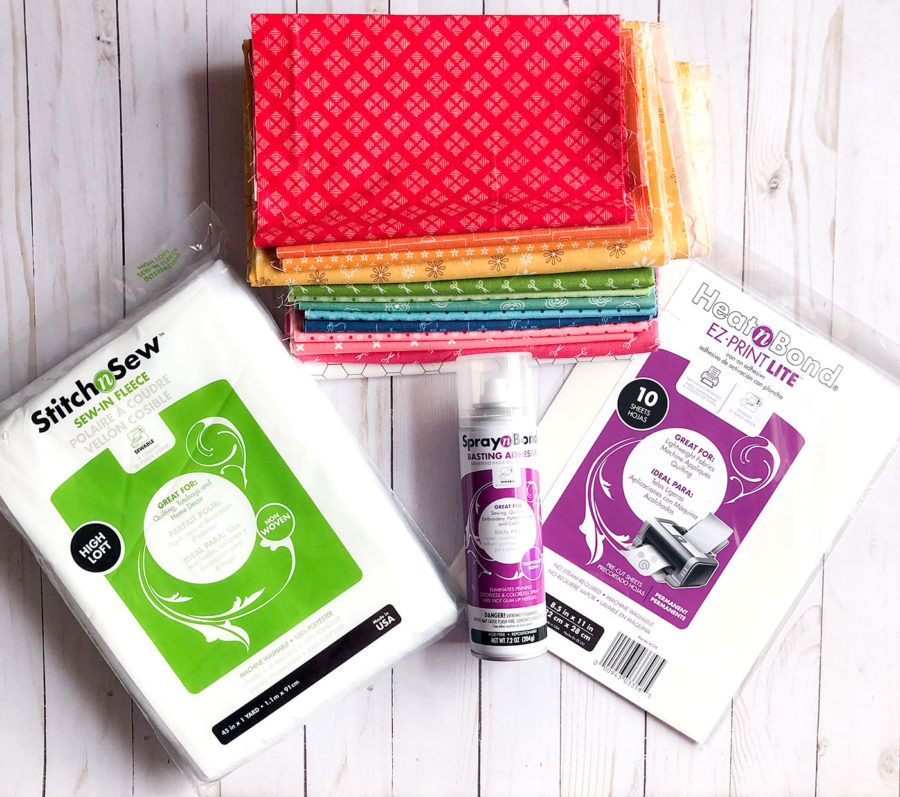
HeatnBond Lite Fusible Adhesive – I prefer the printable sheets for ease of use, but you can definitely use it from the roll too.
Fabric – I am using Bee Basics by Lori Holt for Riley Blake Designs.
StitchnSew Sew-in Fleece
SpraynBond Basting Spray
Pattern- Available in my Etsy shop.
Prepare Applique Pieces:
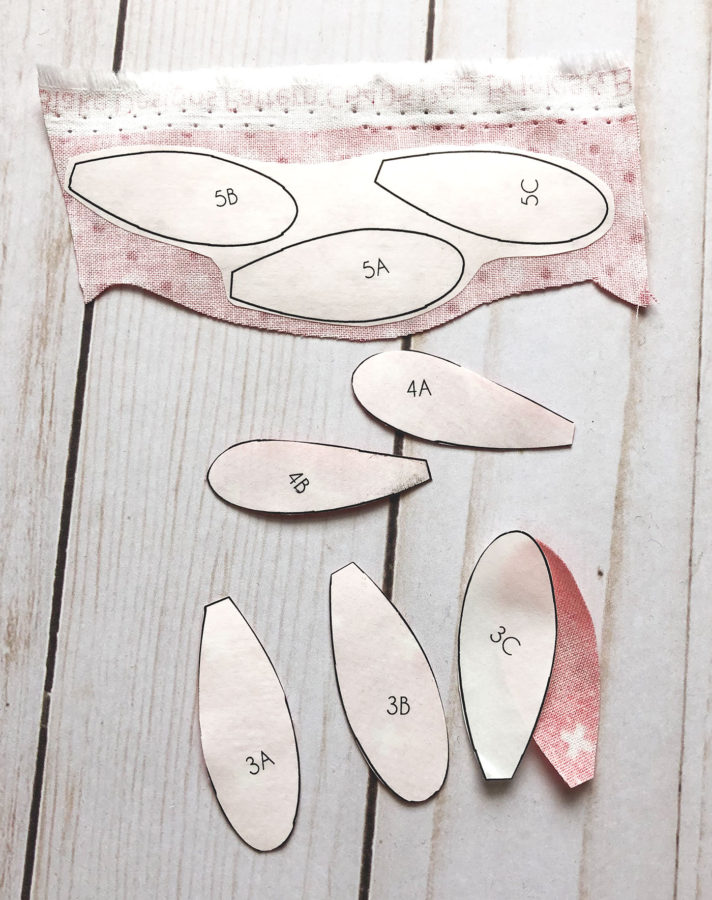
- Print or trace the pattern pieces onto the paper side of your HeatnBond Lite. If you are tracing the pattern, make sure label each piece as you go so you know how to place them later. If you are using a pattern that wasn’t originally designed for applique, you may need to reverse the image before tracing- especially letters or words.
- Cut apart the pattern pieces, leave a slight margin of HeatnBond around the pattern pieces- this makes it easier to cut them out later. If you have groups of pattern pieces that will all be the same color, you can cut around the group.
- Fuse the pattern pieces to the wrong side of the fabric chosen for that pattern piece.
- Cut out the pattern pieces along the printed line.
- Do not pull off the paper backing until you are ready to add the applique to the background, this will help with labeling the pieces so you can place them as desired.
Add Applique to the background fabric
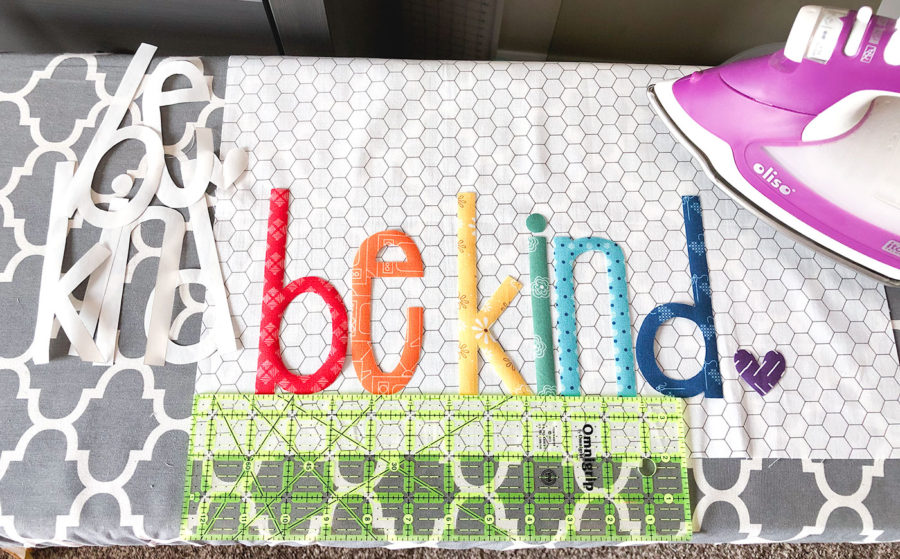
- Cut your background fabric to the appropriate size. If you are adding a lot of applique, you may want to cut your background fabric just slightly bigger (1/2″ or so) than needed to allow for a minute amount of shrinkage from adding the applique. Just remember to trim the background fabric back down to the right size before adding borders.
- Remove the paper backing from the pieces you are ready to place. Position them as indicated in the pattern. If you are lining things up a ruler or other straight edge may be helpful to keep things even. Place your background fabric on your ironing surface before placing the applique pieces. If your background fabric is too big for your ironing surface work on the focal point of the applique first, fuse in place, and then move on to the other applique pieces.
- The most important thing when fusing applique pieces is to follow the directions on the package to make sure the applique pieces stay in place before sewing them down.
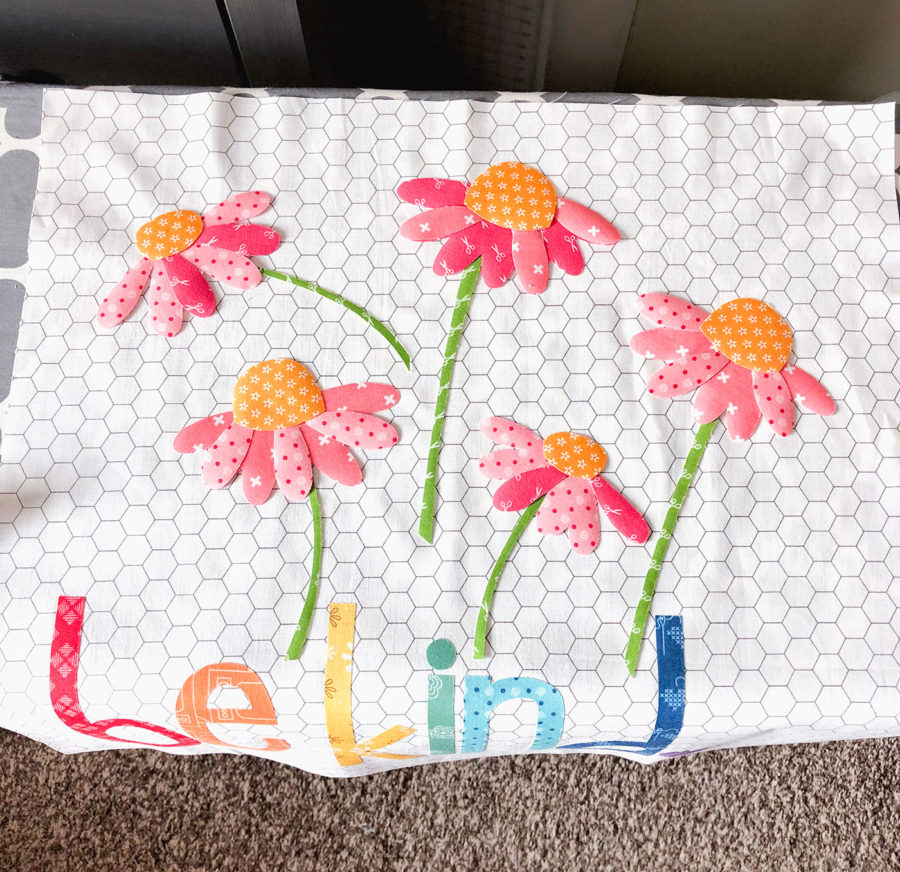
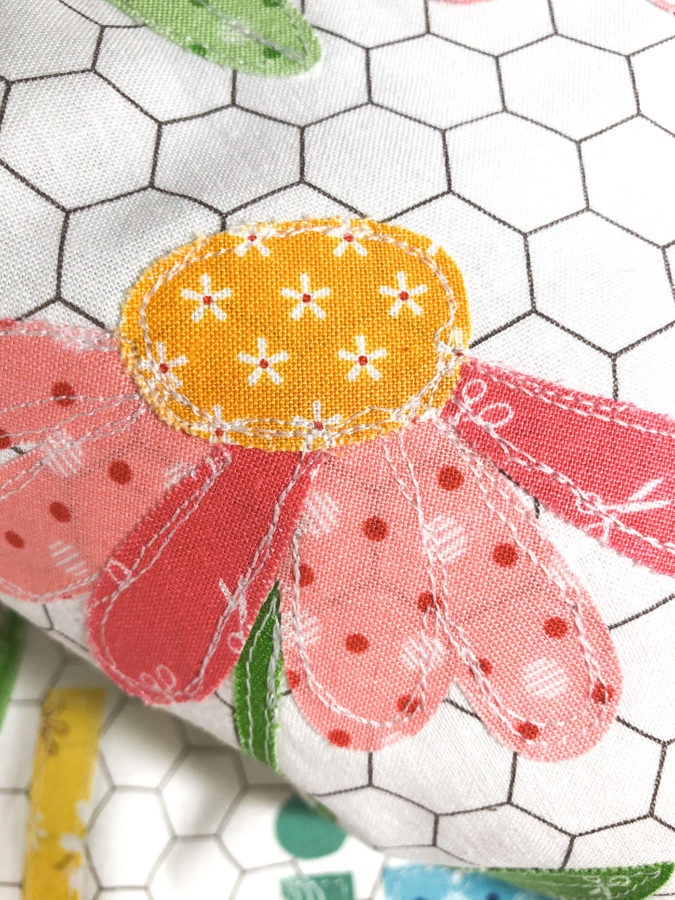
- When placing applique pieces in a large area, position the main features first to make sure they are balanced. In this case, begin with the flower petals then add the stems, sliding them under the petals. Finally, layer the accent petals and flower centers.
- You can either place your first couple layers (petals and stems), fuse and sew before adding the other layers. OR you can add all the layers and fuse them and then sew them down. Your decision would be based on how you plan to sew and add details to your applique.
Sew Applique to background Fabric
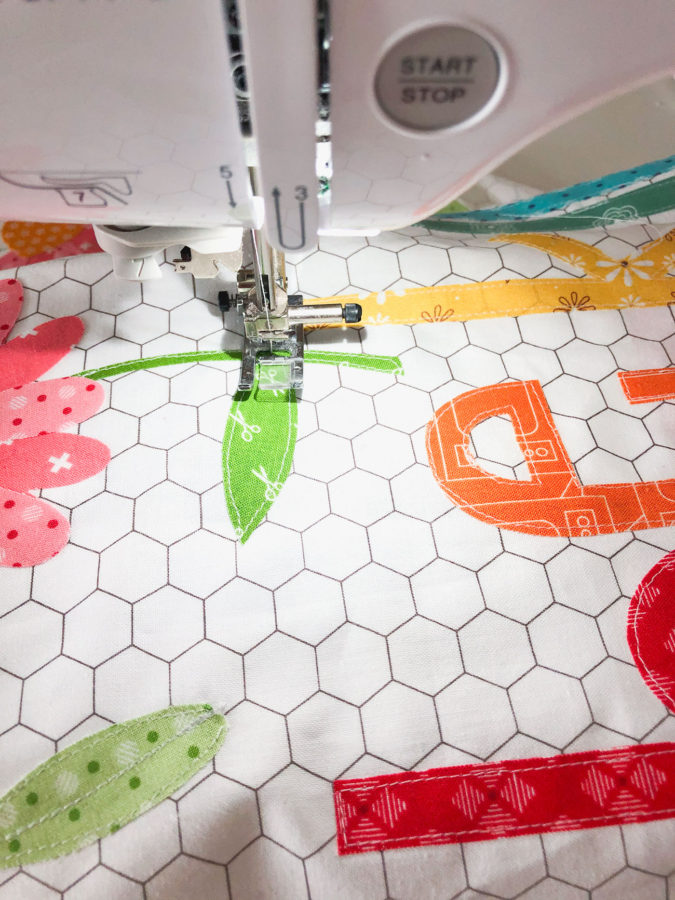
Now it’s time to sew around your applique pieces. The most common way I do this is simply using a straight stitch with my regular presser foot on my sewing machine. This gives me lots of control over where the stitches go and it’s a nice clean look.
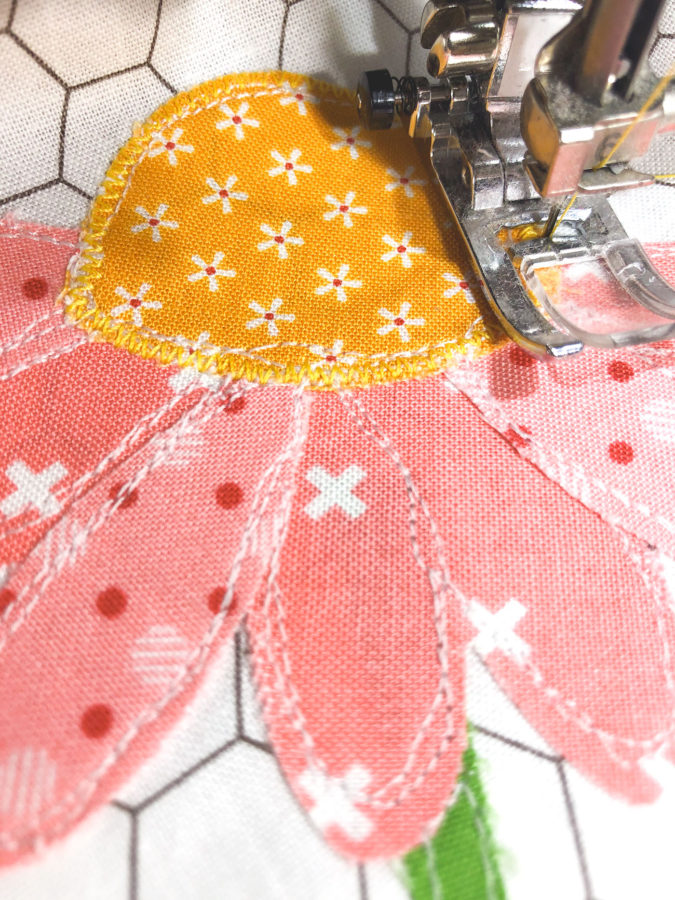
If you are sewing your applique on something that will be worn frequently or used often- like a pillow in a child’s room, I like to use a narrow zig-zag stitch, again with my regular presser foot, to sew around the applique. It gives more definition to the pieces and holds them in place very securely.
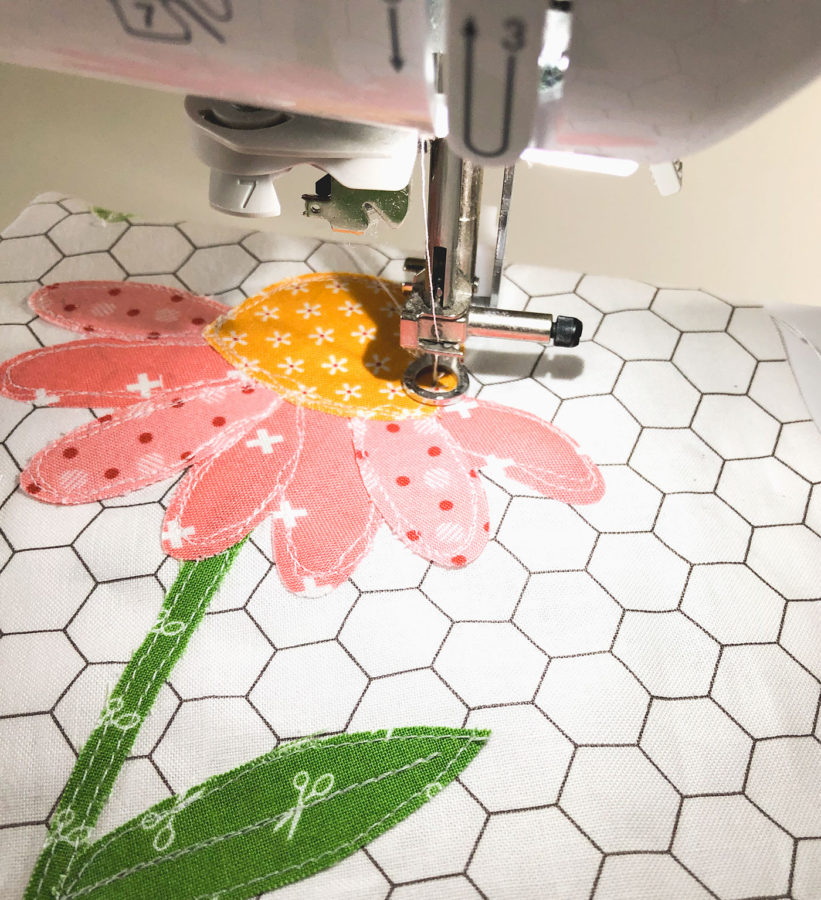
One last way I frequently sew down applique is to use an embroidery foot on my sewing machine, either with the feed dogs up or down, to do some free motion sewing around the pattern pieces. This gives a more sketched look to the stitching. It’s a lot more casual and wonky. I love how it looks on the flowers and petals. This can be a bit trickier on smaller pieces, but with practice, you can use it anywhere you like.
You can also use decorative stitches on your sewing machine, a popular choice is a blanket stitch. The stitching not only adds some security to your project, but it allows you to add another element of design to your project, so have fun with the process!
Finishing the Mini Quilt
Once you’ve stitched down your applique, you can add borders, and then it’s time to finish your mini quilt.
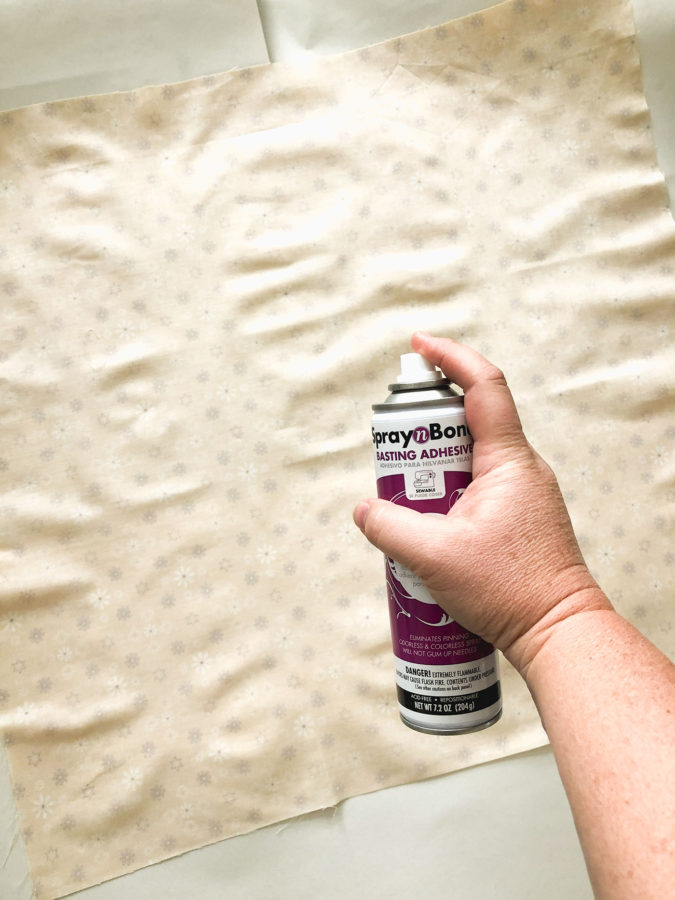
I like to use SpraynBond basting spray on my projects, especially mini quilts because it is fast and easy! Be sure to cover your work surface before spraying to prevent overspray. I use inexpensive rolls of paper to create an area to spray on. You will want to work on a flat even surface, and a harder surface, such as a large tabletop or hardwood or tile floor would be best.
I begin by laying out my mini quilt backing on top of the paper. Spray with the basting spray, being sure to get the edges of your fabric.
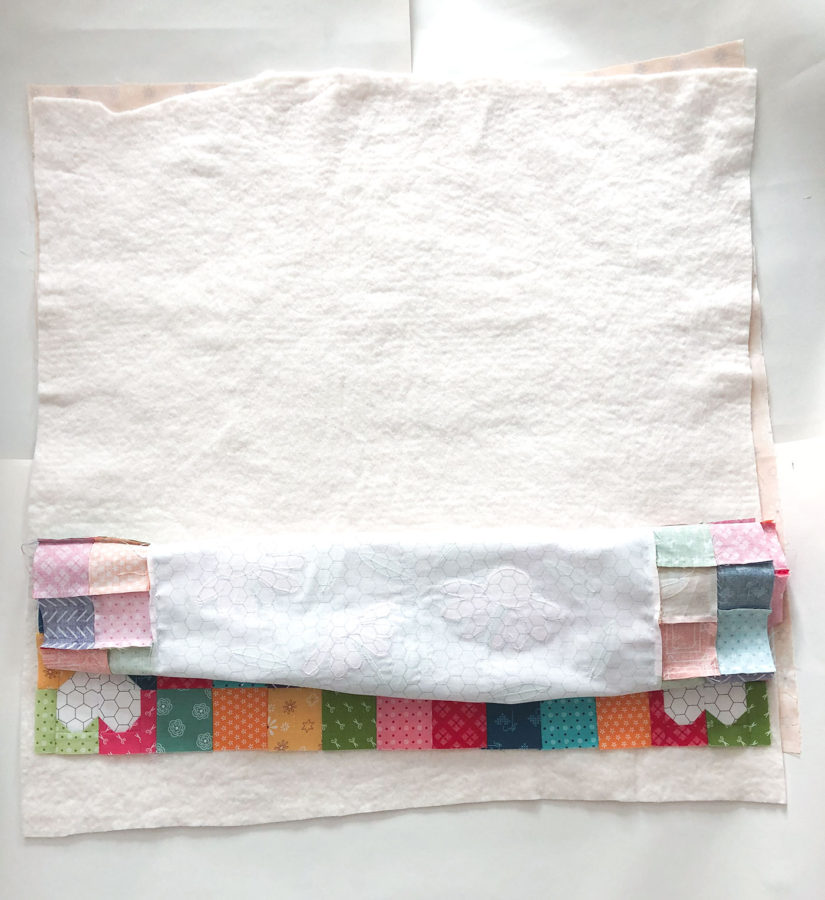
When I lay the next layer on, I roll it up like this. Position the free end where it goes and slowly roll it out. Be sure to keep things even and if there are seam allowances, make sure they are flat and going the right direction. Lay the StitchnSew sew-in fleece, spray the fleece with basting spray and then layer the quilt top.
Finish your Mini Quilt
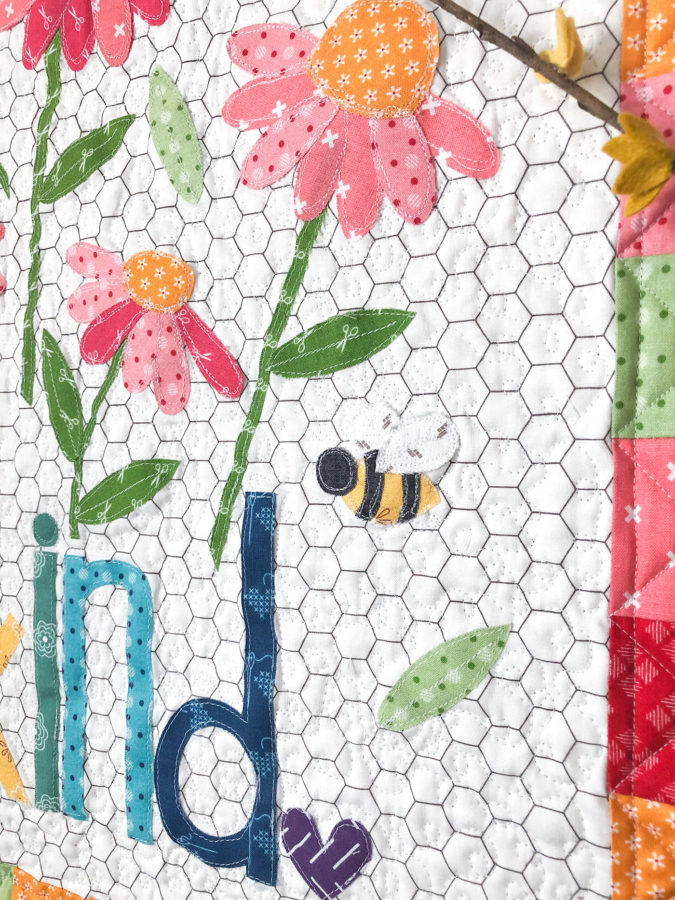
Your mini quilt is now ready for quilting. I like to quilt around the applique pieces, but you can also add quilting to the applique pieces as well. Bind your mini quilt using your favorite method and your mini quilt is finished!
Mini quilts are some of my favorite projects because they don’t need a lot of fabric, can be made quickly, and allow me to practice my techniques without too much worry. Mug rugs are nice for the same reasons, but they are even smaller and faster to make.
This Sand Dollar Mini quilt is only 6″ square and would be the perfect project to start on if you are new to applique!
This mini rainbow mug rug is a bit trickier as the color arches are pretty narrow- it would be a great project to fine-tune your sewing skills on your applique- just go slow and you will be amazed at how fun it is!
And if you’re ready to try a larger mini quilt, but don’t want to purchase a pattern yet, this Hope mini quilt is darling.
I hope you will have some fun sewing up a project using these tips for applique and assembling mini quilts! If you have any questions, don’t hesitate to ask!
Happy sewing! Amy
Barbara Opett
August 26, 2020 at 10:21 am (4 years ago)Could not find the Be Kind Pattern ♀️
admin
August 26, 2020 at 3:06 pm (4 years ago)Hi Barbara…it’s in her store here > https://www.etsy.com/listing/861093129/be-kind-mini-quilt-pdf-pattern?ref=shop_home_active_1&crt=1
Barbara
August 26, 2020 at 6:34 pm (4 years ago)Thank you sew much!
carol
August 26, 2020 at 10:48 am (4 years ago)I couldn’t find this pattern in your Etsy store,
admin
August 26, 2020 at 3:05 pm (4 years ago)Hi Carol! It’s in her store here > https://www.etsy.com/listing/861093129/be-kind-mini-quilt-pdf-pattern?ref=shop_home_active_1&crt=1
Angela
August 26, 2020 at 1:58 pm (4 years ago)I cannot find the Be Kind mini quilt in the Etsy shop either. Disappointed
admin
August 26, 2020 at 3:06 pm (4 years ago)Hi Angela…here’s the link to the pattern…something things just take a minute. 😉 https://www.etsy.com/listing/861093129/be-kind-mini-quilt-pdf-pattern?ref=shop_home_active_1&crt=1
Angela
August 27, 2020 at 8:05 am (4 years ago)I see it now. . Thank you!