


Hi everyone! It’s Kim Lapacek of Persimon Dreams here!
A new rage in the fabric/fiber industry is weaving with the wefty needle. I’ve been drooling over these gorgeous projects for probably about a year now and I finally decided to give it a try myself.
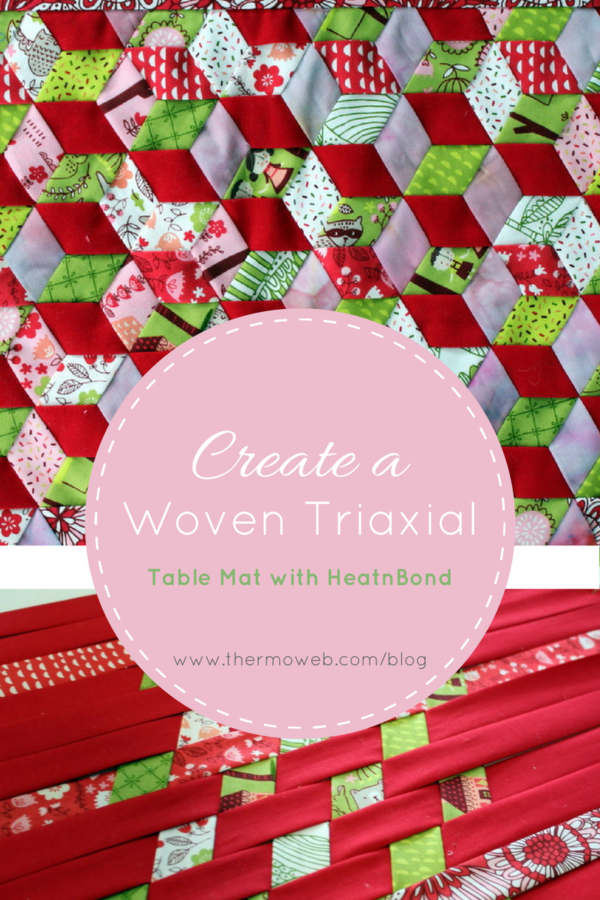
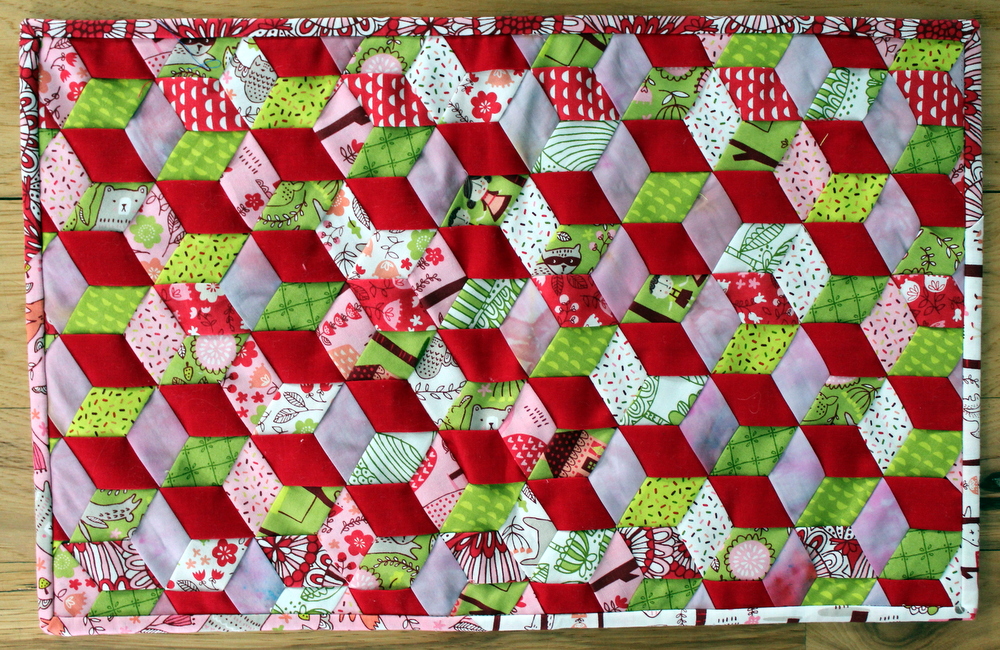
Another Walk in the Woods – Triaxial Woven Table Mat
I’m going to give you a general overview of what I did but I highly recommend checking out t_jaye’s (she created the wefty needle) website and youtube for more tutorials, videos, tips and tricks to help you get started!
Supplies:
- Foam Core (preferably 1/2″ thick but I “made it work” with 1/8″ thick)
- pack of map pins
- Fabric: Weaving
- (3) jelly roll strips in red from “Just Another Walk in the Woods” from Moda Fabrics trimmed to 2.0″
- (10) jelly roll strips in green from “Just Another Walk in the Woods” from Moda Fabrics trimmed to 2.0″
- (5) jelly roll strips in pink from “Just Another Walk in the Woods” from Moda Fabrics trimmed to 2.0″
- (5) 2.0″ x WOF strips of red solid fabric
- (5) 2.0″ x WOF strips of soft pink fabric (solid or hand-dyed – just so it “reads” pink)
- Fabric: Binding – (2) jelly roll strips from “Just Another Walk in the Woods” from Moda fabrics (minimum of 60″ x 2.5″ for binding)
- Fabric: Backing – 19″ x 13″
- 1.0″ bias tape maker
- Oliso Iron
- 15″ x 20″ of HeatnBond® Non-Woven Fusible Medium Weight
- 1.0″ wefty Needle (or two)
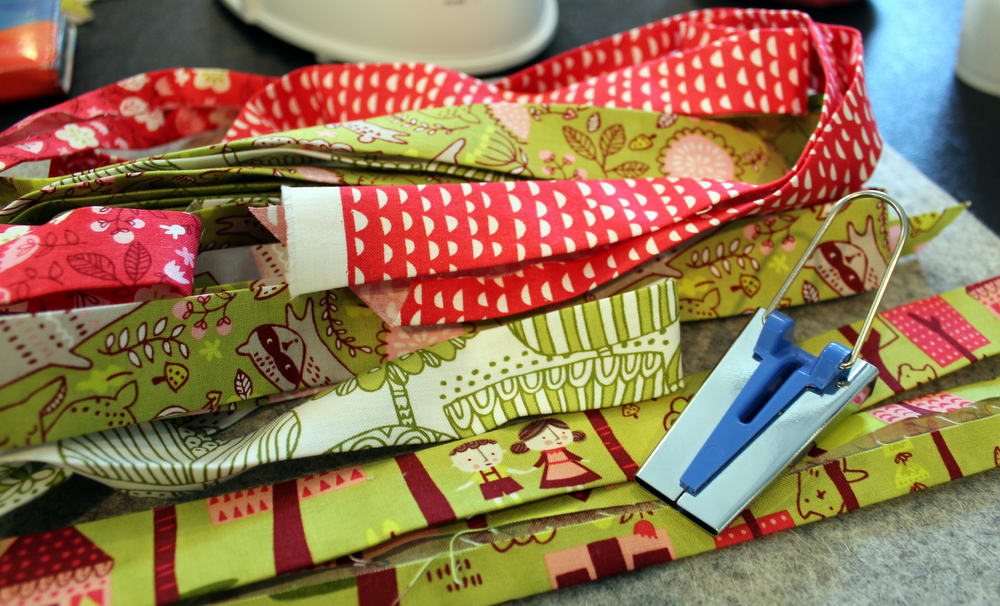
Before you get going you need to create your bias tape strips of fabric for weaving. When you purchase a wefty needle you get one for a 1-inch strip and a 1/2-inch strip. I would recommend weaving with the 1-inch strips for your first project and then move onto the smaller once you’re comfortable with the process.
I am using strips from the moda “Just another walk in the woods” jelly roll so I needed to trim all the strips down to 2.0-inches to put them through the biased tape maker.
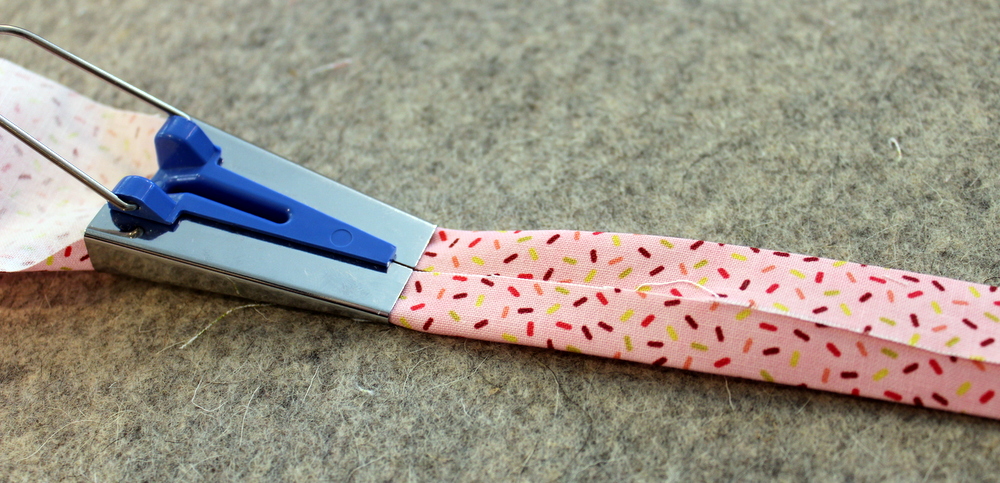
To aid in threading the fabric through the biased tape maker – cut the end of the strip at 45-degree angle. This will get the strip through smoothly and then you just press the fabric down to create a 1.0″ strip with no raw edges that will show once the weaving is complete.
Once the biased strips are pressed cut them in half so they measure 1.0″ to approximately 21.0″.
Triaxial Woven Table Mat
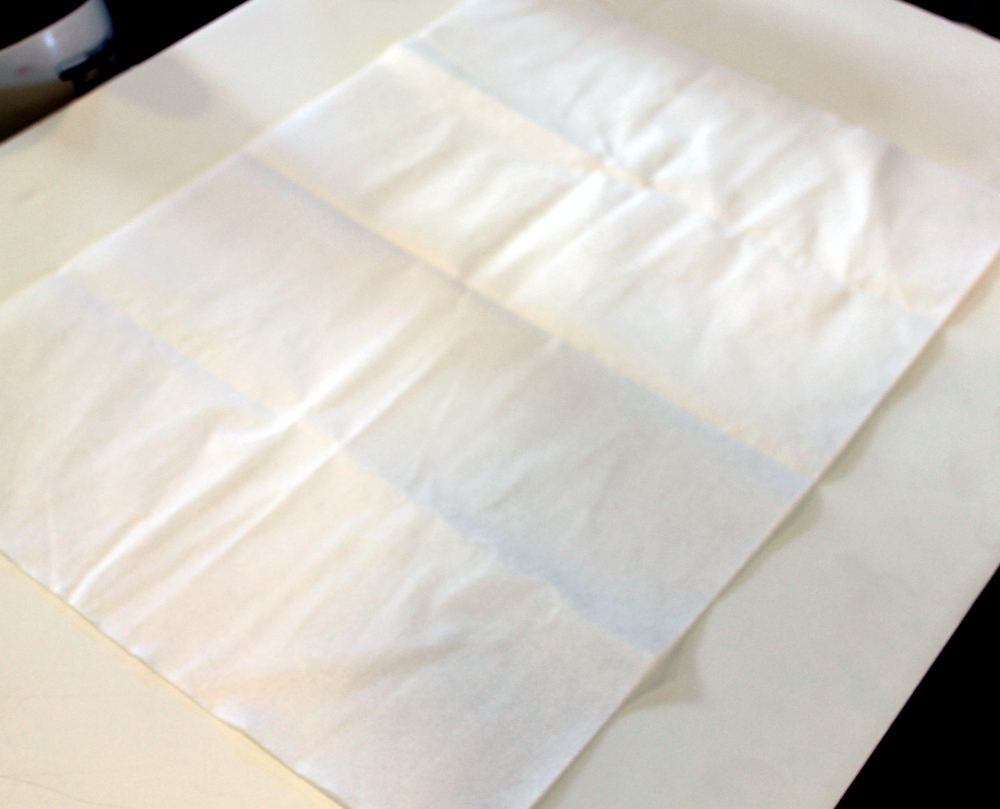
Now – pull out your foam core and your sheet of HeatnBond® Non-Woven Fusible Medium Weight. Lay the HeatnBond Non-Woven Fusible Medium Weight sticky (or rough) side UP. You want the smooth side against the foam core. You will then begin your weaving project right on top of the HeatnBond® Non-Woven Fusible Medium Weight.
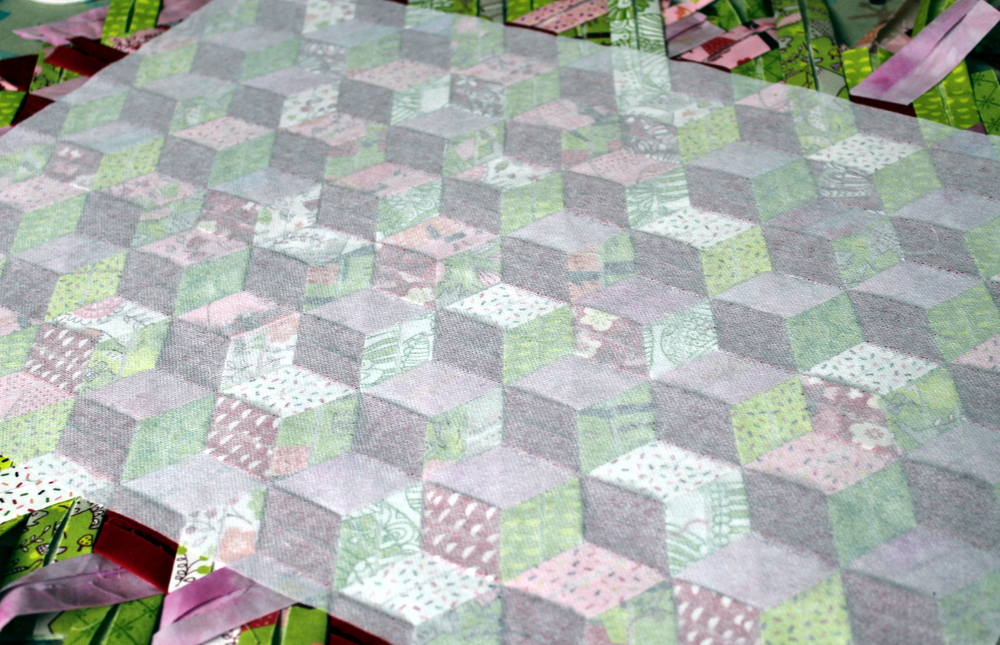
As you proceed in this process you may want to reference the book “Hex Weave and Mad Weave: An Introduction to Triaxial Weaving“. This book will help you decide which pattern you want your fabric to make. I chose the one that looked like cubes. (I need to take a moment to thank Trisha Frankland (aka Quilt Chicken) for also walking me through this process at our guild retreat. She did an amazing job breaking down the steps!)
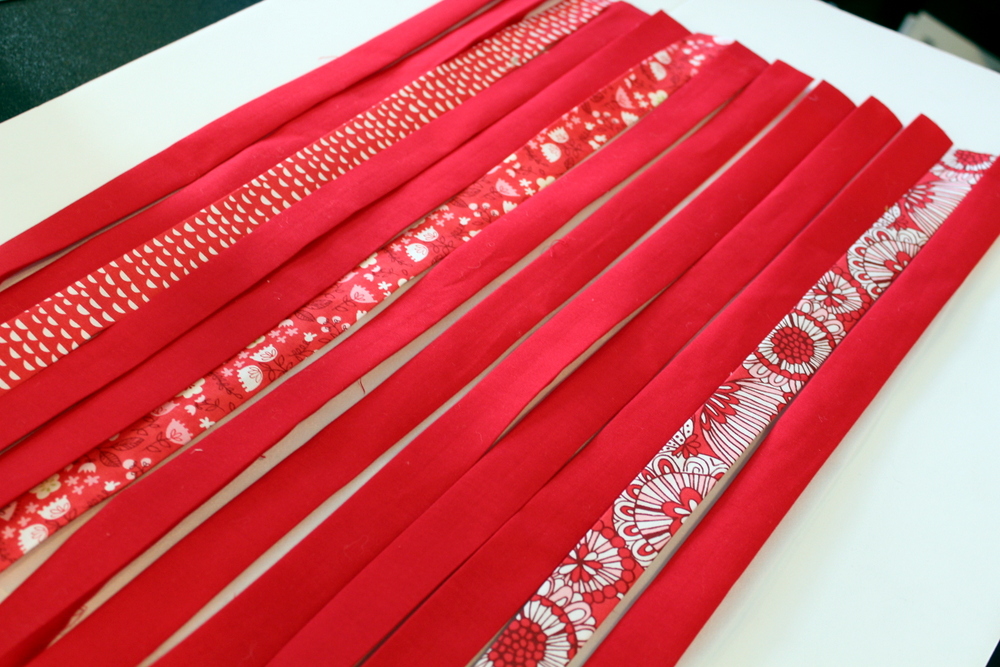
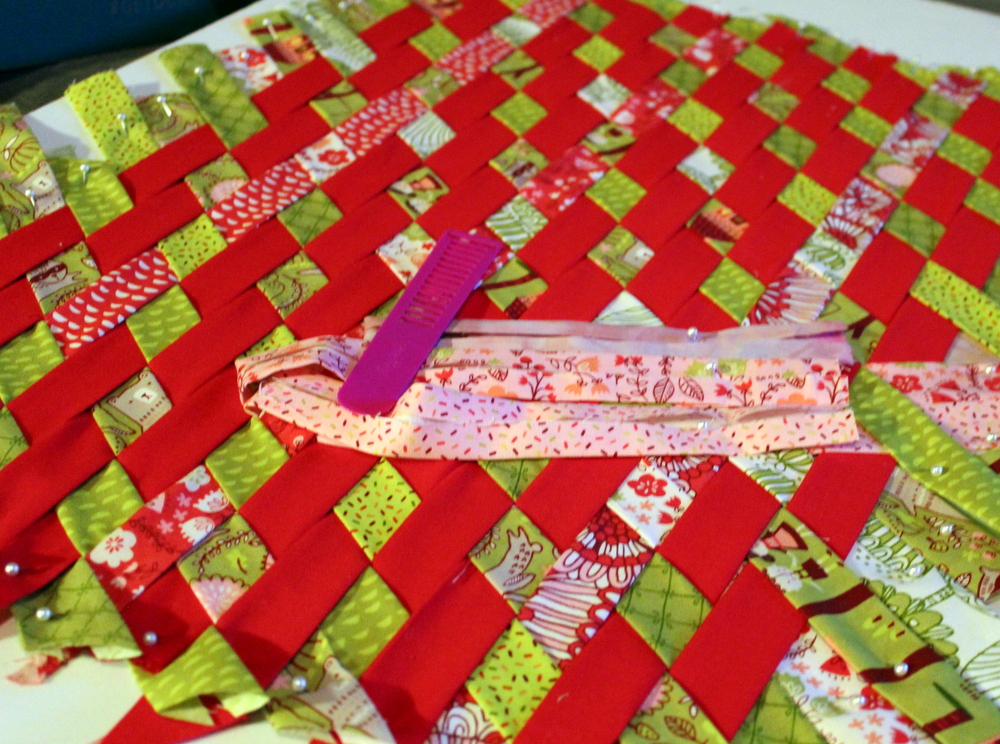
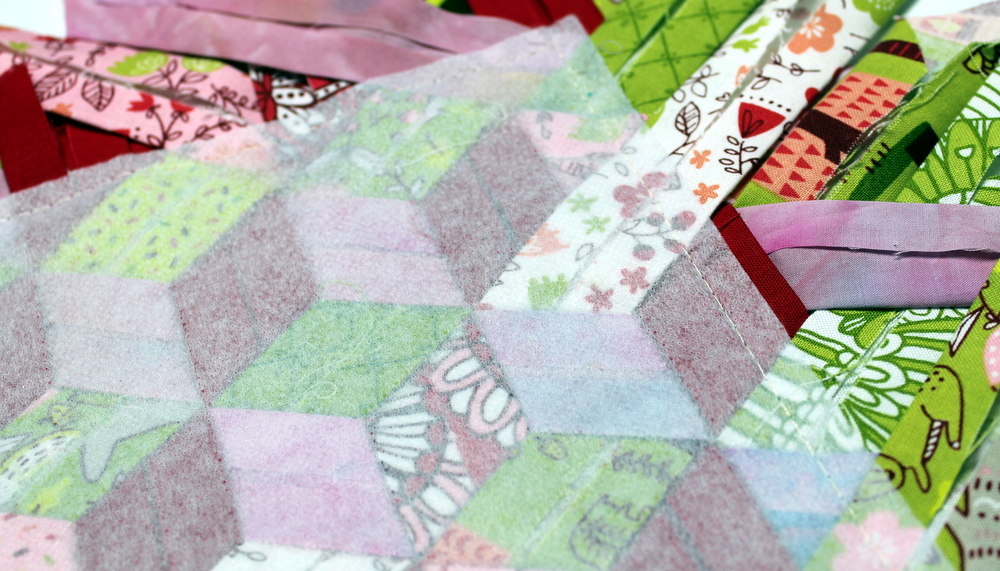
Lay the red strips down so all the raw edges of the biased tape just made are facing the foam core. You should not be able to see any of the raw edges.
Use the map pins to pin each of the ends. Make sure each of the strips butt each other tightly but don’t overlap. Pin one side of the strip and then pull the strip taught before pinning the opposite side.
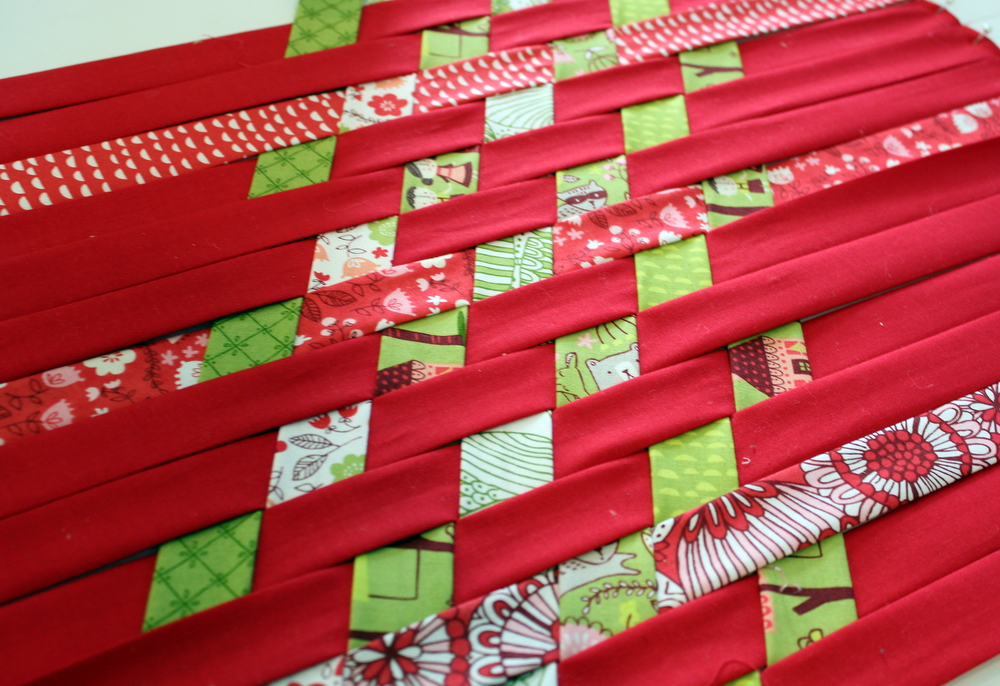
Following the diagram in the book “Hex Weave and Mad Weave: An Introduction to Triaxial Weaving“. – weave the second color (green in this case) at a 30-degree angle to the first strips). You will use your wefty needle to make this easier. At this point I highly recommend watching T Jaye’s YouTube video on how this weaving is done. Seeing it happen will definitely aide you in understanding the process. You will also see how a second wefty needle will help you in the weaving process.
As you weave in the second color, use the map pins to secure each of the strips into place. After a few are woven in – double check that you have an accurate 30-degree angle. This will make the third layer of weaving go much more smoothly.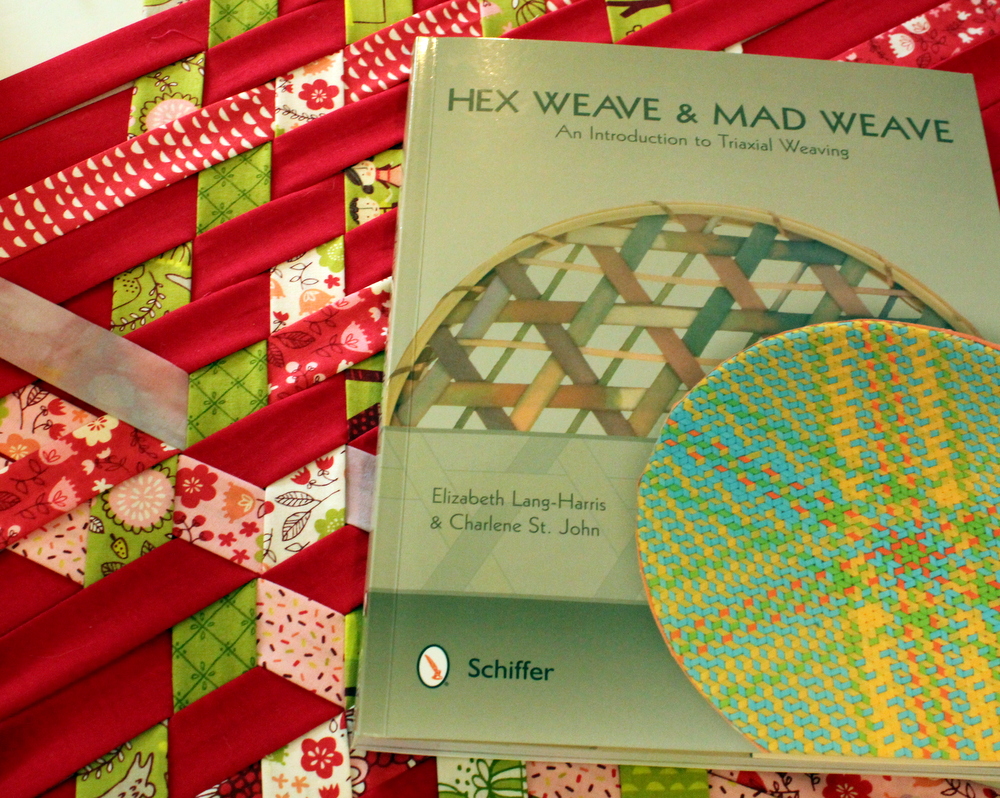
I was at a retreat when I started this project and while i had my helper (Trisha Frankland) there I wanted to at least get three strips in the opposite direction woven in so I knew where I was heading. Typically you would weave all of the second color in before you start the third color.
Weaving the Strips In
Once I arrived home it was time to finish weaving all the green strips in. Here’s what it looks like! I have to admit … I had so much fun with this project. With each strip I wove in I may have jumped up and down a bit because after each strip it just kept looking cooler and cooler. The folks at the quilting retreat and my family thought I was a bit crazy.
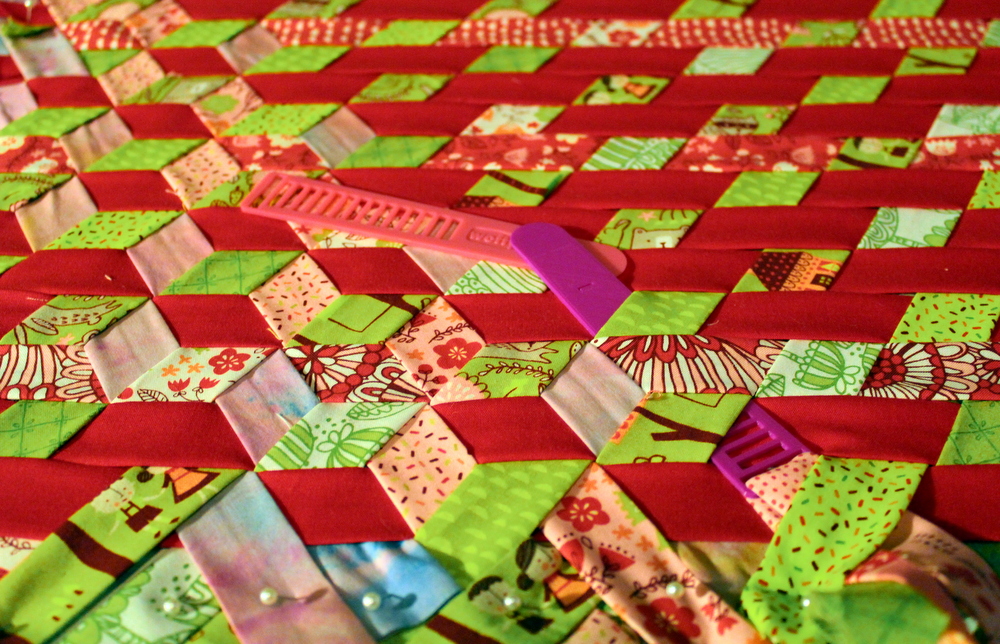
I personally found on the third strip woven in, it was super helpful to use a second wefty needle.
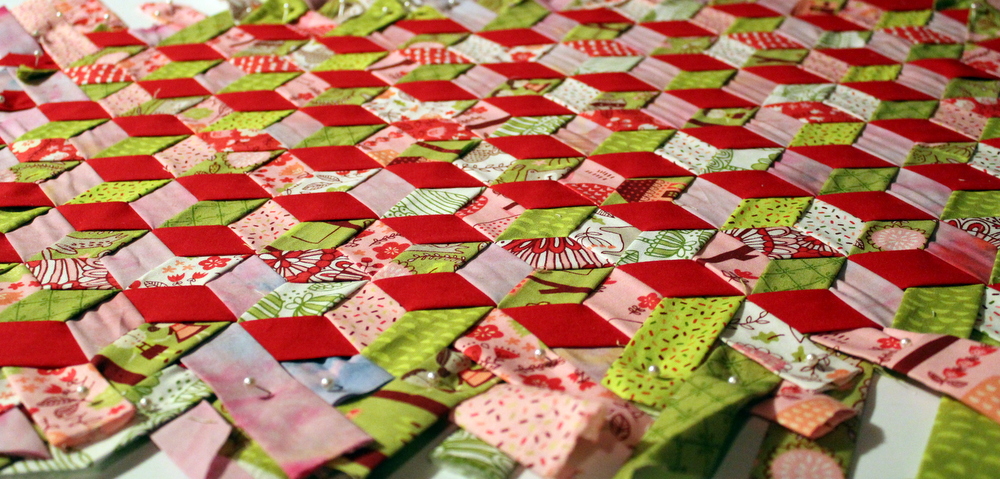
Before you know it – you’ll have all three layers woven together! Seriously! How fun is this!?
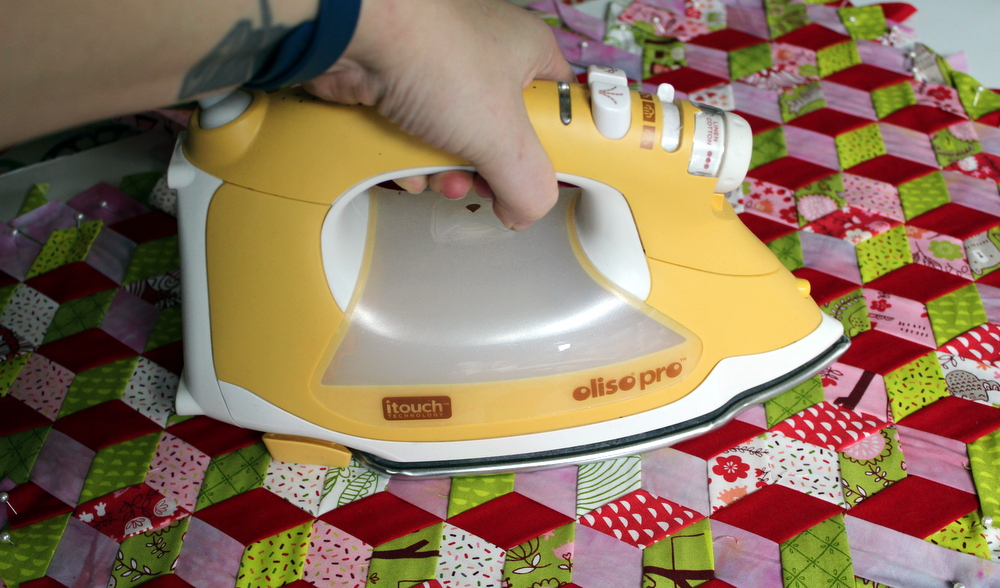
Now – the tricky part. This is when you’re going to be really happy that you remembered to put that layer of HeatnBond® Non-Woven Fusible Medium Weight down before you wove. Using your Oliso iron, press the woven area with a hot iron. You want to press enough that it activates the fusible but not so much that it melts the foam core.
Once the fusible is secure, removed the map pins and flip the project over so the fusible faces up. Draw a line at minimum 1/4″ away from the edge of the fusible.
Sew a basting stitch right on that line. Once that’s basted you’ll feel a lot better moving your weaving around.
Draw a 18.0″ x 11.5″ rectangle onto the fusible. Stitch with a standard stitch length the line drawn. Trim outside the stitch just made for a 18.5″ x 12.0″ table mat.
Layer the backing fabric right sides away from the fusible and spray baste with SprayNBond® Basting Adhesive so the fabric lays against the weaving nicely. There are plenty of layers from the weaving so batting is not necessary in this project. Once the backing was fused on simply attach the binding in your preferred method. I chose not to quilt this piece – I love the woven look just as it is.
And just like that – you have a fun woven table mat! I love how Moda’s “Just Another Walk in the Woods” fabric created “peek-a-boo’s” in the weaving – can you find the couple, the raccoon, the house? I can say easily I will definitely be weaving more projects!
Final size: 18.5″ x 12.0″
Christina
February 28, 2017 at 7:06 pm (7 years ago)The project looks great…love it! What is the foam core for? It’s not really explained. Is it just to have something to put the pins into? Or does it somehow end up in the project?
admin
March 1, 2017 at 2:34 pm (7 years ago)Hi Christina! Kim replied that the foam core is just to stick those pins in to. Hope that helps!